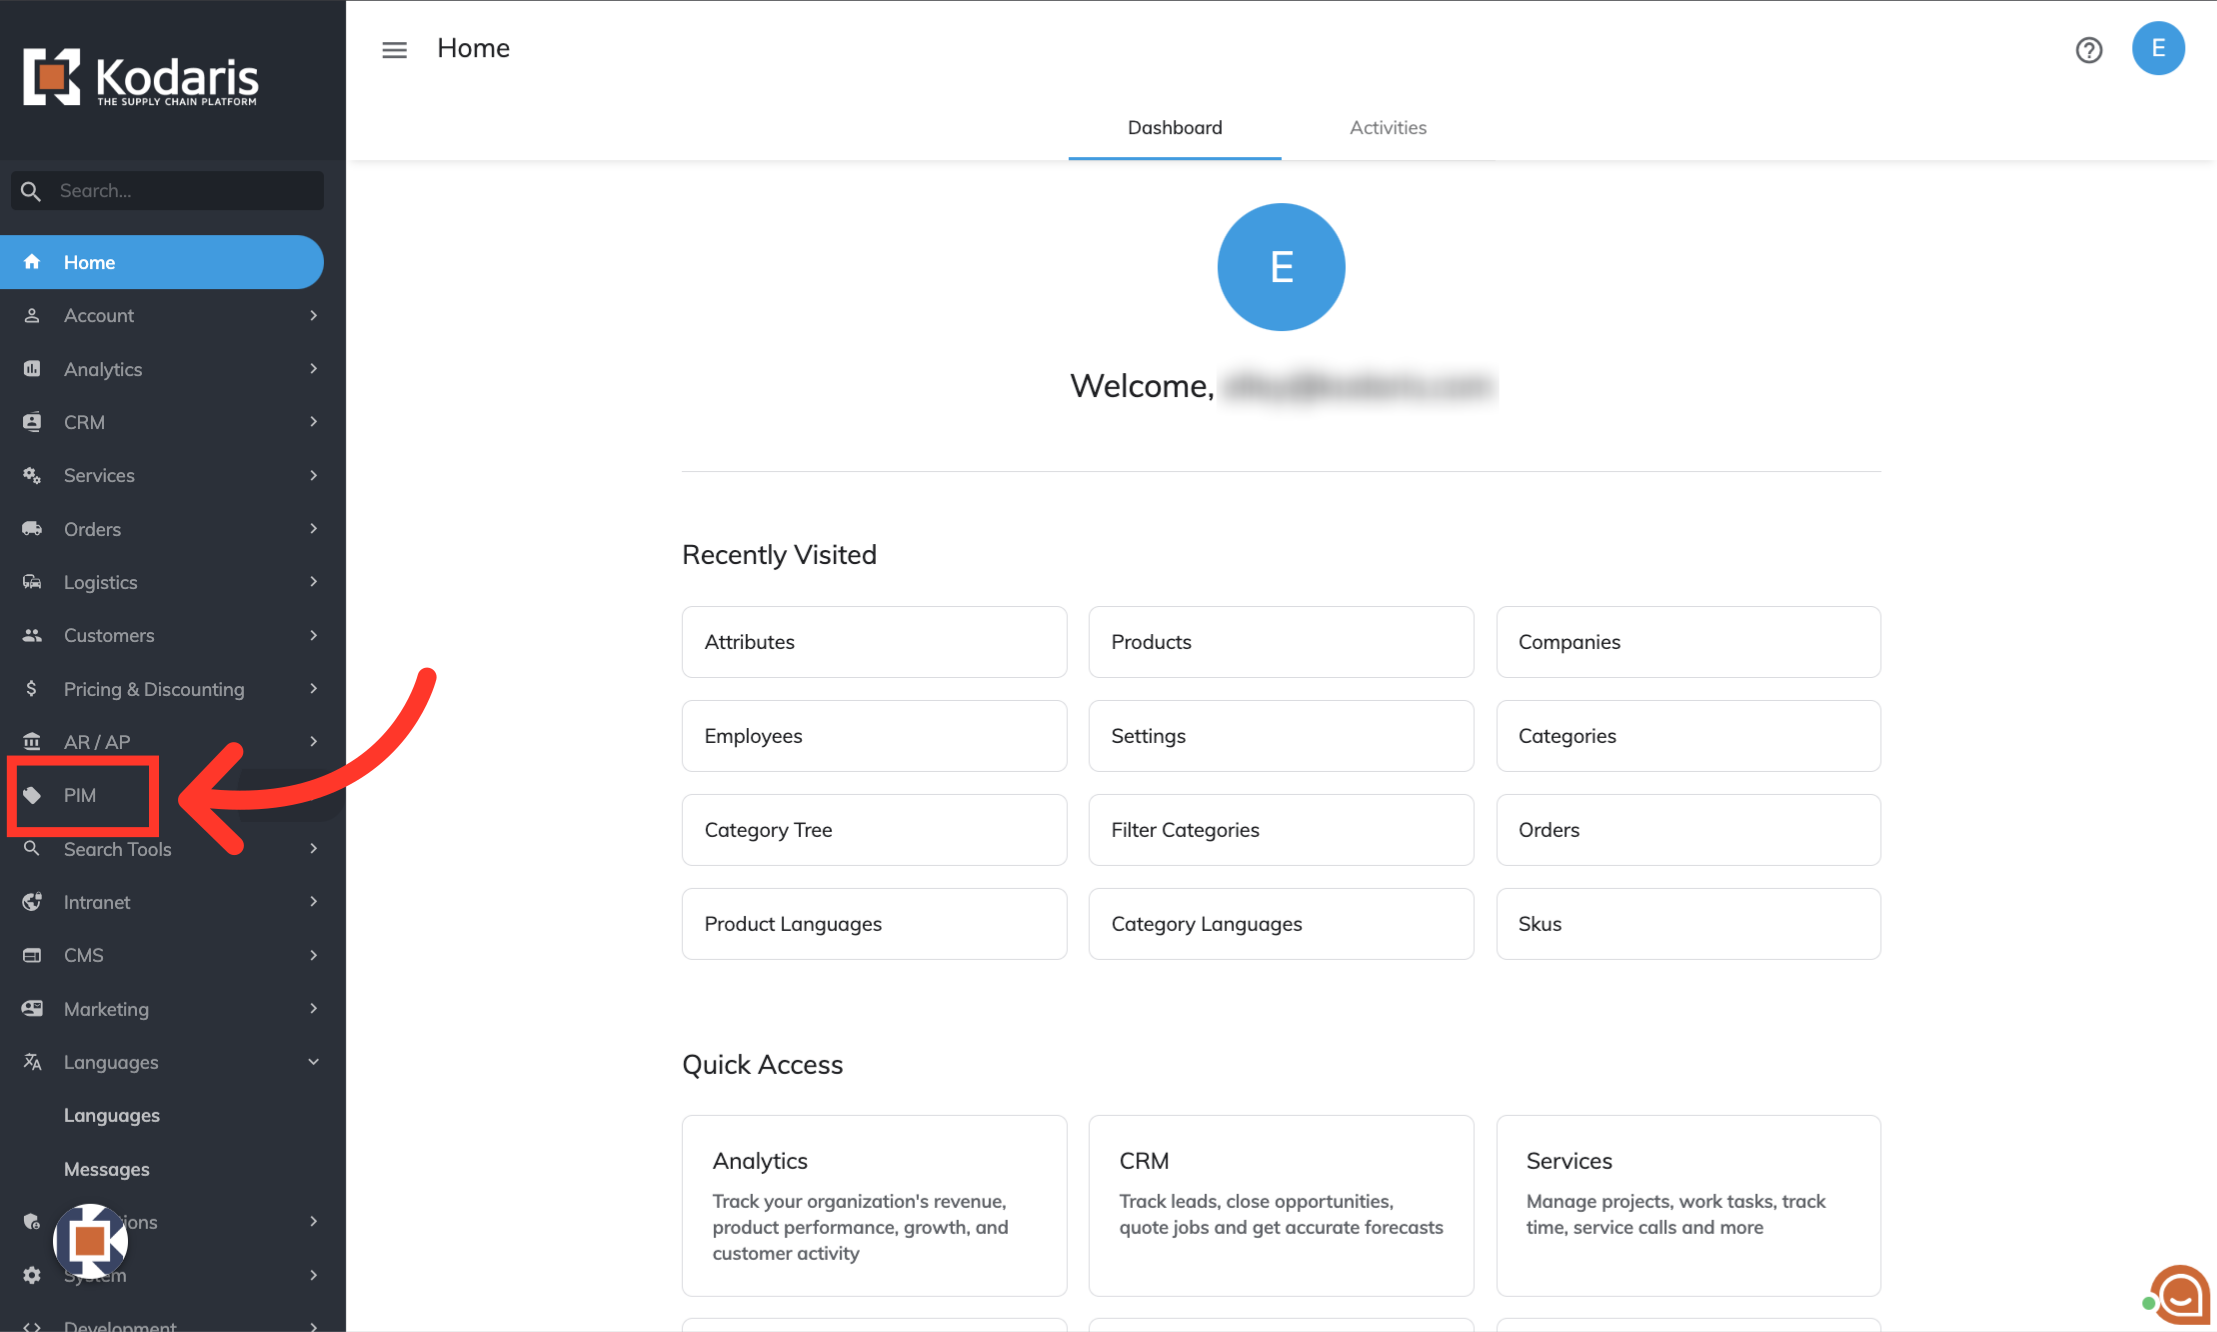
To access all Attributes in the PIM portal, first click "PIM".
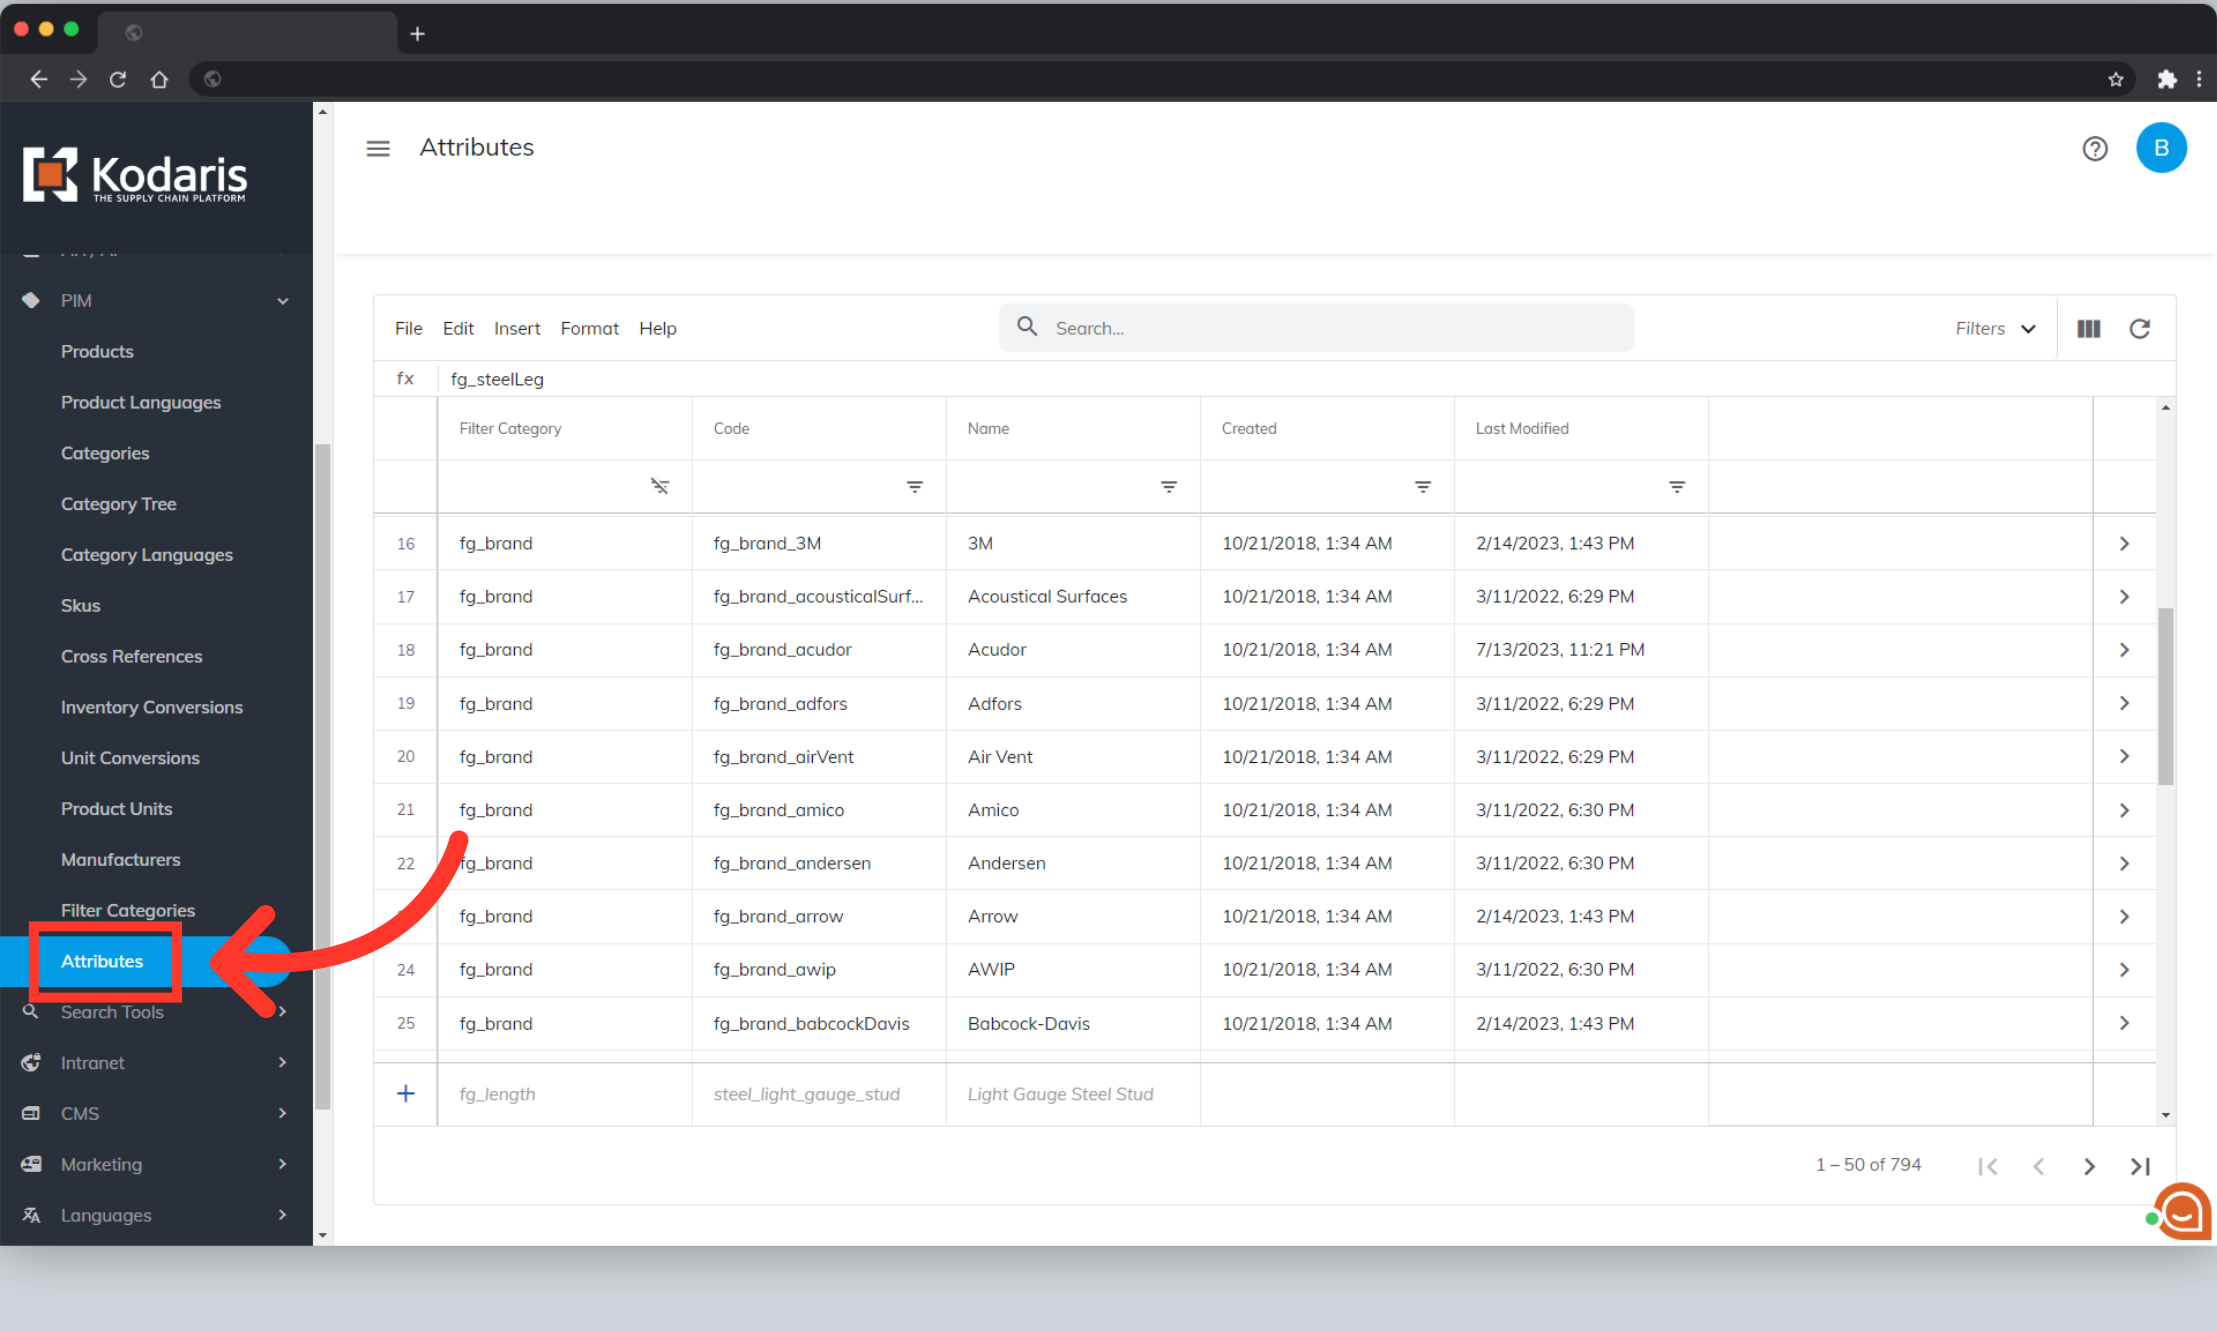
Click "Attributes".
Click on the "Show/Hide" icon to select the columns you would like to export. Some basic columns would be: filter category, code, and name. If you are using this export to work on data that you will be importing back into the system, you will want to export any columns you need to update. The code is required when importing data back into the system.

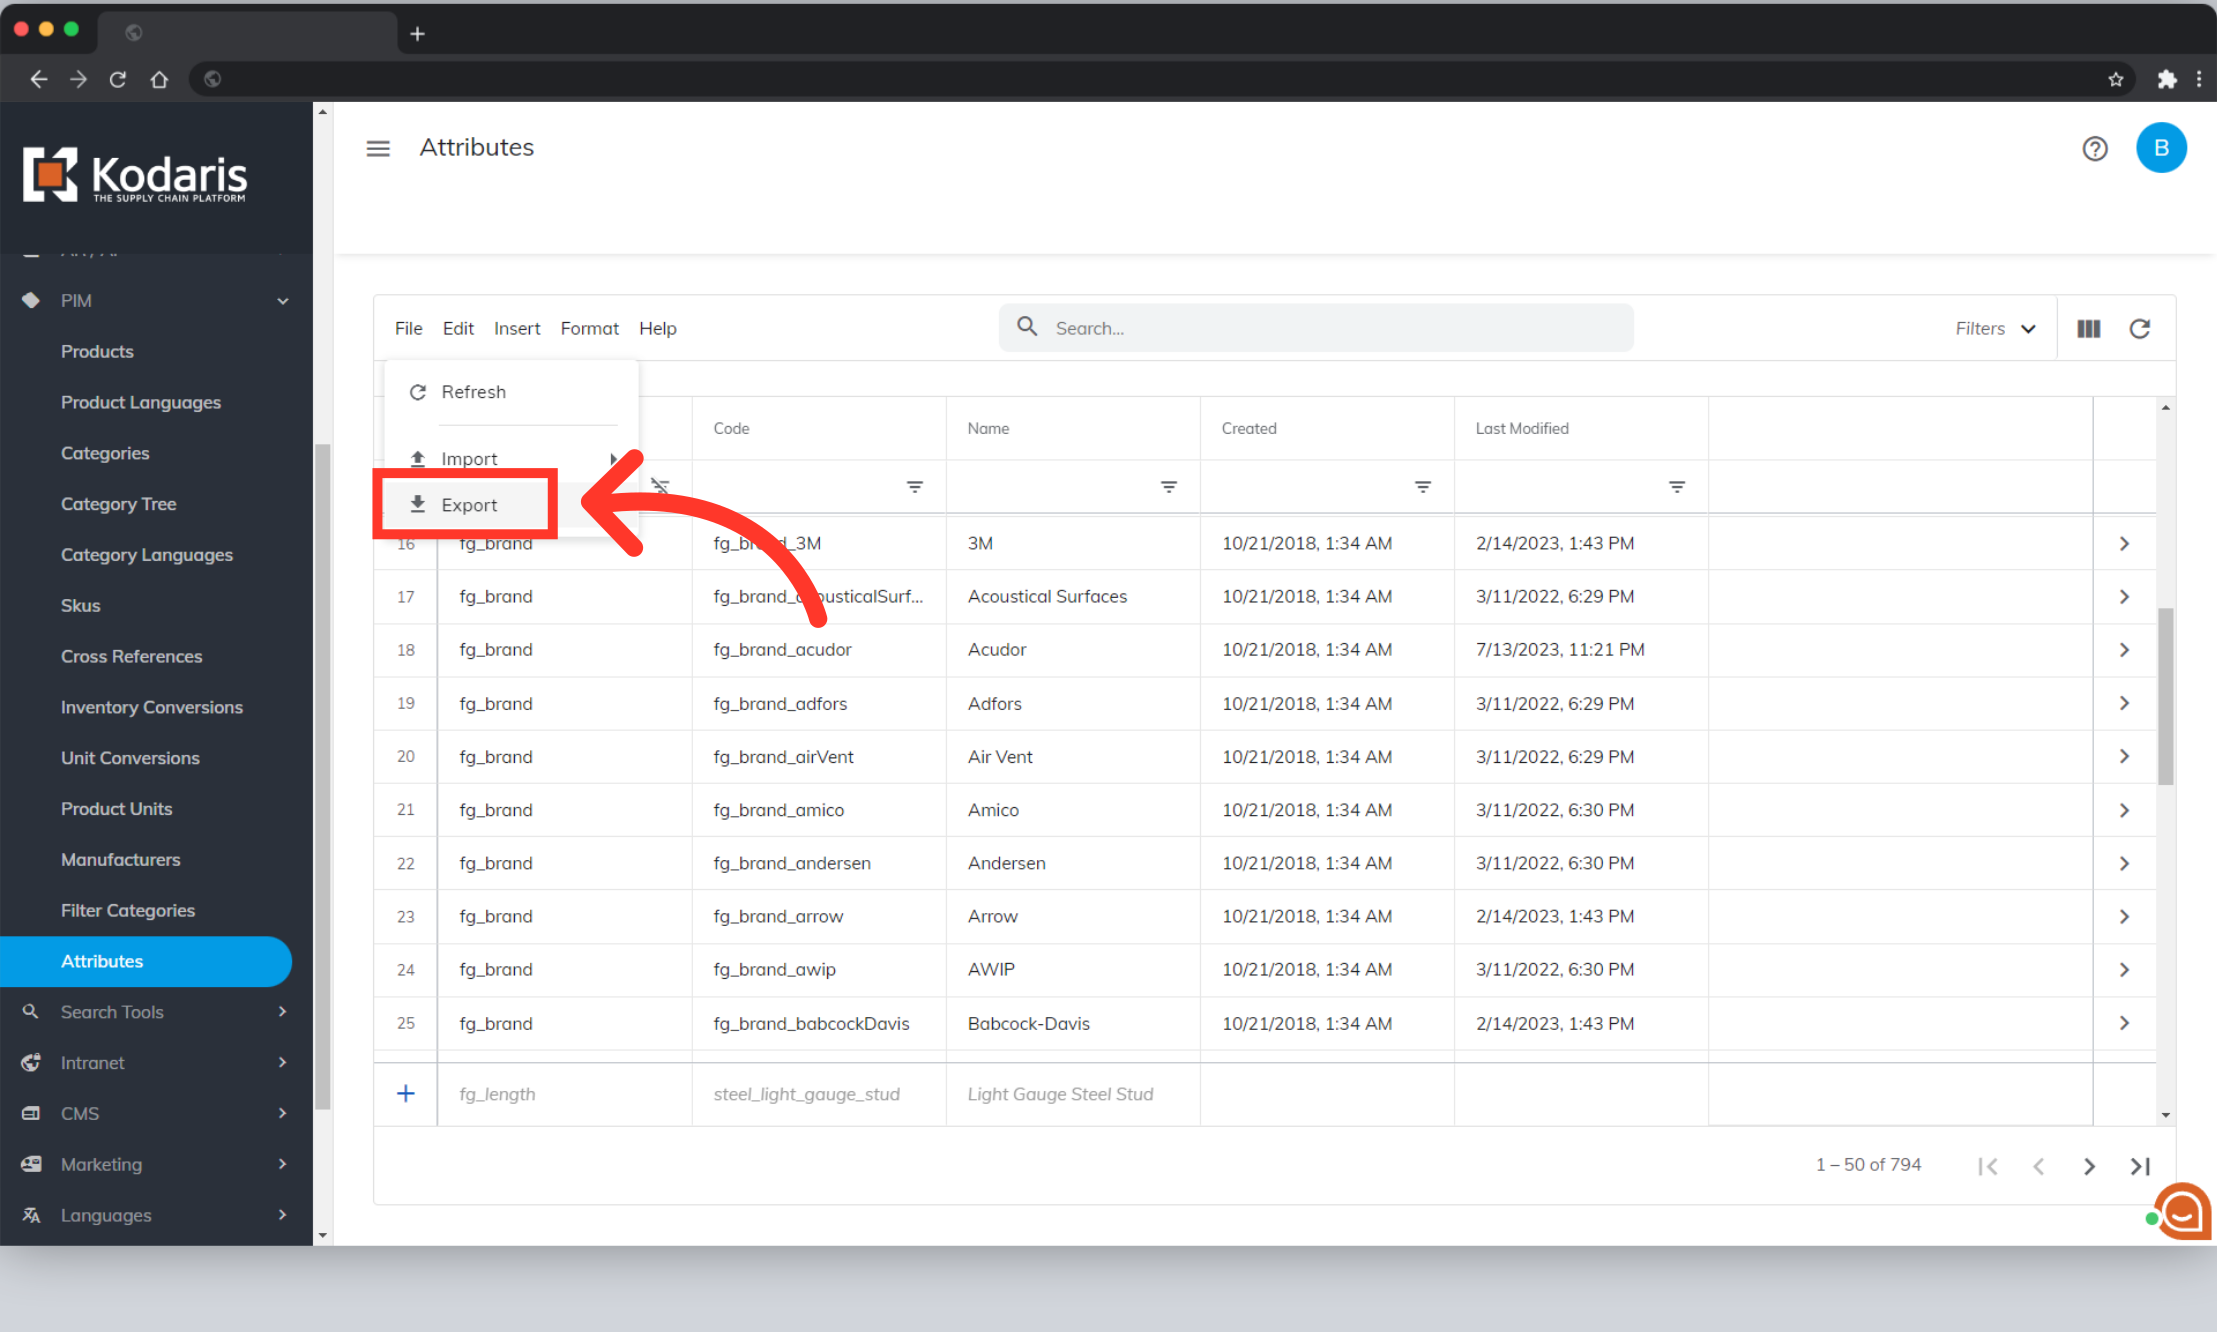
Once you have selected the columns you would like to see, click on the "File" menu option.

Click the "Export" option.
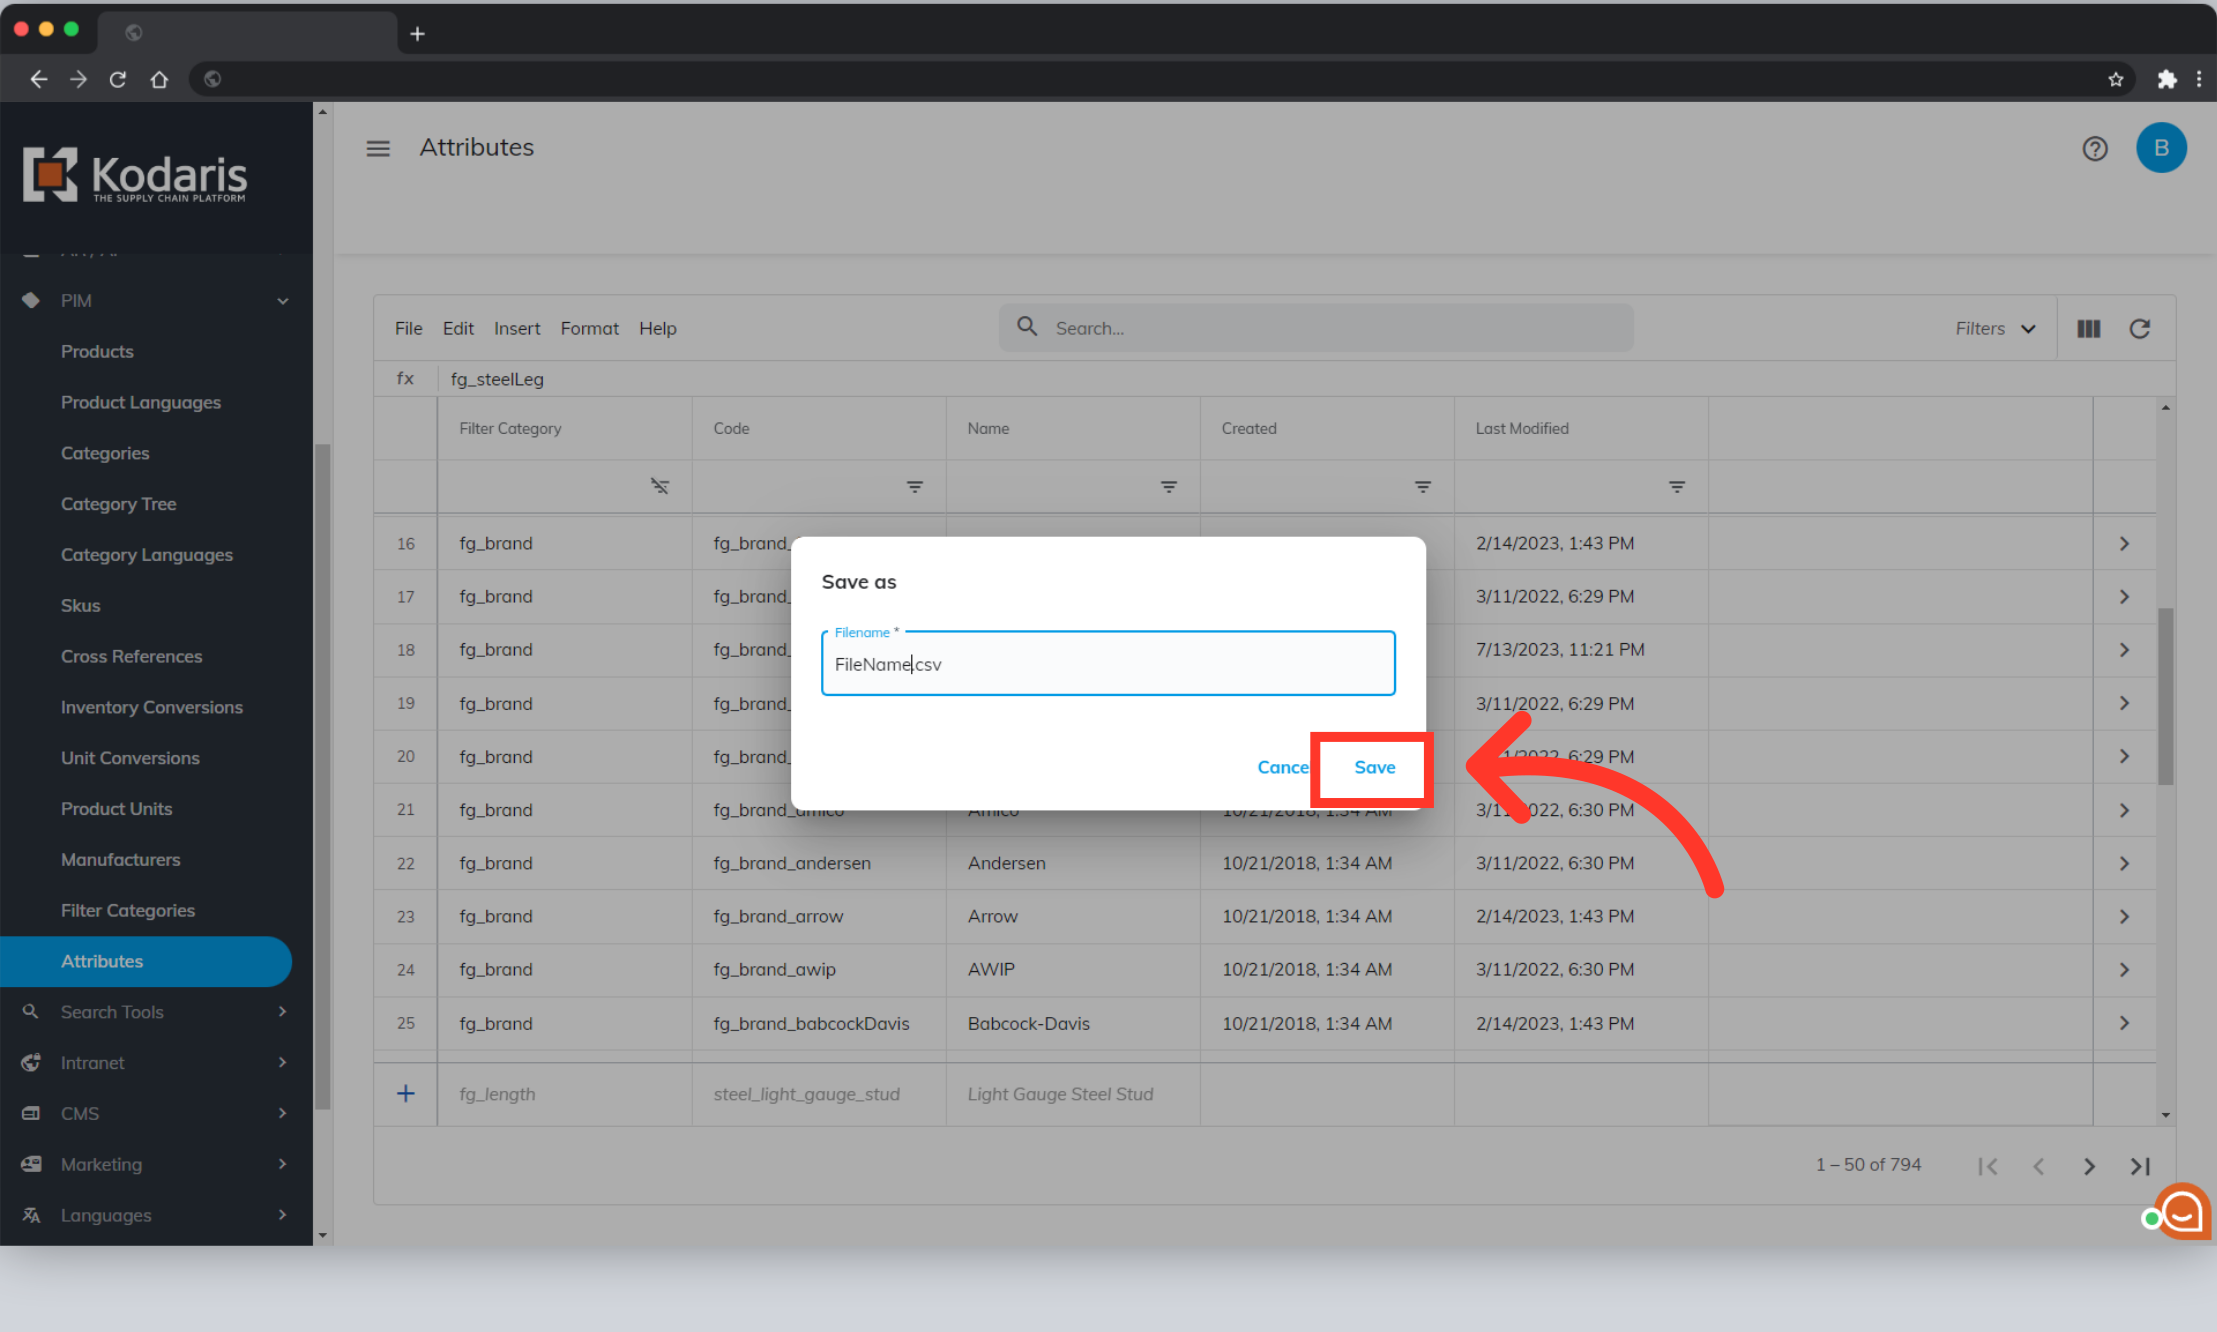
"Save as" dialog box should appear. If you would like to rename your export, click in the filename field to type and enter the name of your file.

Click "Save" to save the file to your computer. If you are exporting a large amount of data, it may take a small amount of time to complete the export. The file will download and save to your computer.
Once the file has saved to your computer, you can check and update your file. The header row and code column is required if you will be importing data back into the system.
