To add new companies by importing, navigate to the "CRM" section in the operations portal.
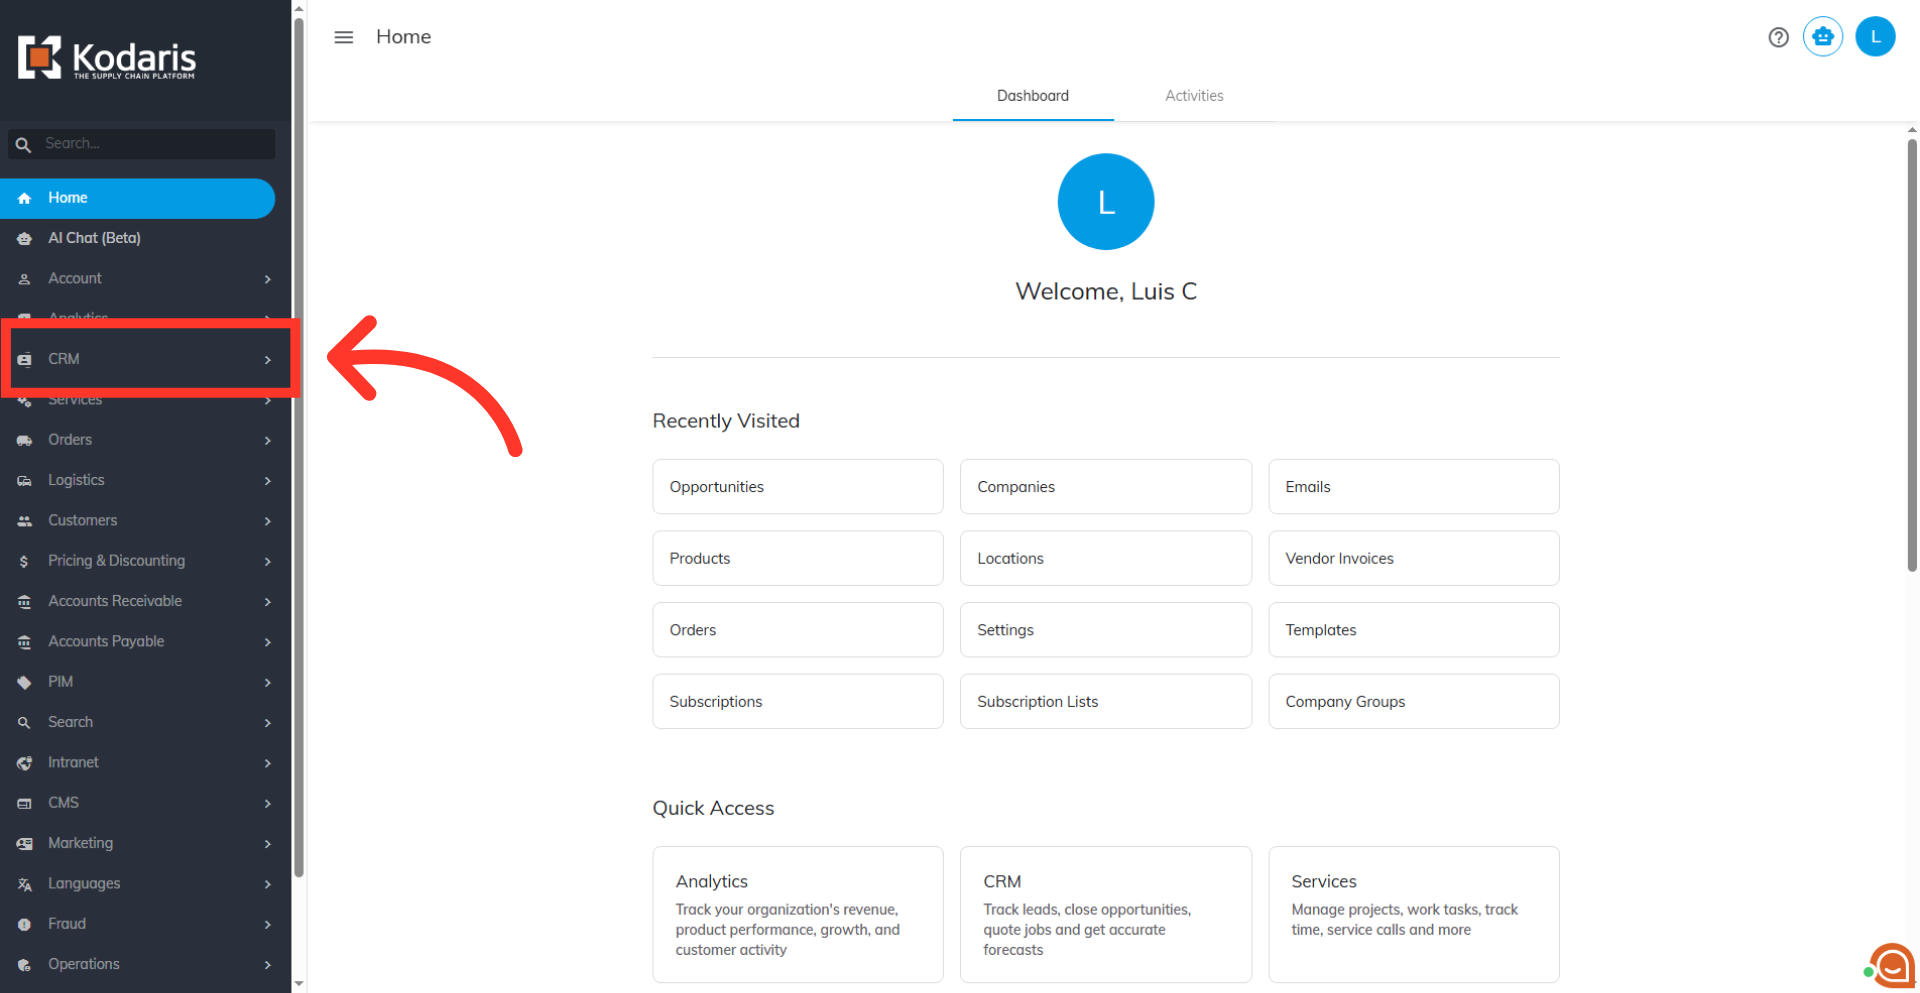
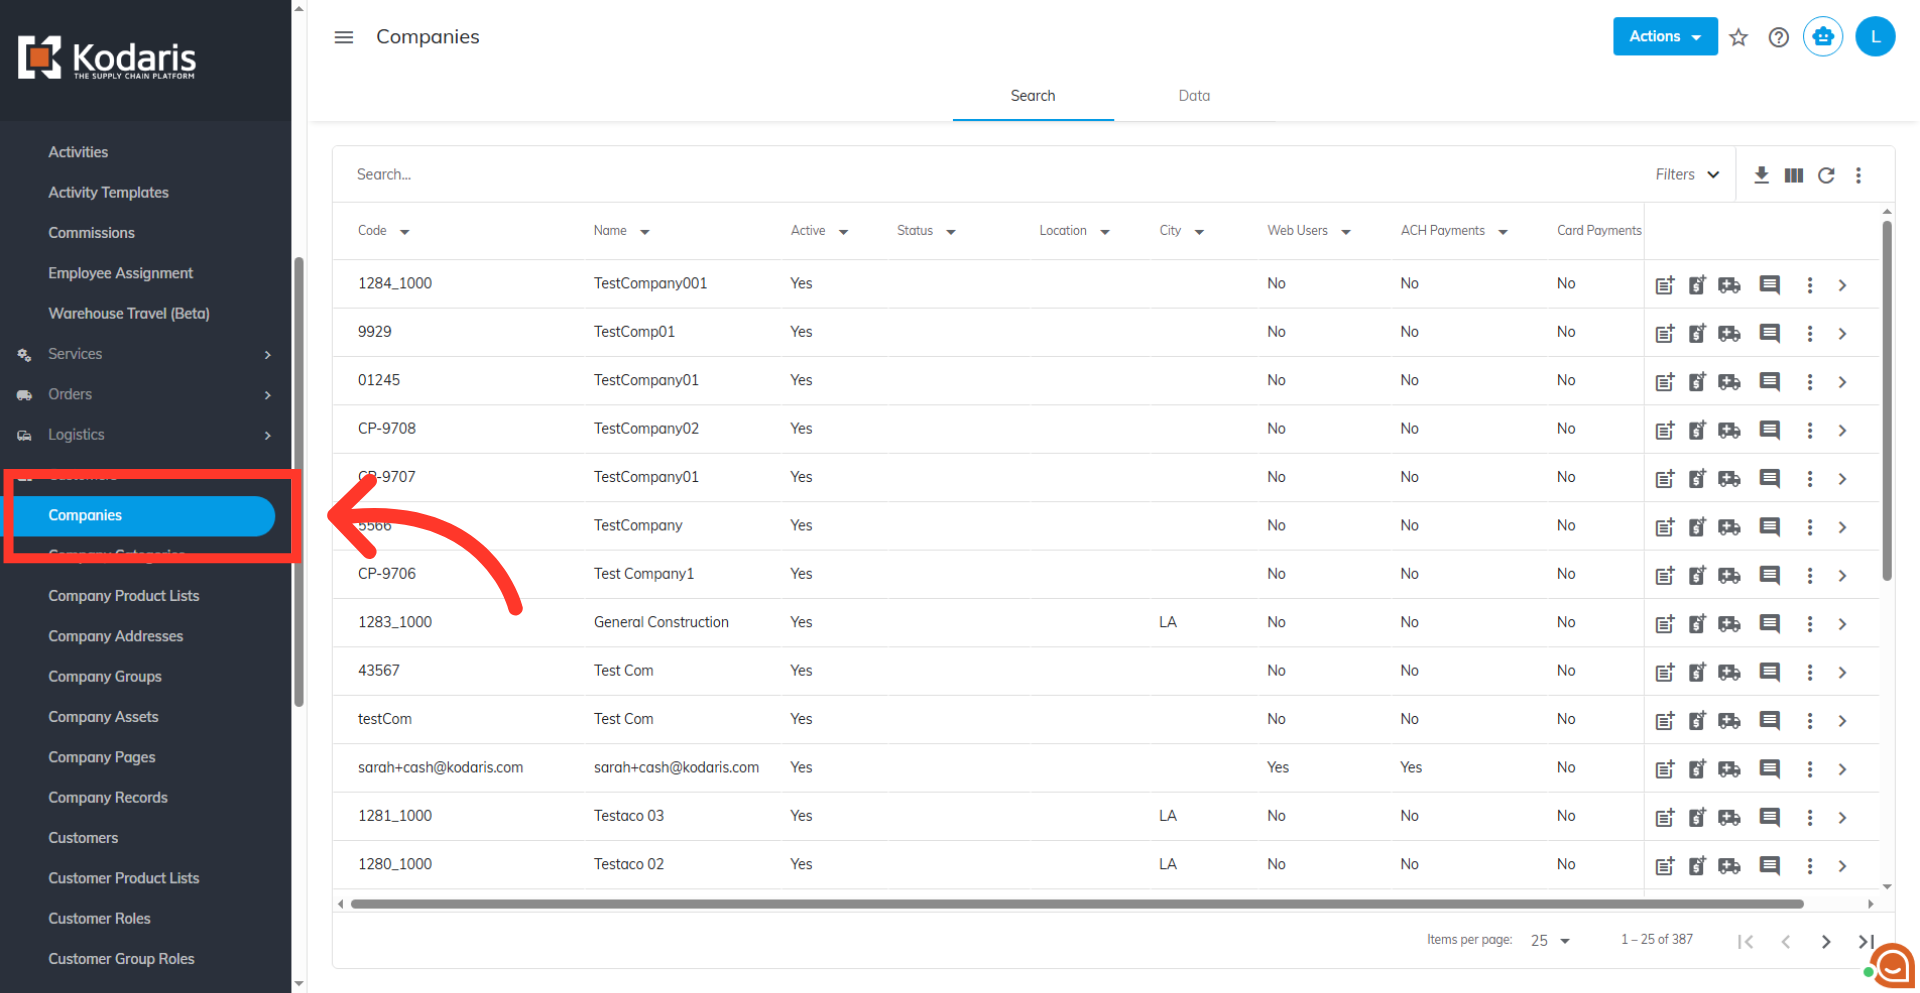
Then, click "Companies". In order to access "Companies" the account will need to be set up either as an "administrator" or a "superuser", or have the appropriate roles: "companyView," "companyEdit" , "customerView," and "customerEdit" along with "importEdit" and "importView". These last two roles are needed for importing.
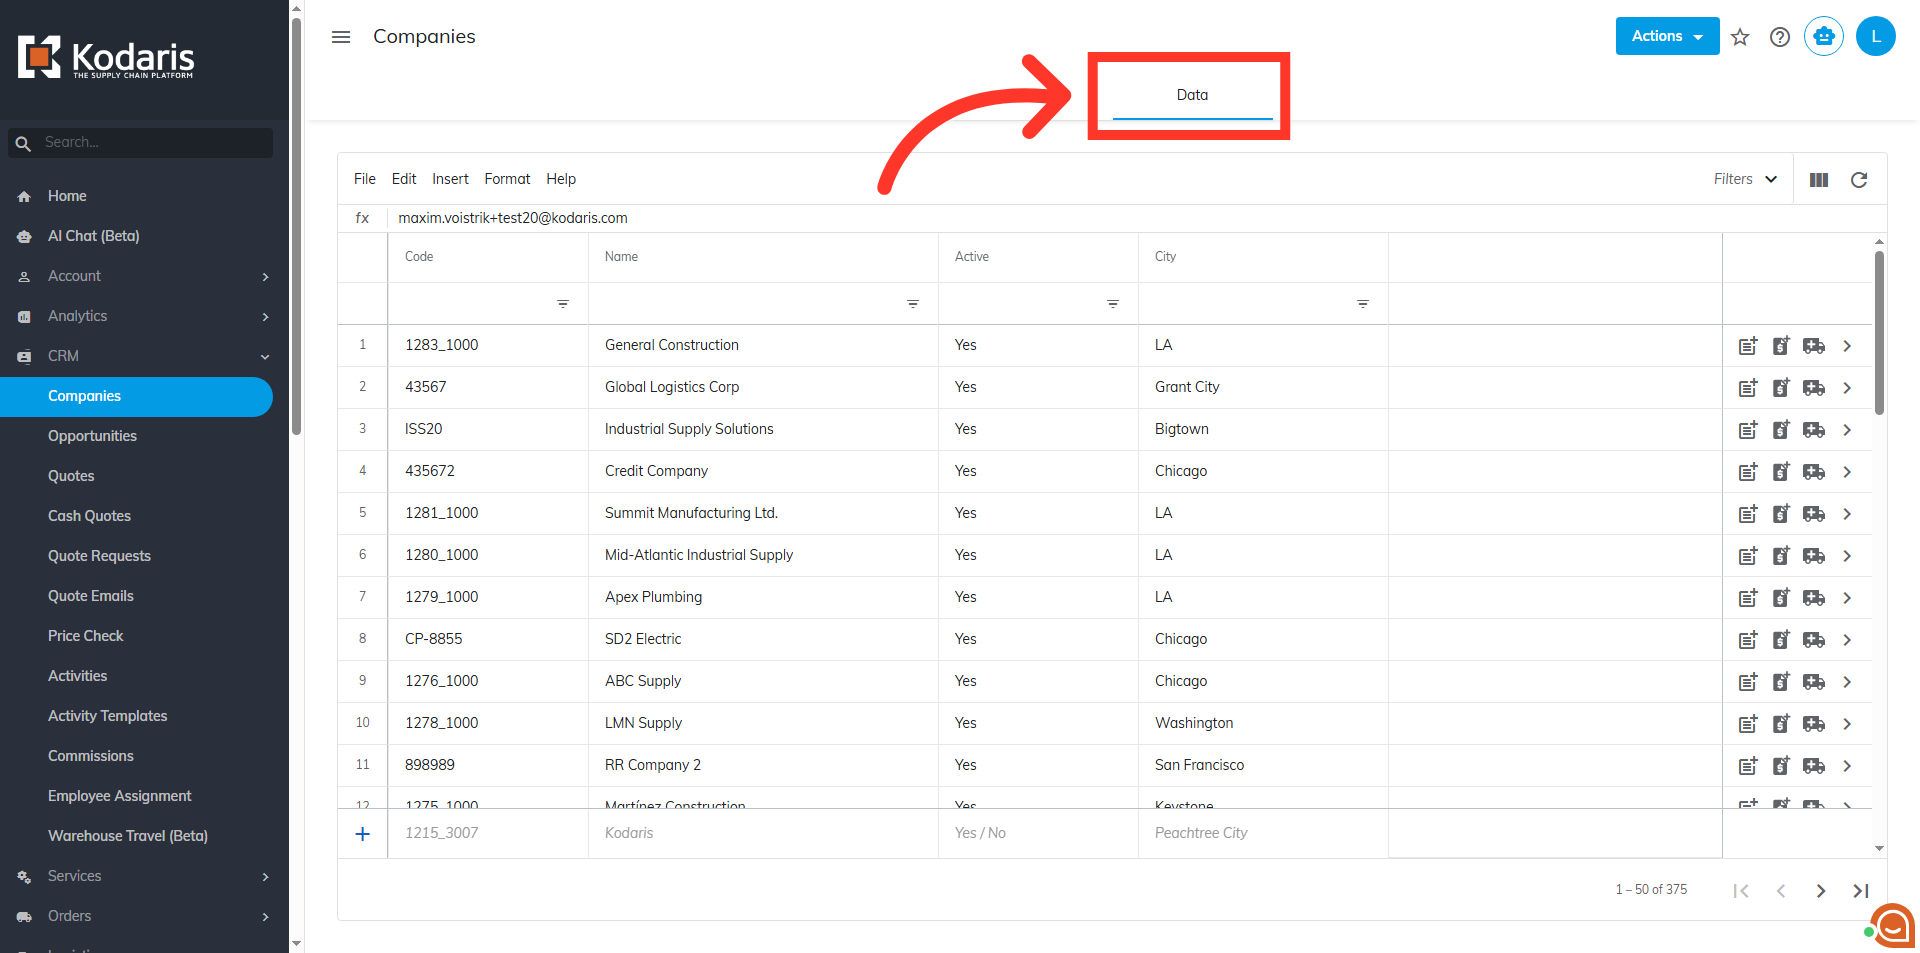
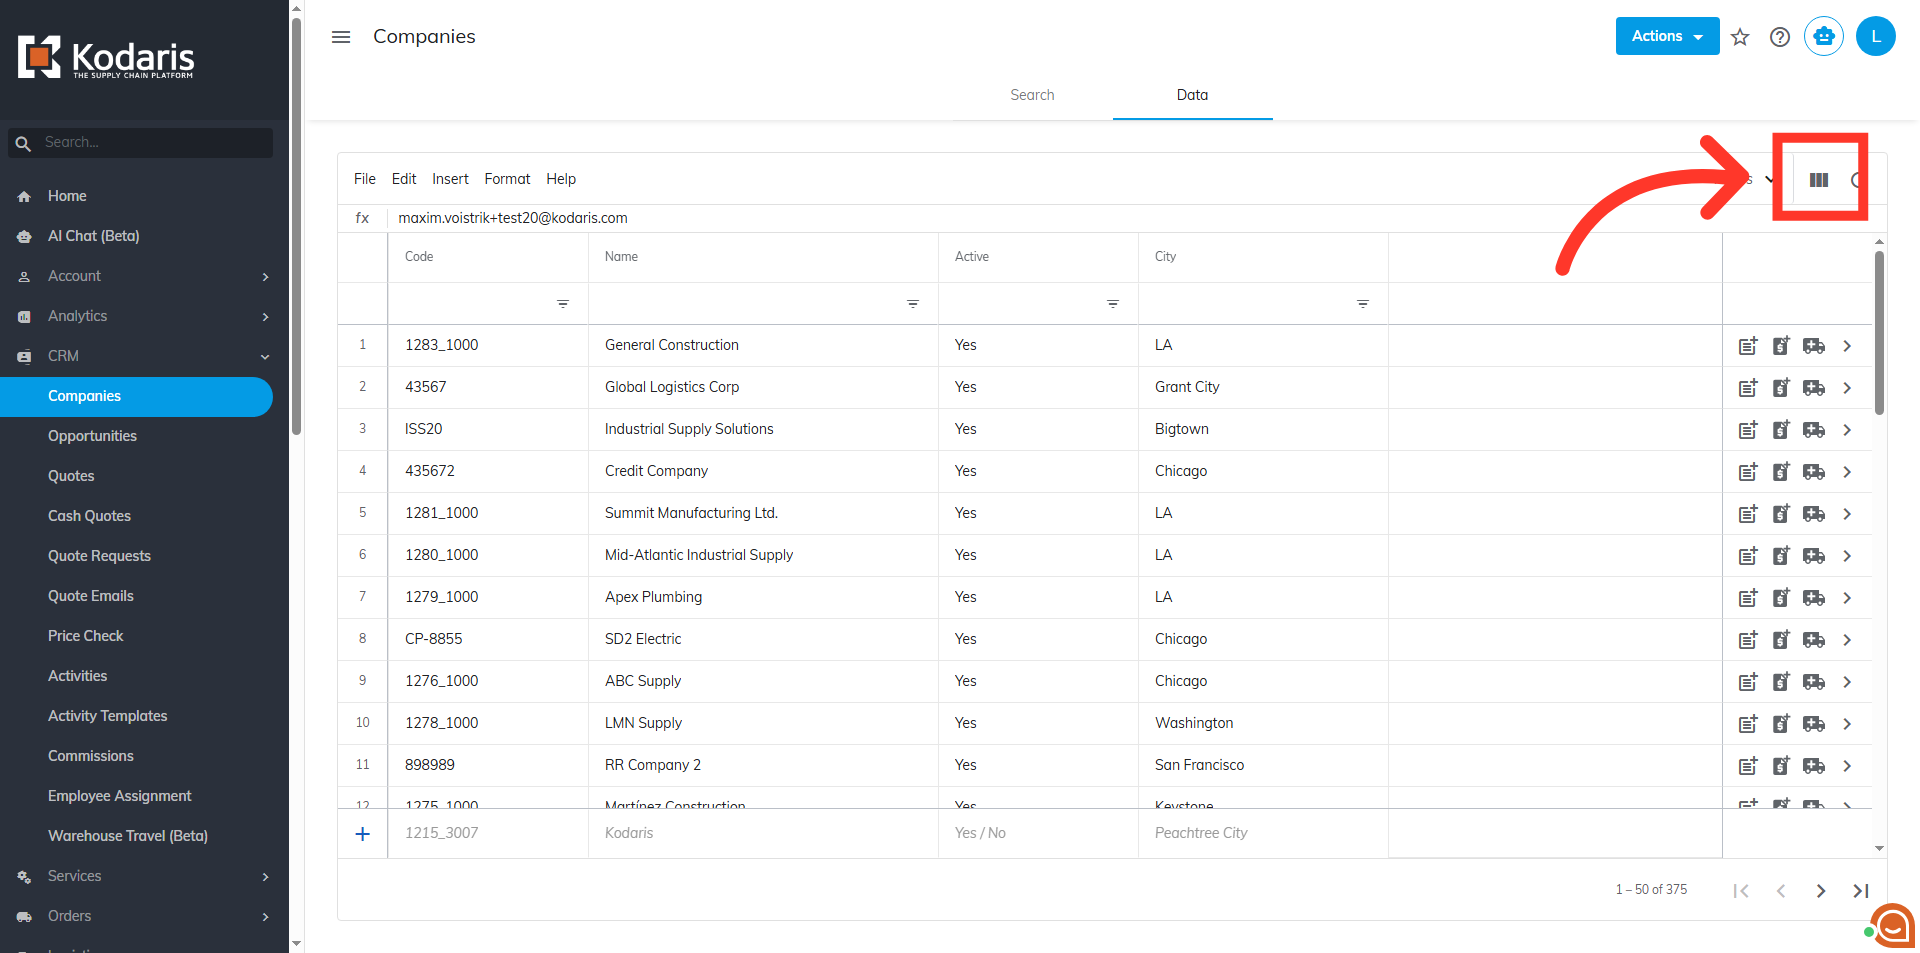
Go to the "Data" tab.
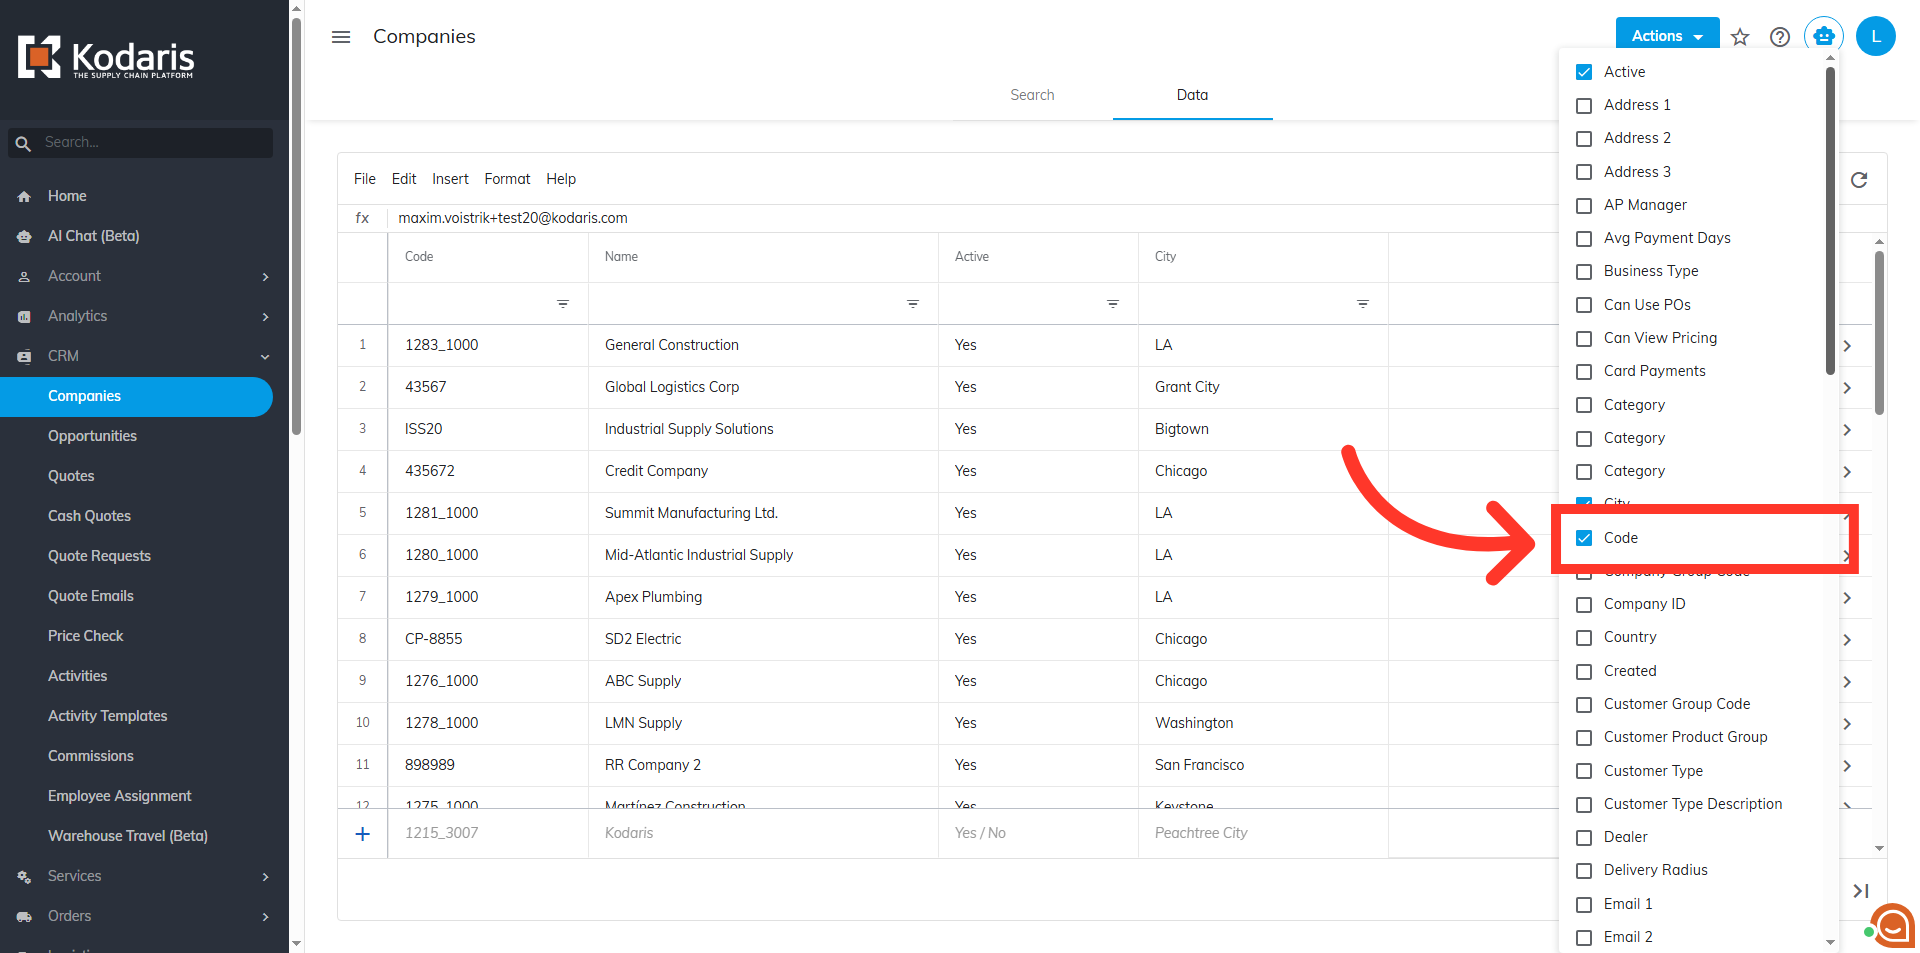
Click "Show / Hide Columns" icon to view the columns that can be added to your screen.
Select the columns you would like to update by importing. Be sure that the required "Code" column has been added to the screen. While not required, the "Name" column can be helpful when working with data.
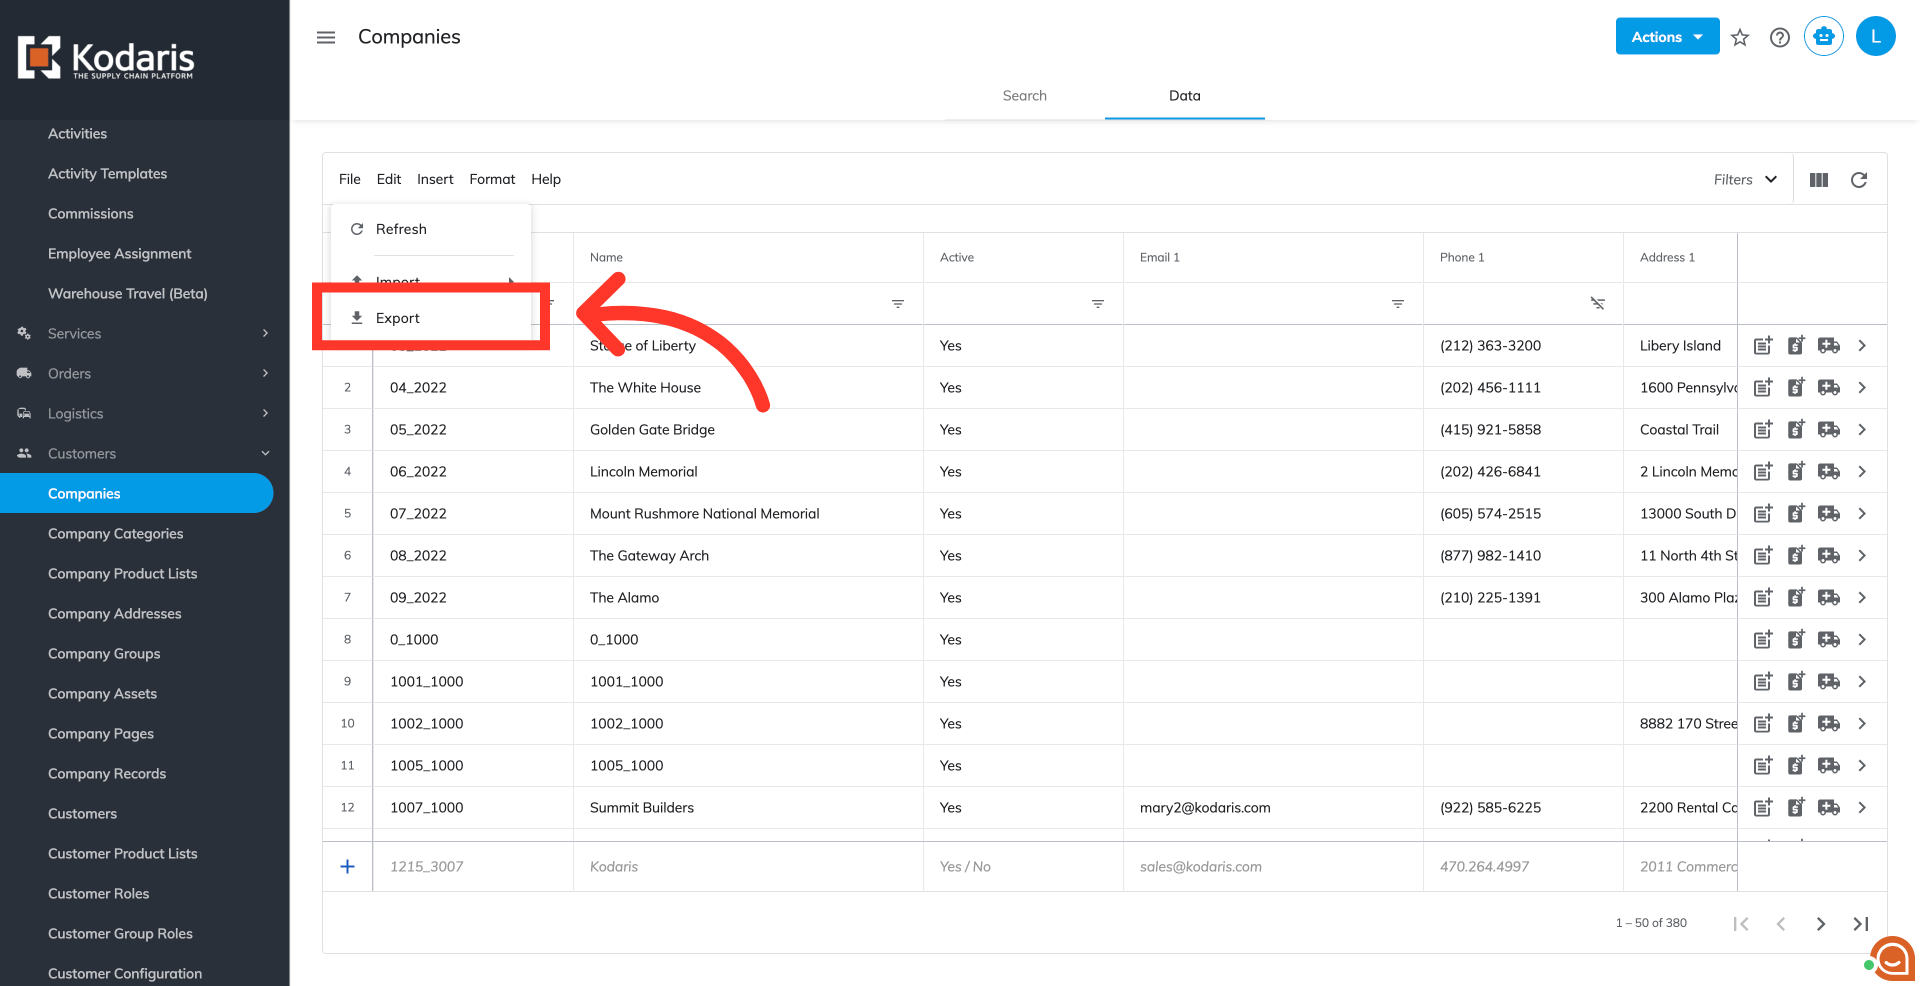
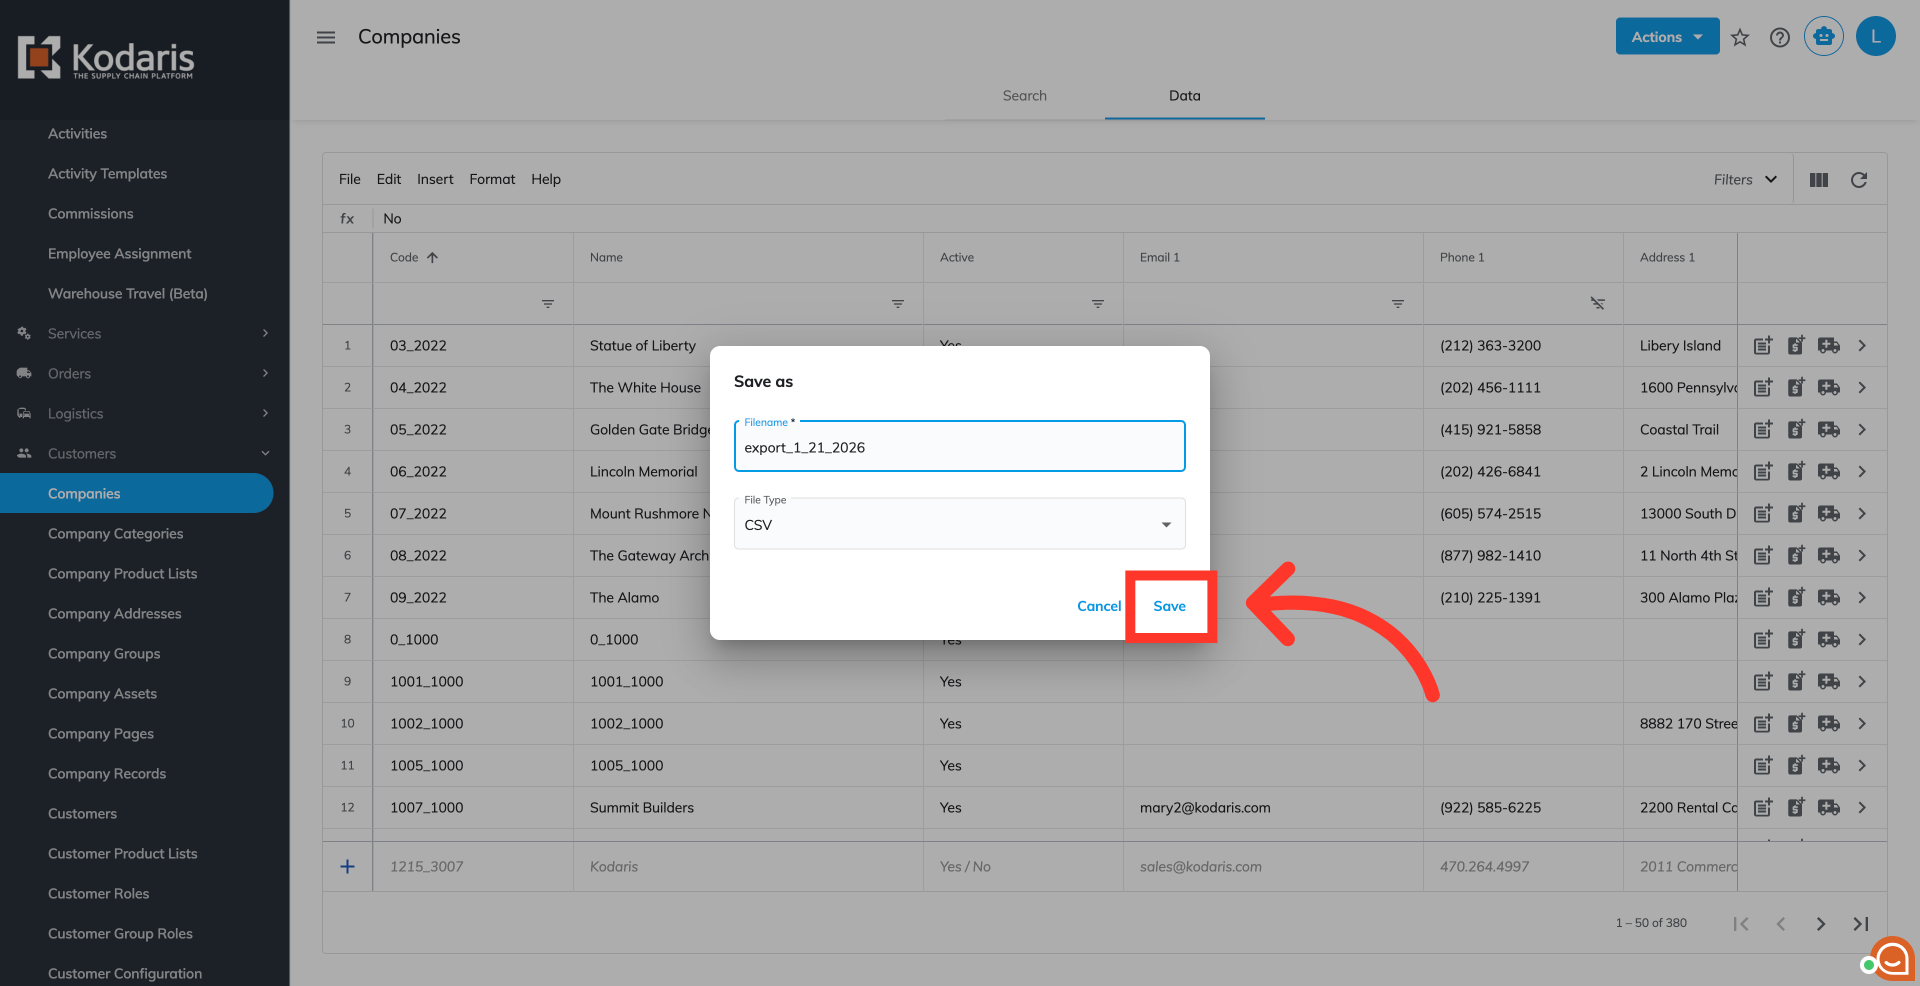
Click "File" from the menu.

Select "Export". This export can be used as a template for importing your company data.
If you would like to update the name of the file, click into the field and enter the desired name.
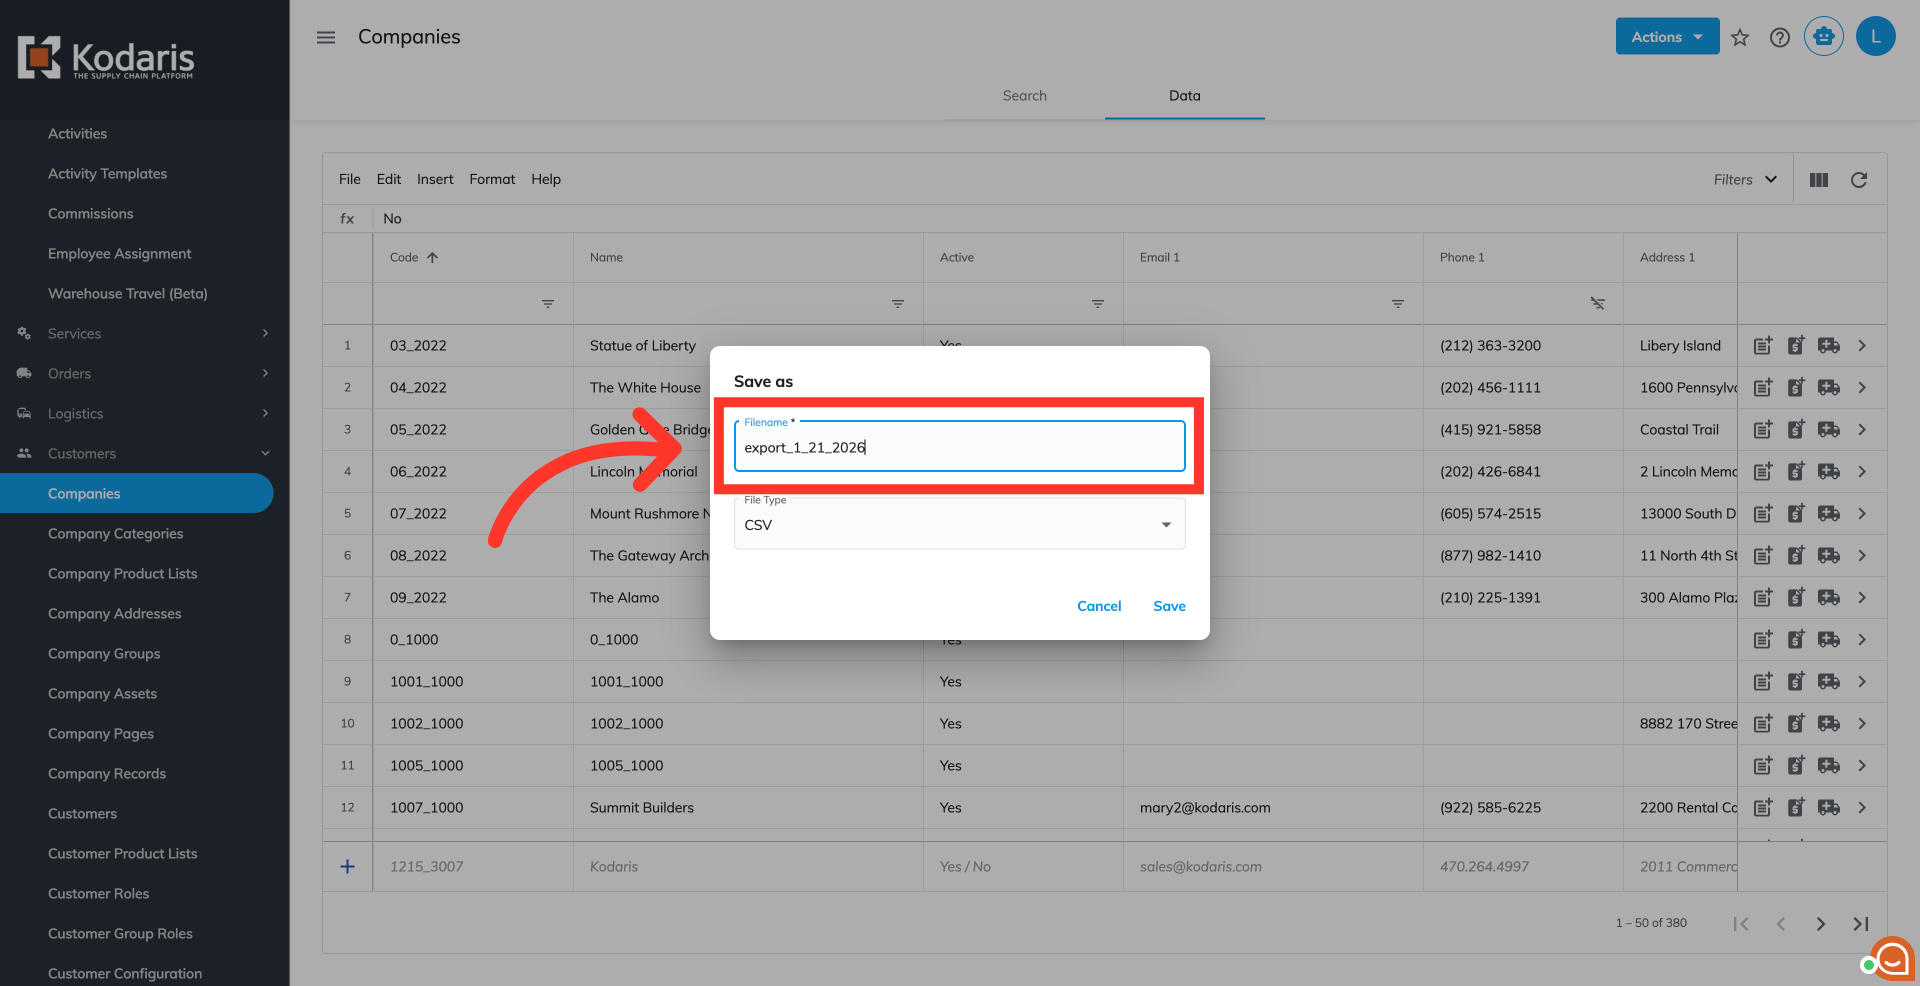
Then, click the "Save button.
The generated CSV file will contain the needed header for importing data back into the system.
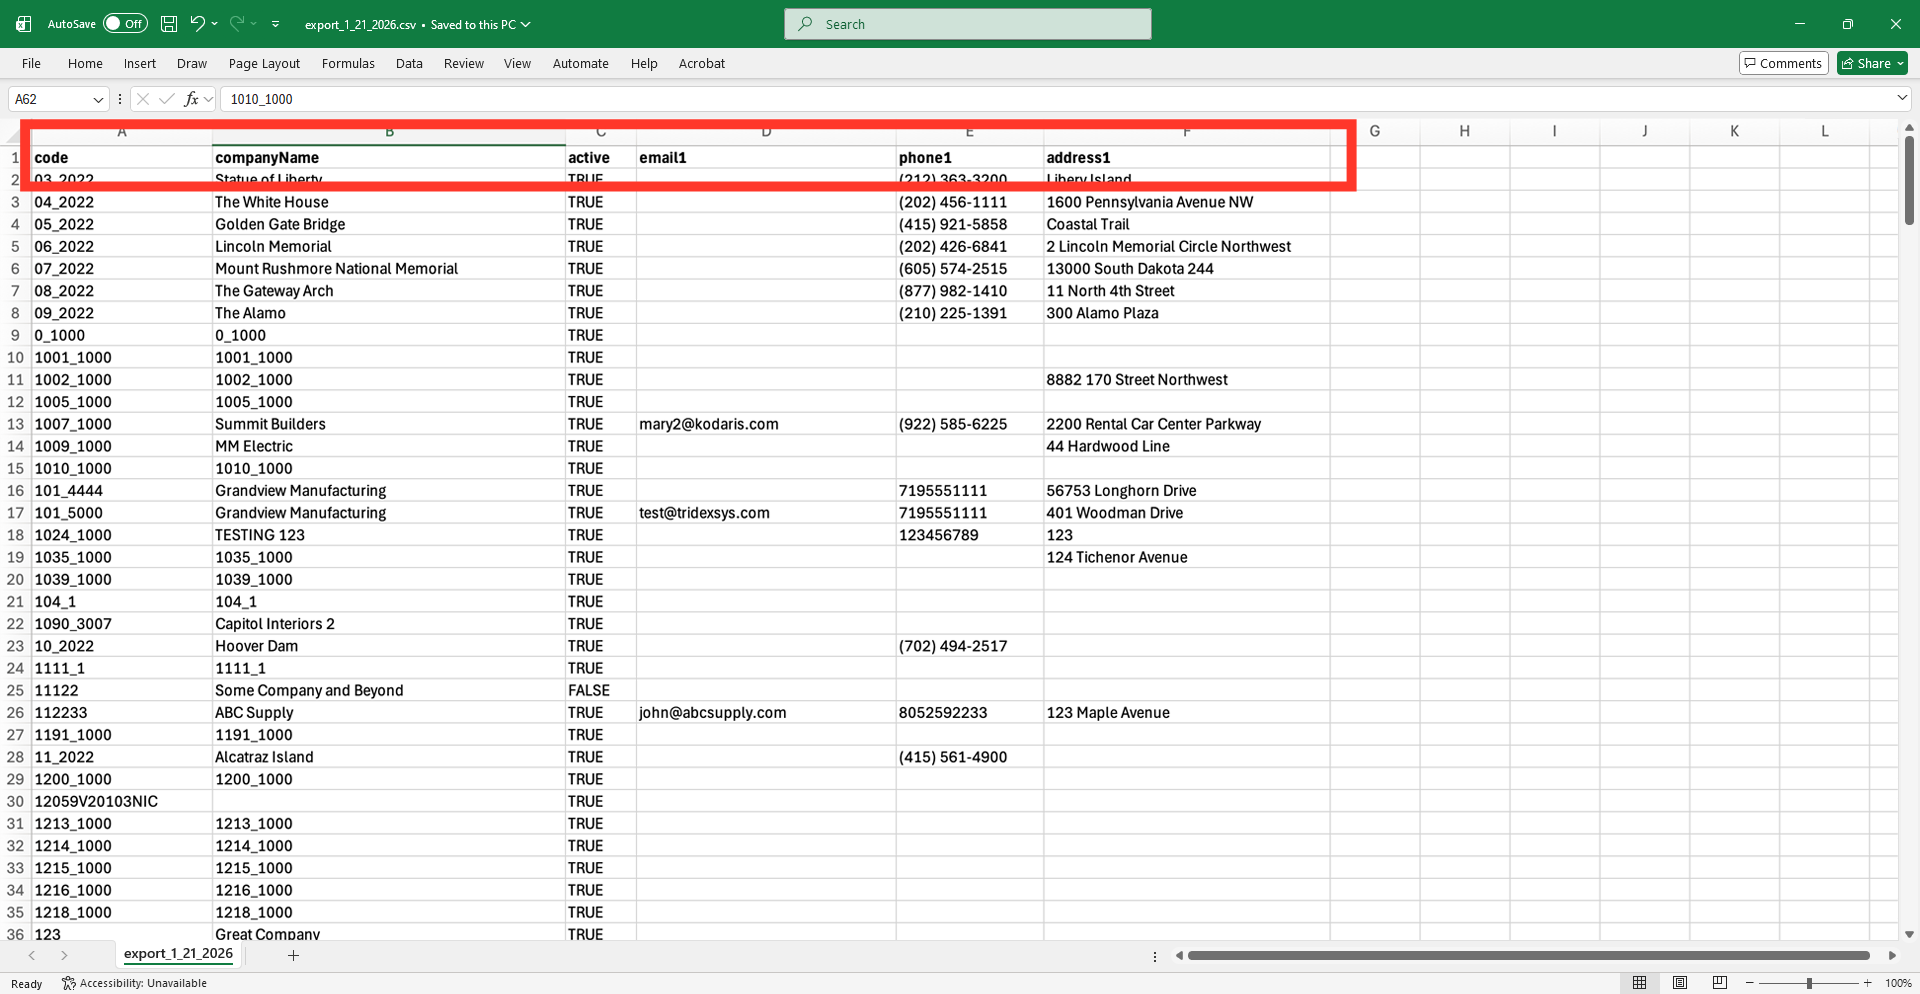
This column is required as it serves as the unique identifier for each company. Be sure that new companies use a code that doesn't already exist in the system.
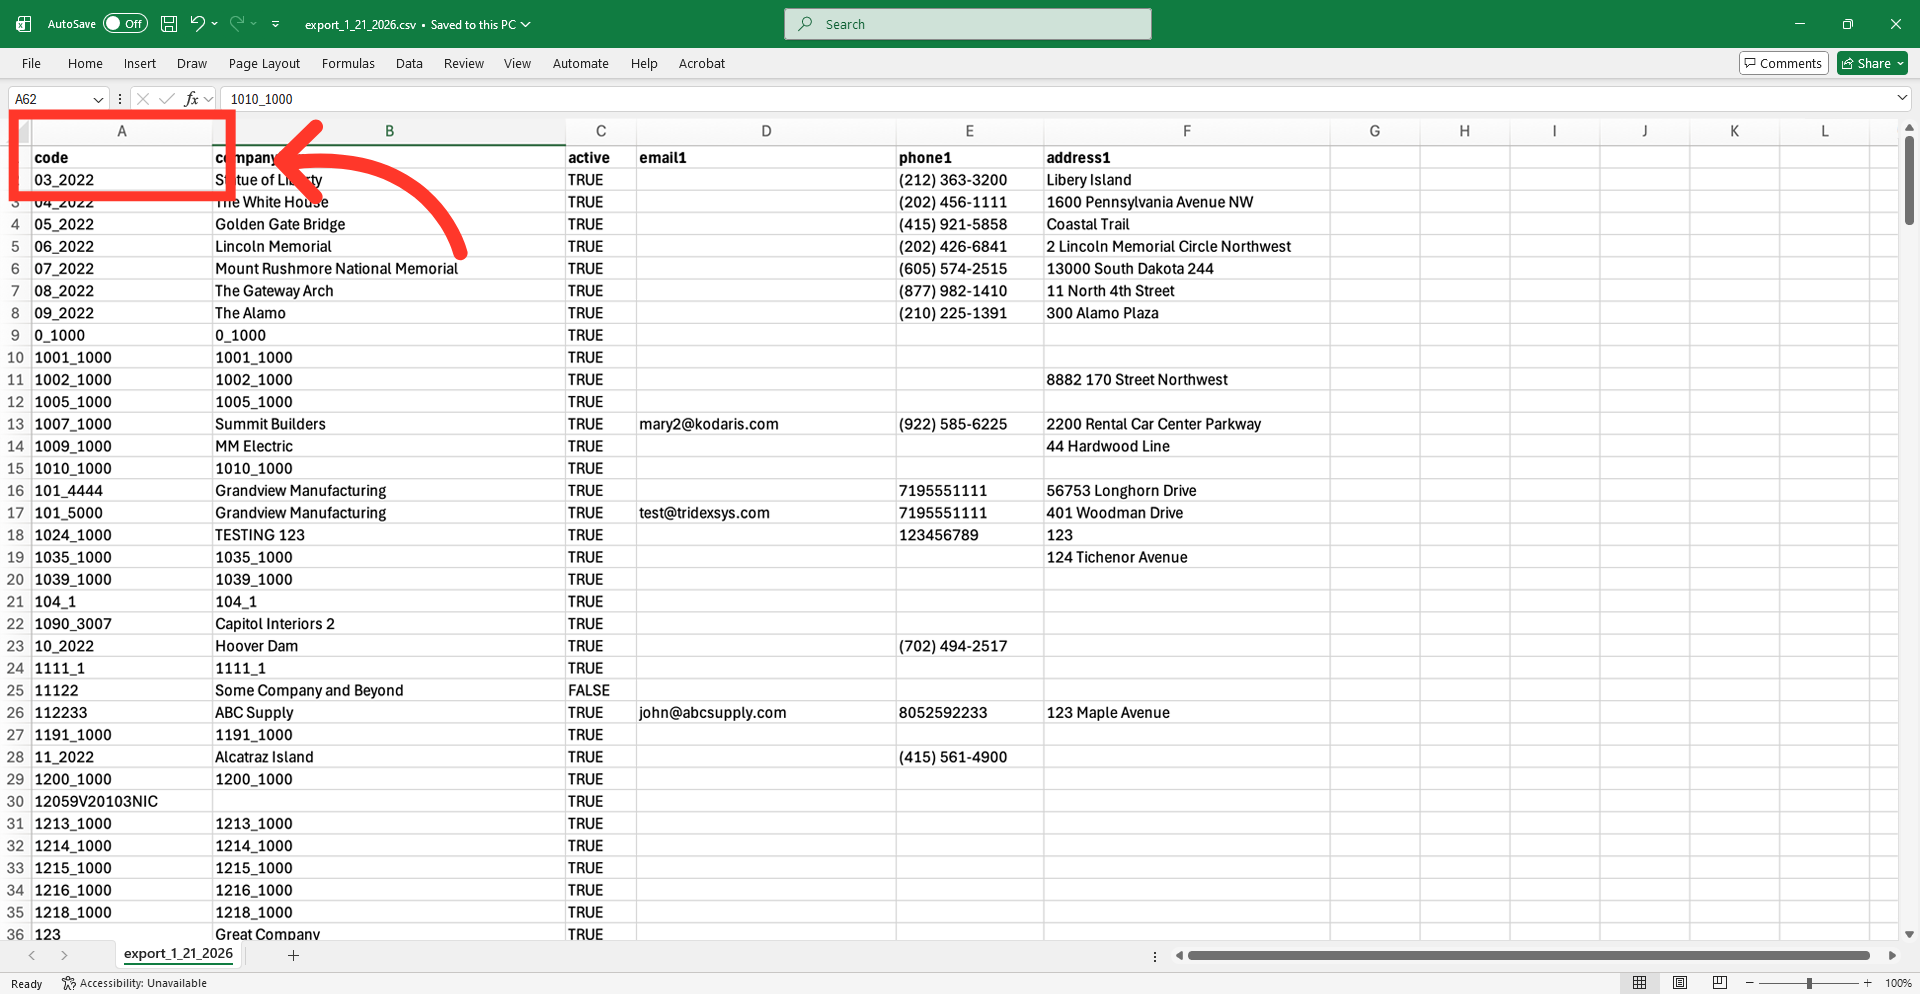
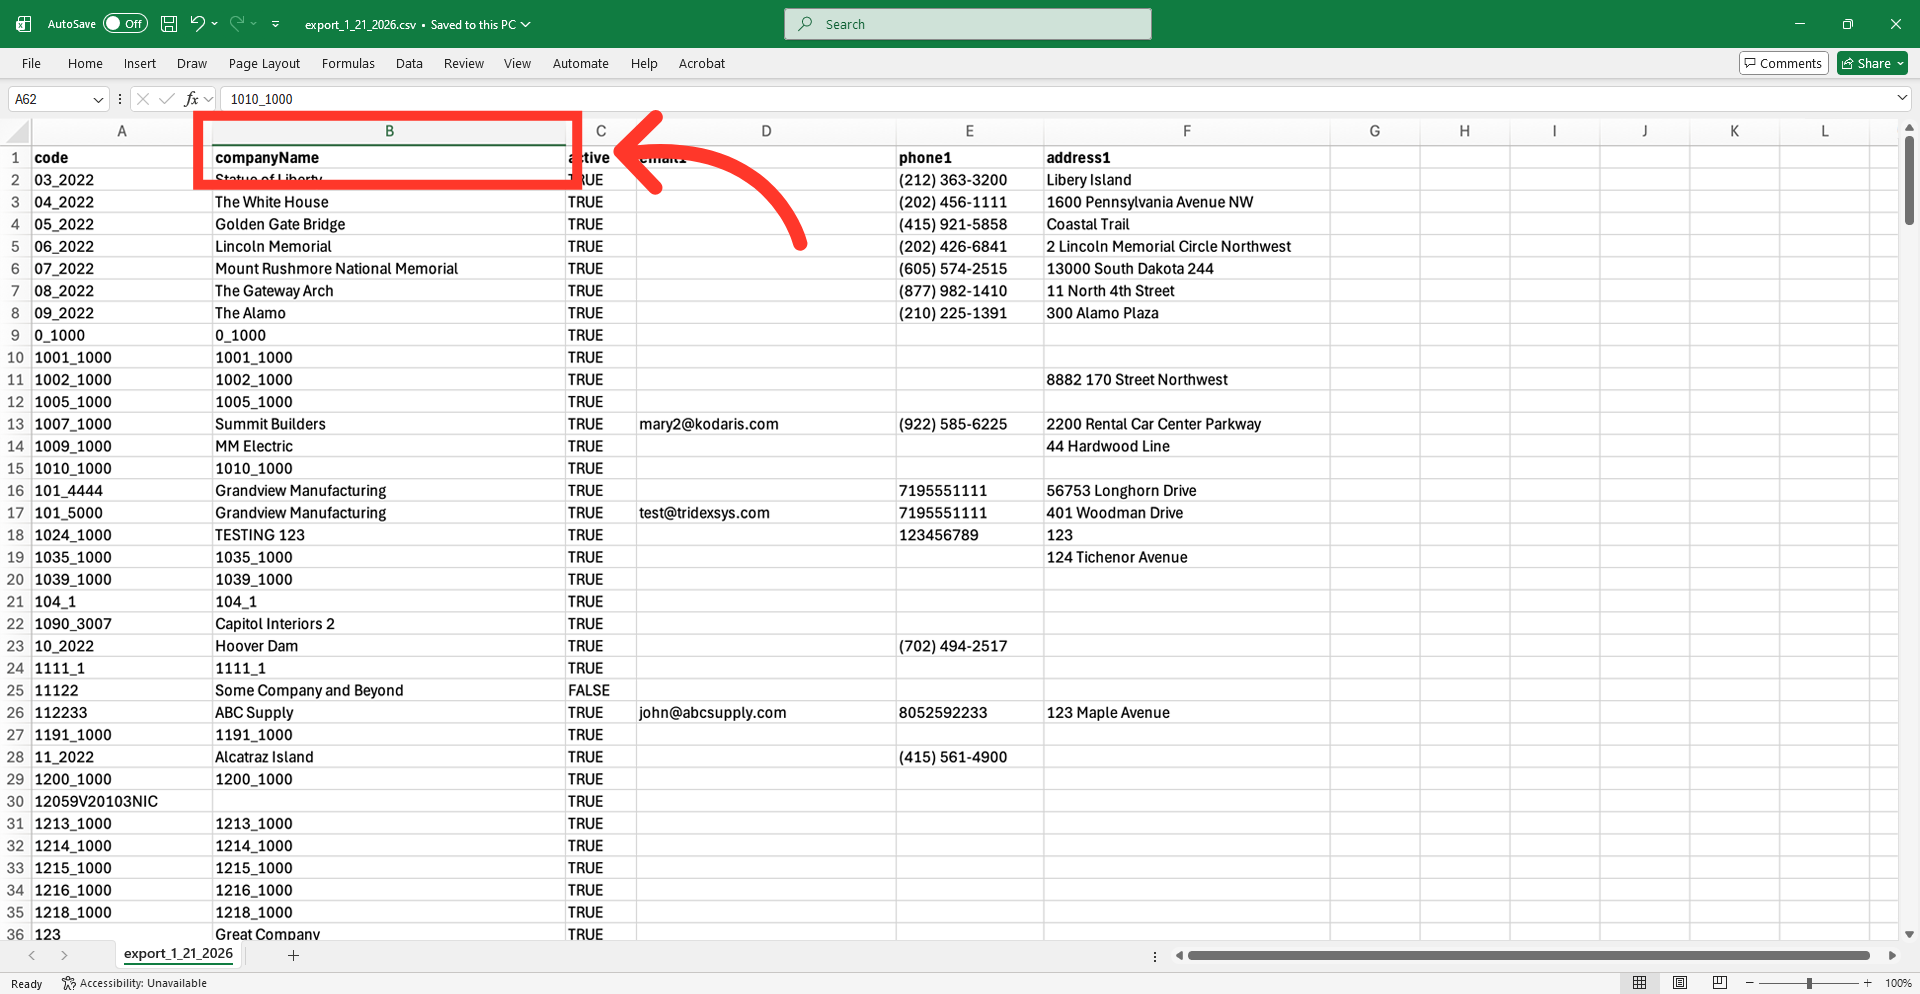
Fill the "companyName" column with the company names - while not required for importing, you can easily update the name of the companies with this import.
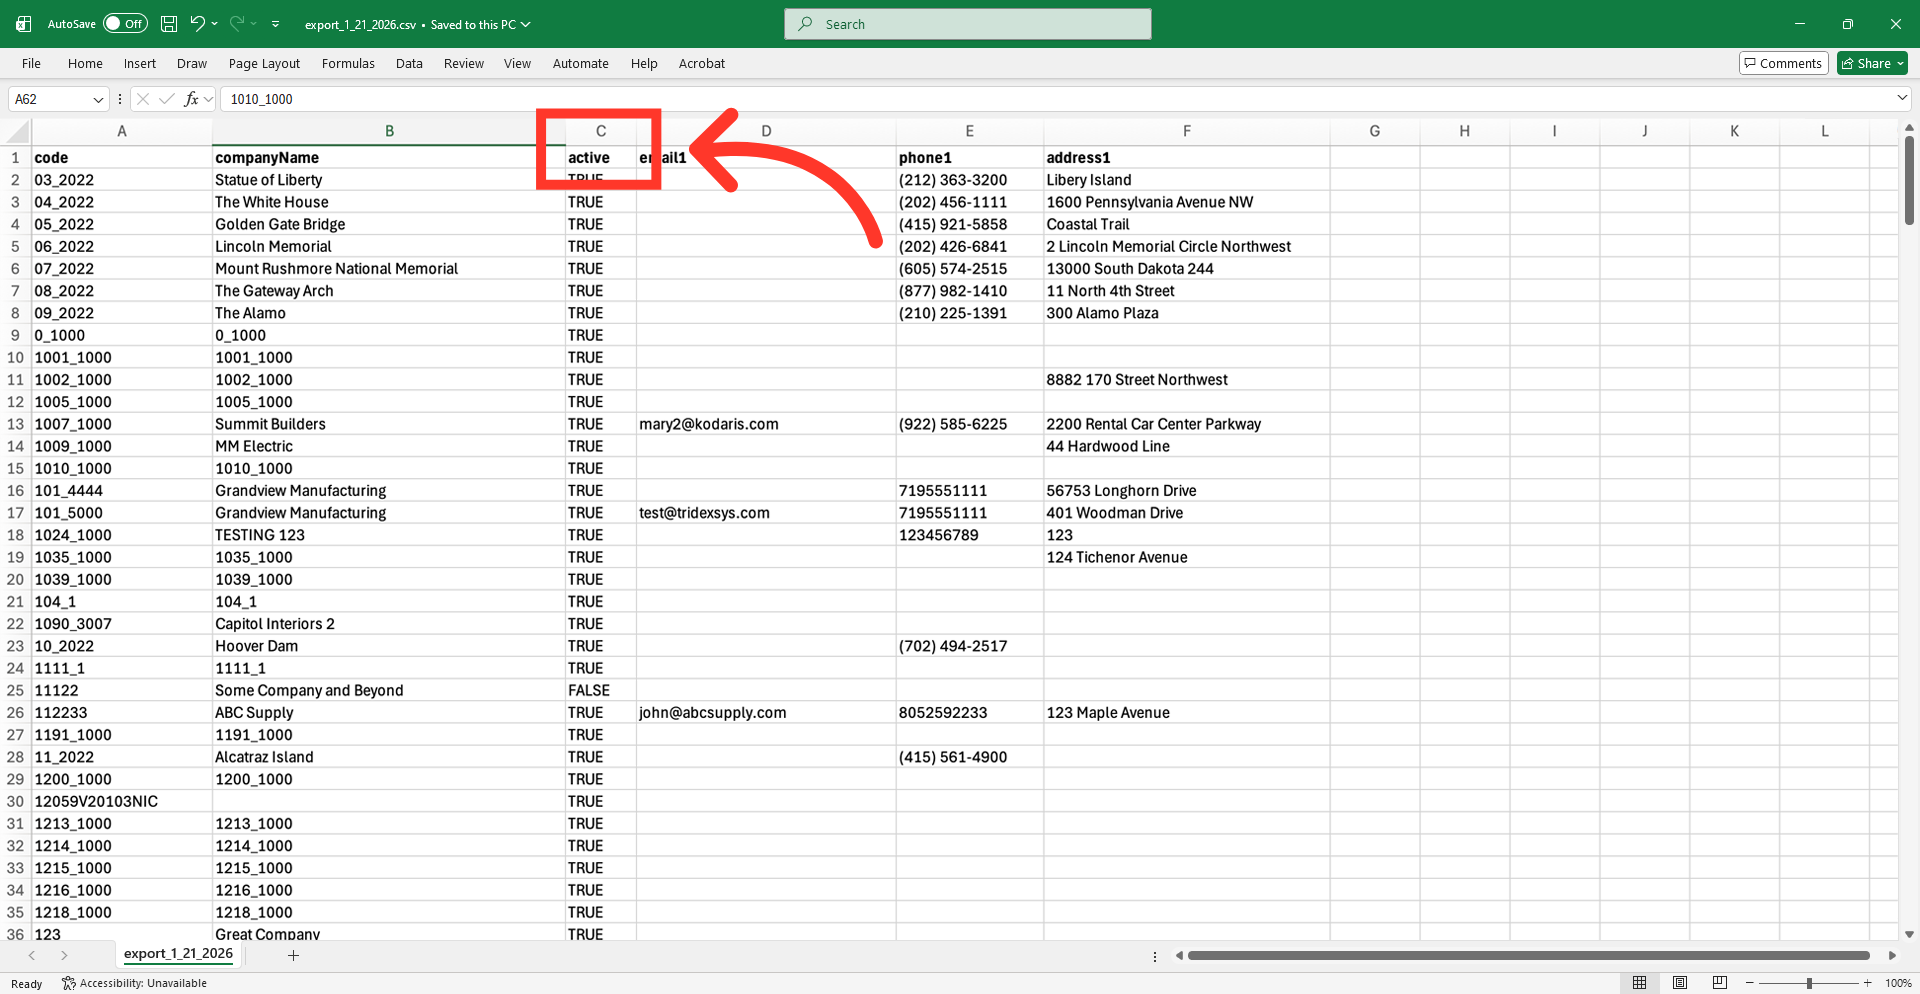
Set this cell to "TRUE" if you would like the company to be active in the system. "FALSE" if you do not want it active. This column is optional. If you do not include this during import, the company will be automatically updated as active.
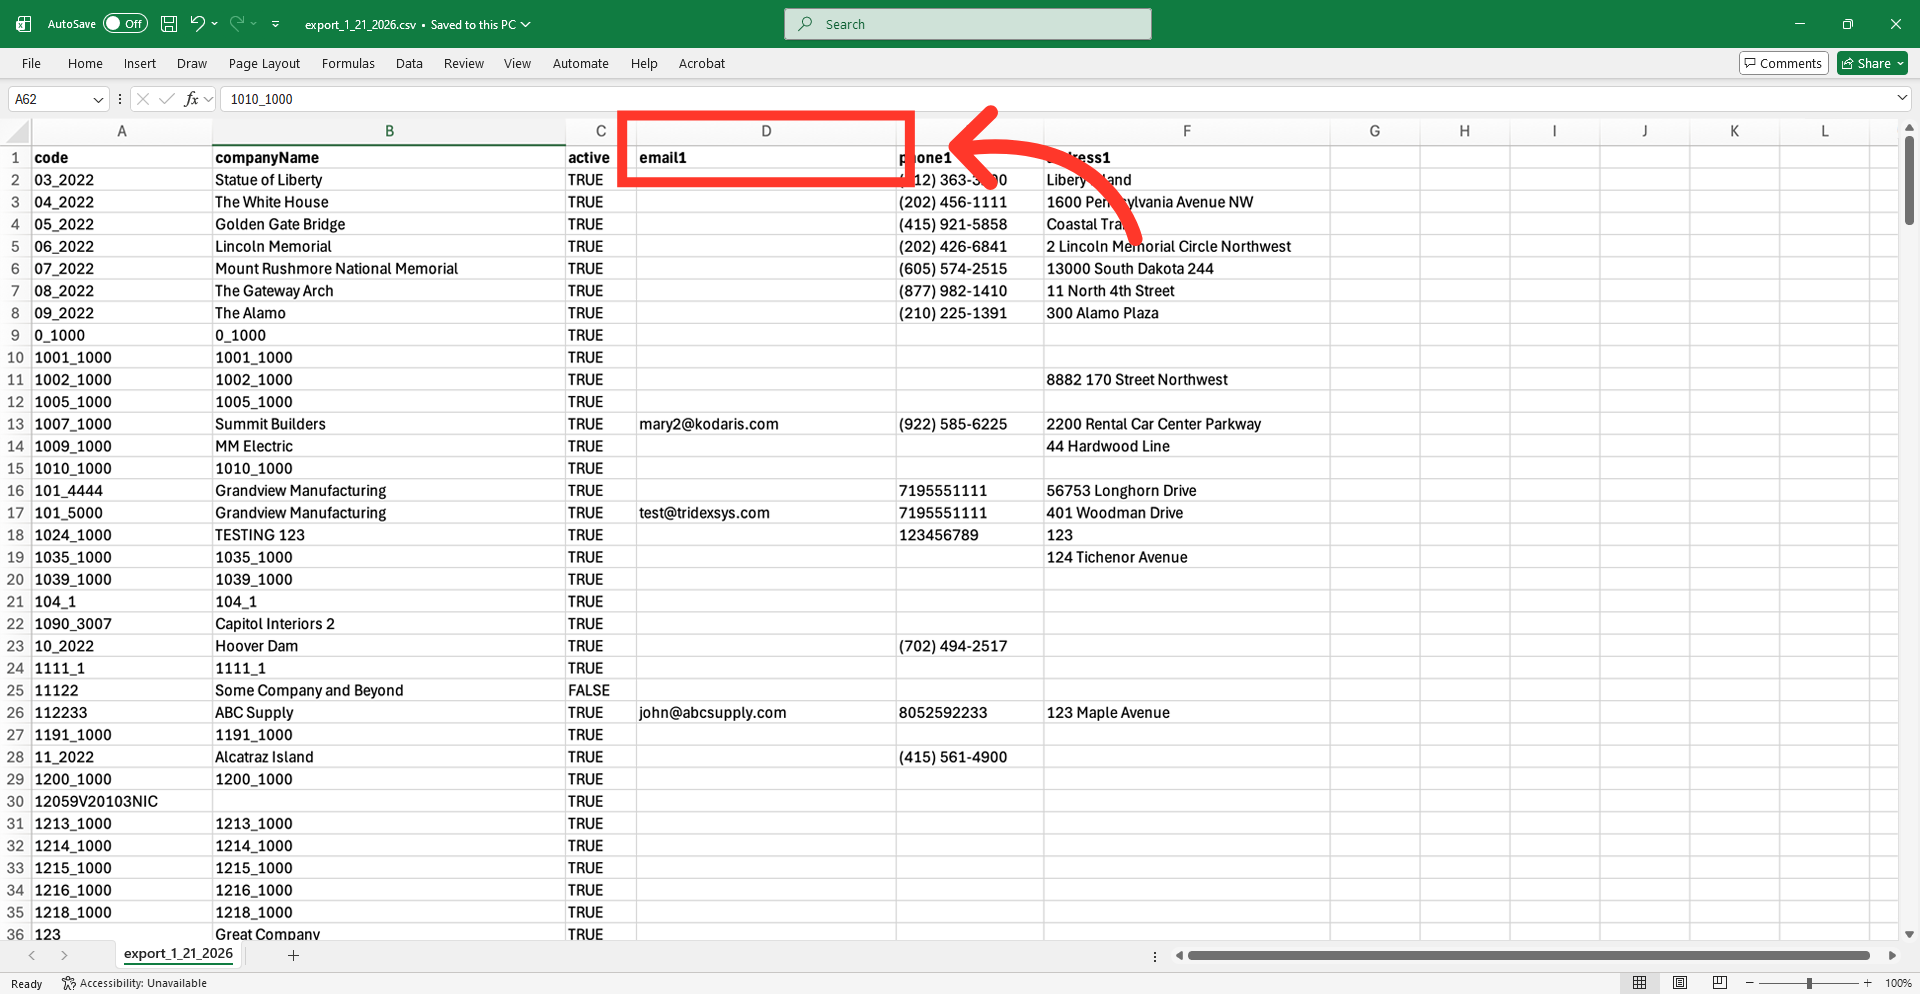
Update this cell with the company's email address. This column is also not required, but should be updated with an email address if the company will be receiving system notifications and company communications.
This optional column contains the primary phone number.
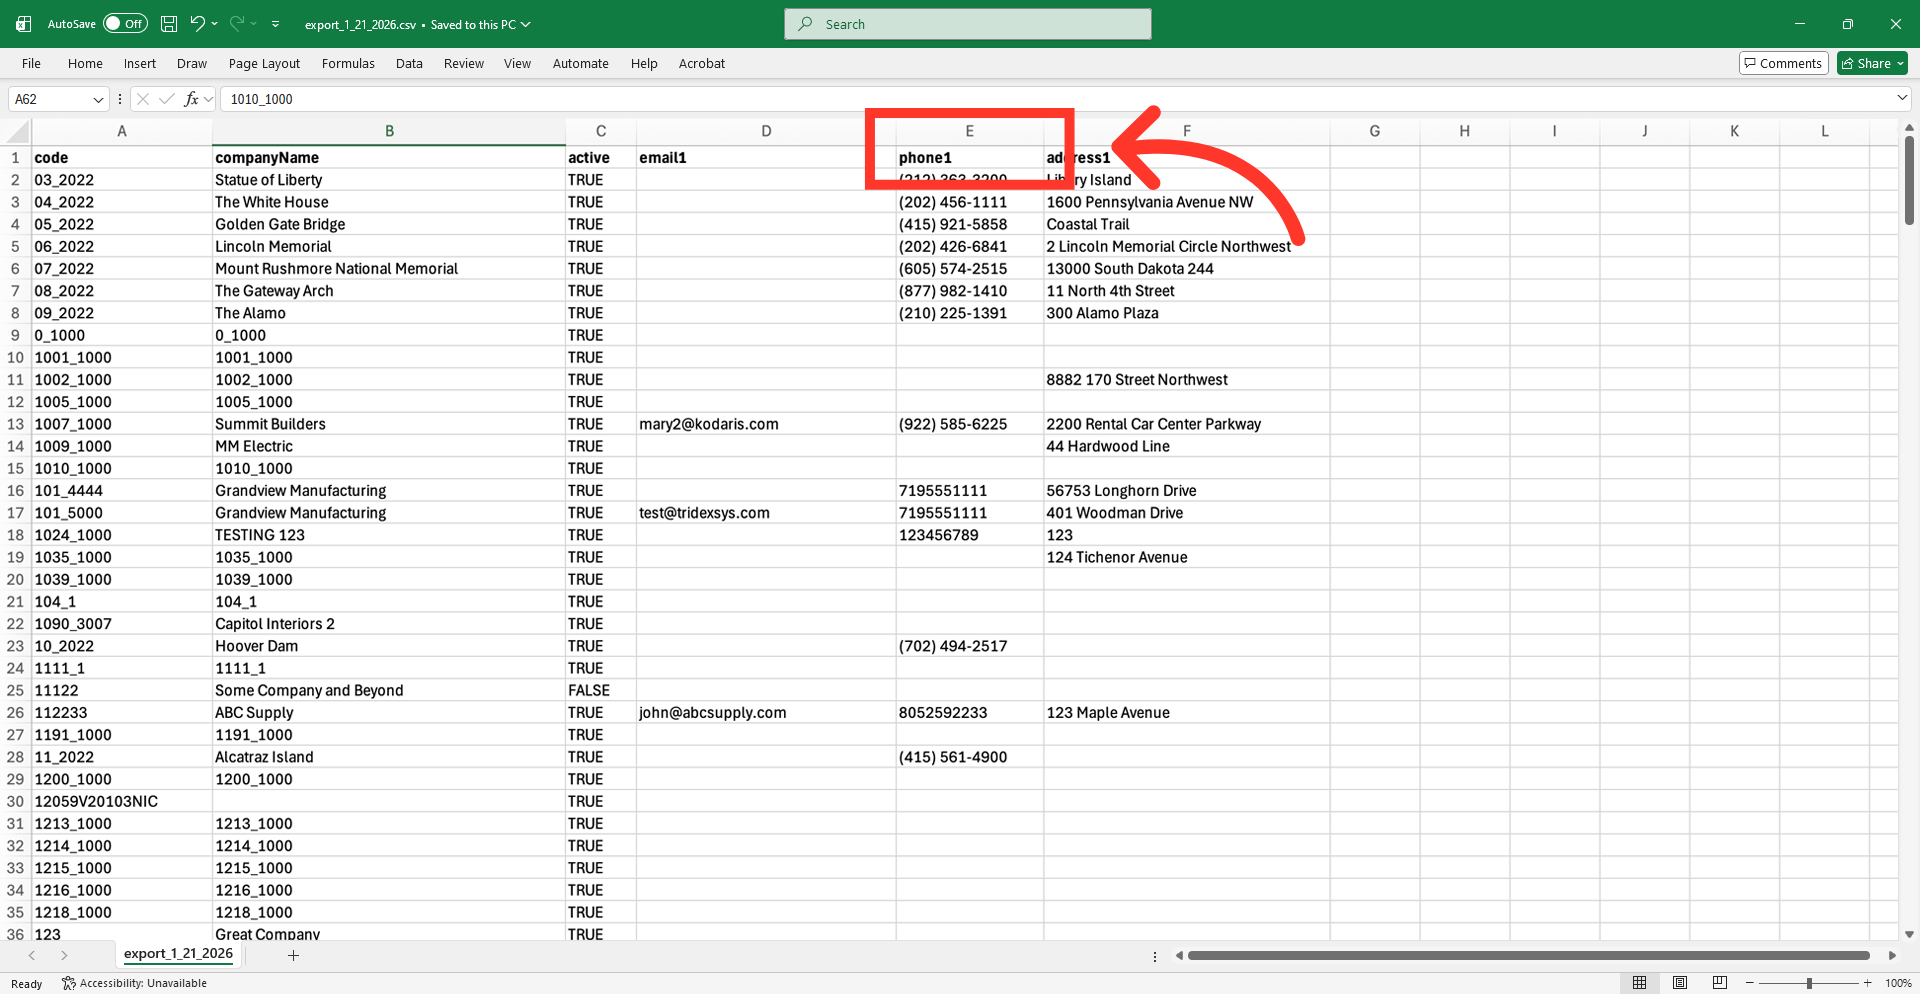
This column is for the company’s physical address. This is also optional, but can be added during import.

Update the spreadsheet using this header and save the updated spreadsheet as a CSV file on your computer. Be sure that your spreadsheet has all of the information you would like to add before importing.
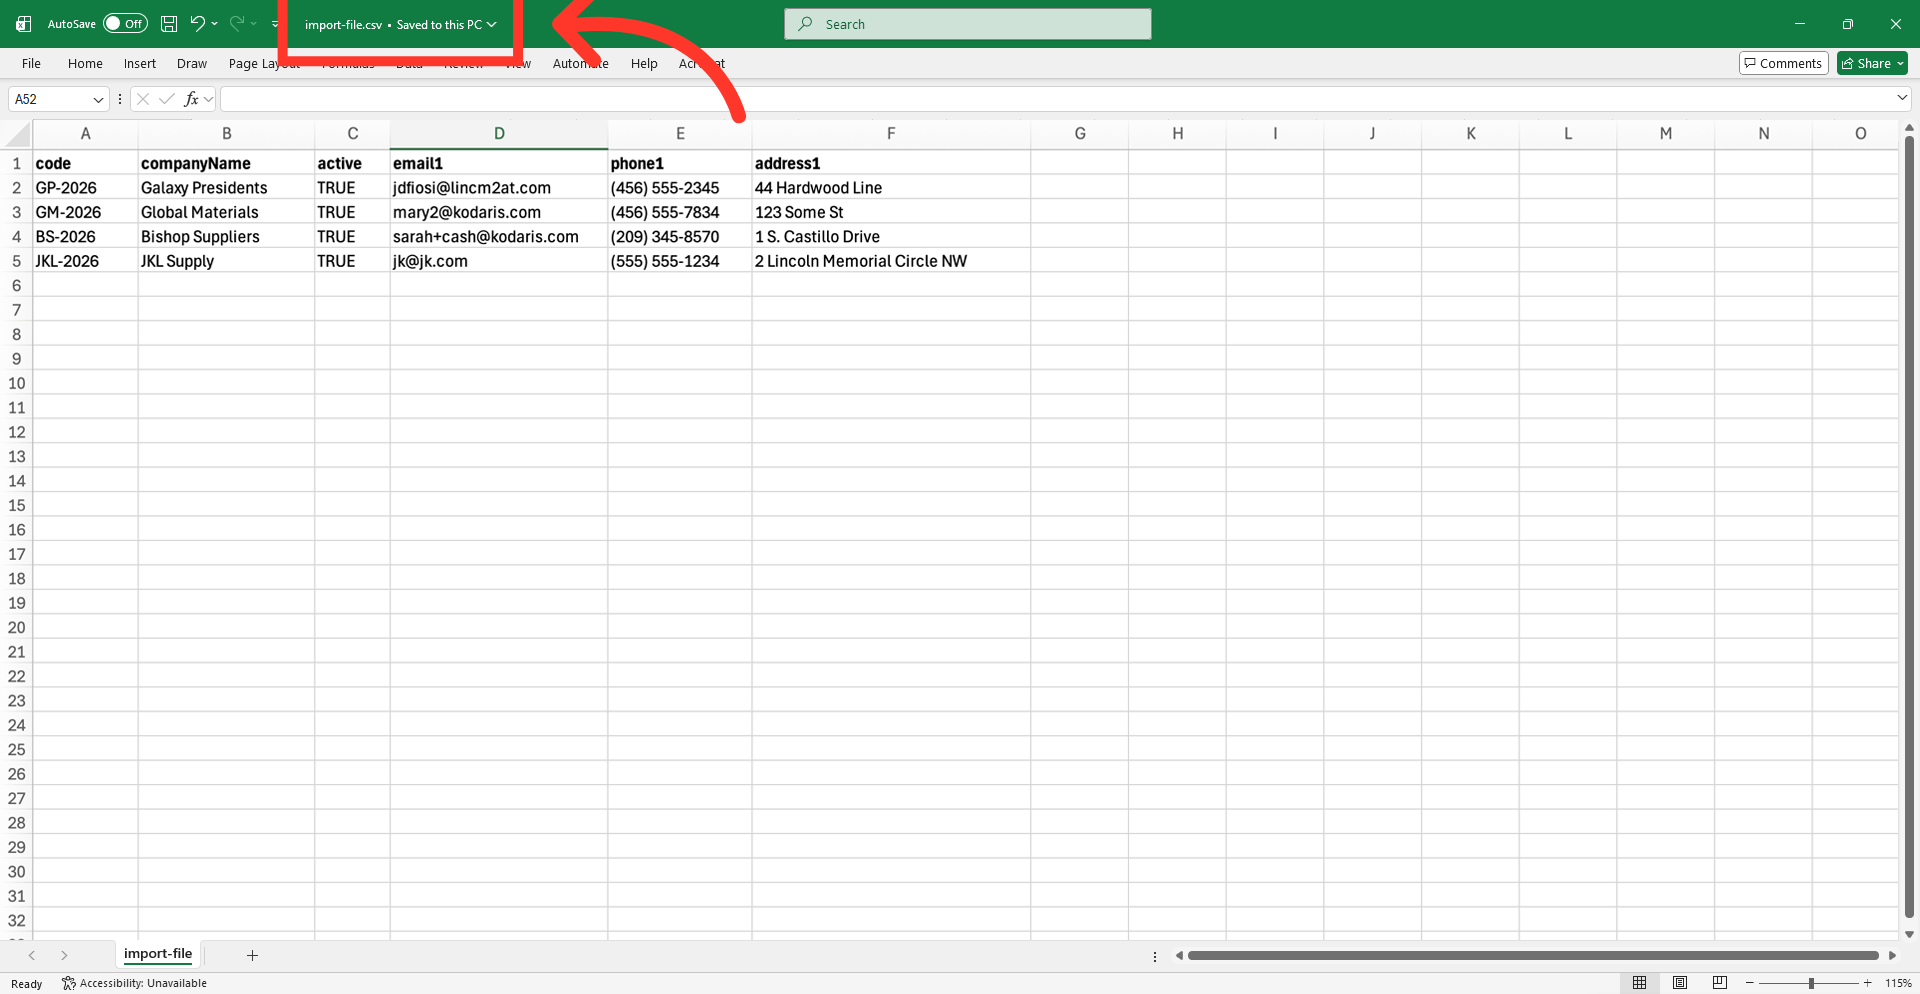
Now that your file is ready for importing, navigate back to the "Data" tab in the operations portal. Then, select "Import" from the "File" menu.
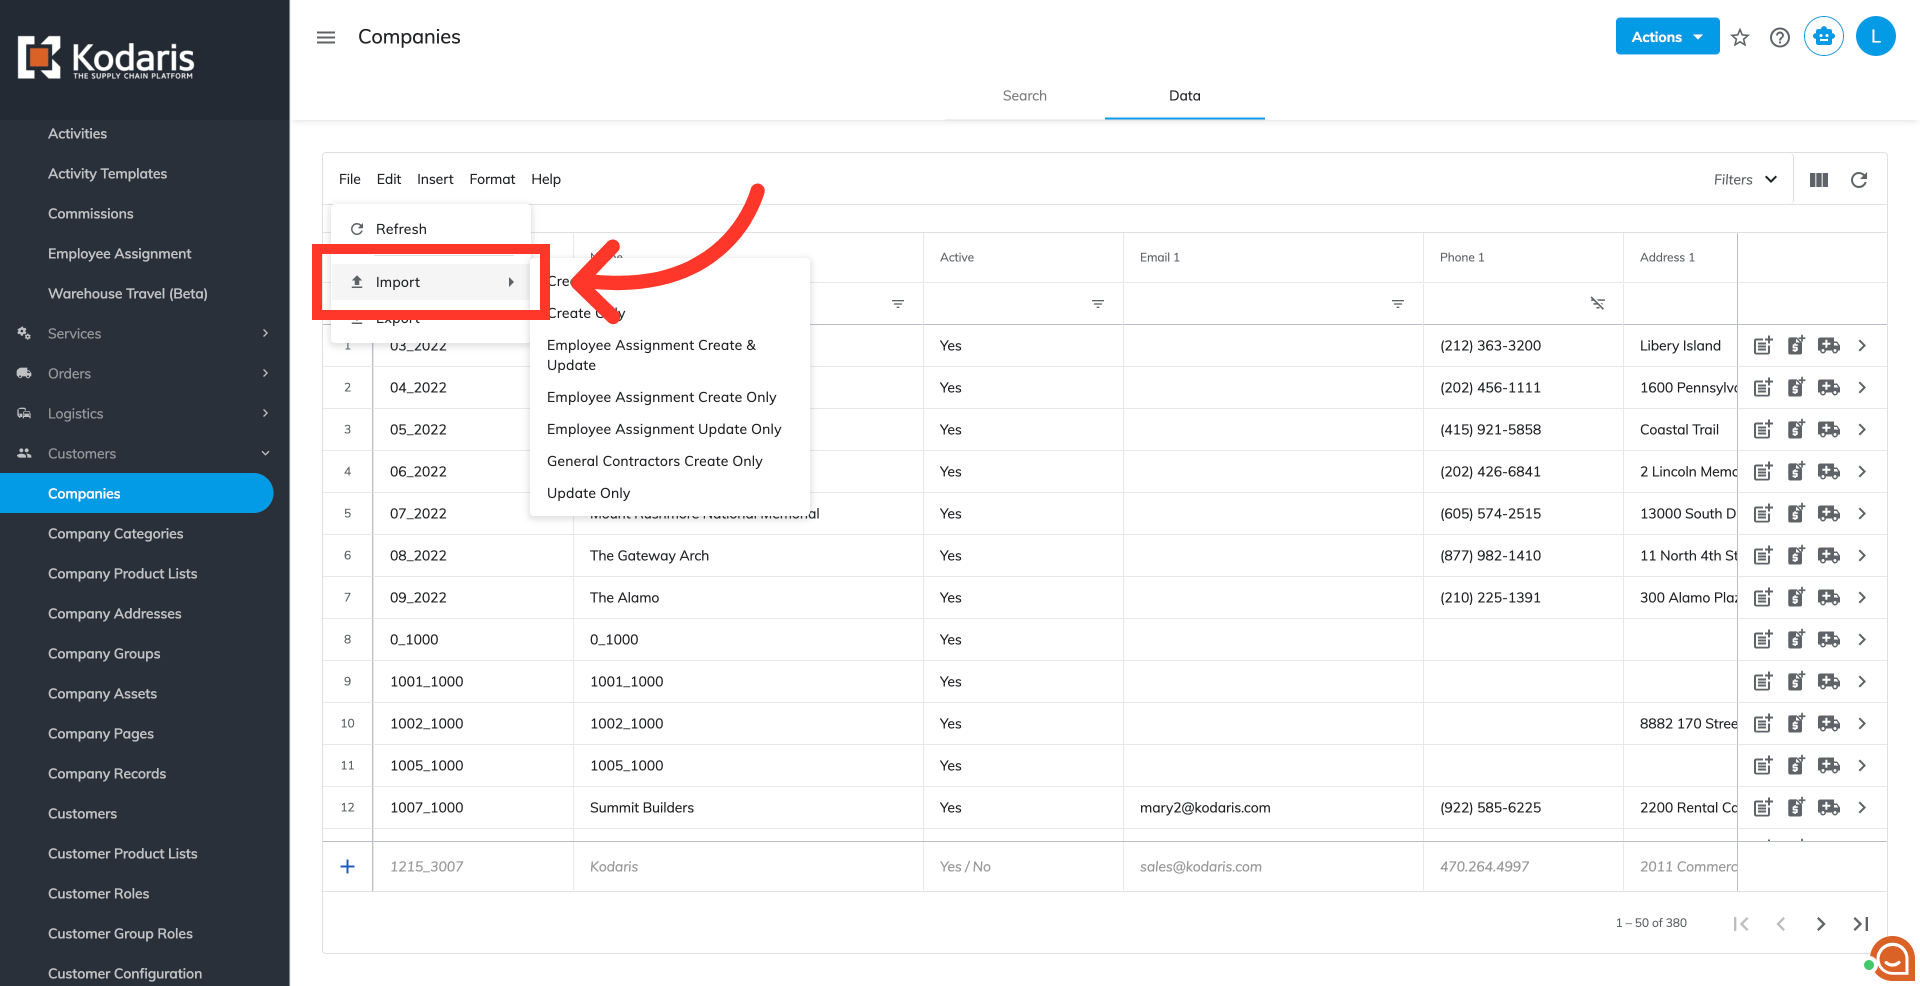
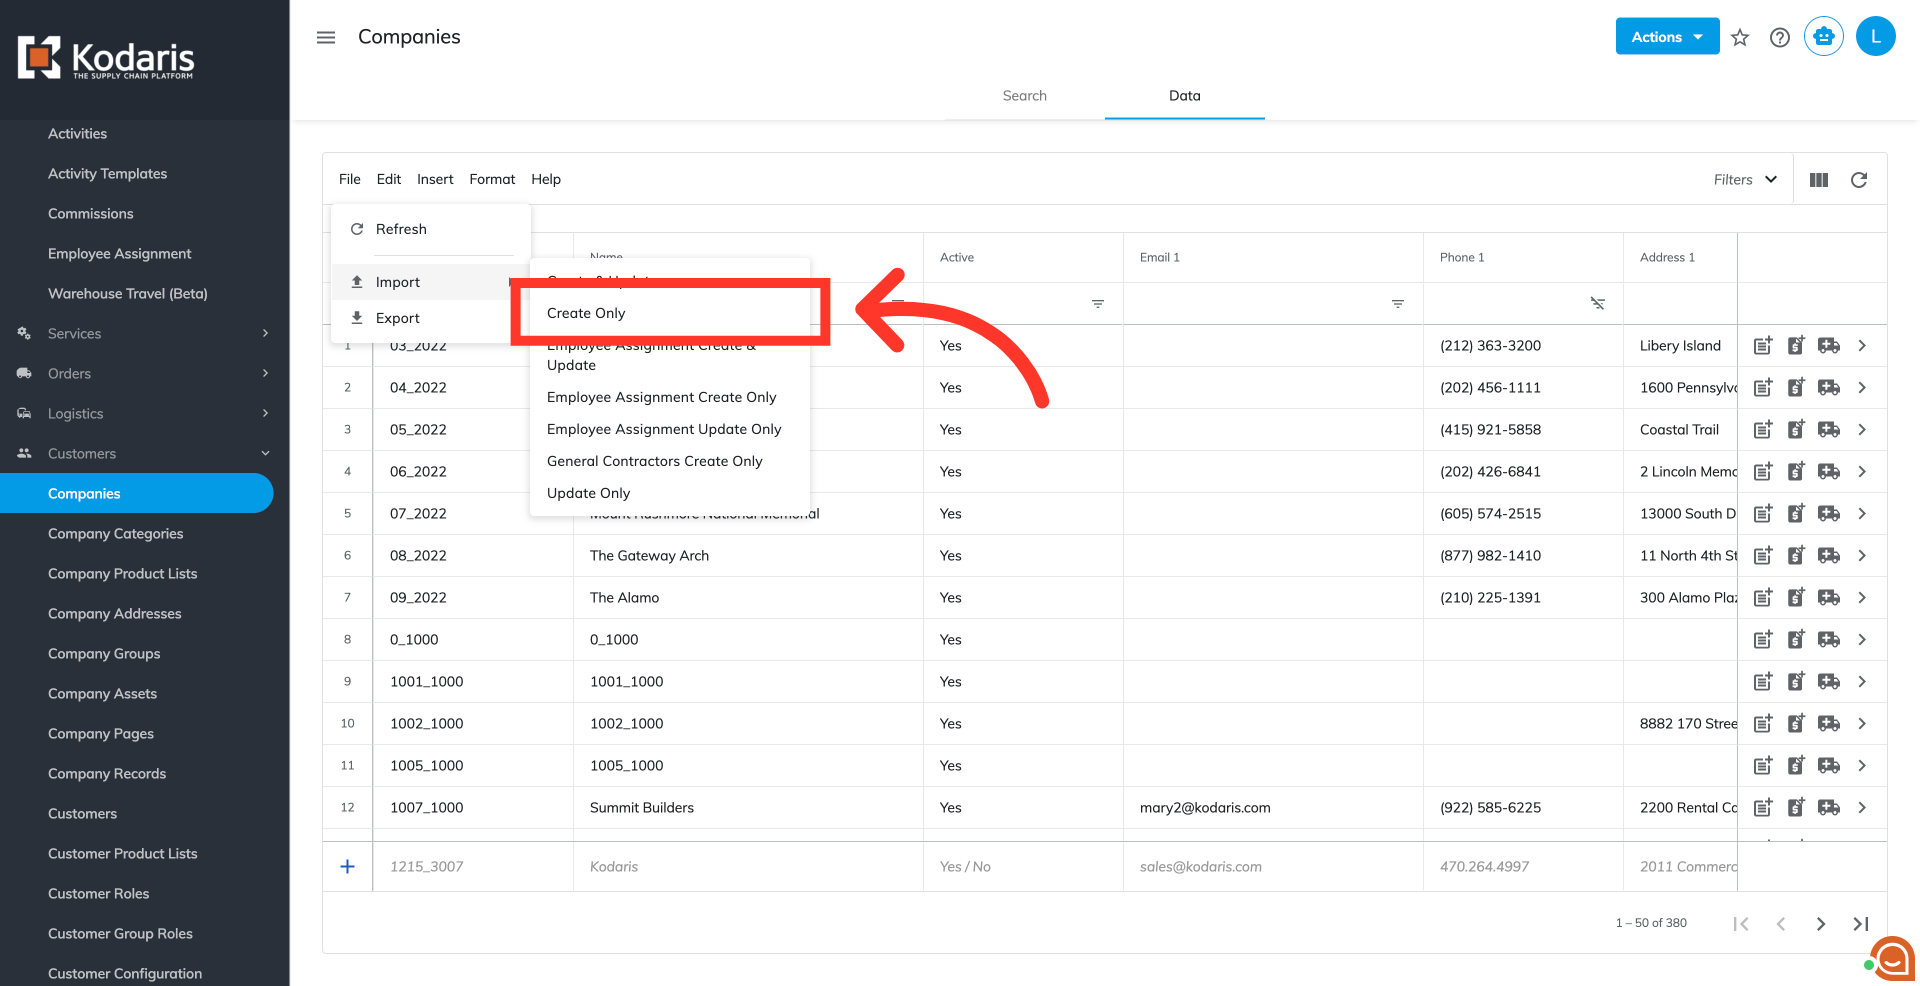
Since you're only creating new companies with this import, choose "Create Only".
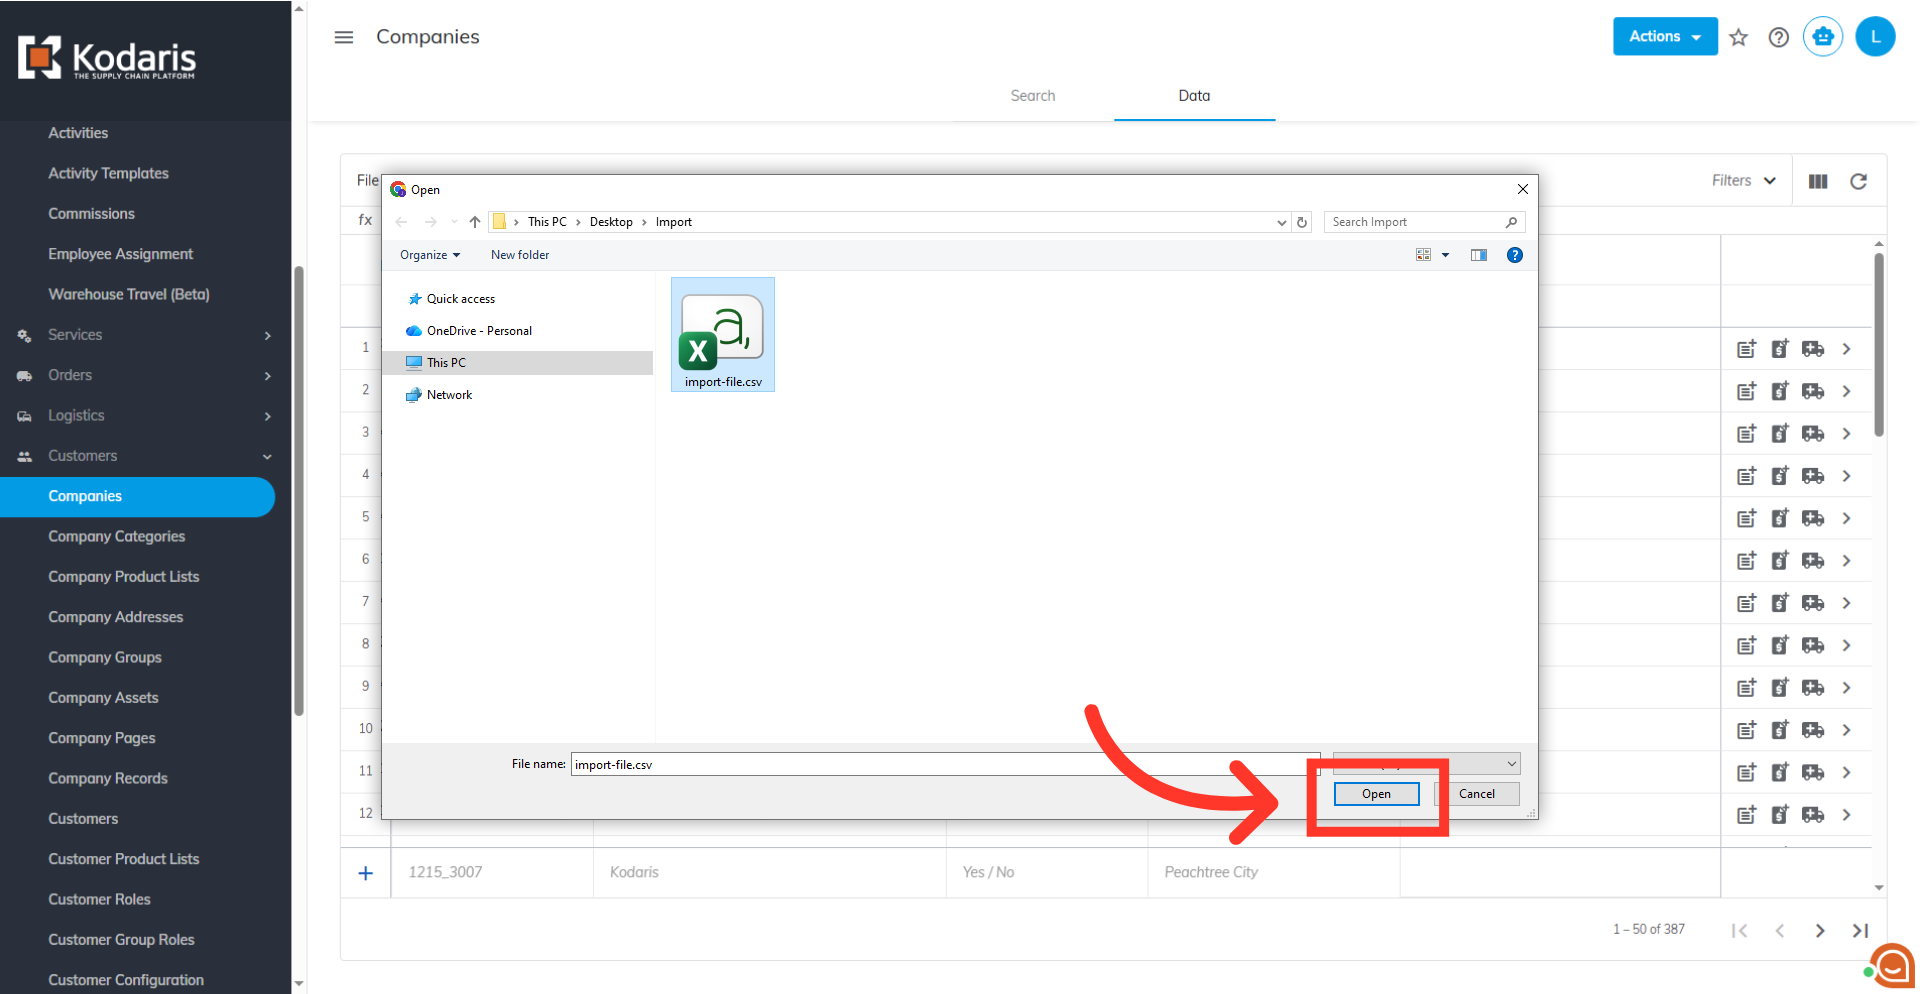
Select the correct CSV file from the computer for upload and click the "Open" button to start importing. The import will run in the background. Allow a few minutes for the data to be imported, and note that larger imports may take longer. There are no rollbacks for imports, so ensure your data is correct before importing.
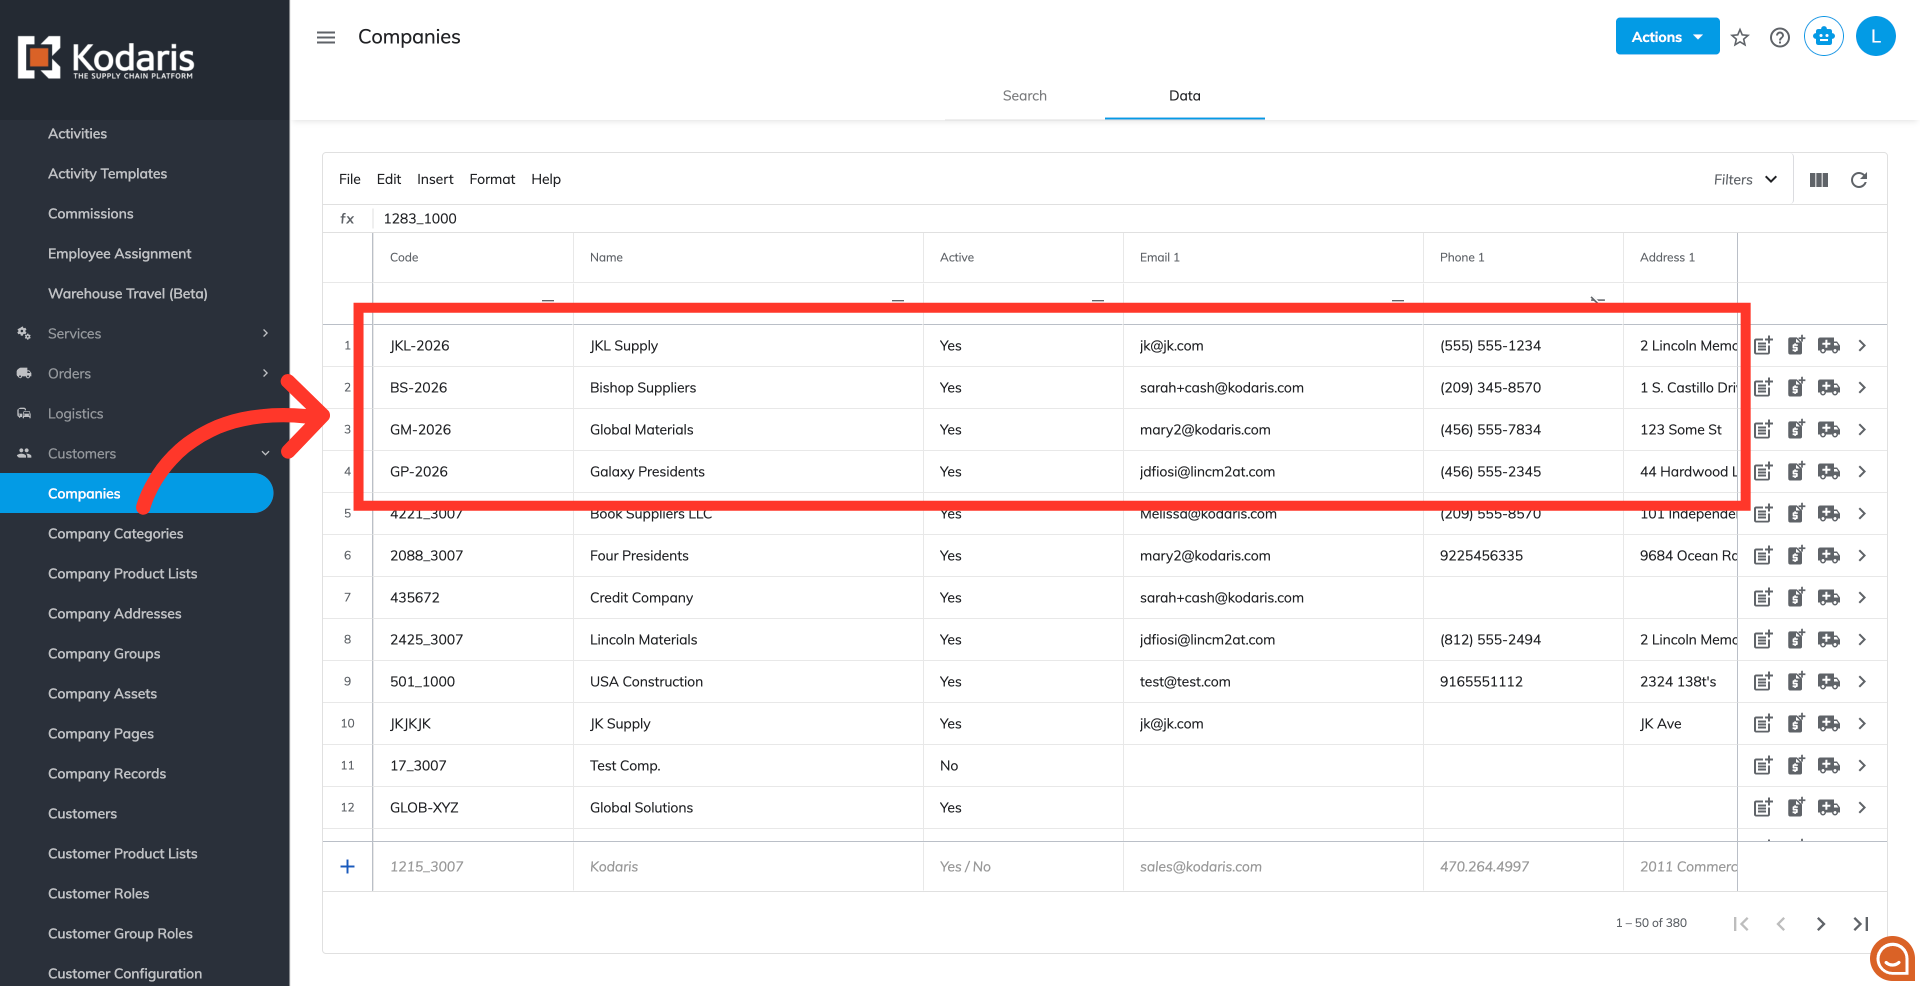
Once the import is complete, you can see the new information has been added to your screen.
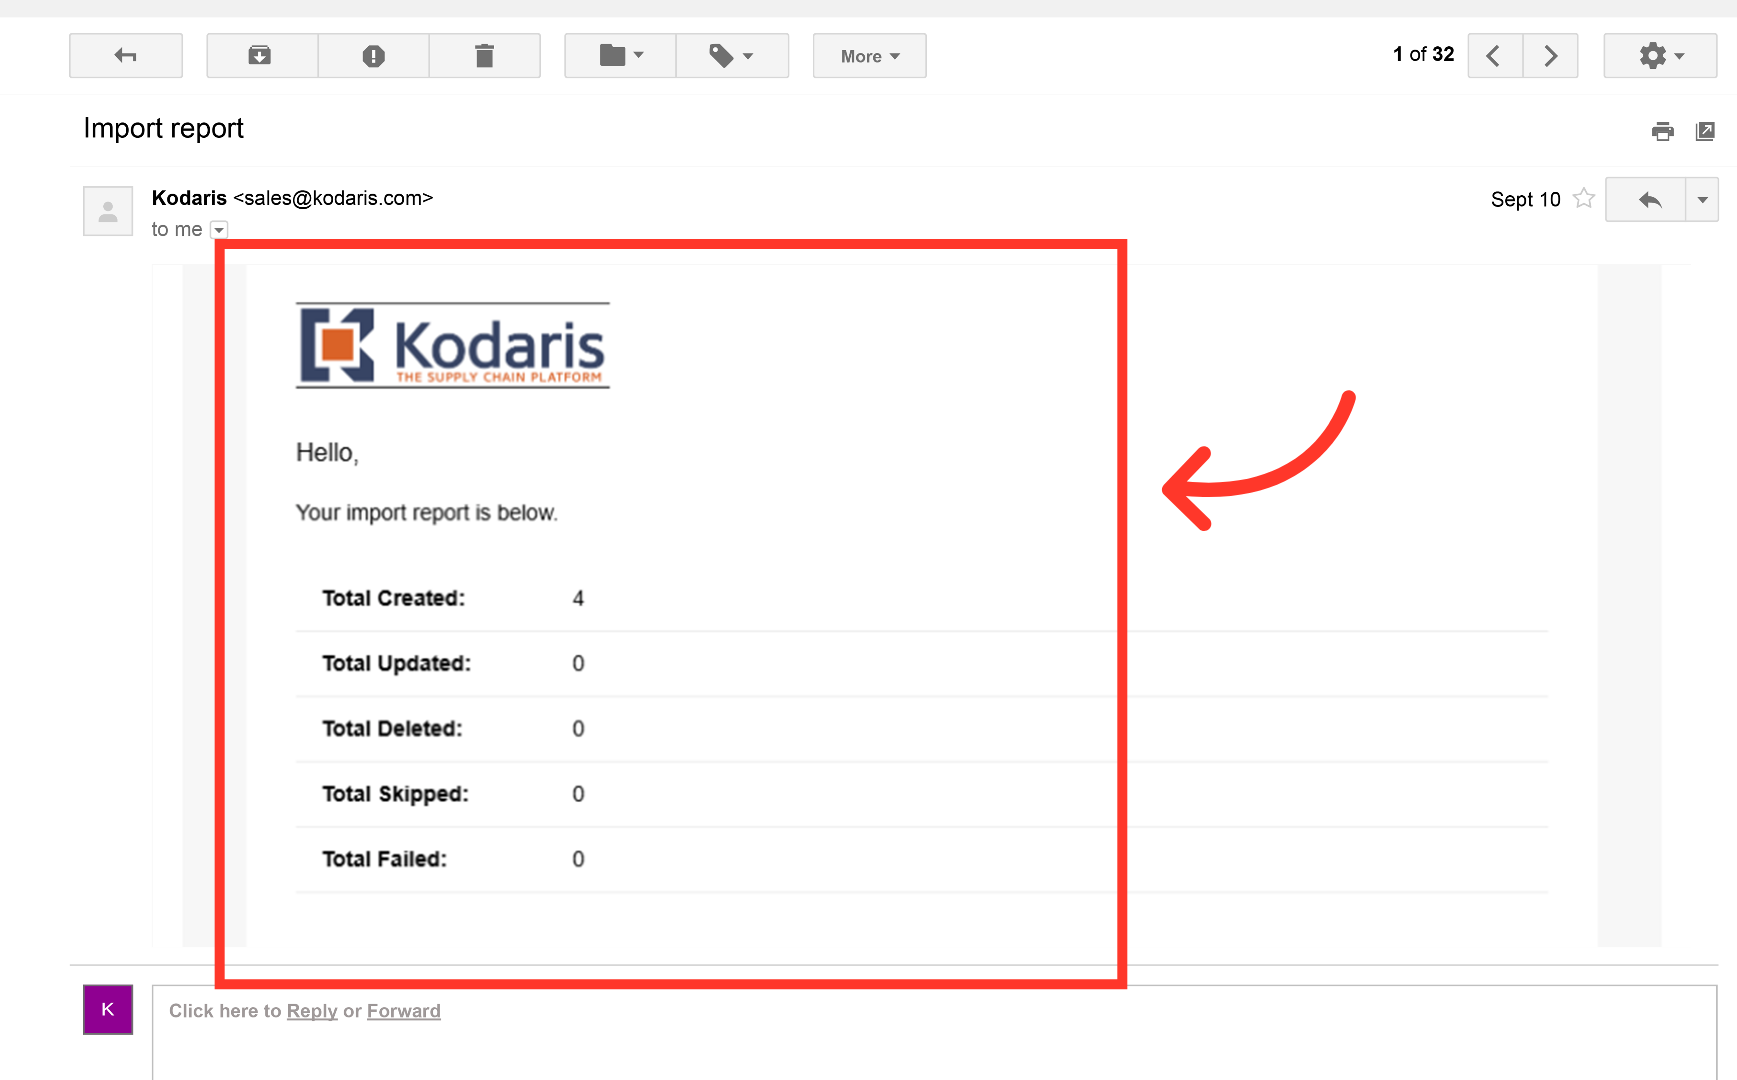
An email report will also sent once the import has finished.