Navigate to AR/AP in the Operations Portal.
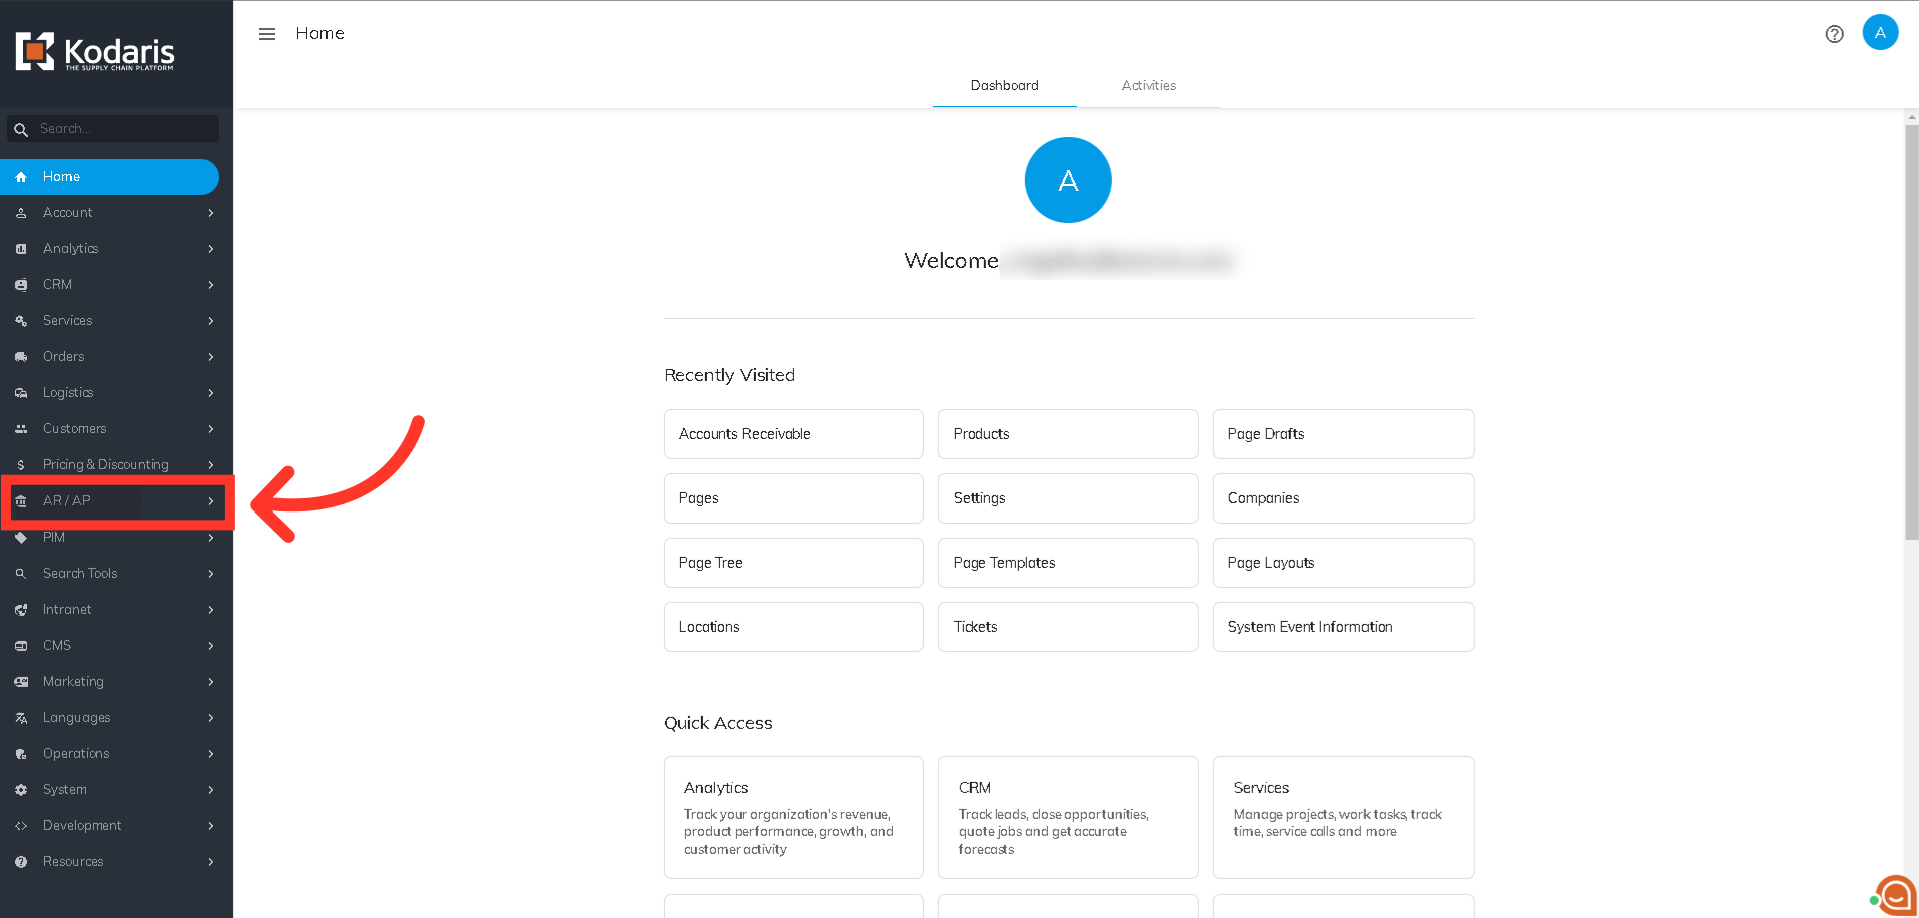
In order to access "Accounts Receivable" you will need to be set up either as an "administrator" or a "superuser", or “accountant” or have the following roles: "paymentEdit and paymentView”. Then, click on "Accounts Receivable".

The AR/AP grid is customizable to each user, and you can add, remove and adjust columns to display the data you would like to see on the screen. To see the available columns to add to the screen, click the "Show/Hide Columns" icon.

Scroll up or down to see all the available options.
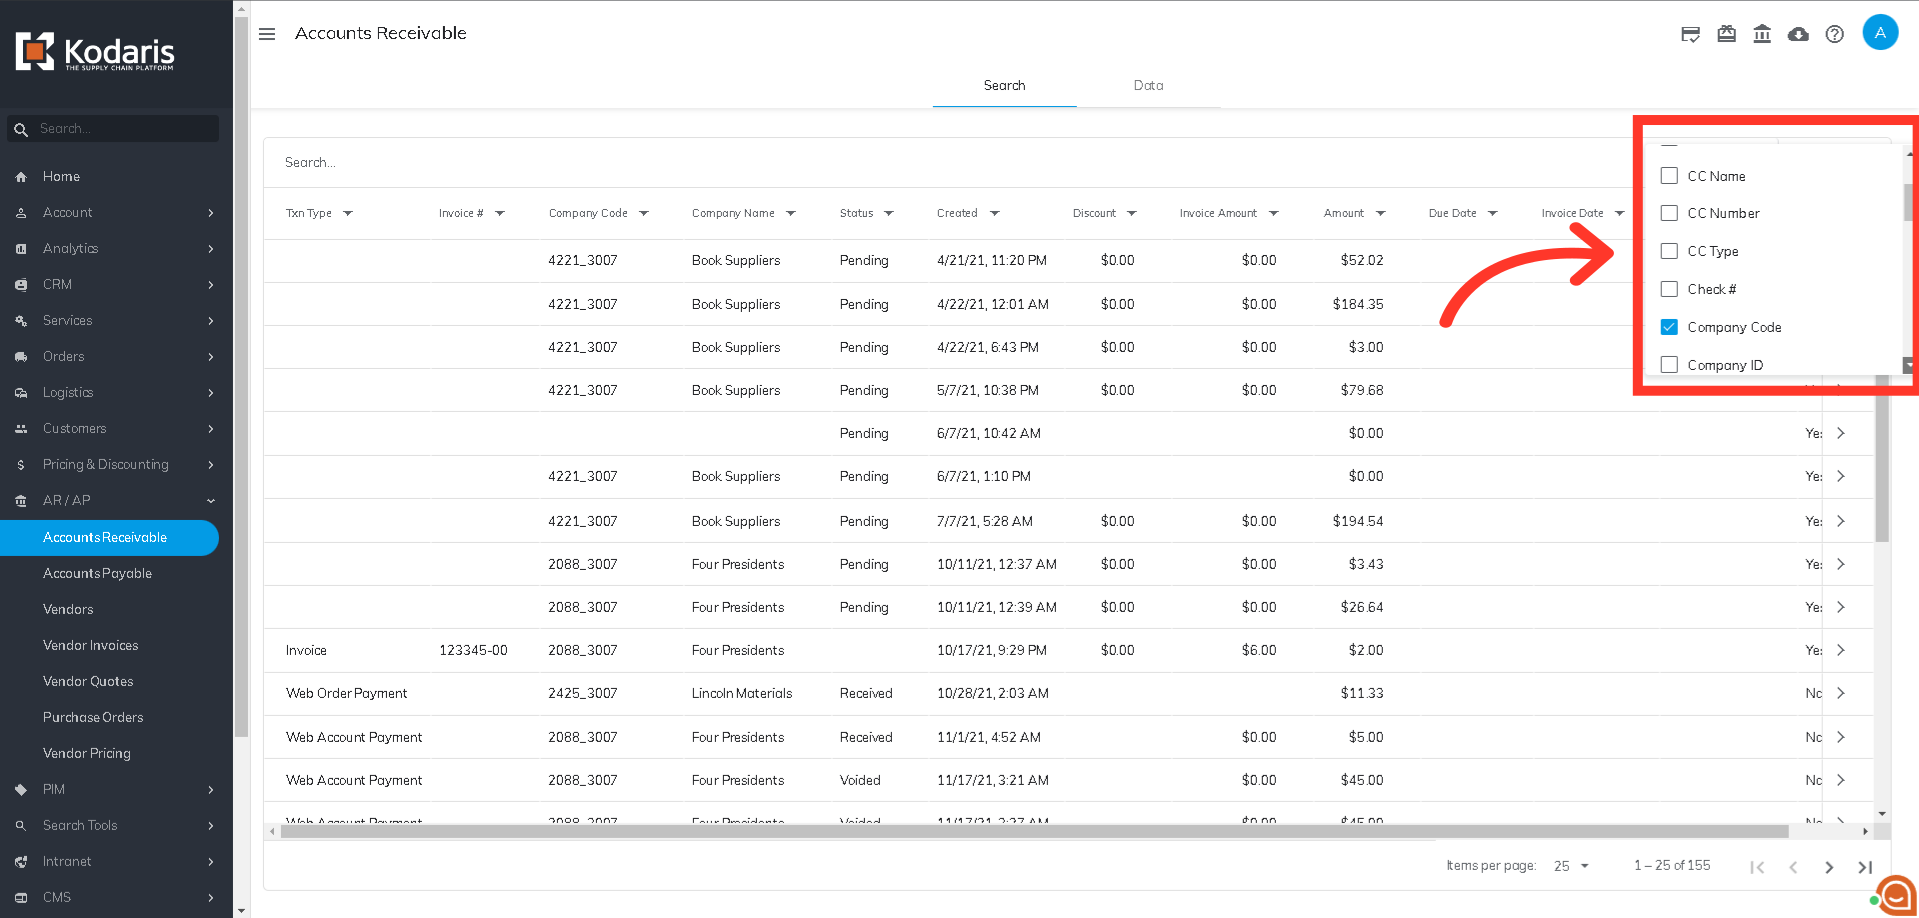
Then, select the columns you want to view in the grid. Deselect the checkbox to remove any columns. You can choose to view as many columns as you would like.

Once you’ve added the needed columns to your grid, you can scroll to view all columns.

It is also possible to rearrange the layout of the columns by dragging the column header to where you want the column to be positioned.

You can also filter data in a column by simply clicking on the dropdown icon within the column.

A box will appear where you will select the information you want to view. Some filters are defaulted to "Equal to". If this filter is what you want to use, you can enter the data on the field.

Or, click the column filter dropdown icon to show all other filter types.

Select the filter type you want to use.

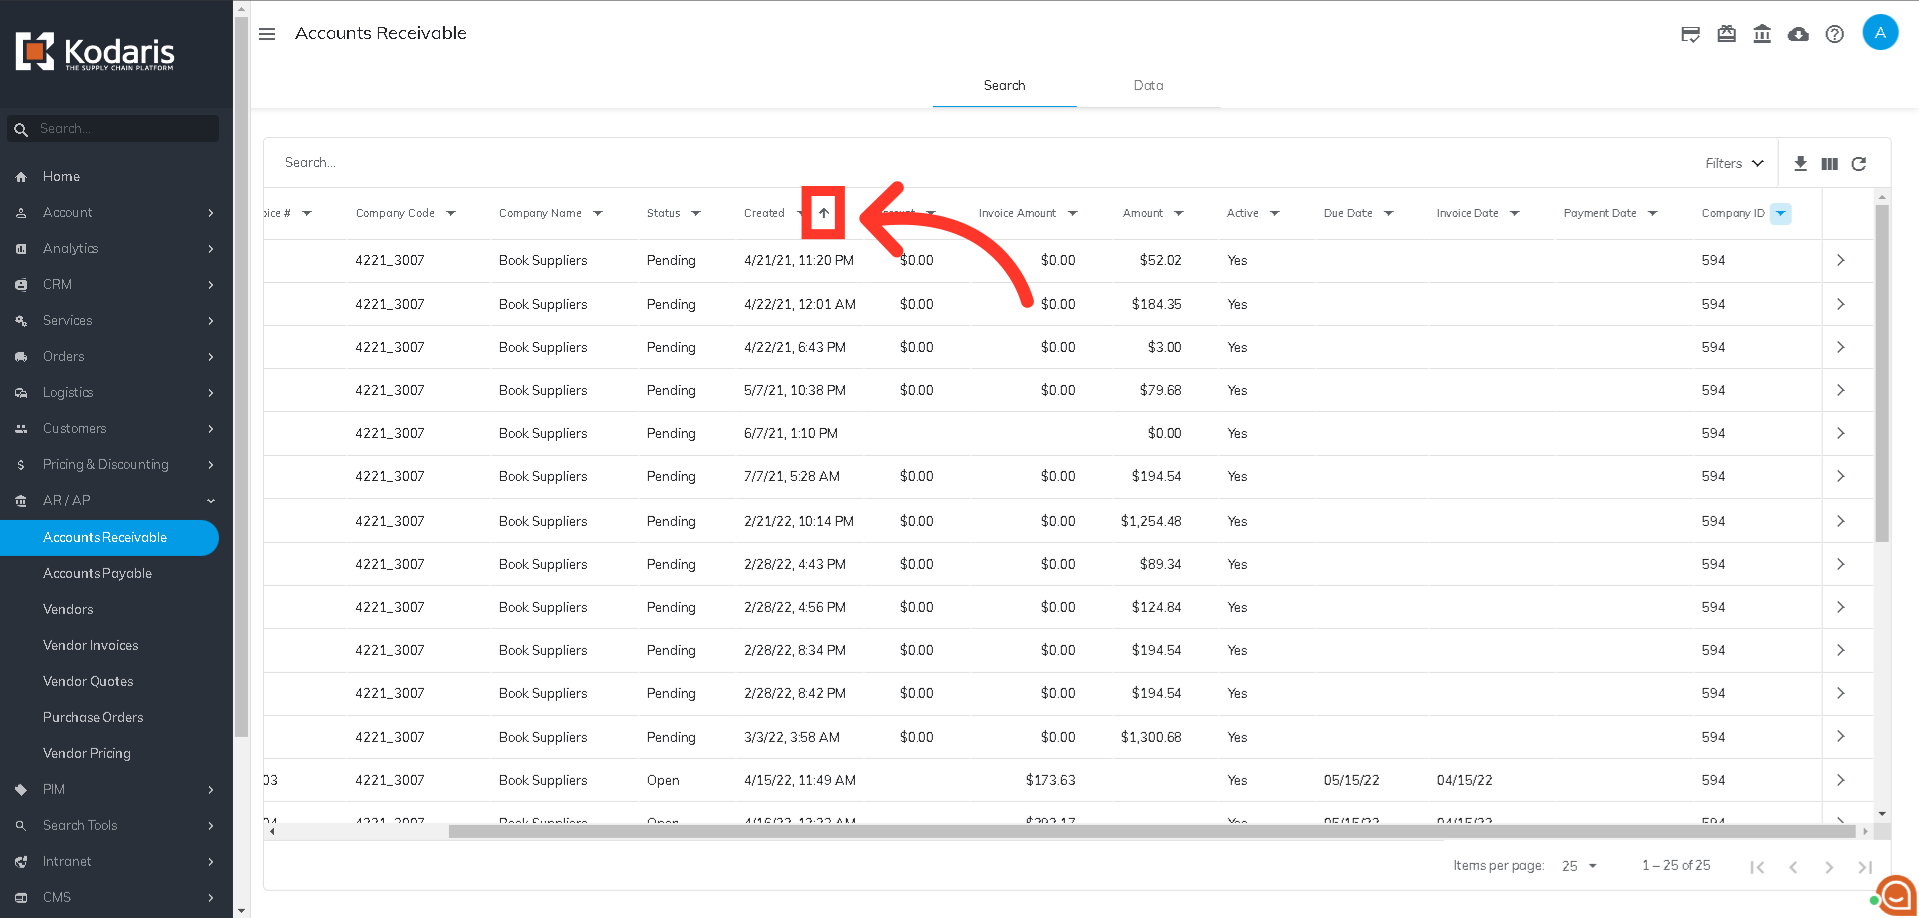
You also have the option to sort the data in each column. Hover the mouse over the column header to see the sorting arrow. Then, click the arrow to sort data by ascending or descending order.
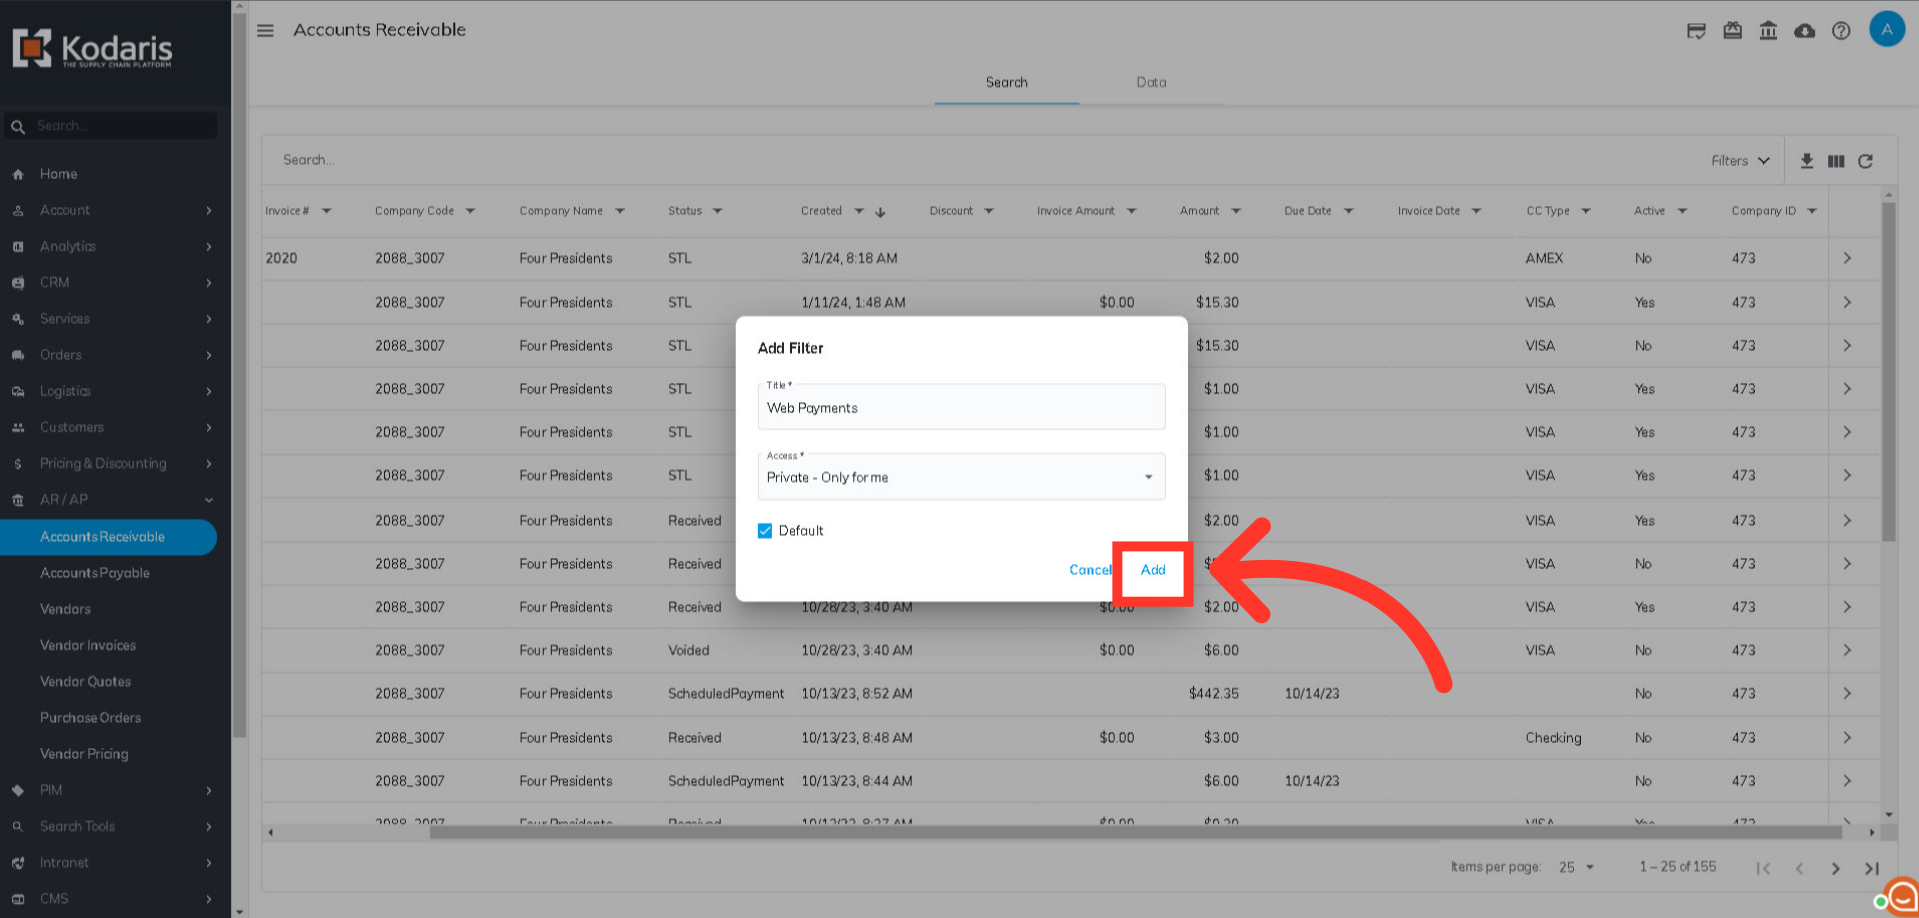
If you create a screen view that you want to save for future use, you can save the view by setting up a sticky filter. You can create as many sticky filters as you would like. To do this, click the "Filters" dropdown.

Then, select "Save as".

"Add Filter" dialog box should appear. Now, you need to add a title to the sticky filter.

Next, you need to set the access restriction of the sticky filter. Select "Public" if you want the sticky filter to be shared with all users, or "Private" if you want it to be only available to you.

You can click the "Default" checkbox so that the filter will automatically appear in the AR grid each time you log in.

Then, click "Add" to save your sticky filter.
Click "Filters" to view all the sticky filters.

All available sticky filters will be shown.

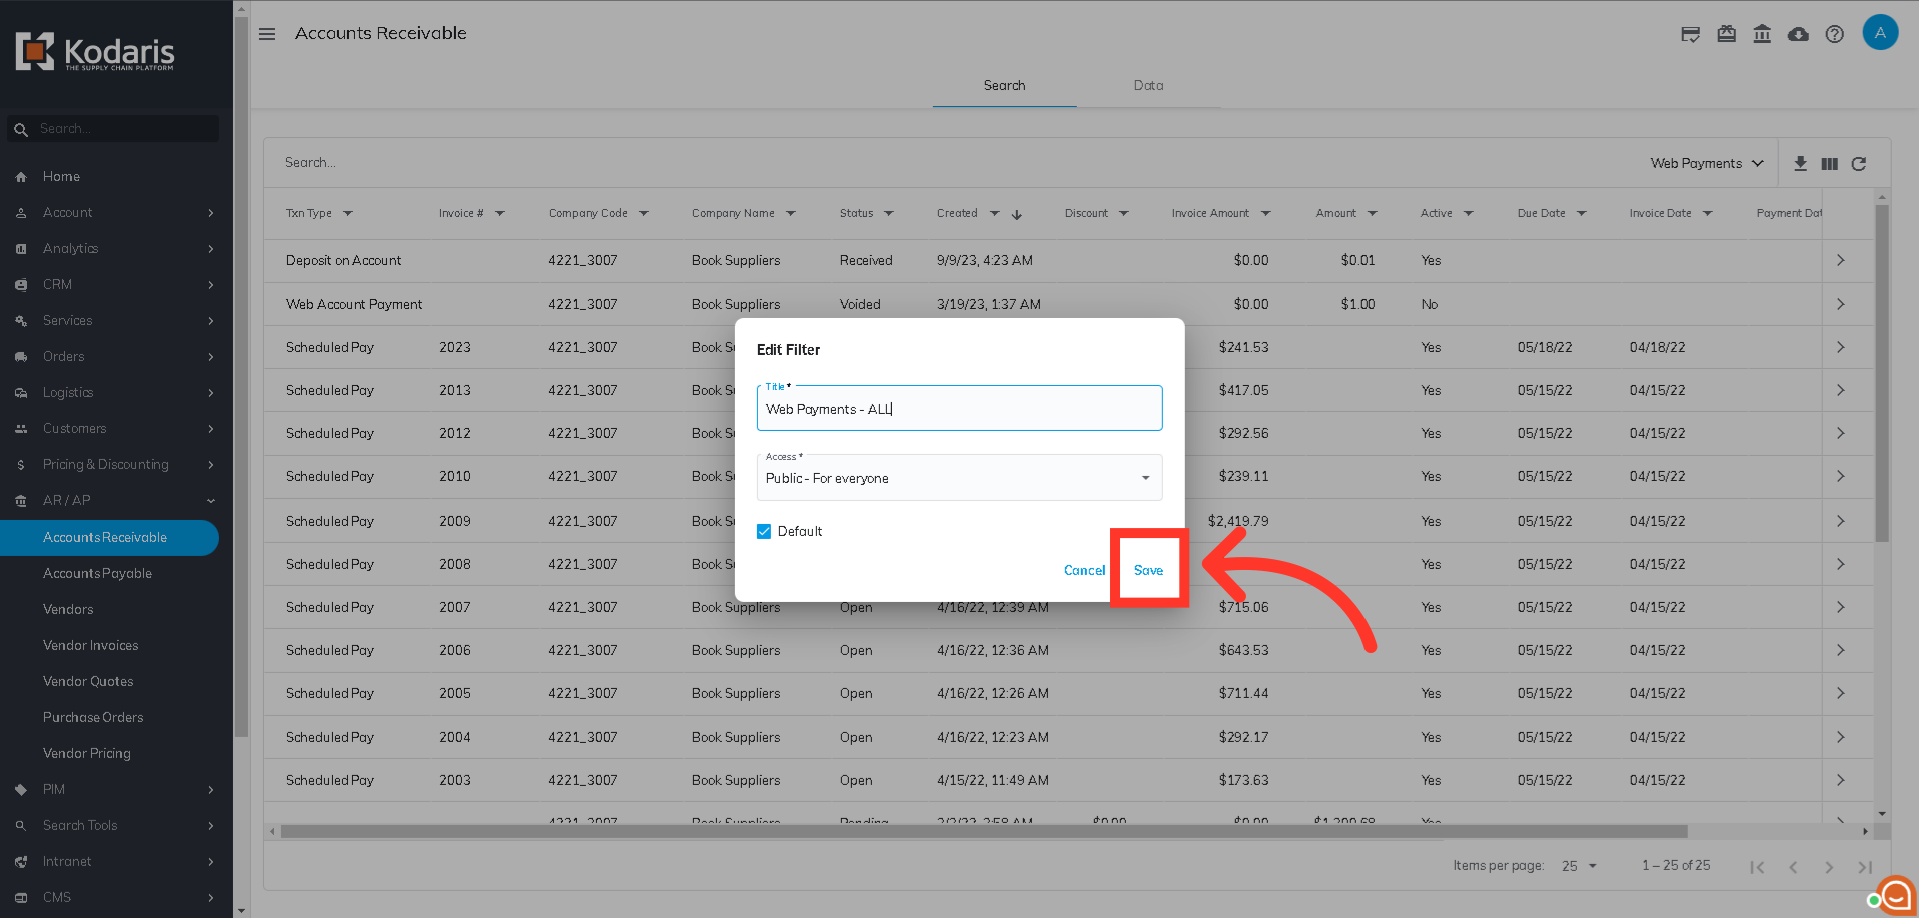
Click the pencil like icon to edit the sticky filter.

Edit as needed, then click "Save".
If you no longer need the filter you created, click on the trash can icon to permanently delete the sticky filter.
