Go to the "Accounts Receivable" screen in the Operations Portal.
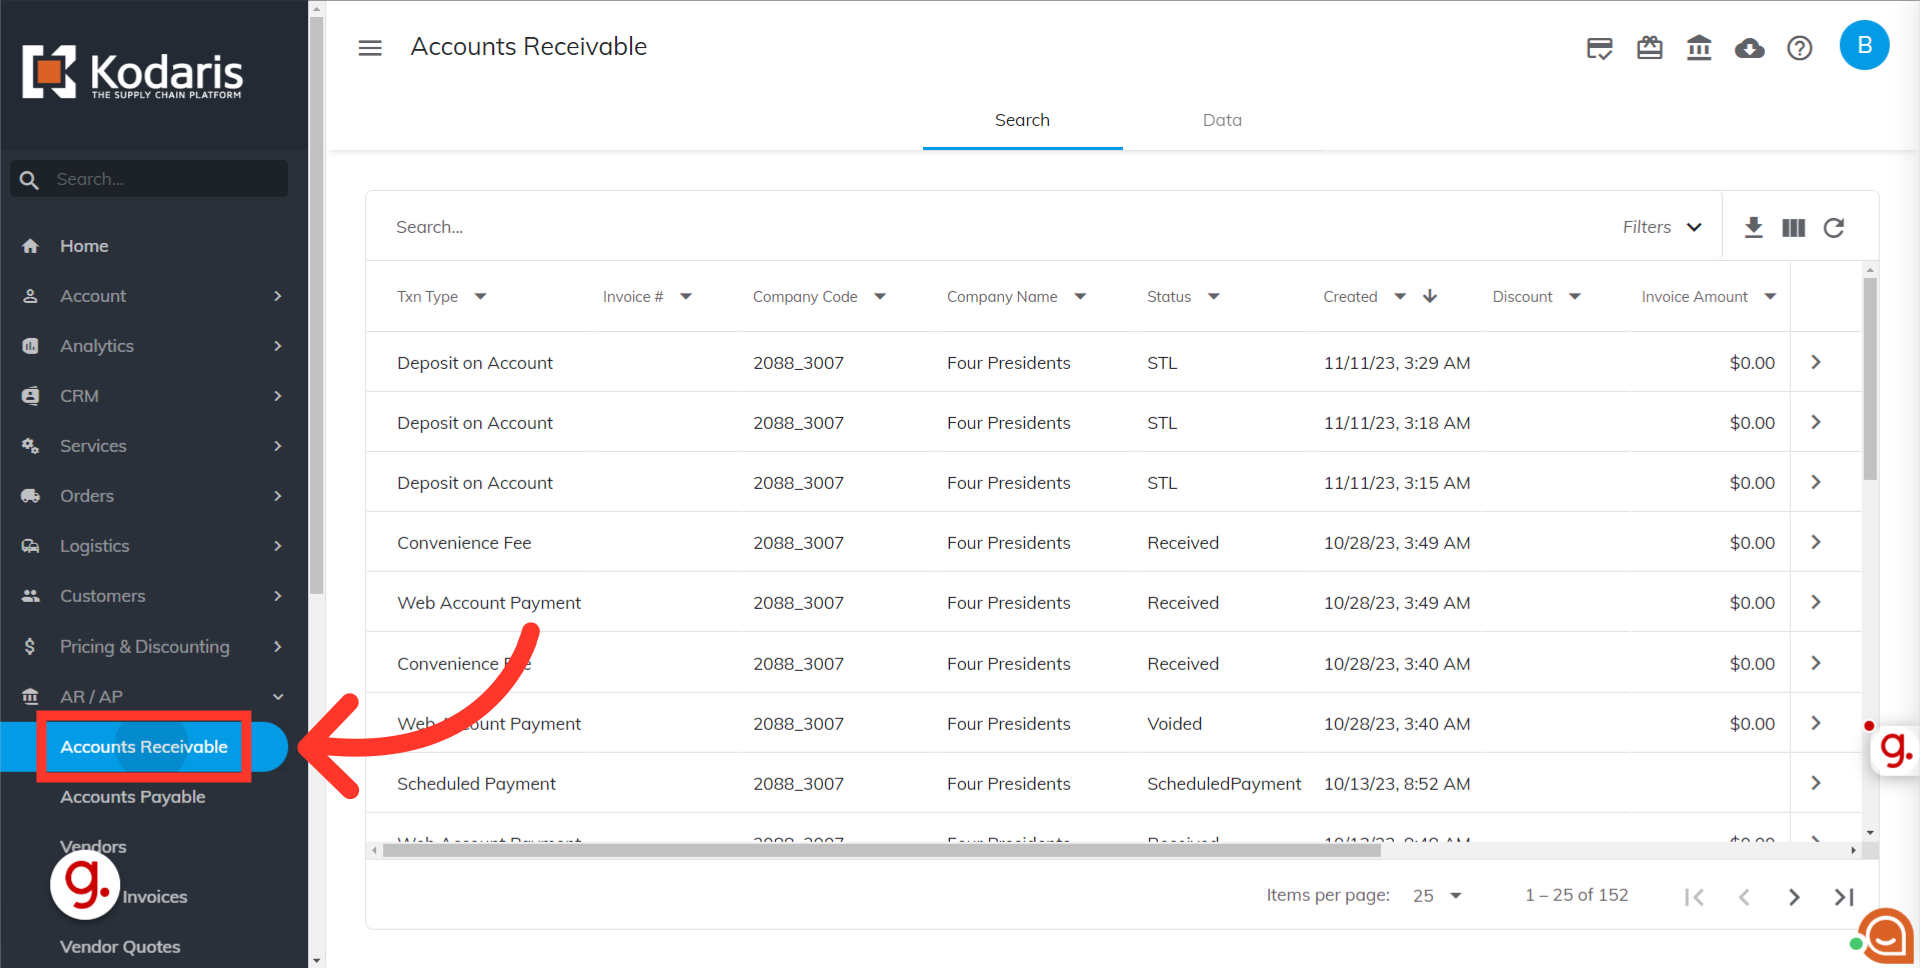
Search for the payment you want to void by typing an invoice number or keyword into the "Search" field.

Utilize the column filters to narrow down the results.

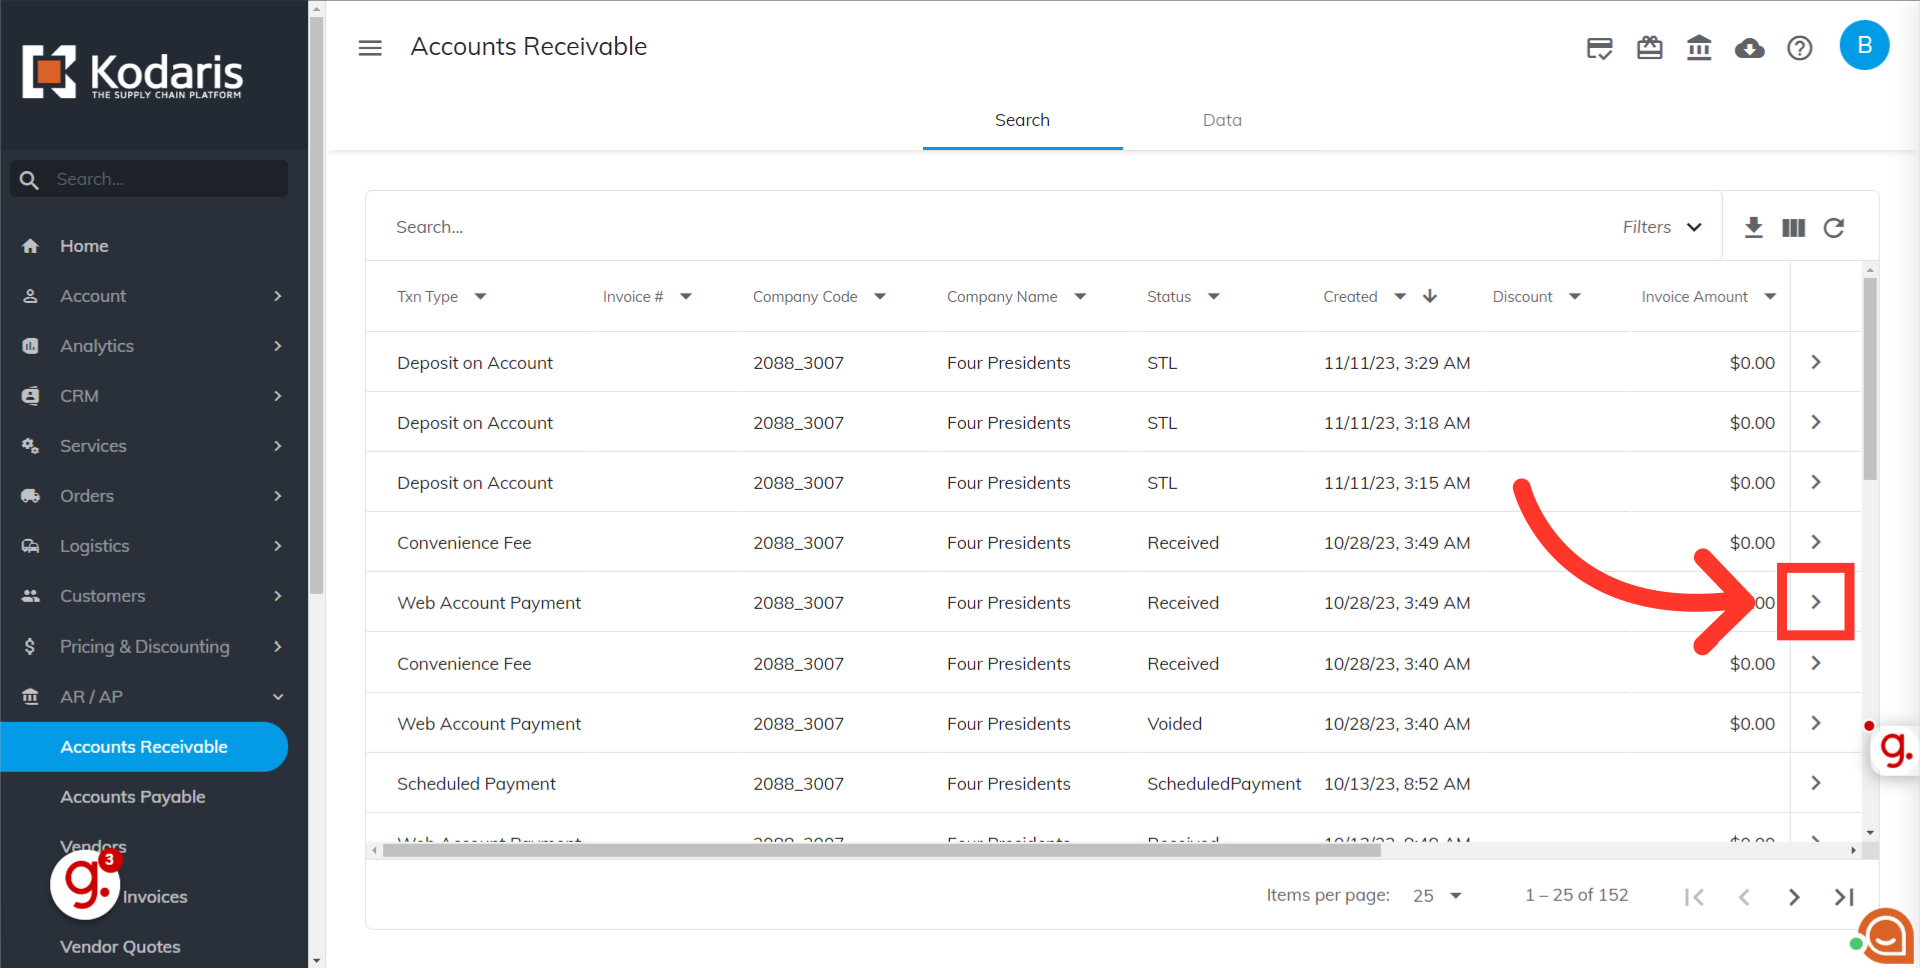
Select the transaction you would like to void by clicking on the more details icon.
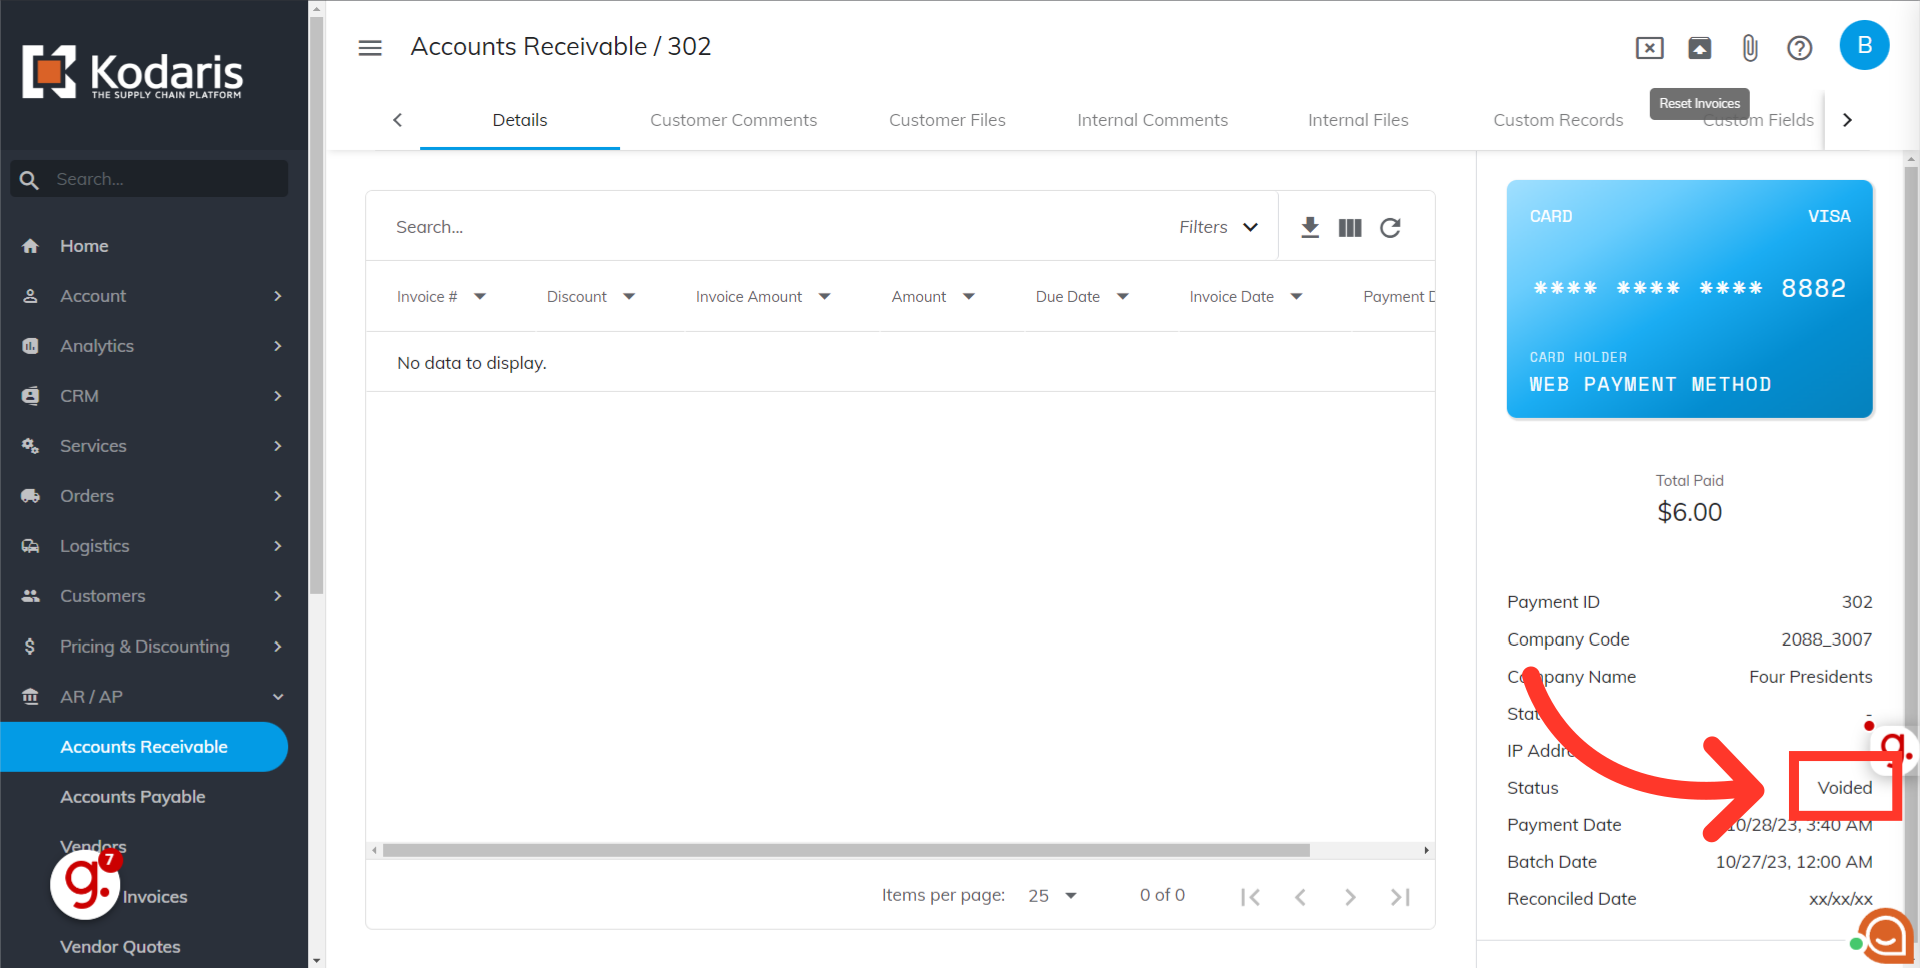
On the upper right corner of the Details screen, you will find Void Payment and Reset Invoice icons.

To void the payment, click on the "Void Payment" icon.

A success message should appear on the lower left corner of the screen if voiding is successful.

If successful, the status of the invoice should also update to "Voided".
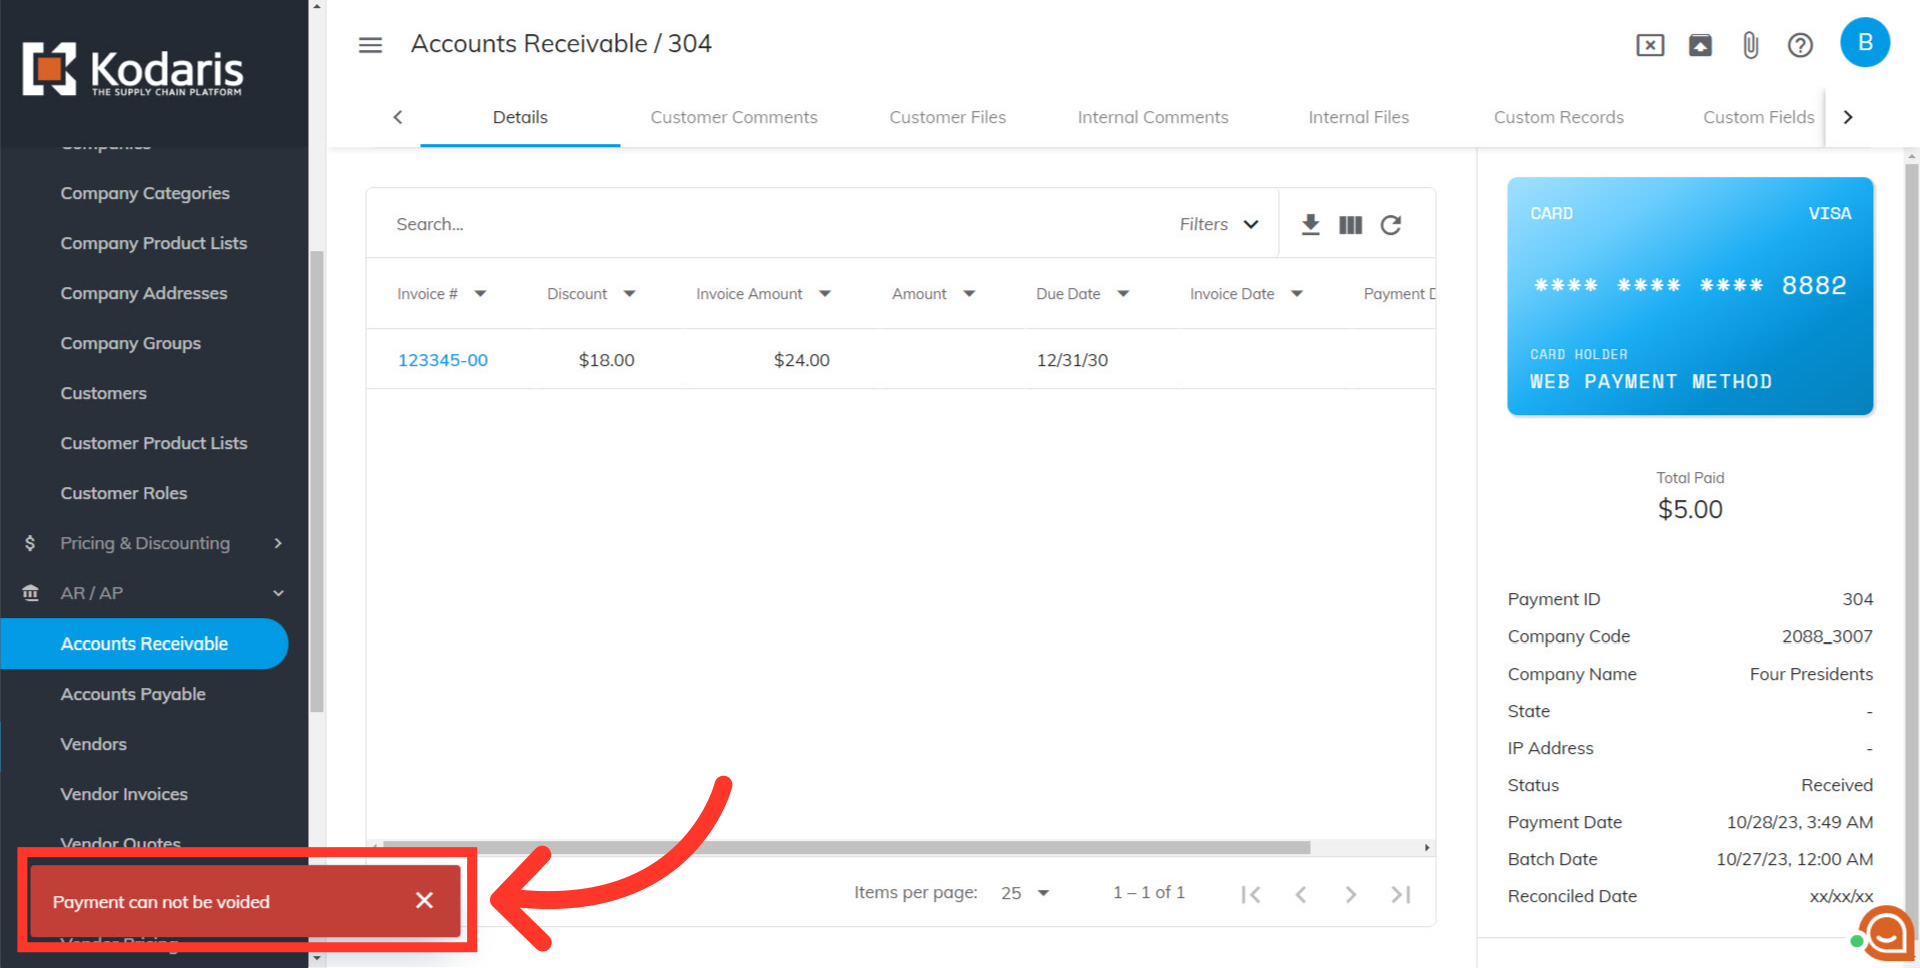
In case the payment has already been processed, you will be prompted with an error message letting you know that the payment cannot be voided.
To reset the order status back to invoiced, click on the "Reset Invoices" icon.

A success message should appear on the lower left corner of the screen if the invoice has been reset. Your customer should now be able to select this invoice in their Customer Portal and make the payment.
