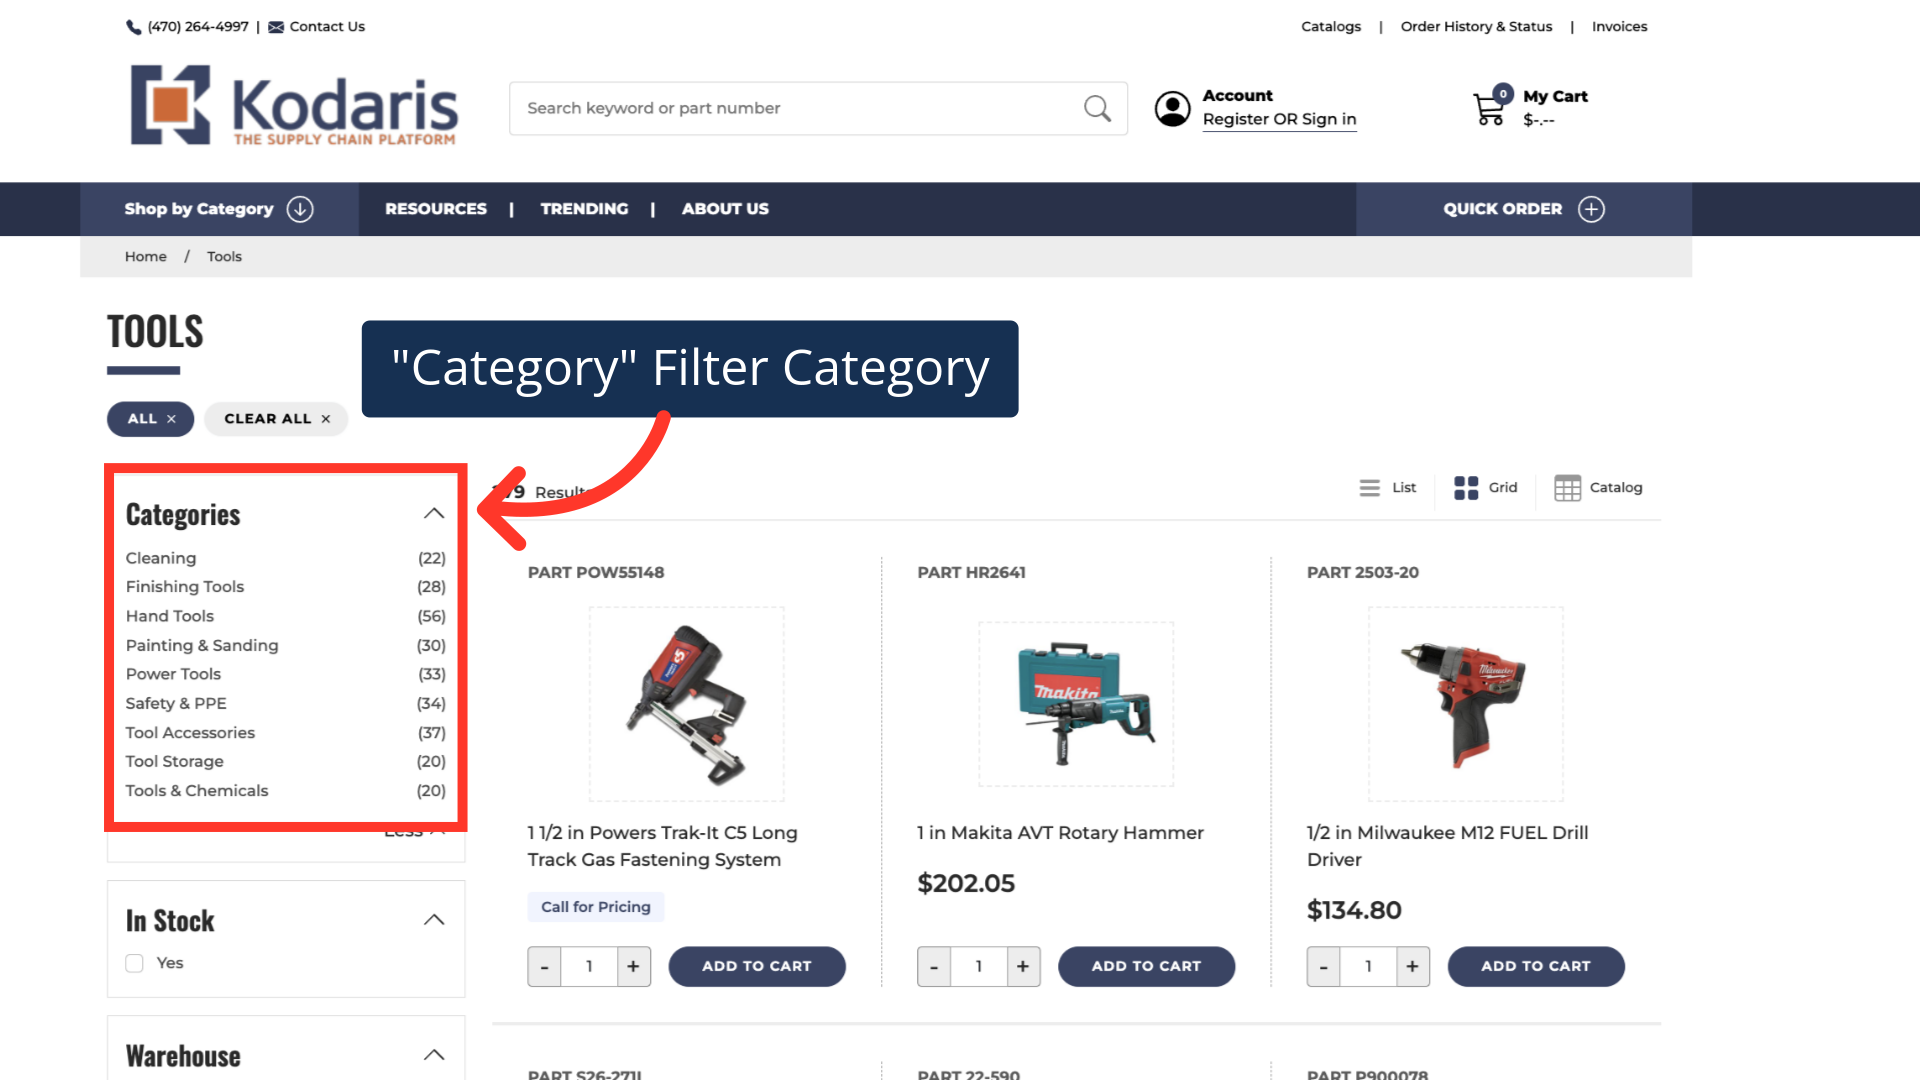
You can create a "Category" filter category that will list second level categories after clicking any main category on the home page of your website. In this case, we clicked on the main category of "Tools", and can now view the second level tool categories. This can be helpful if users would like to view products by category, rather than using the search tools.
In order to create the "Category" filter category, navigate to the "PIM" section in the Operations Portal.

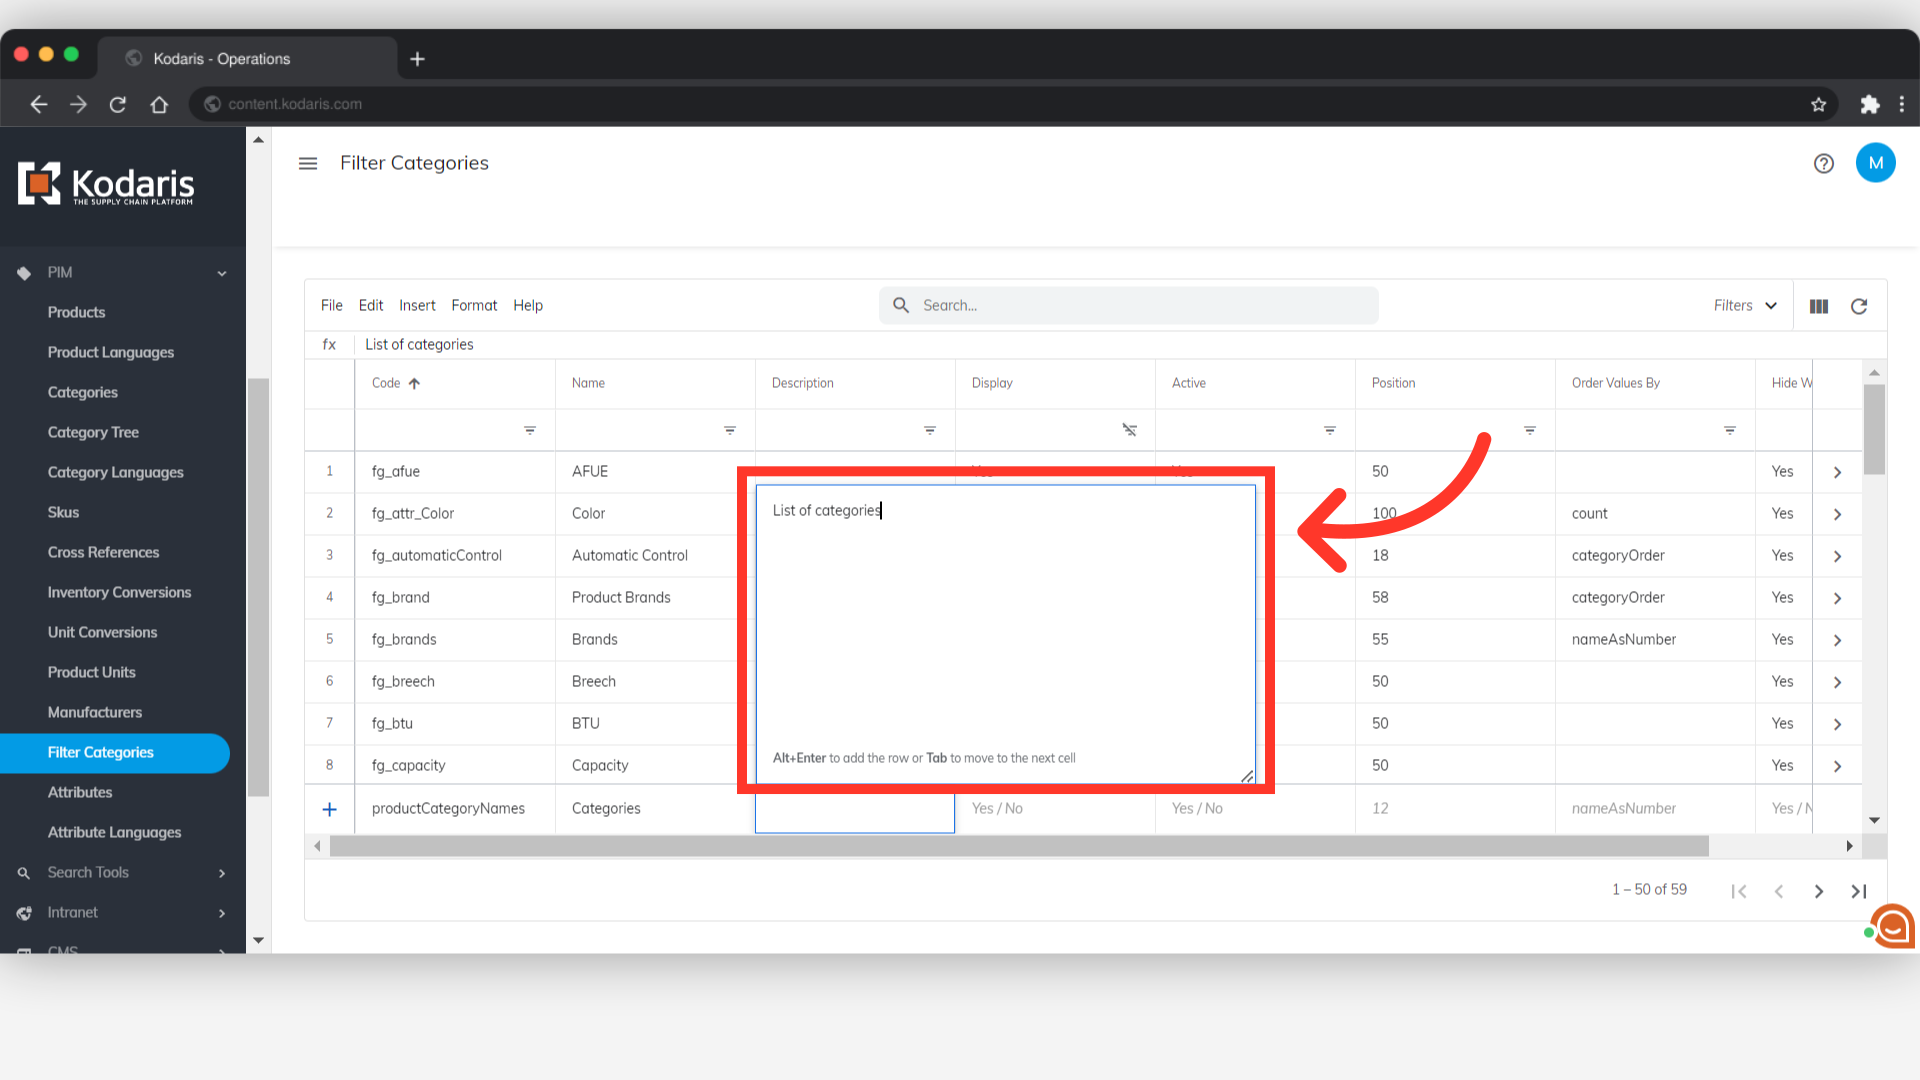
Then, click "Filter Categories". In order to access and update “Filter Categories” you will need to be set up either as an “administrator” or a “superuser”, or have the roles of: “facetGroupView” and “facetGroupEdit”.

Start creating this custom filter category by entering "productCategoryNames" in the add "Code" field.

Enter "Categories" in the "Name" field.

If you would like to add a description to this filter category, click into the "Description" field.

You can enter any description text, but it can be helpful for users to know what this custom filter category is for. An example description could be: "Example of how to use the filter categories automatically created from categories in the system"
Since we want this to be seen on the commerce site, set "Display" to "Yes".
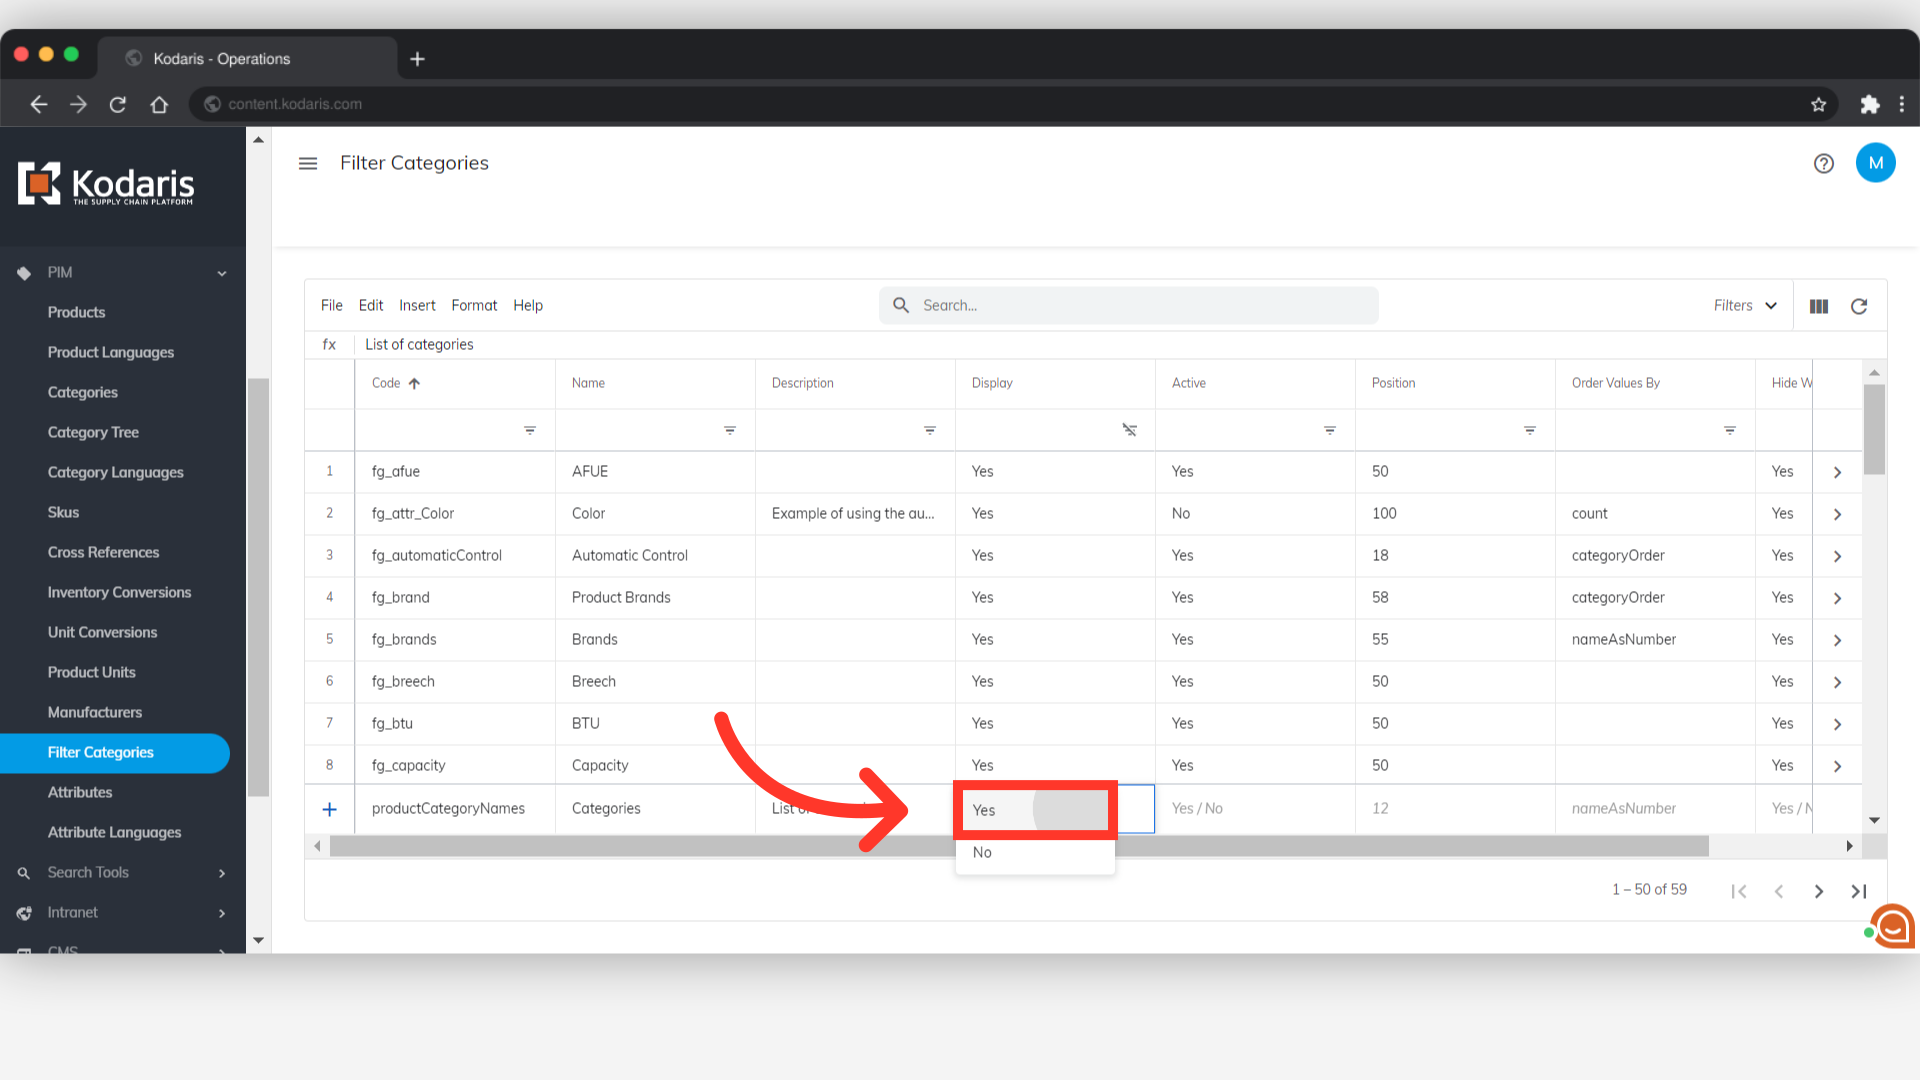
We also want to set "Active" to "Yes".

The "Position" field controls the position or order of filter categories on the commerce site. Since we would like this filter category positioned at the top of all filter categories, we want to enter the lowest numerical value. In this case, our lowest value is "2". Note: the lowest value that you can enter is "0". If you have other filter categories using the same position value, you may need to adjust them.

The "Order Values By" field will control the order of the sub-categories in this filter category. In this case, we would like to have the sub-categories listed in alphabetical order and will select "nameAsNumber".

If you would like to hide categories if there are no products, you will want select "Yes" in the "Hide When Empty" field.

Now that you have entered all of the needed data to create this filter category, press "Enter" on your keyboard. The custom filter category will then be created, and will be visible on your commerce site once you create second level categories and have assigned products to them. Note: A cell with the new data will to be selected in order to add a new filter category. Cells will automatically be selected if data has just been entered. If a dropdown field is selected, you will need to press enter twice.
