To restrict products to designated customer accounts, you will first need to hide these products from all other customers. Navigate to "PIM" section in the Operations Portal.

Click "Products". In order to access and update "Products" you will need to be set up either as an "administrator" or a "superuser", or have the roles of: "productView" and "productEdit".

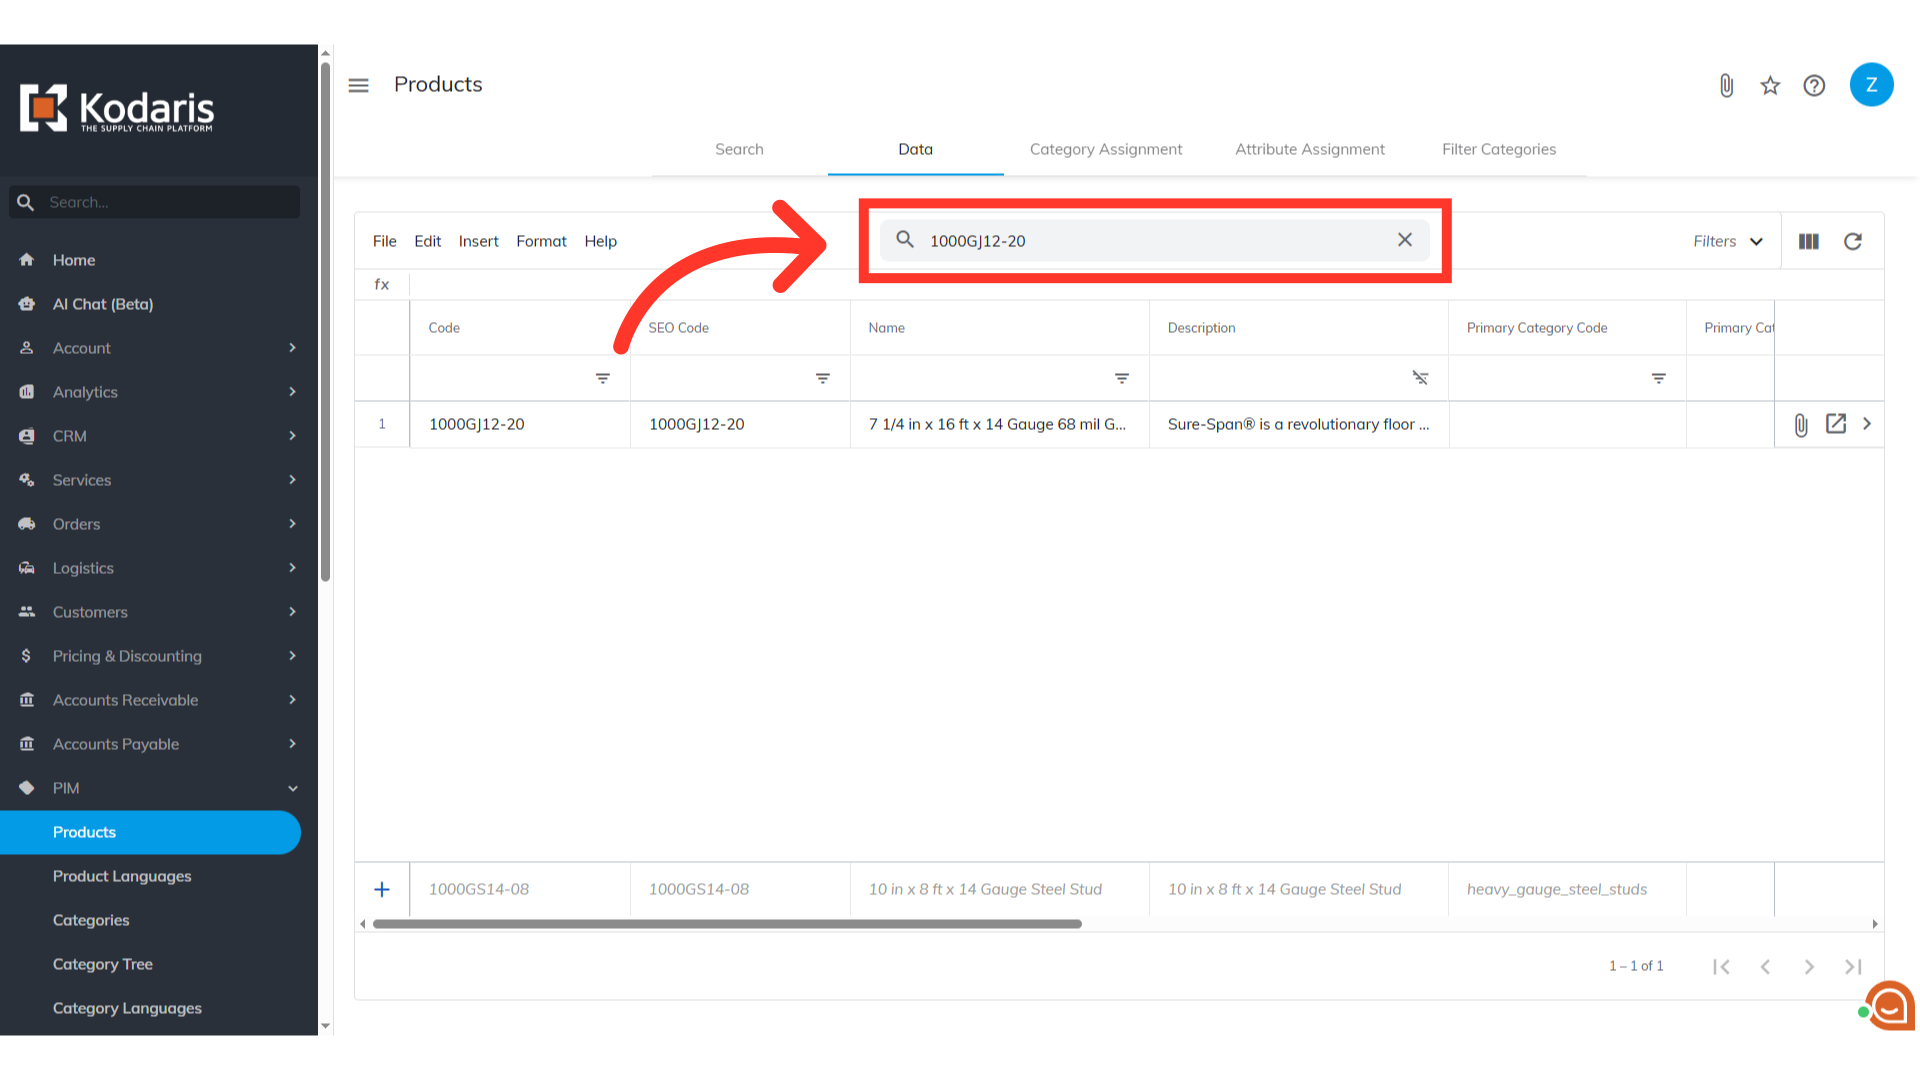
Type to search for the product in the "Search" bar.
Click "Show/Hide Columns" icon.

Click "Display" to add it to the grid.

Select "No" in the Display field on any products you would like to restrict. Updating this field will hide the product from all other customers. If you have a lot of products to update, then you can also do this update via import.

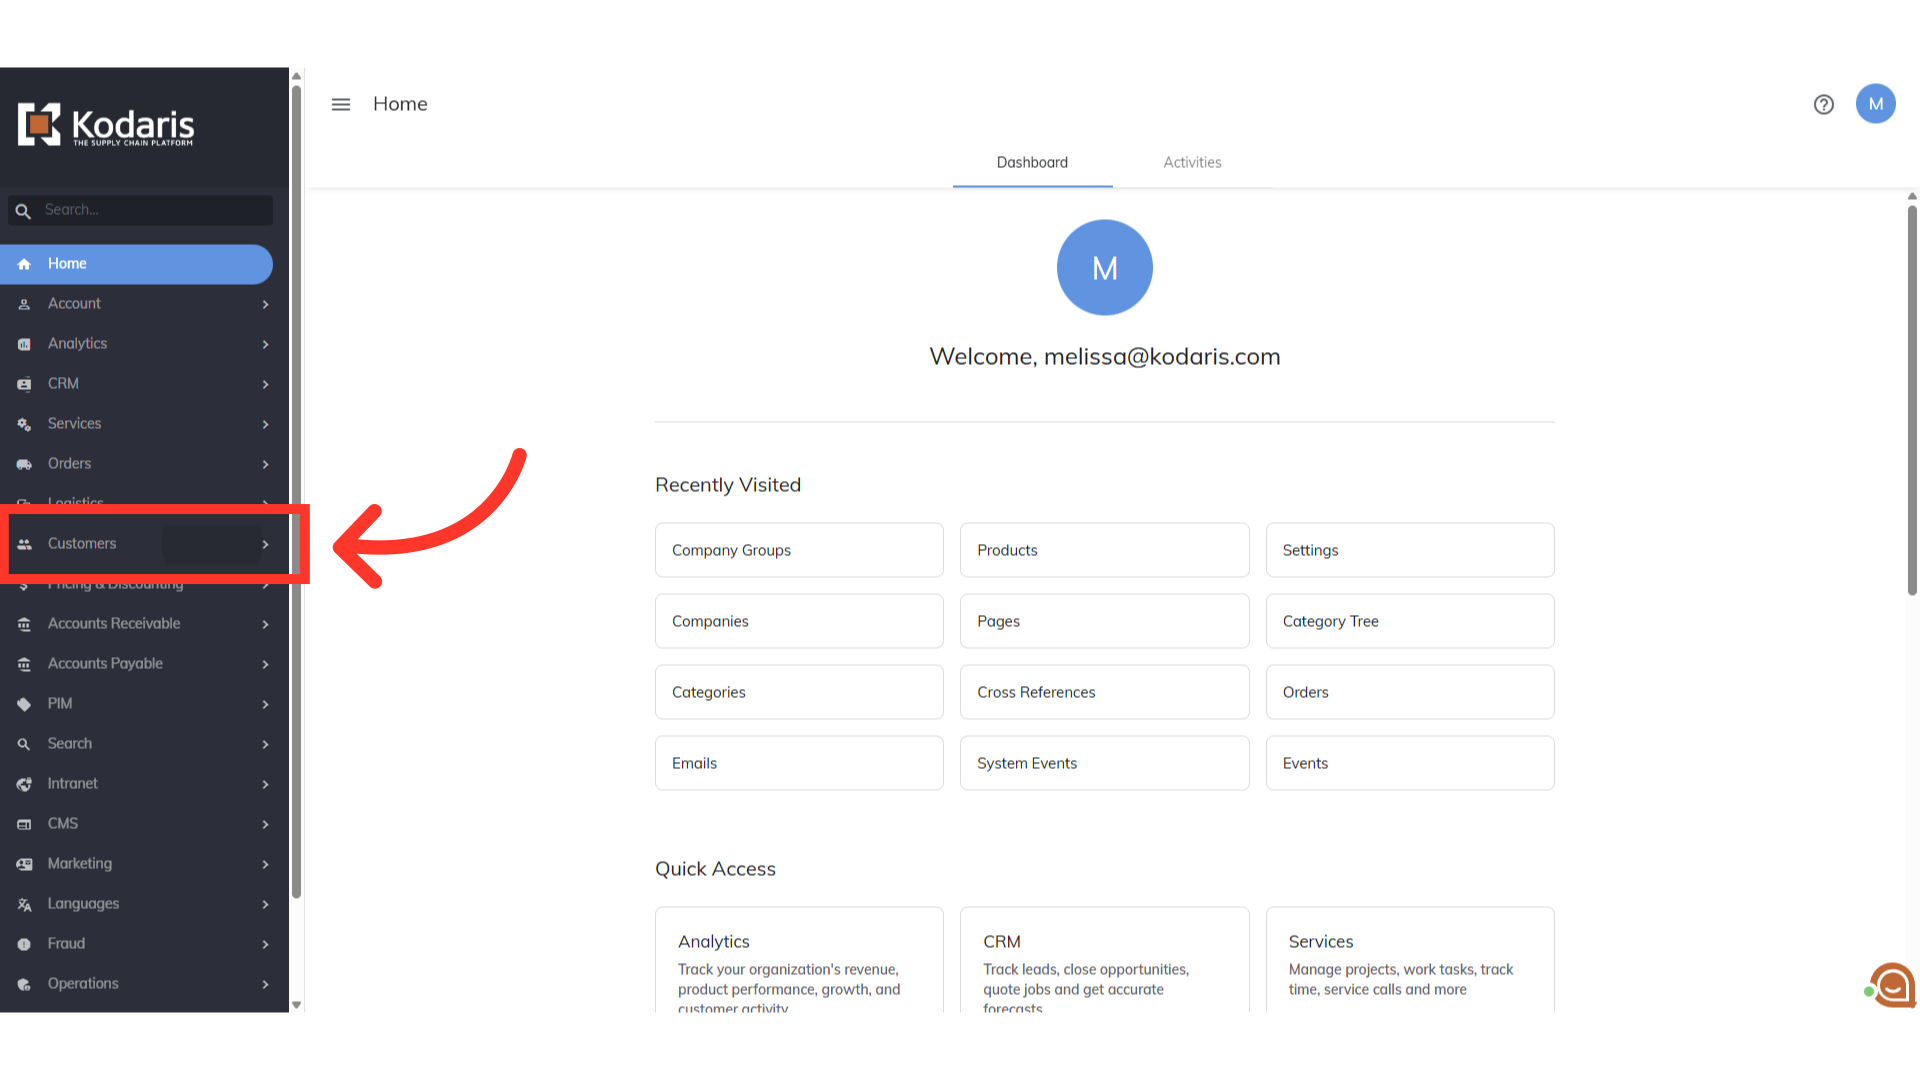
Navigate to "Customers" section in the Operations Portal.
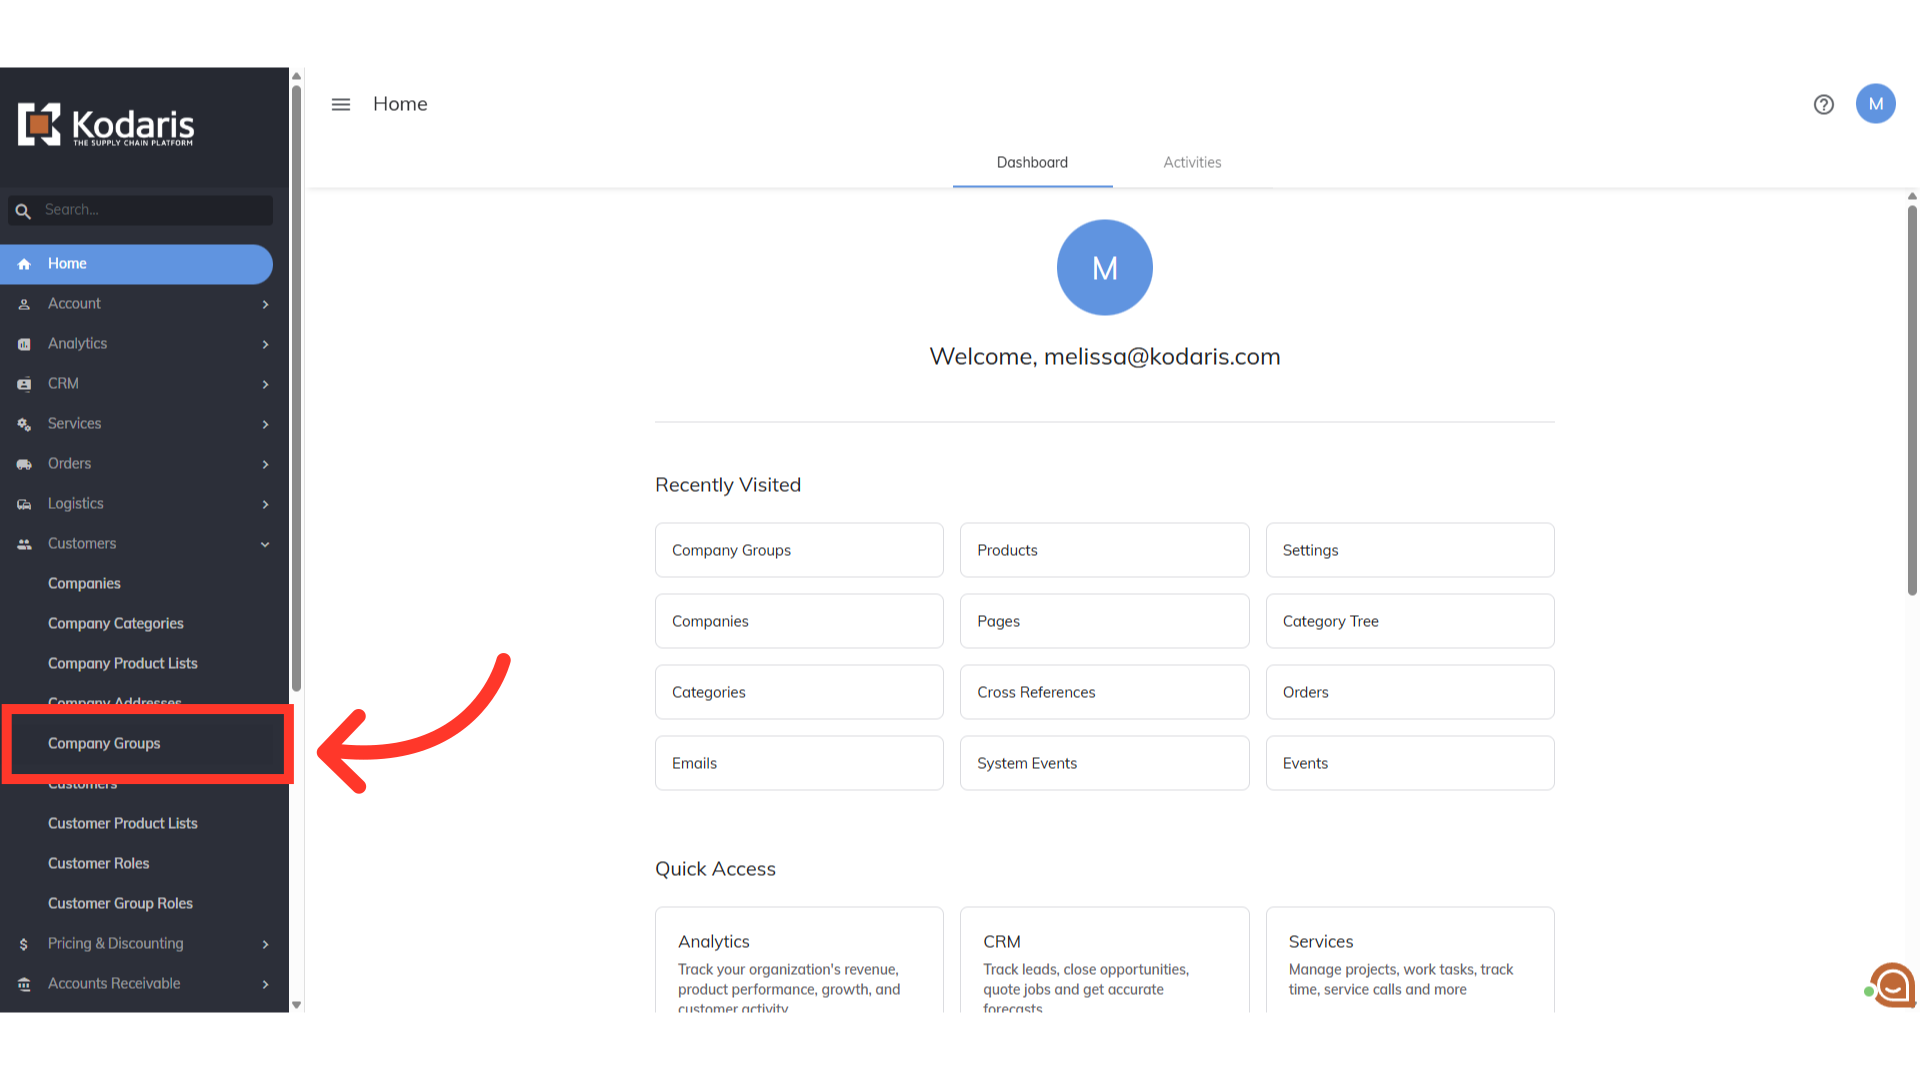
Click "Company Groups". In order to access and update "Company Groups" you will need to be set up either as an "administrator" or a "superuser", or have the roles of: “customerGroupView” and “customerGroupEdit”.
We now need to create a company group if you are not adding products to an existing company group. Enter a new company group by filling in the "Add a row" fields at the bottom of the grid.

Hit the "Enter" key to create the new company group.

Click the more details icon.

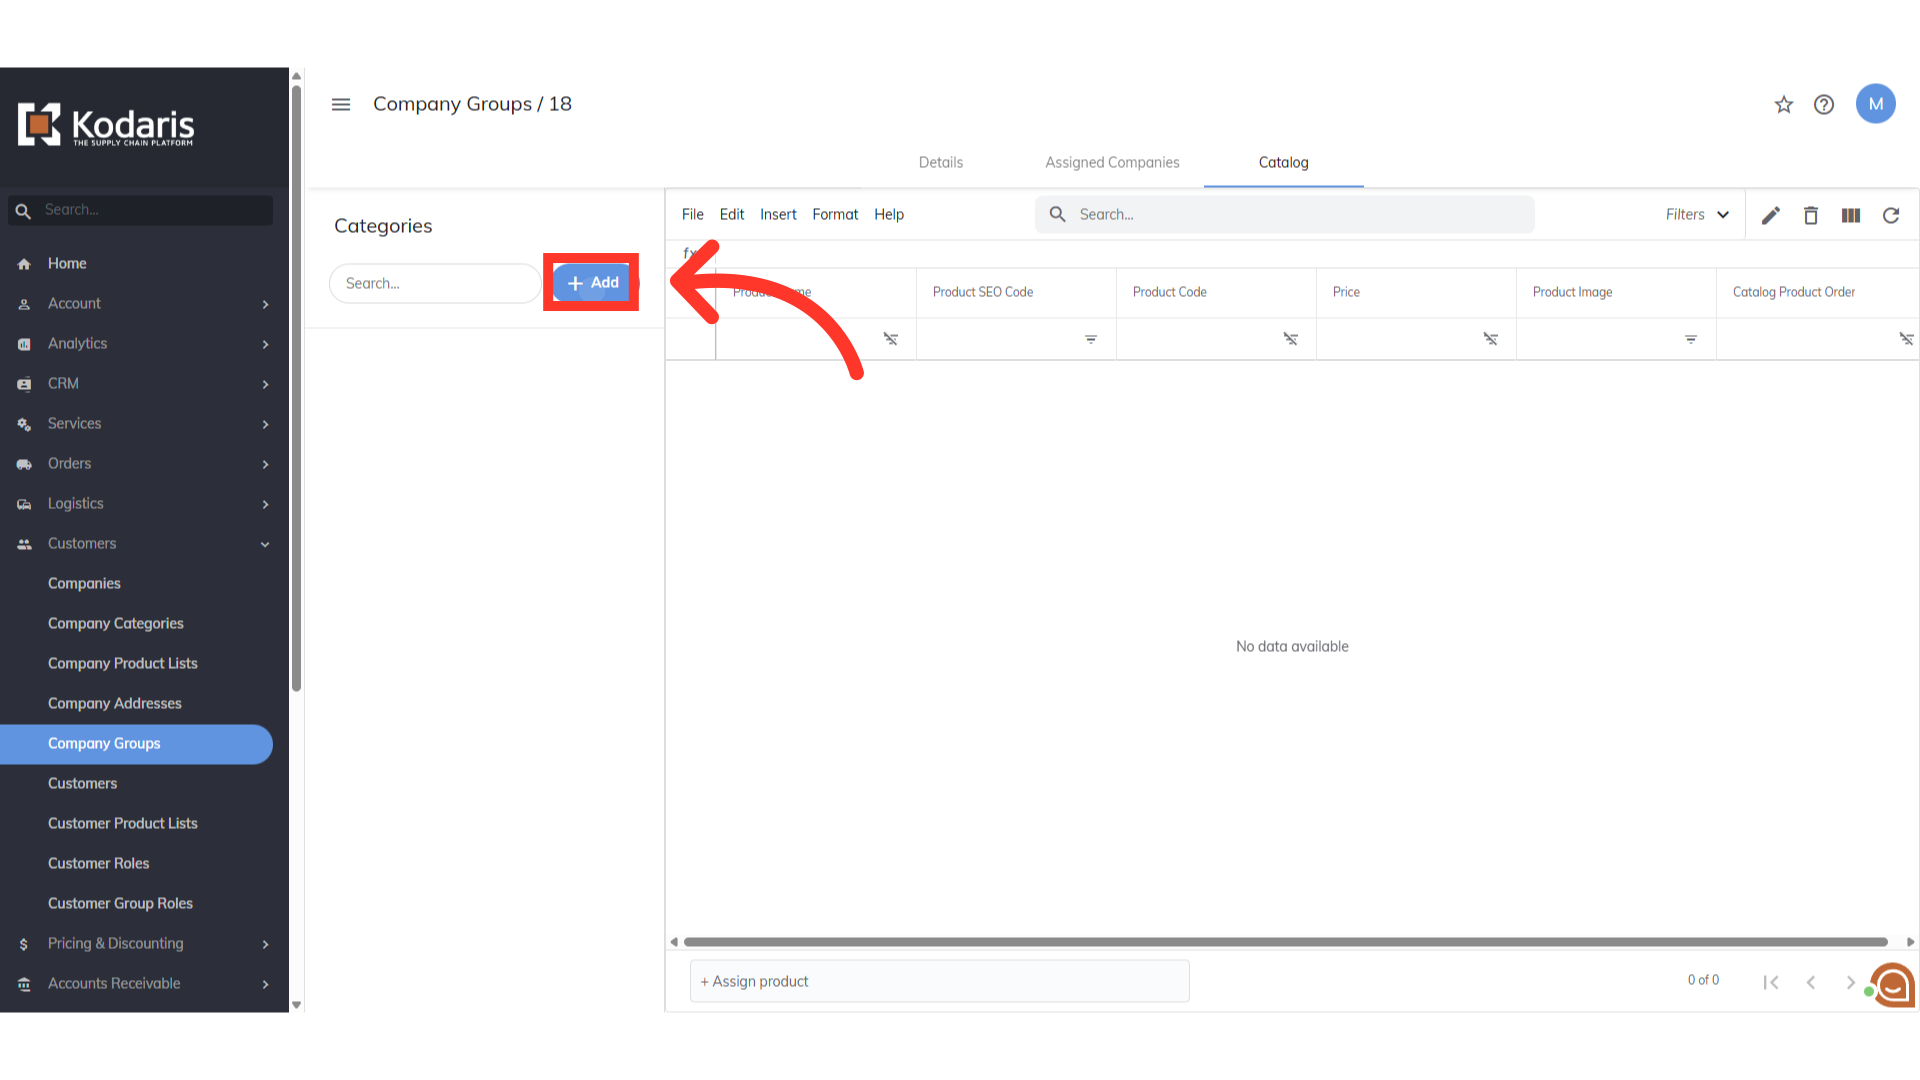
Click the "Catalog" tab.

You will need to add a new category here. Start by clicking the "Add" button.
Fill in the "Code" and "Name" fields. These terms can be customized to your needs, but keep in mind that the name will be displayed to the customer.

Choose "Yes" in the "Active" field to display to the customer.
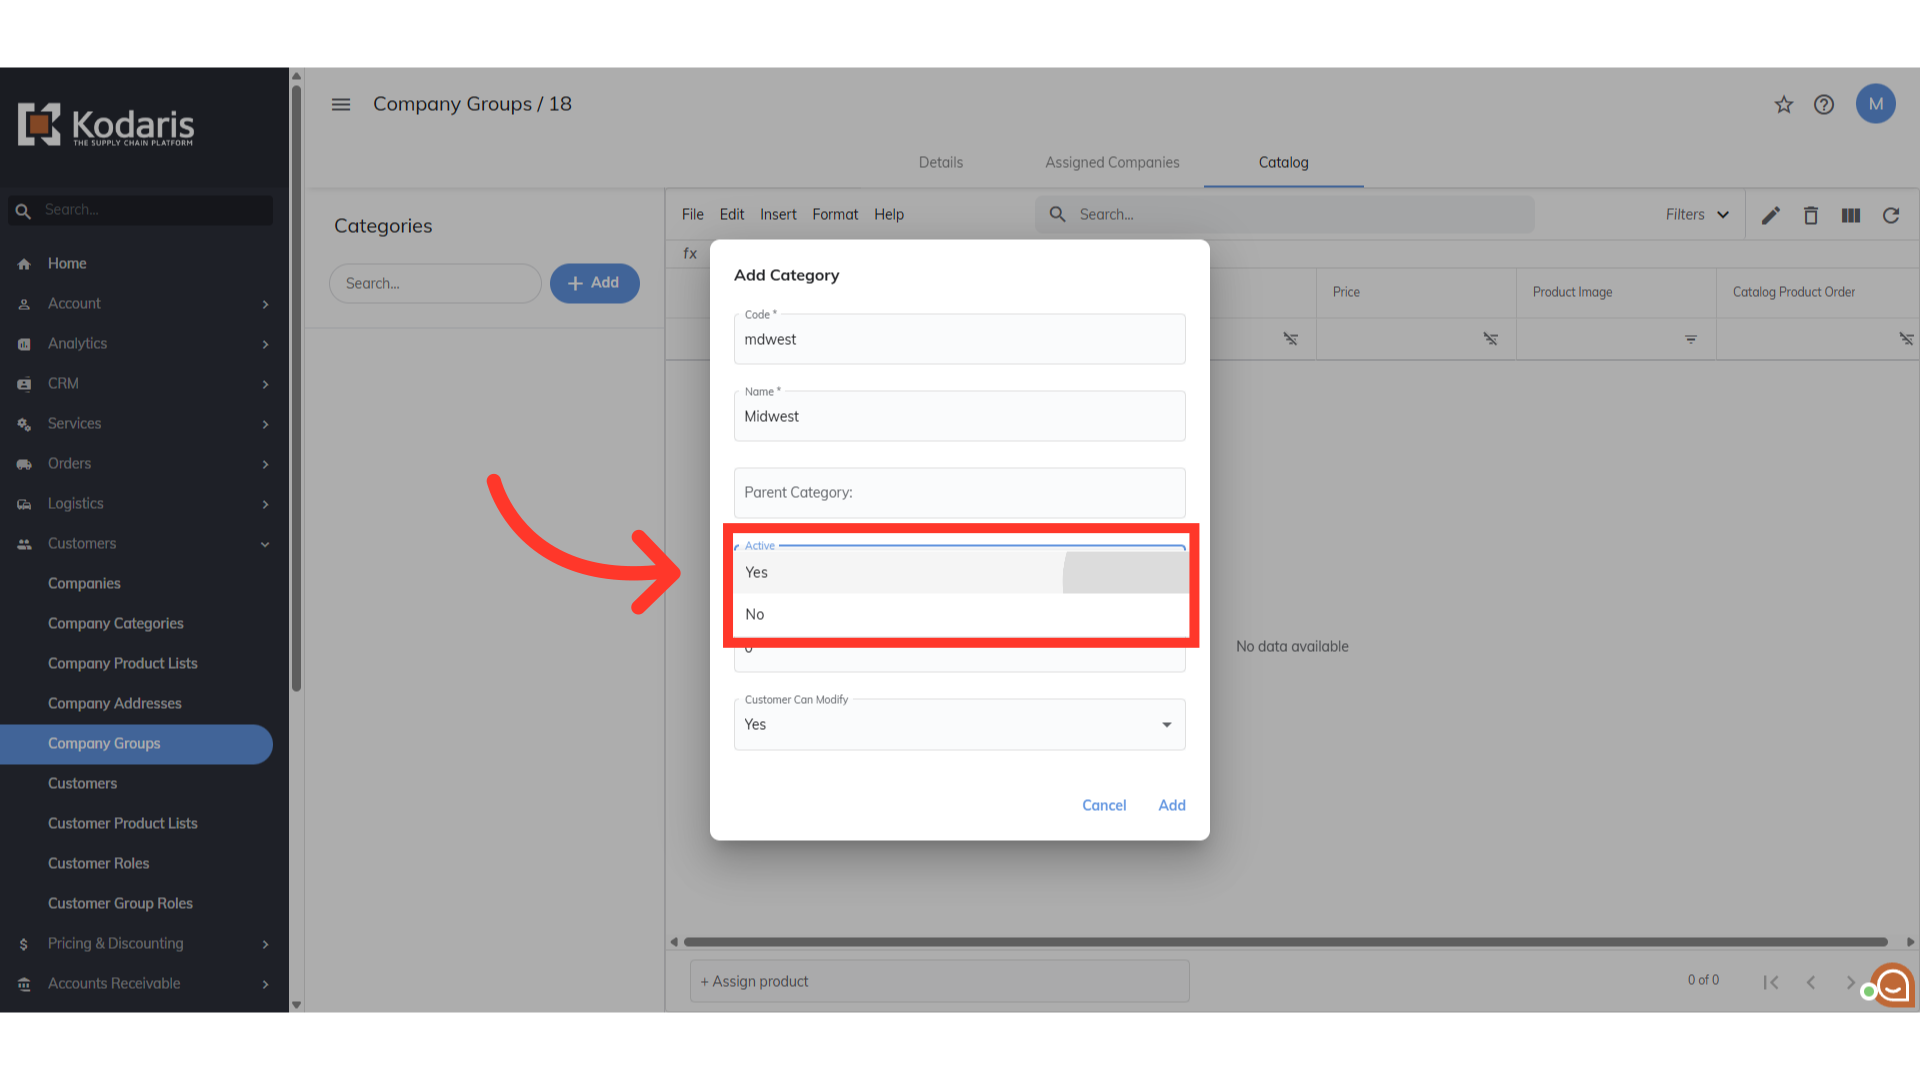
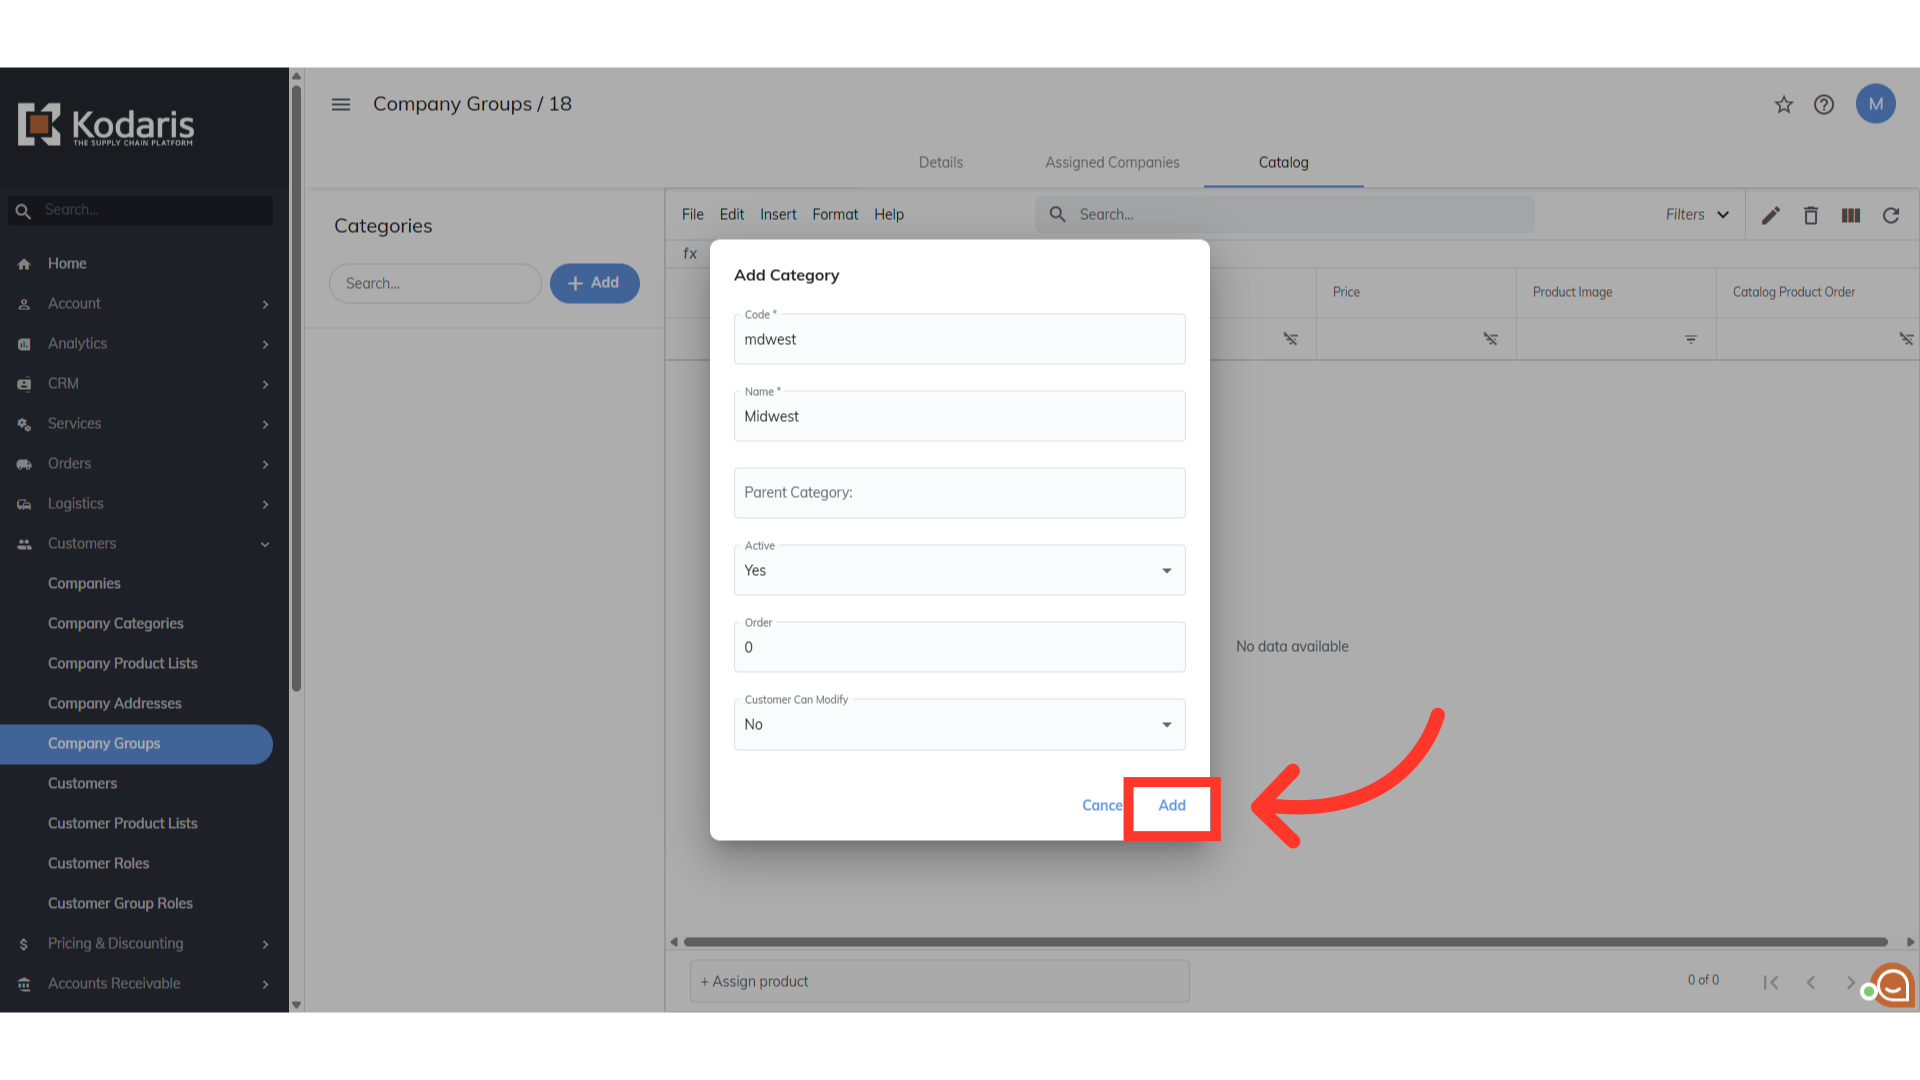
Select "No" on "Customer Can Modify" dropdown if you do not want the customer to modify.

Then, click "Add".
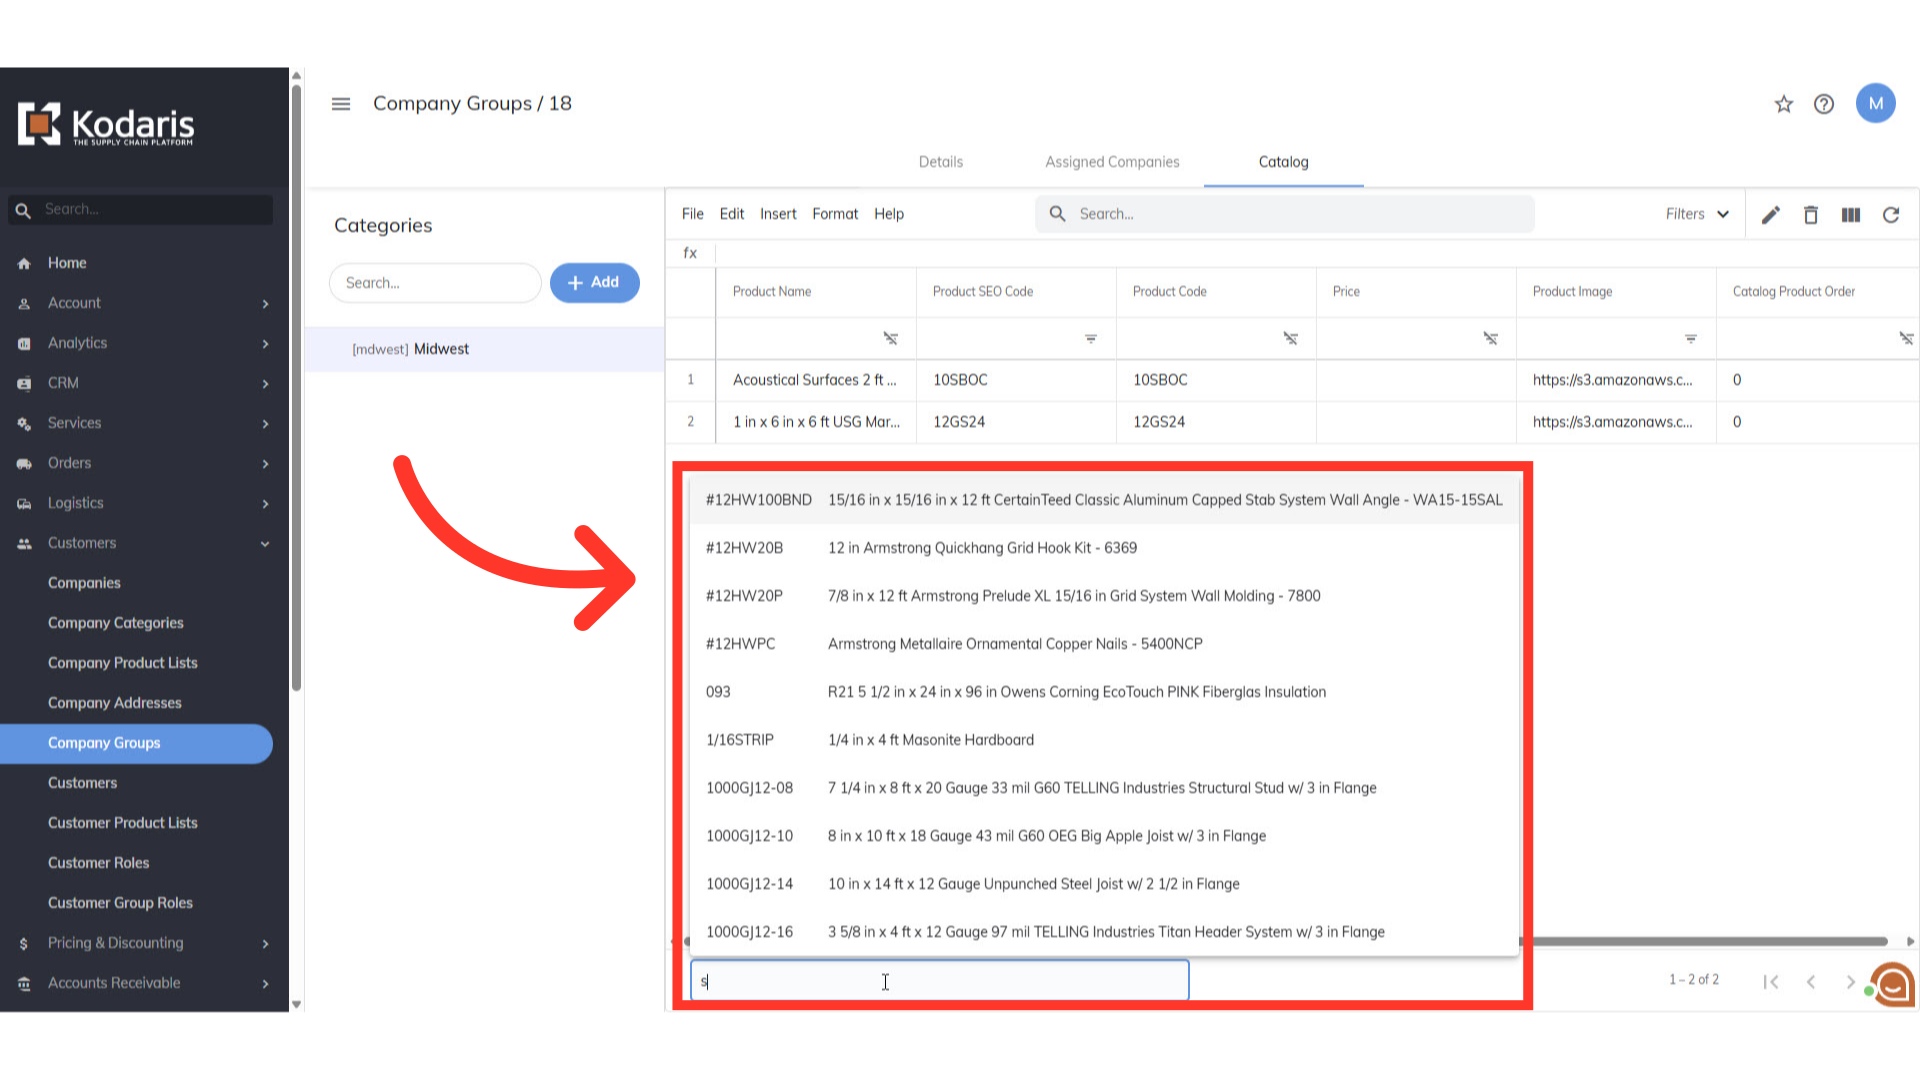
Now, let's assign the products to the new category. Click the "Assign Product" field.

Type to search for the product you would like to display to the customer, and select from the results. Repeat the steps to add more products as needed. Import is available if you're dealing with bulk products to add here.
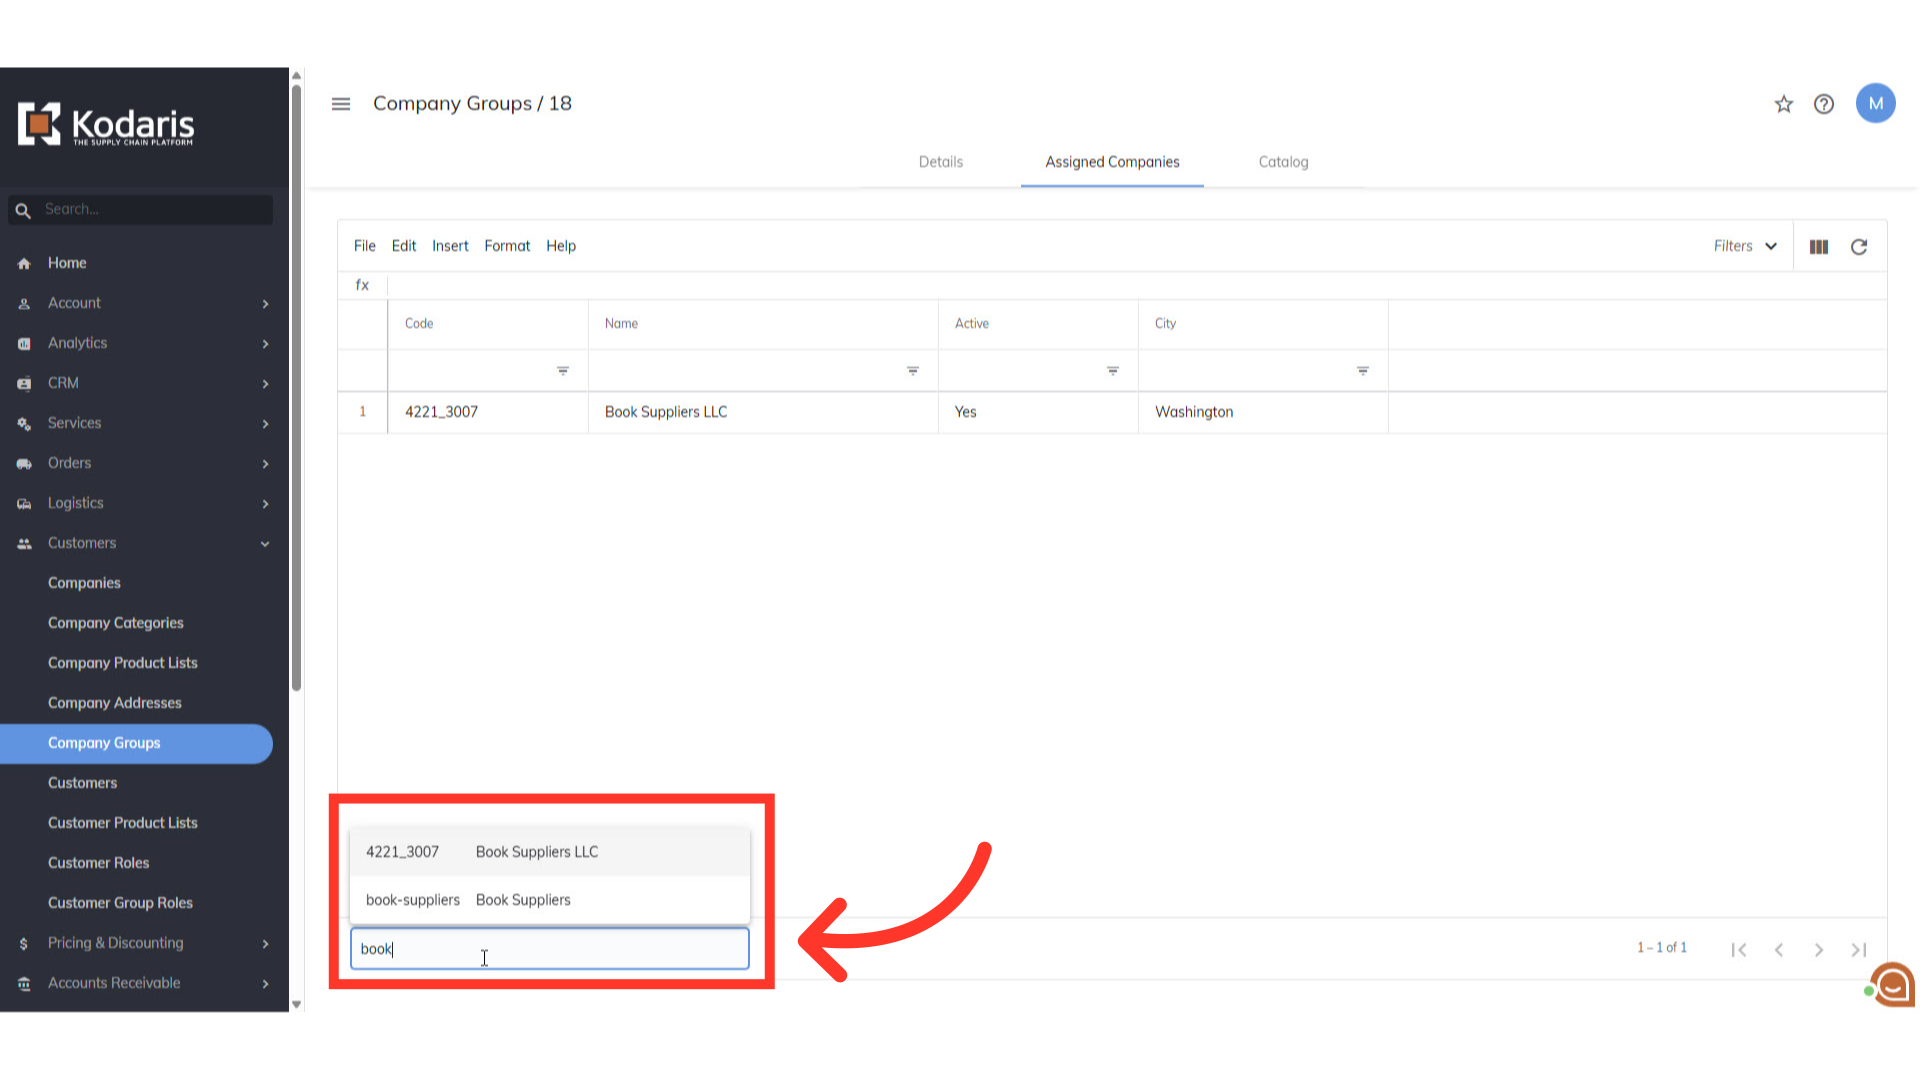
Go to "Assigned Companies" tab. You will now assign the customer account that you want the products to be available for. You can also assign multiple customer accounts to the catalog.

To assign companies, click the "Assign Company" field.

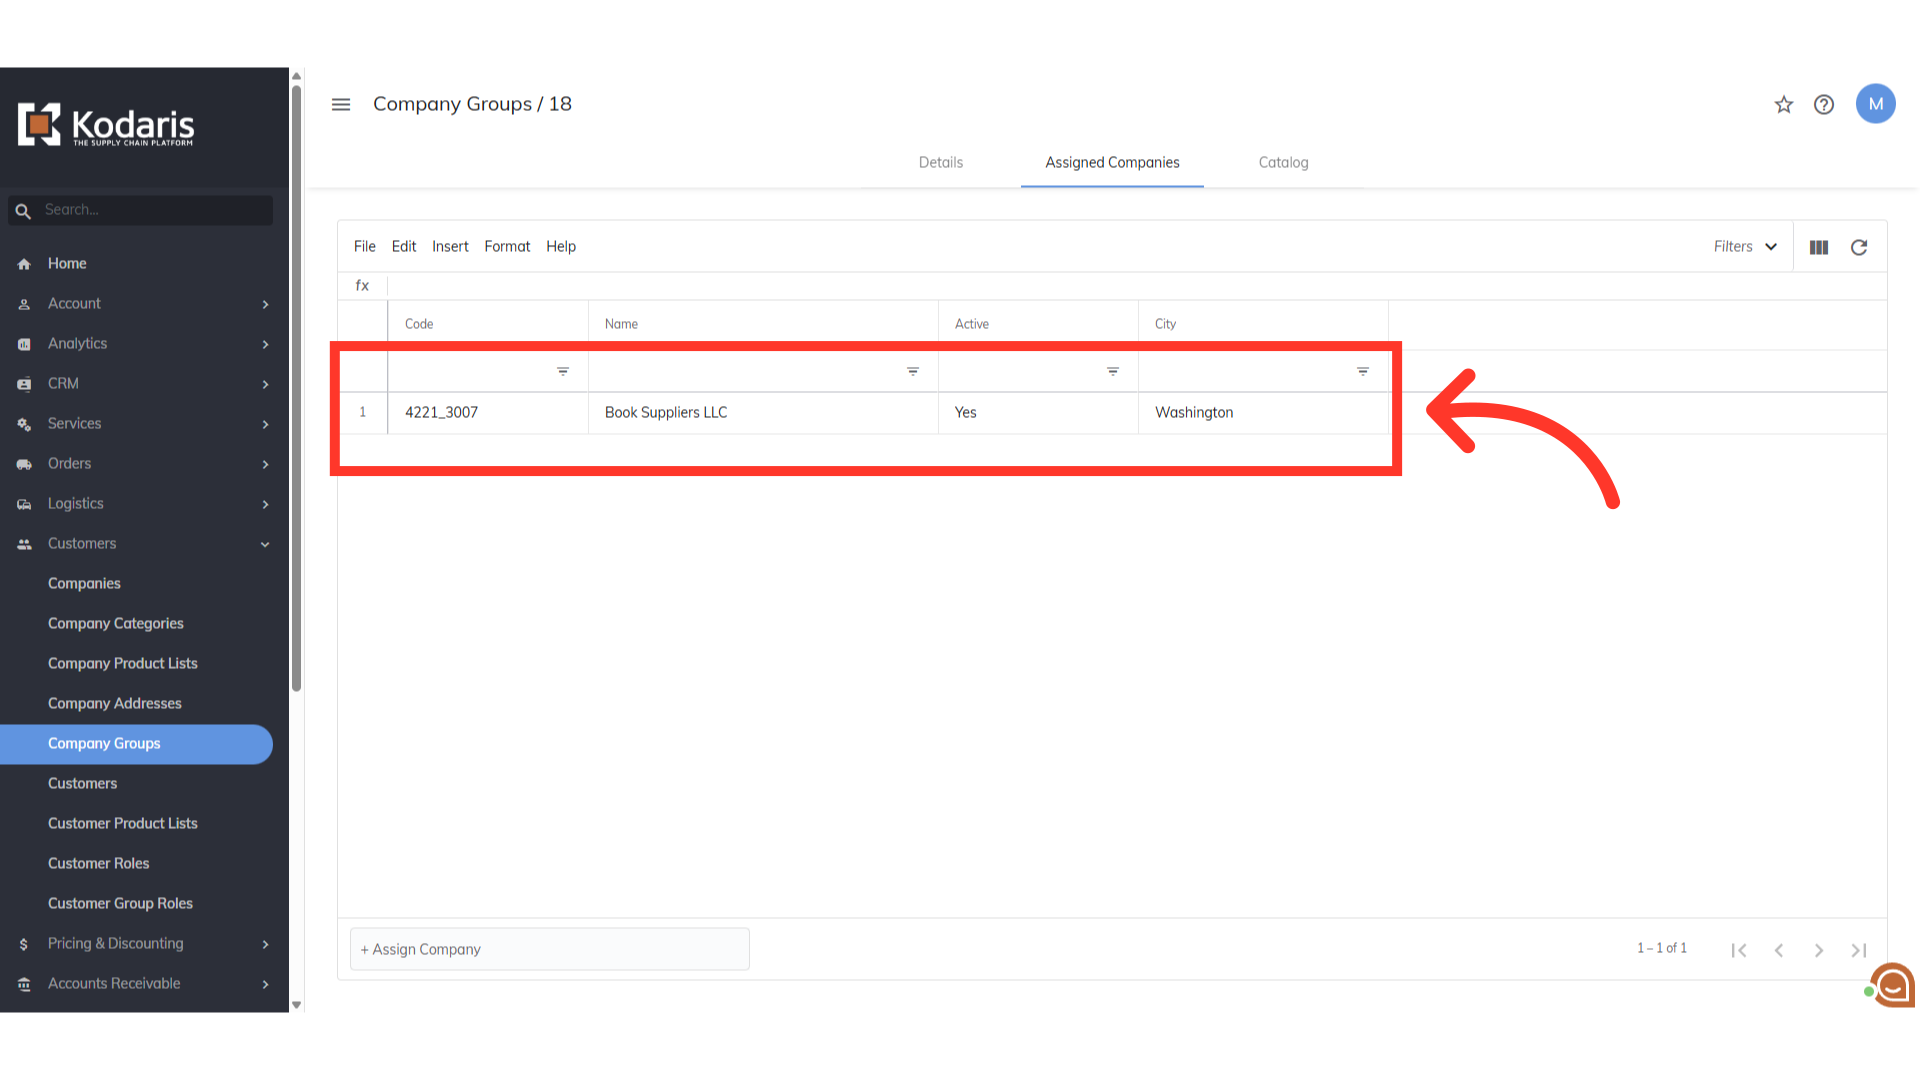
Type to search the company code or name and select it from the results.
Now that the company has been assigned, this company will now be able to see the products that you've hidden but have added to the company group catalog.
On the customer side, the products can be viewed under "Catalogs" and to whichever "Category" you've added them to.
