To send emails to customers directly from the Operations Portal, log in to the portal and select "Customers" from the menu options. In order to access "Customers" you will need to be set up either as an "administrator" or a "superuser", or have the appropriate roles: "customerView" and "customerEdit".

Locate the customer you want to email by searching for their account via the search field. You can also scroll through the list of customers or use the grid filters to locate their account.

Once you've located the customer, select the "More Details" button associated with their account.

To initiate sending an email to your customer, select the "Email" icon.

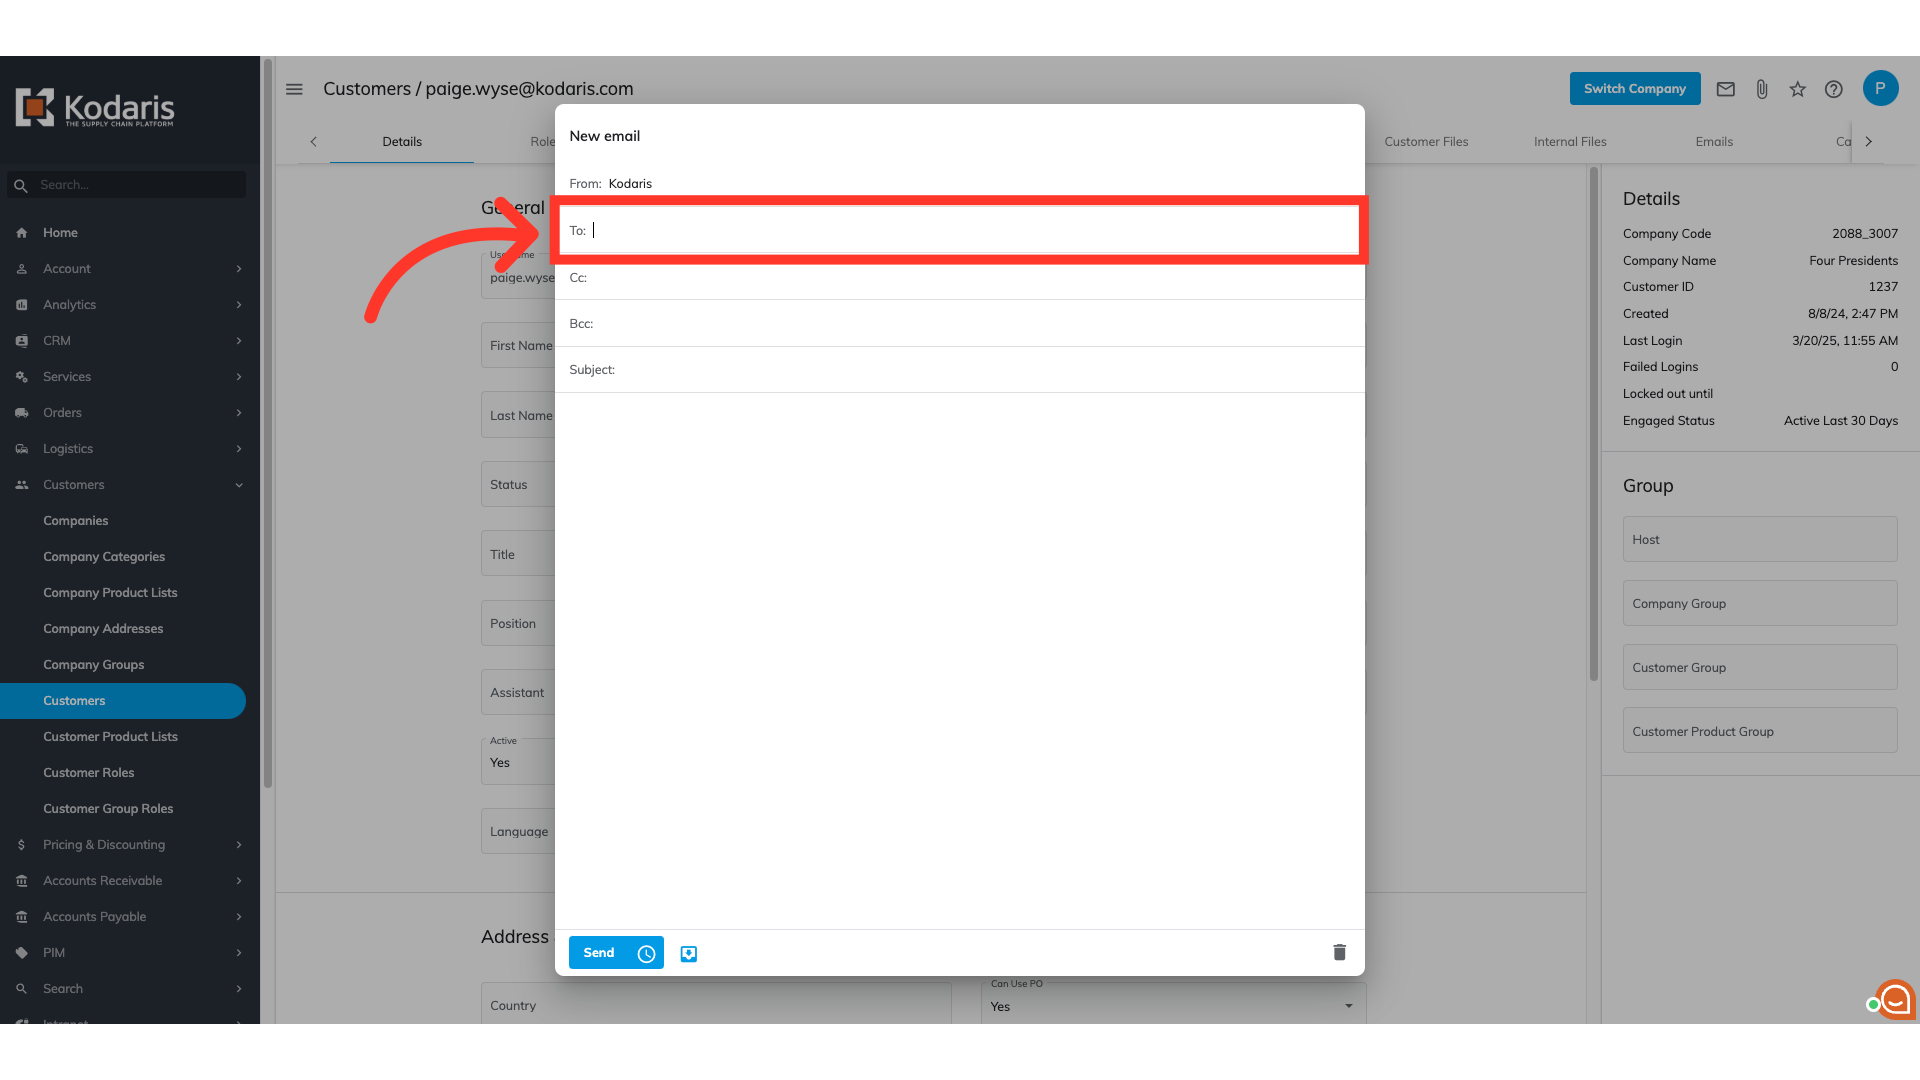
A pop-up will appear. First, enter the customer's email address in the "To" field.
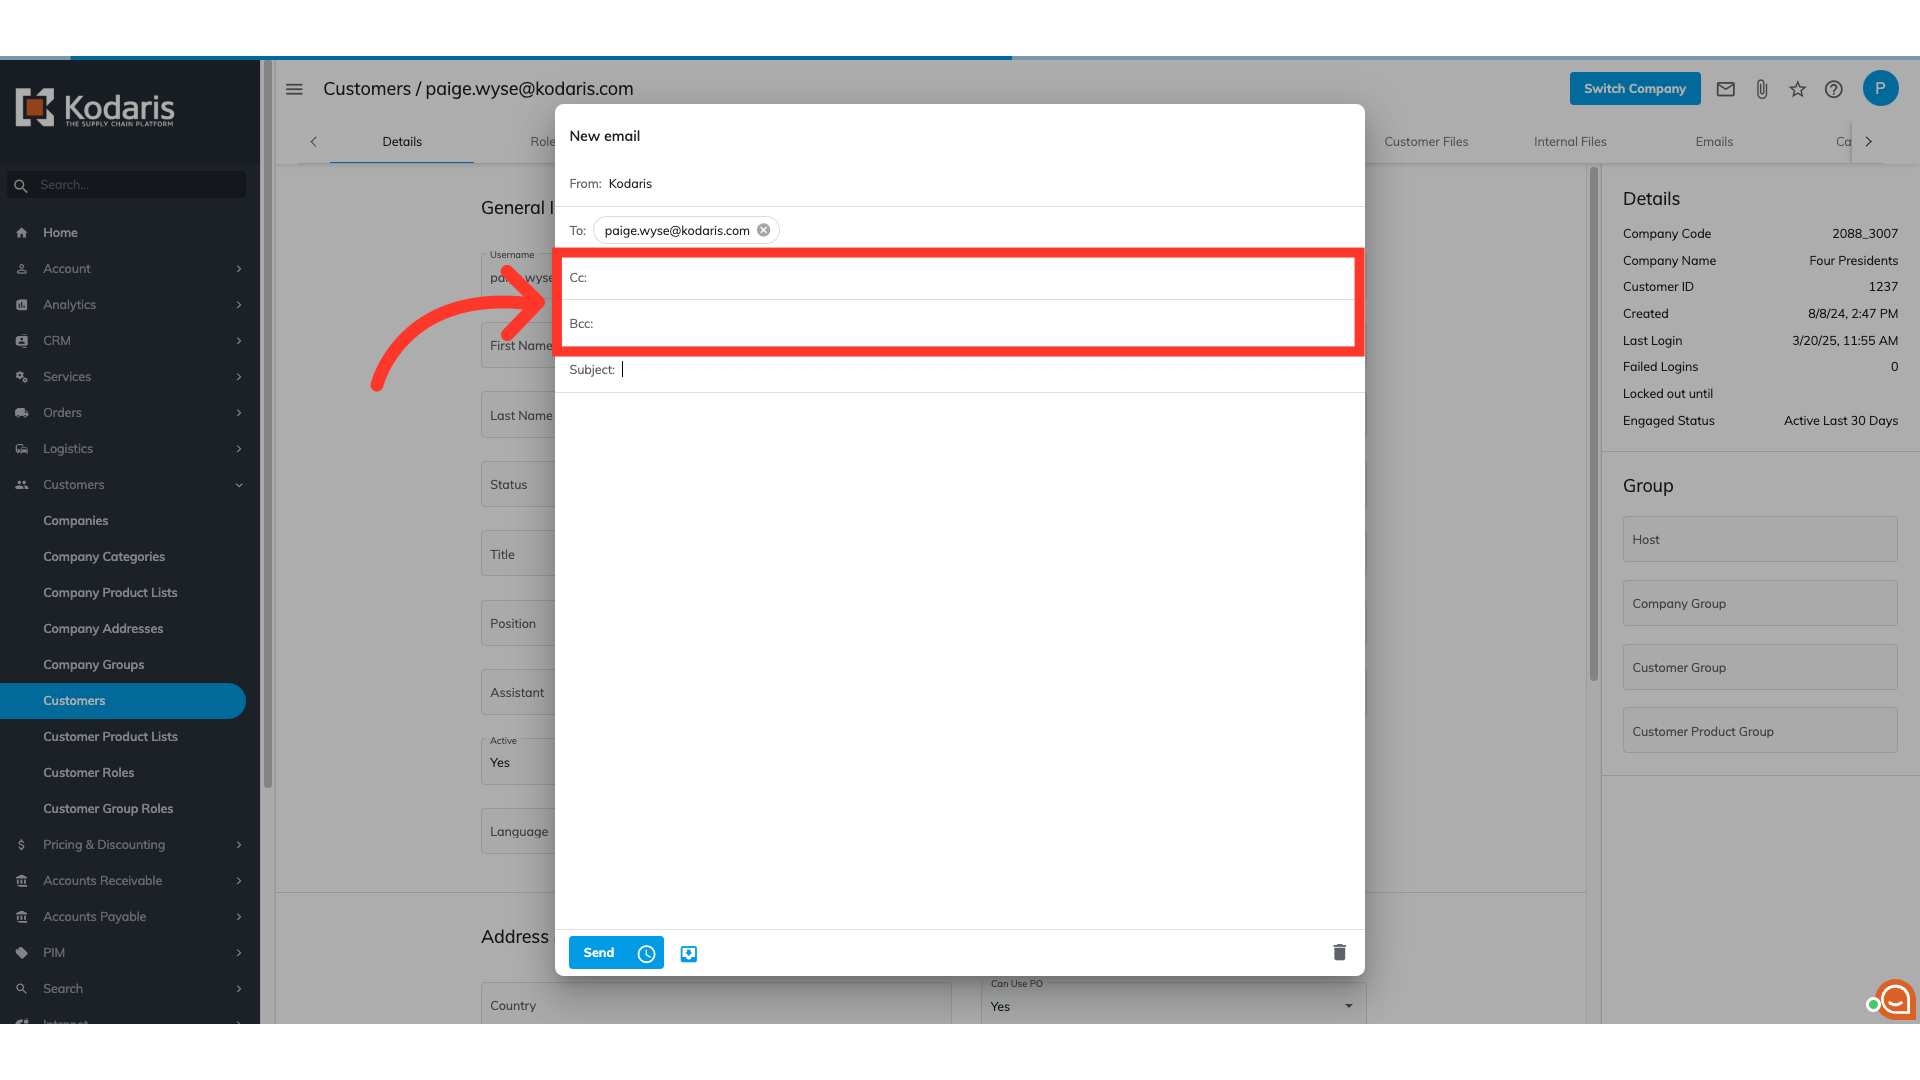
You also have the option to add email addresses to the "Cc" and "Bcc" fields. These fields are optional. In this example, we will leave them blank.
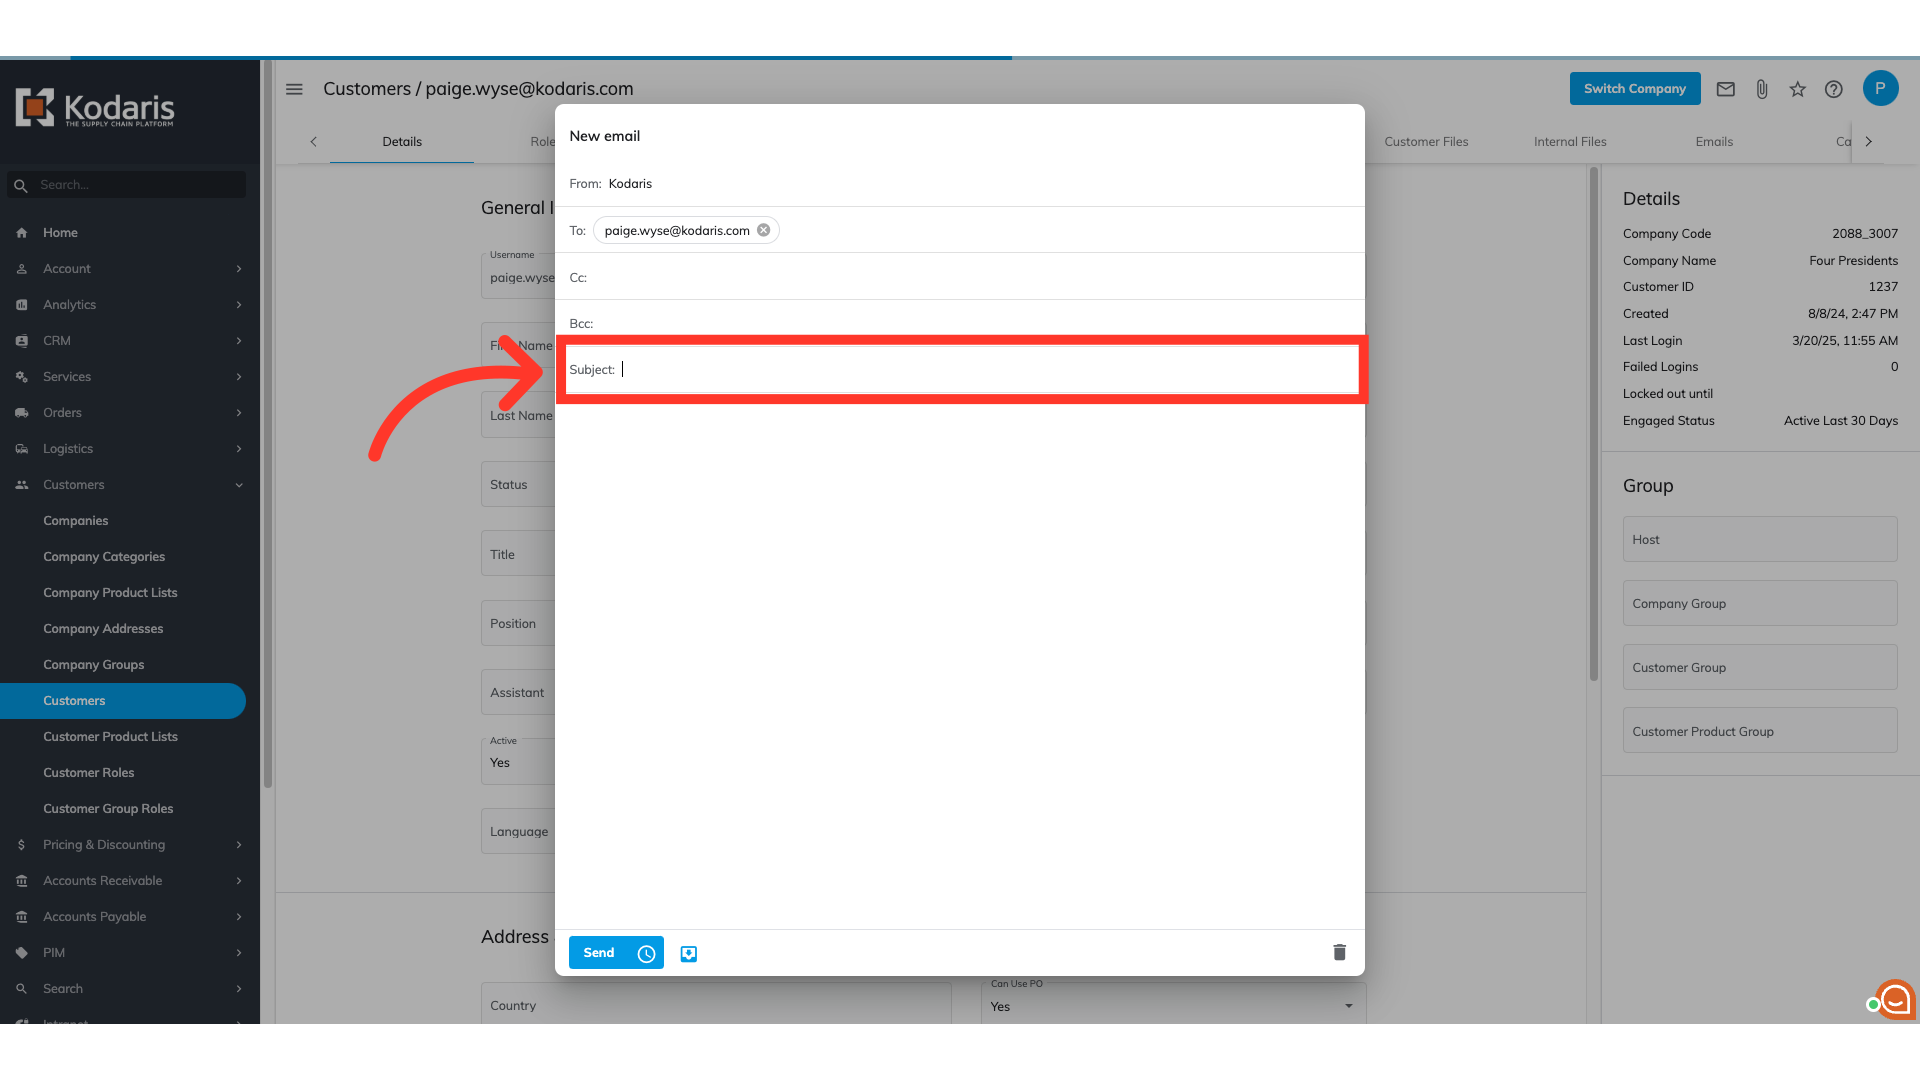
Next, enter your desired text in the "Subject" field. If this is not filled out, the email will have an empty subject line.
Lastly, add text to the body of your email.

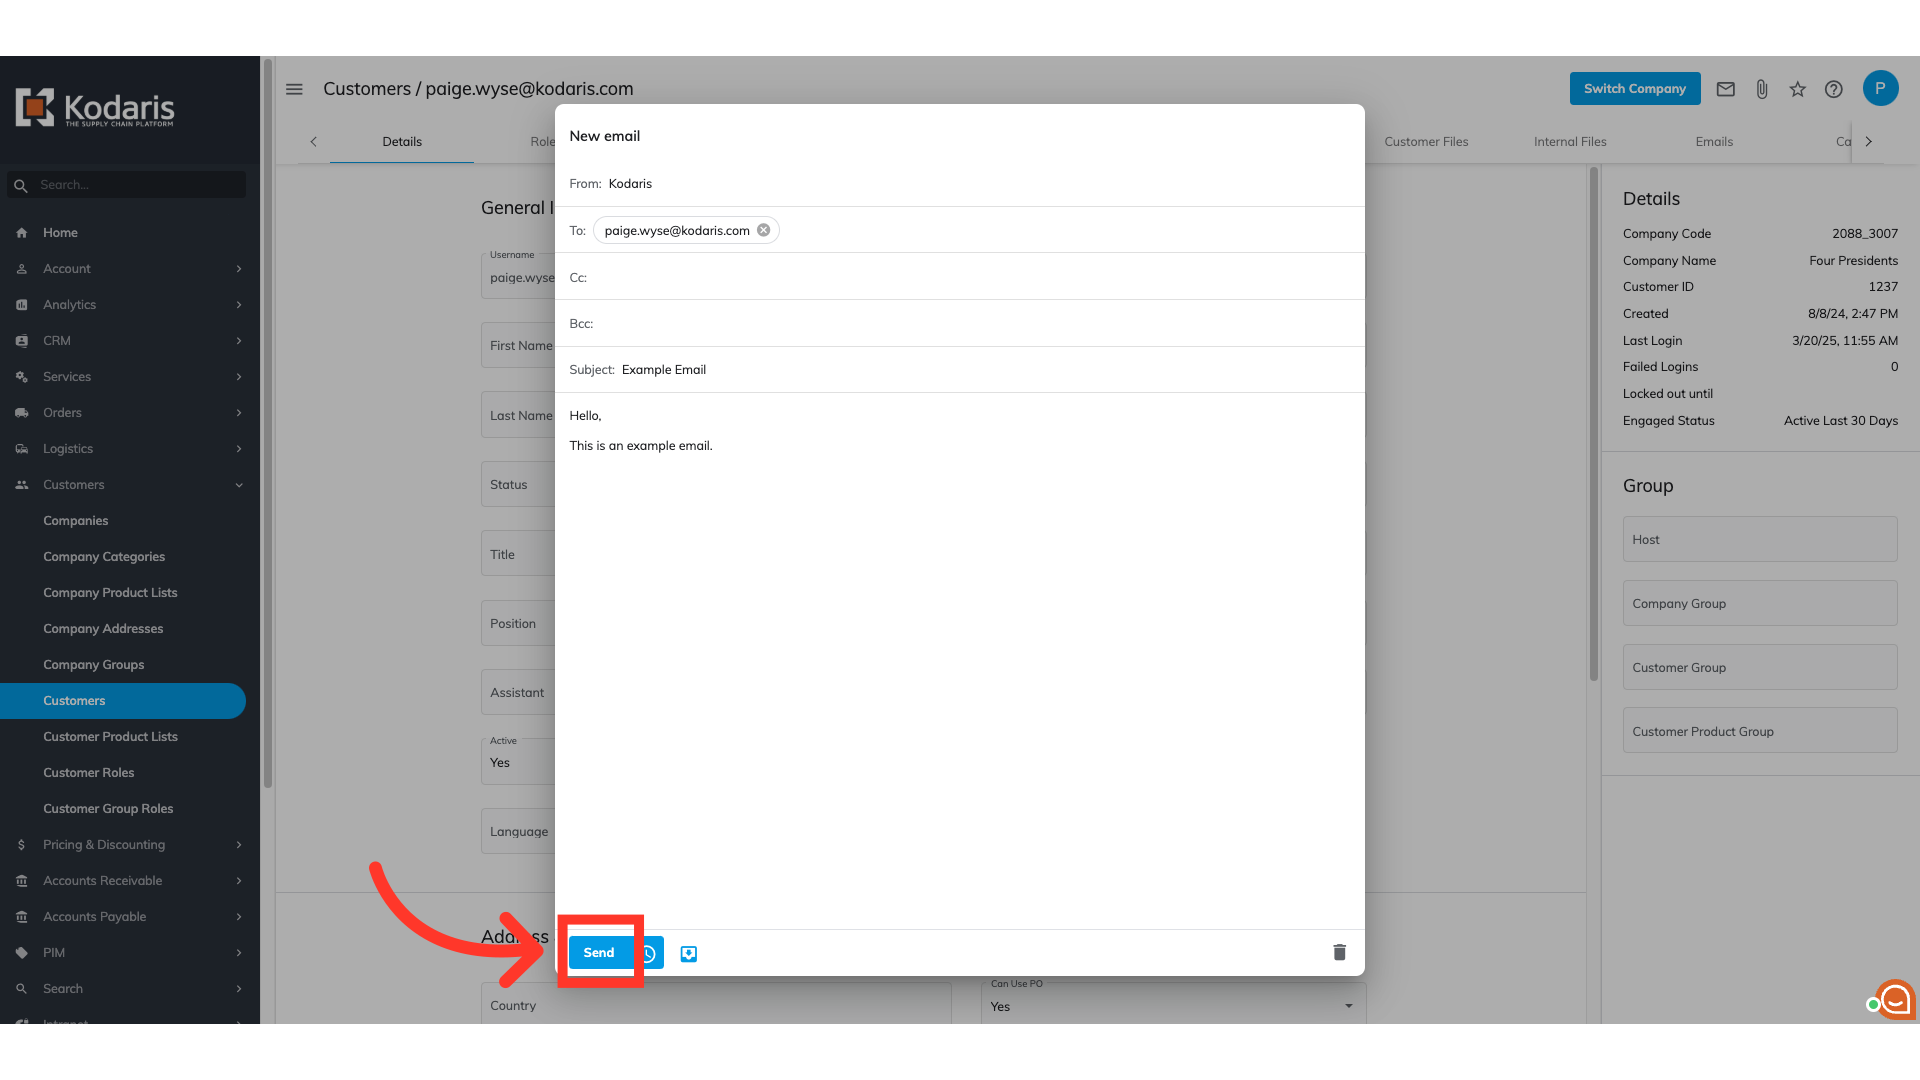
Once the email fields are filled out and you are ready to send the email, select the "Send" button. Upon selecting the "Send" button, the system will automatically send the email to the customer.
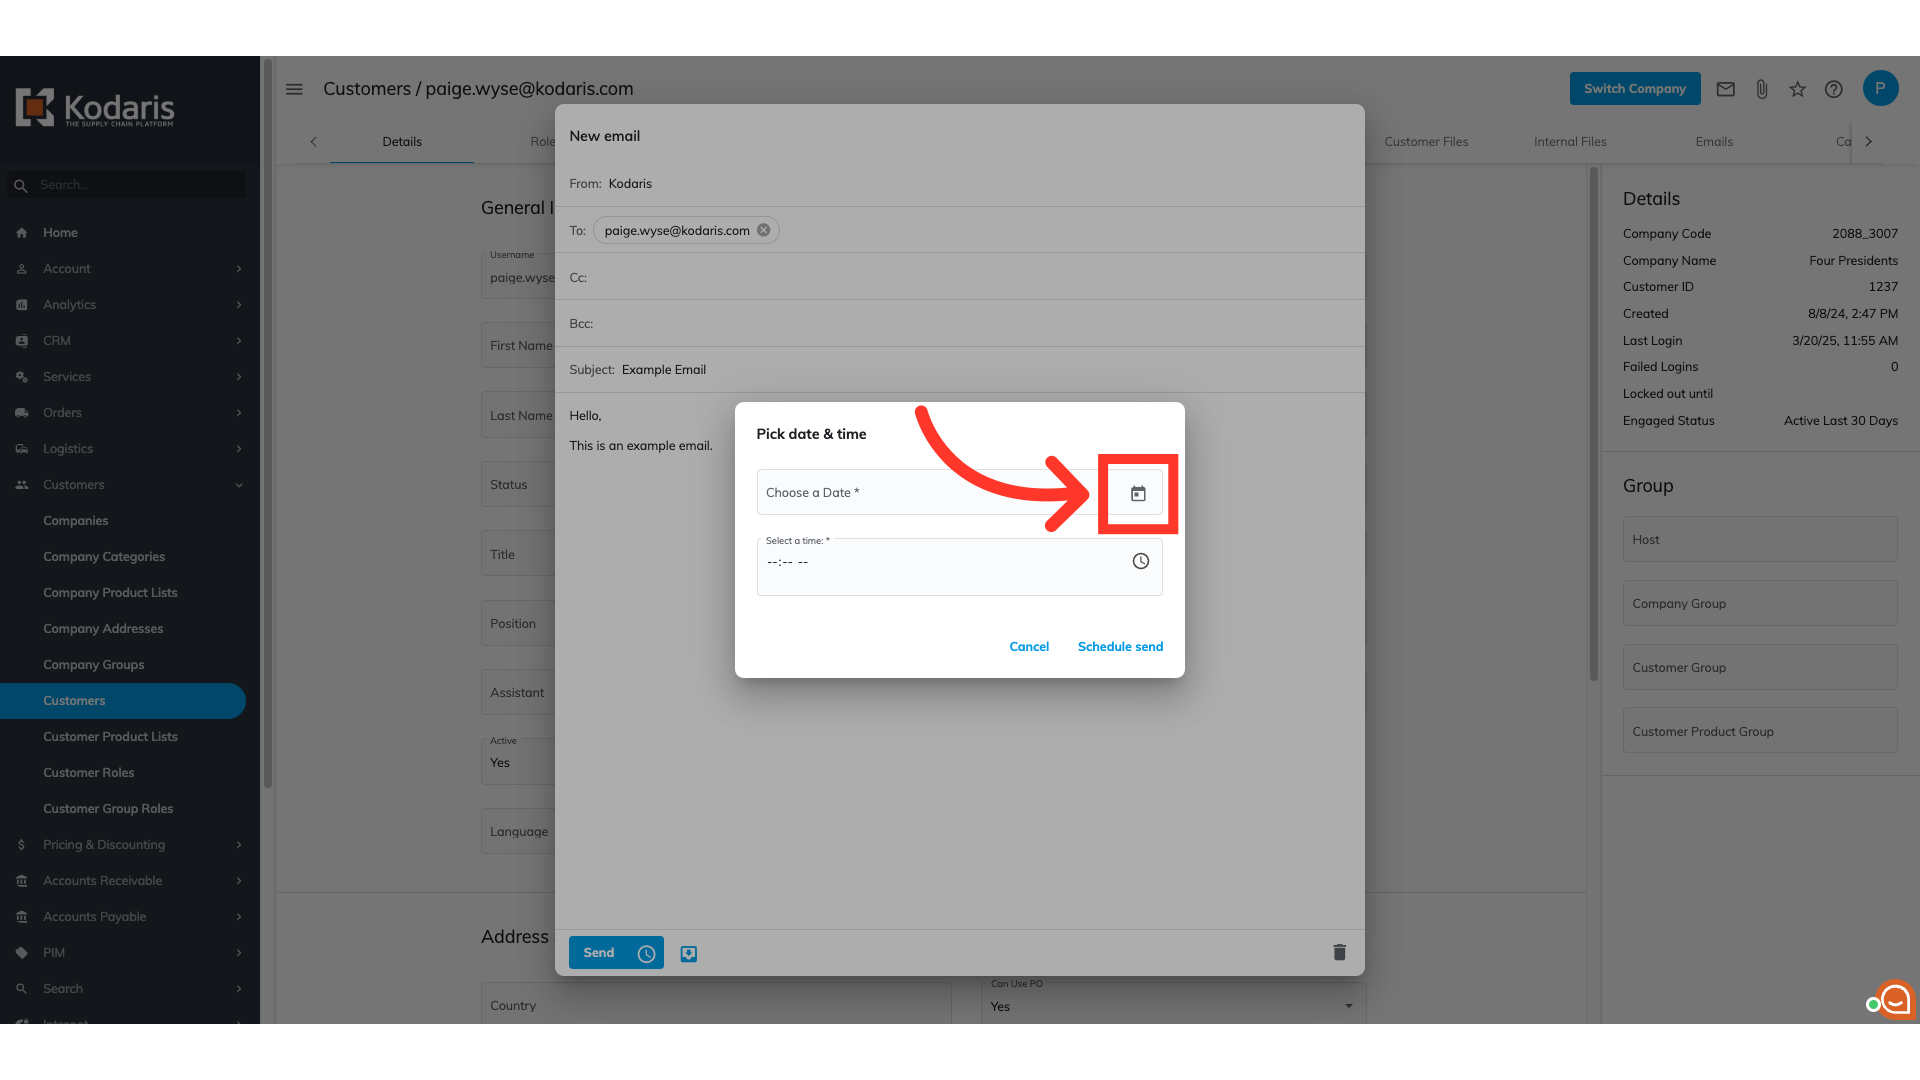
If you'd like to schedule the email to be sent on a different date and/or time, select the "Clock" icon to schedule your email.

A pop-up will appear that will allow you to schedule your email. Select the "Calendar" icon to choose the date you want to send the email.
Use the calendar to select the date you want to send the email.
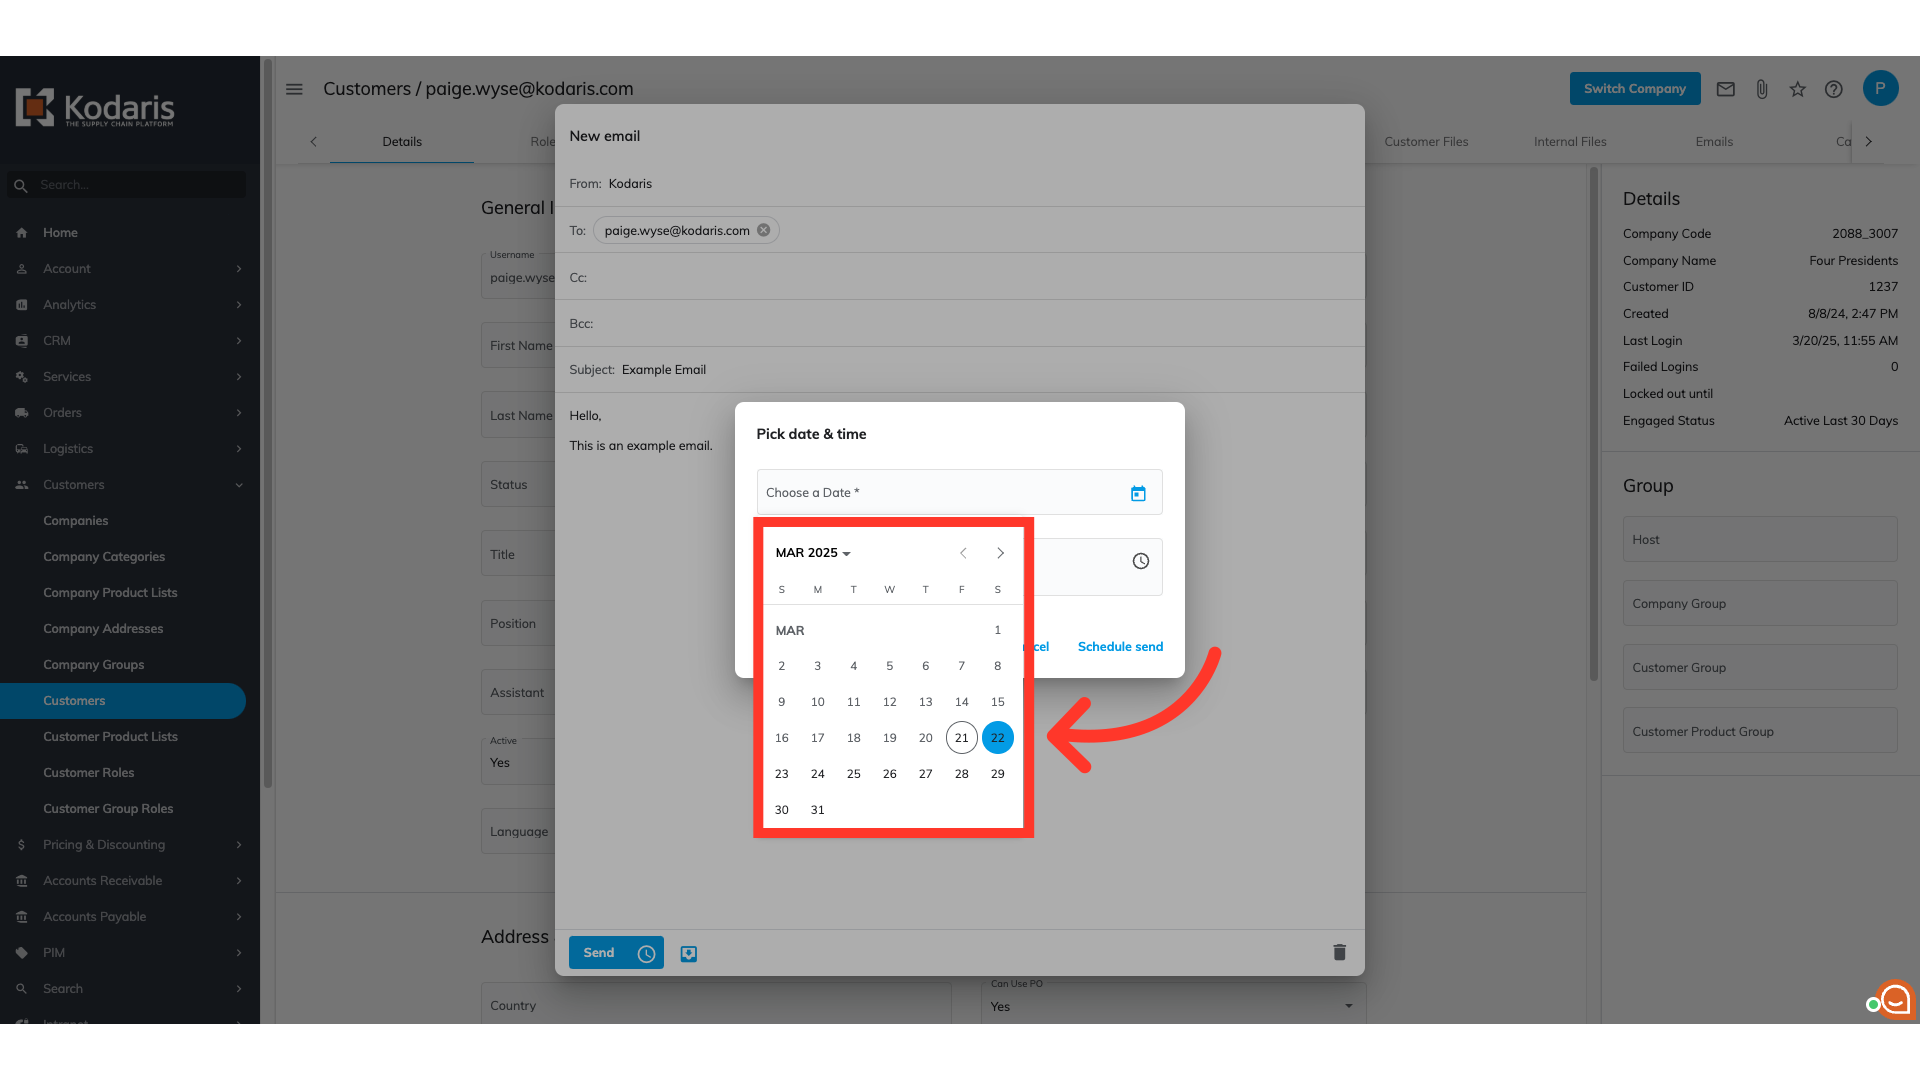
Select the "Clock" icon to set the time you want the email to be sent.

Select the time you want to send the email.

Once you've set the date and time you want to send the email, select "Schedule send".

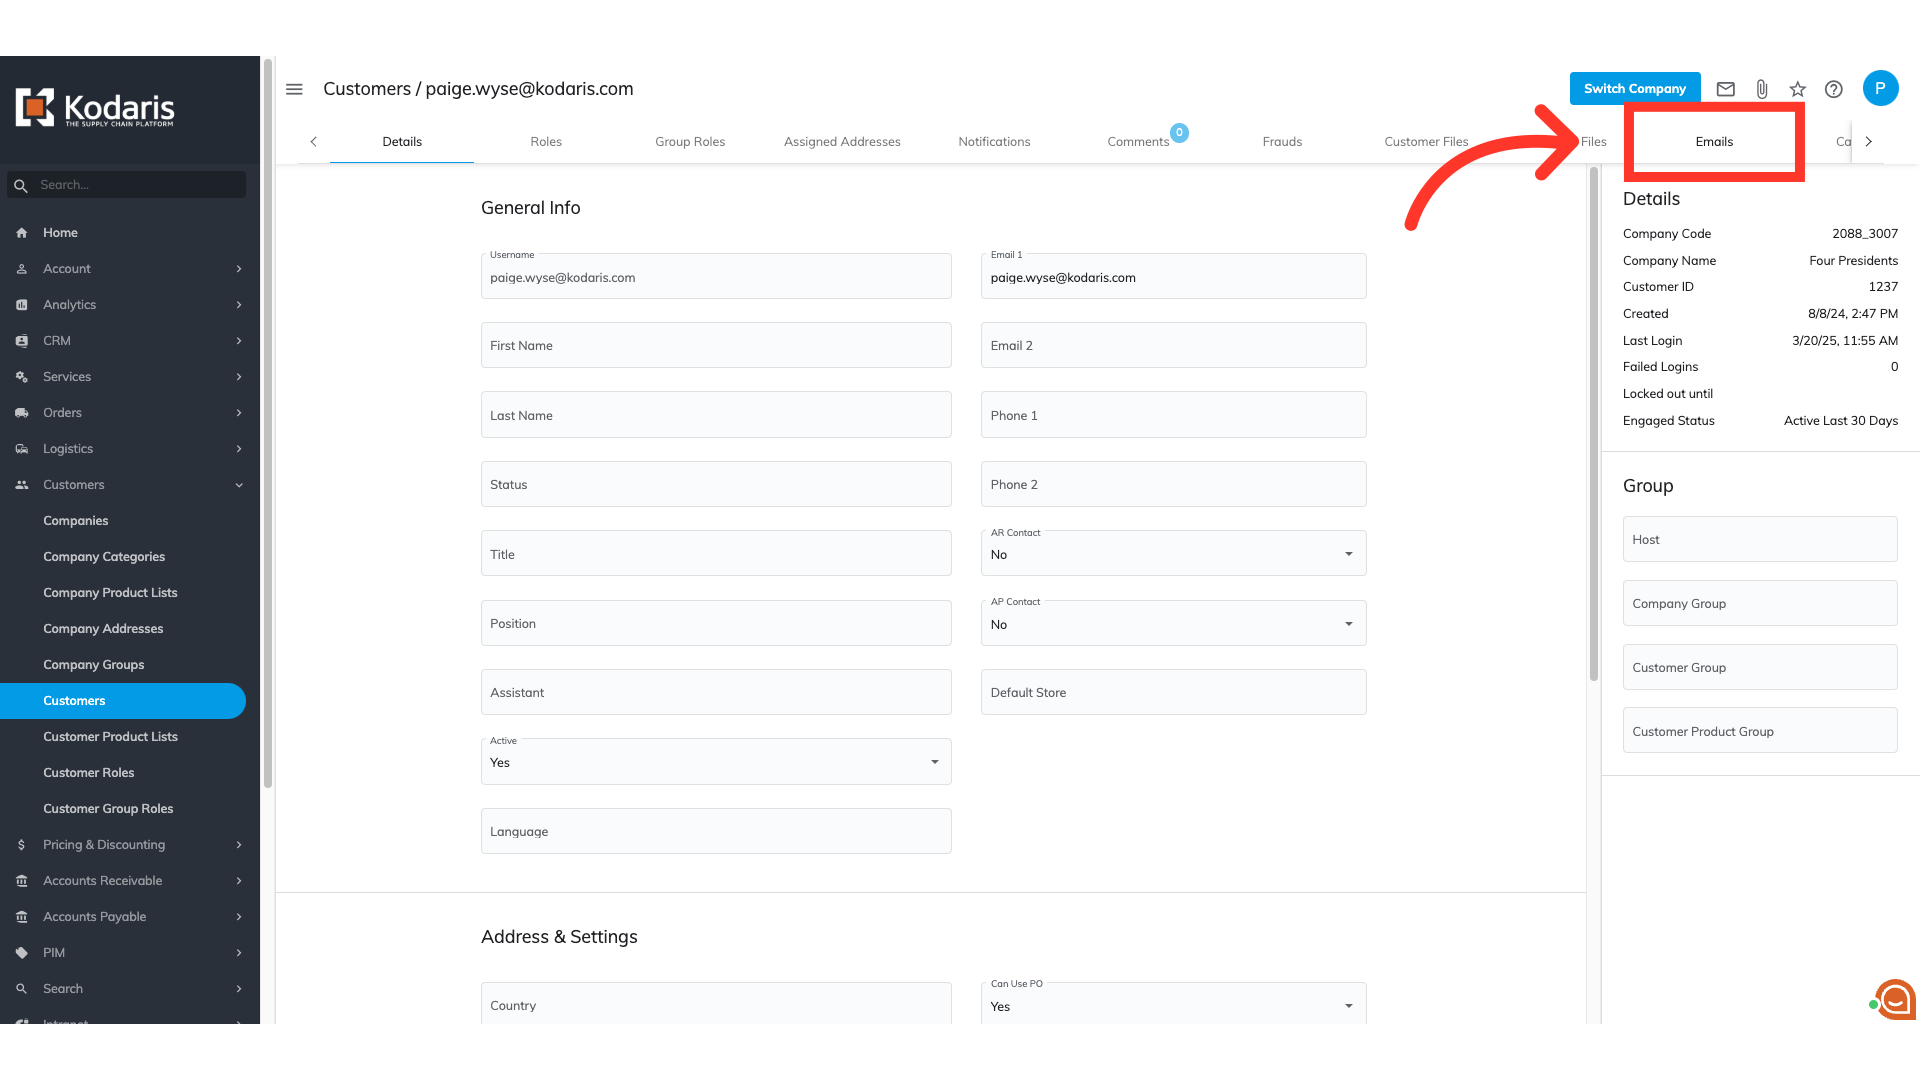
Upon scheduling the email, the pop-up will disappear and the system will wait to send the email until the designated date and time you've chosen. To view all the scheduled and sent emails to your customer, select the "Emails" tab.
On this screen, you can view a log of all scheduled and sent emails to the specific customer.
