To log work time to a ticket, navigate to "Services" section in the Operations Portal.
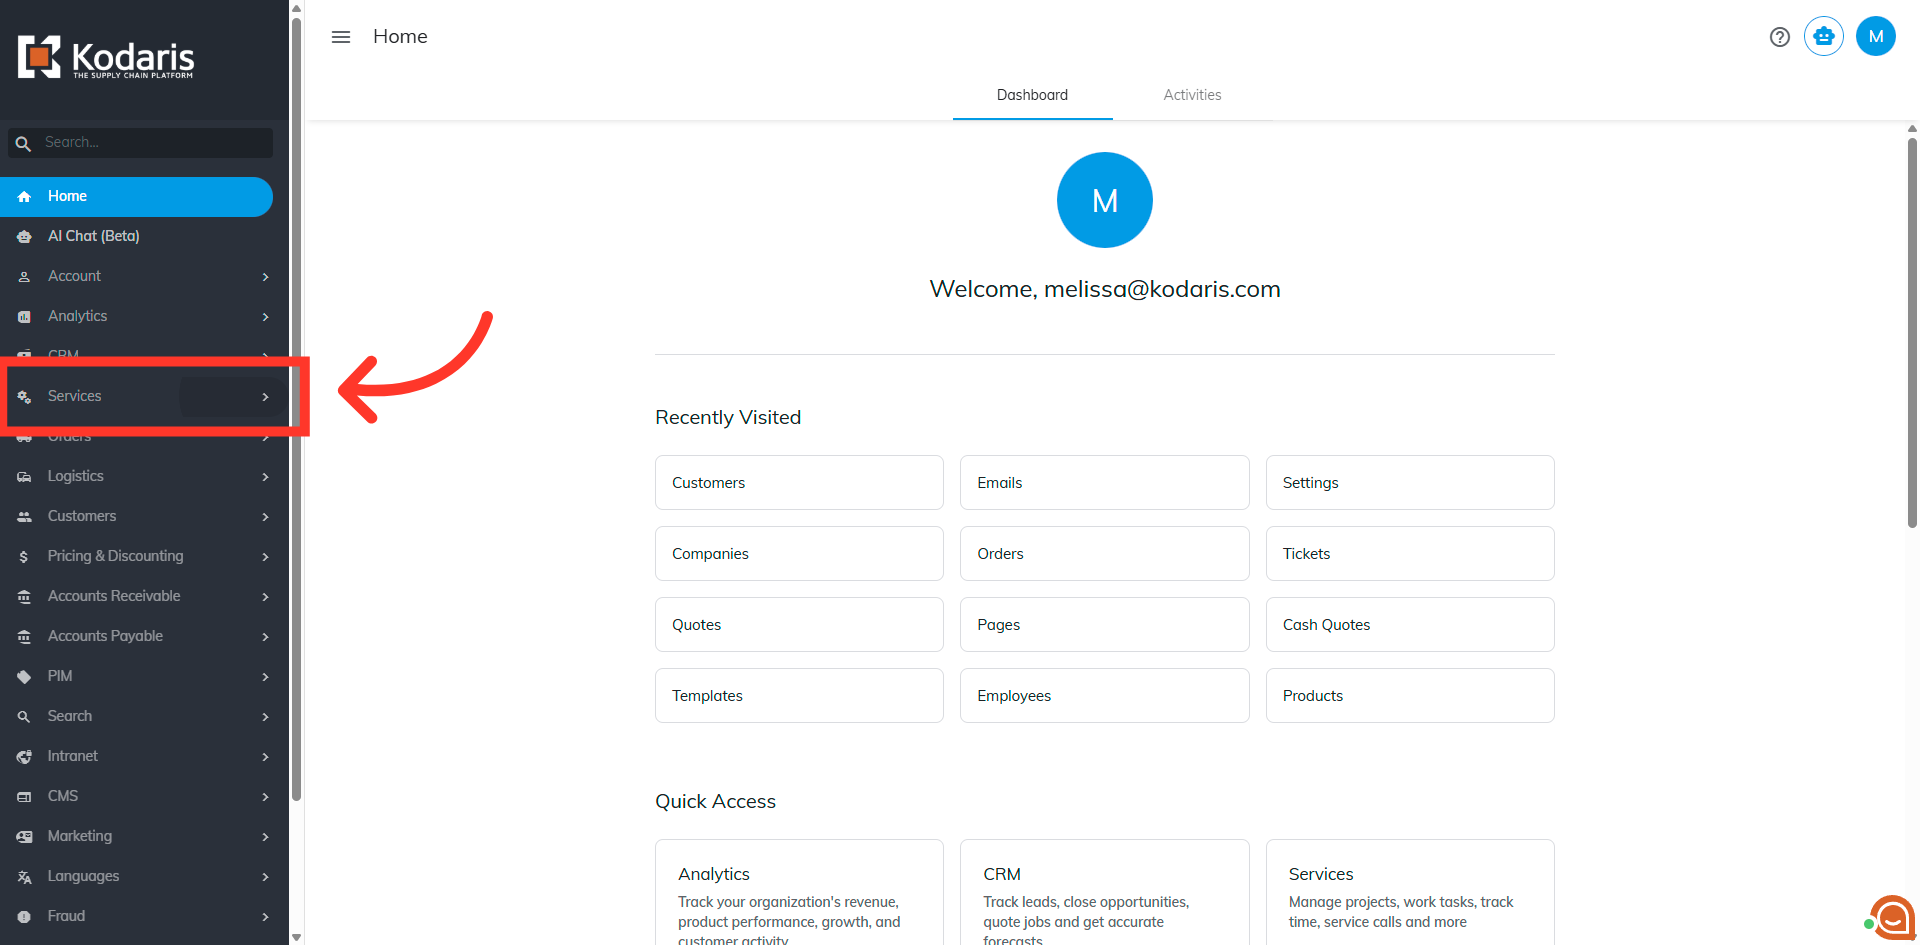
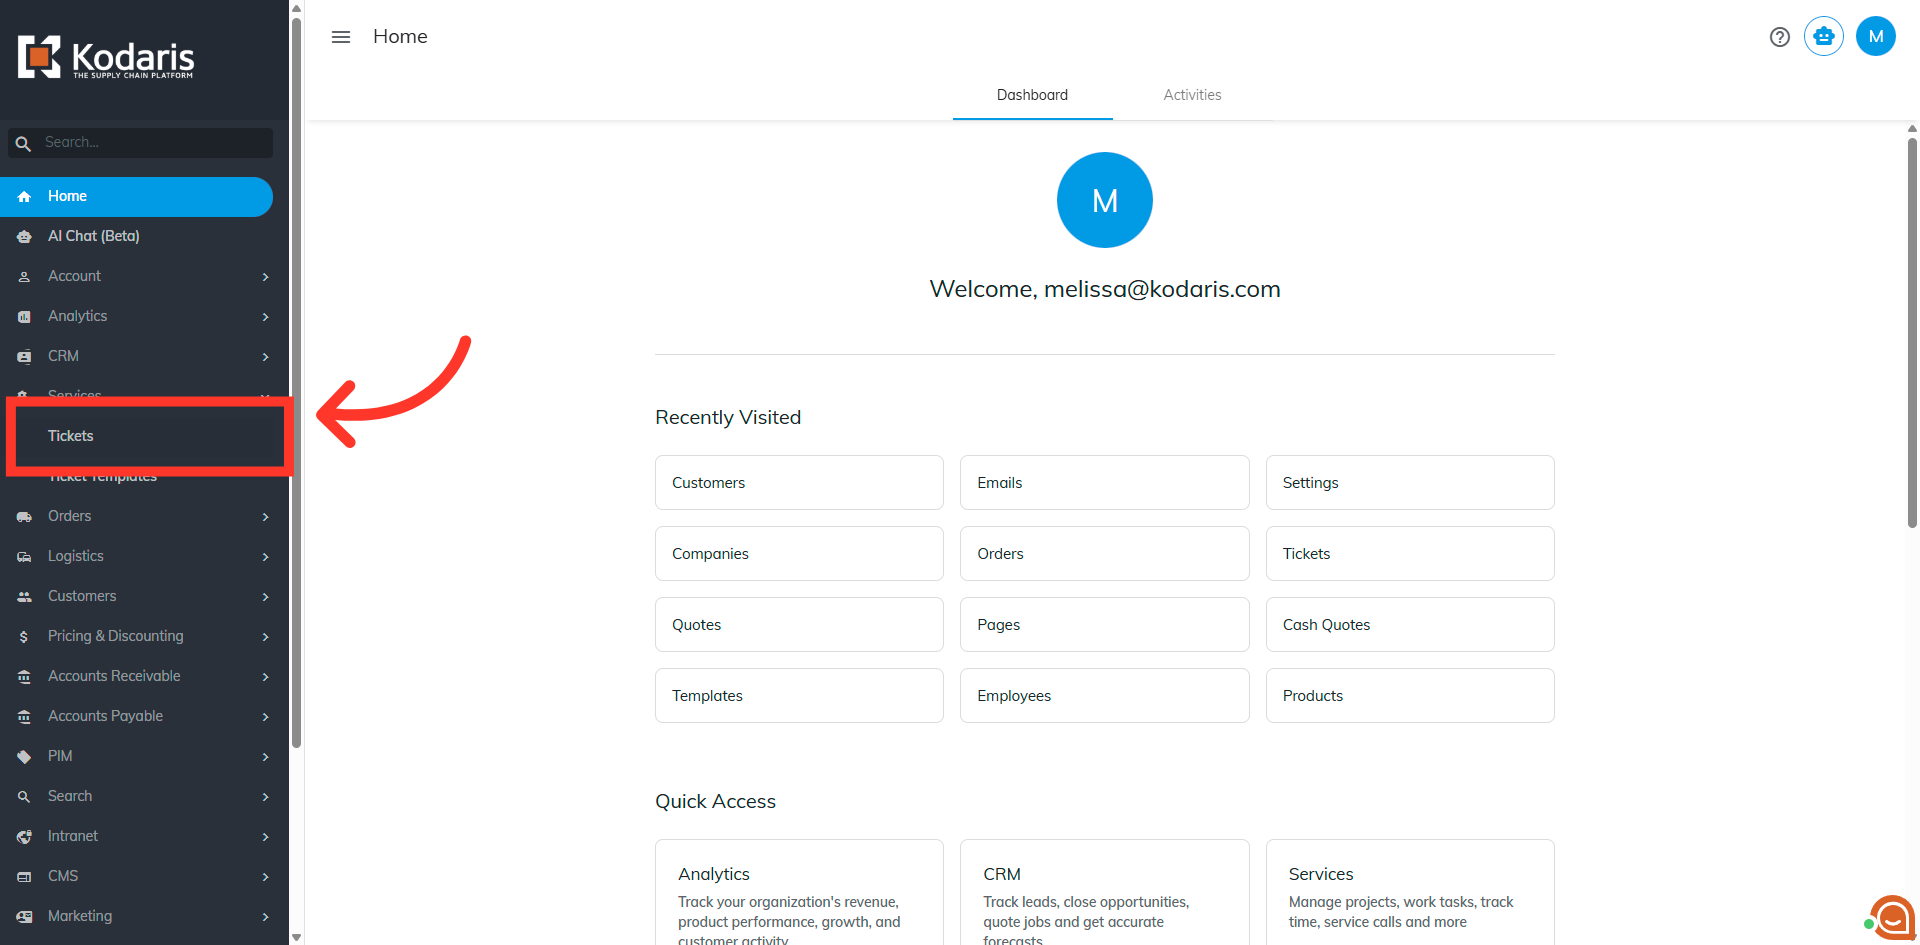
Then, click "Tickets". In order to access "Tickets" you will need to be set up either as an "administrator" or a "superuser", or have the appropriate roles: "ticketView" and "ticketEdit".
Search for the ticket in the "Search" field.
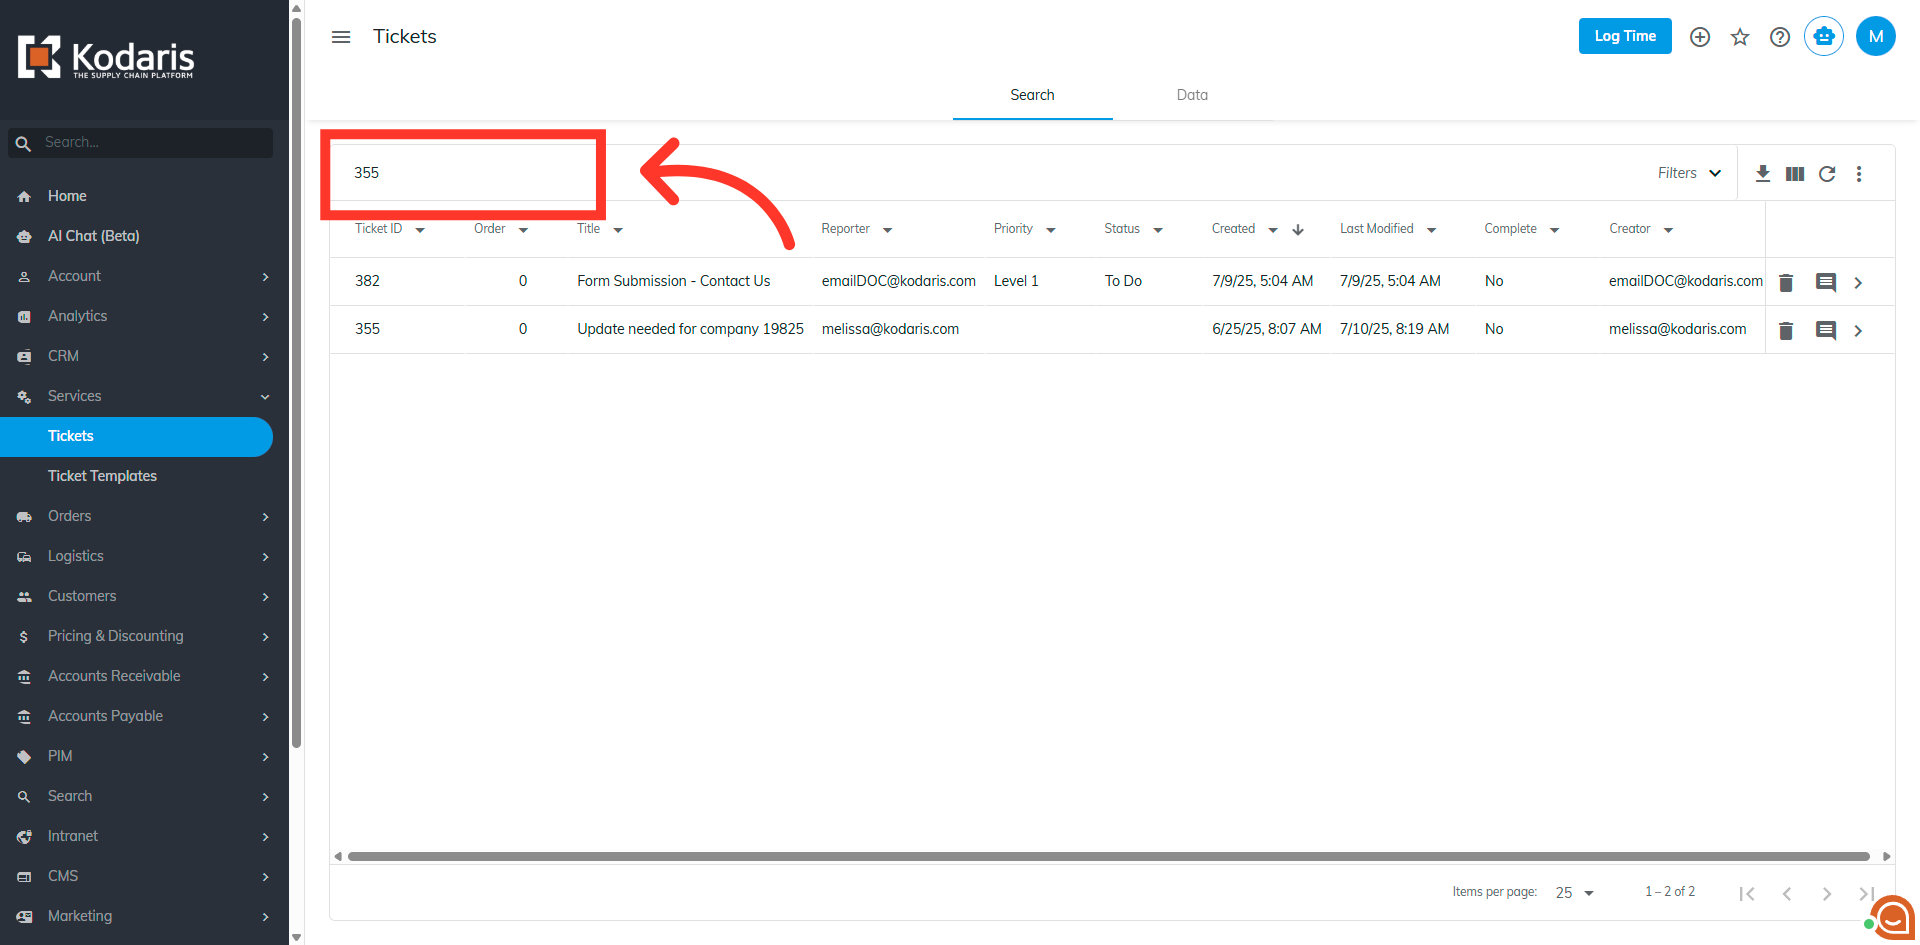
Click the more details icon to go to the details page of the ticket.

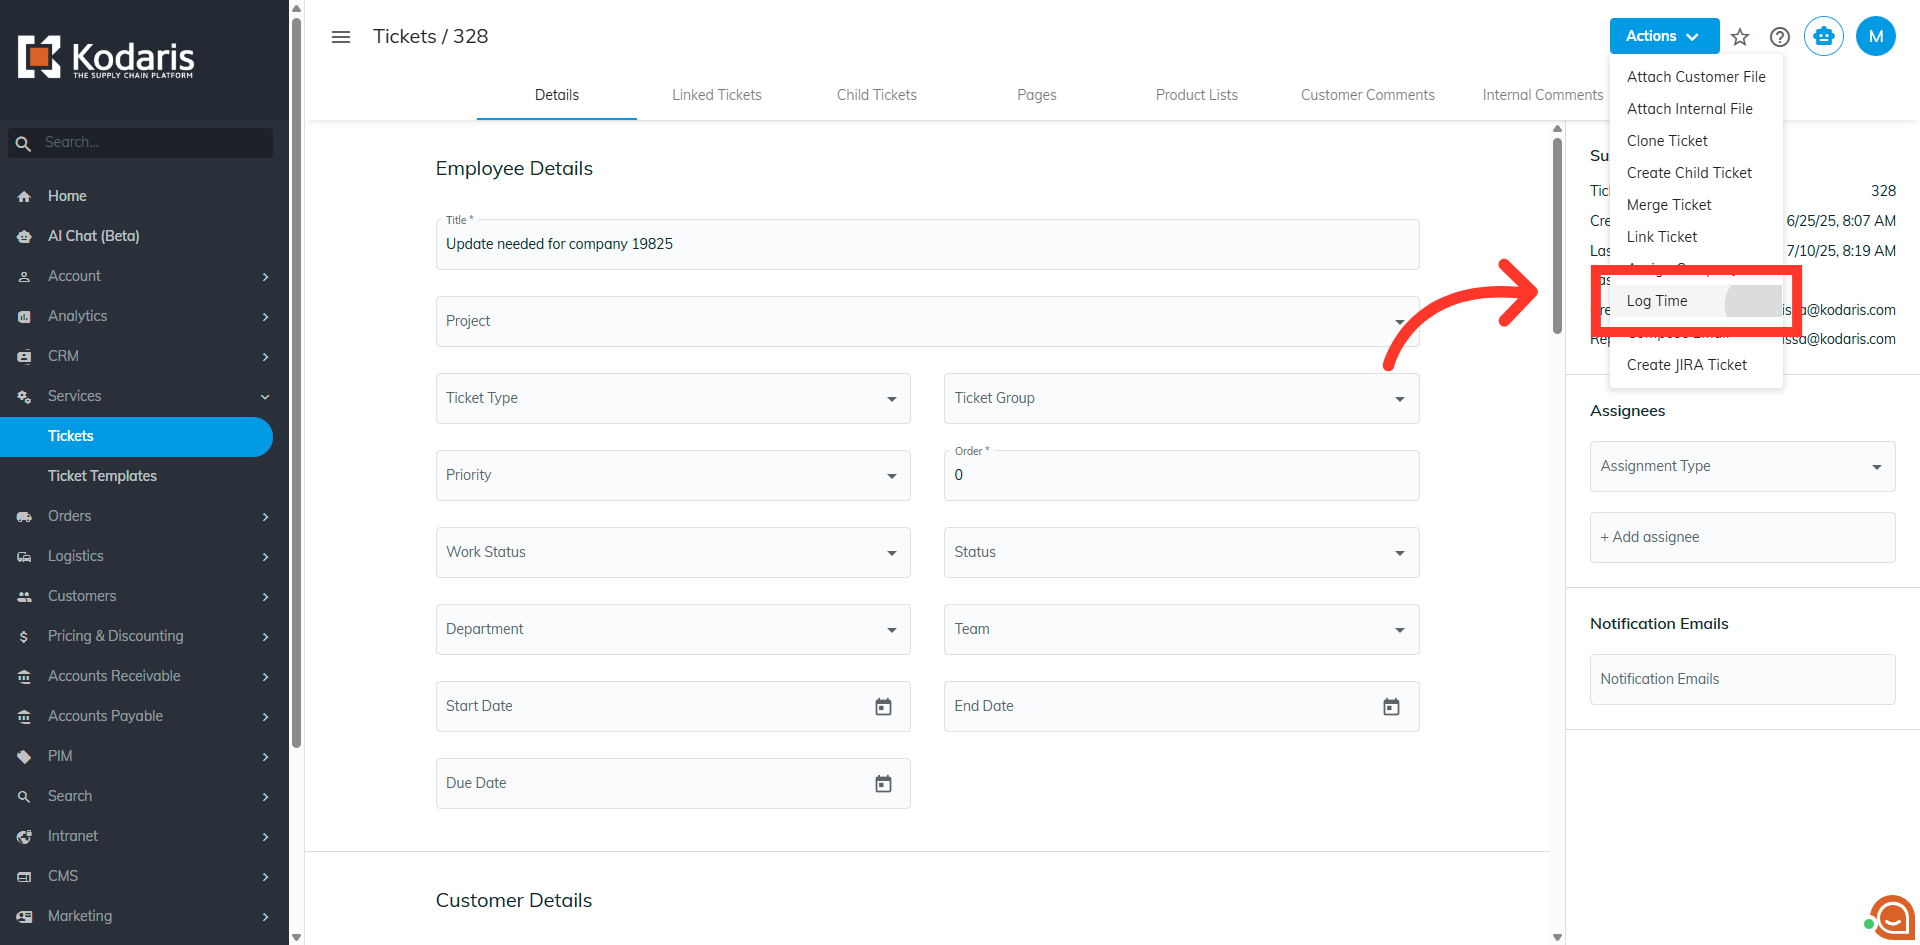
Find and click the "Actions" button.

Then, select the "Log Time" option.
Start typing the employee's name in the "Employee" field. If you are logging time for yourself, this step is optional.

Select the employee from the drop down.

Enter the date in the "Date" field or click the calendar to select a date. This can be helpful if you need to choose a different day for logging work time.

Enter in the number of hours and minutes spent for the task.
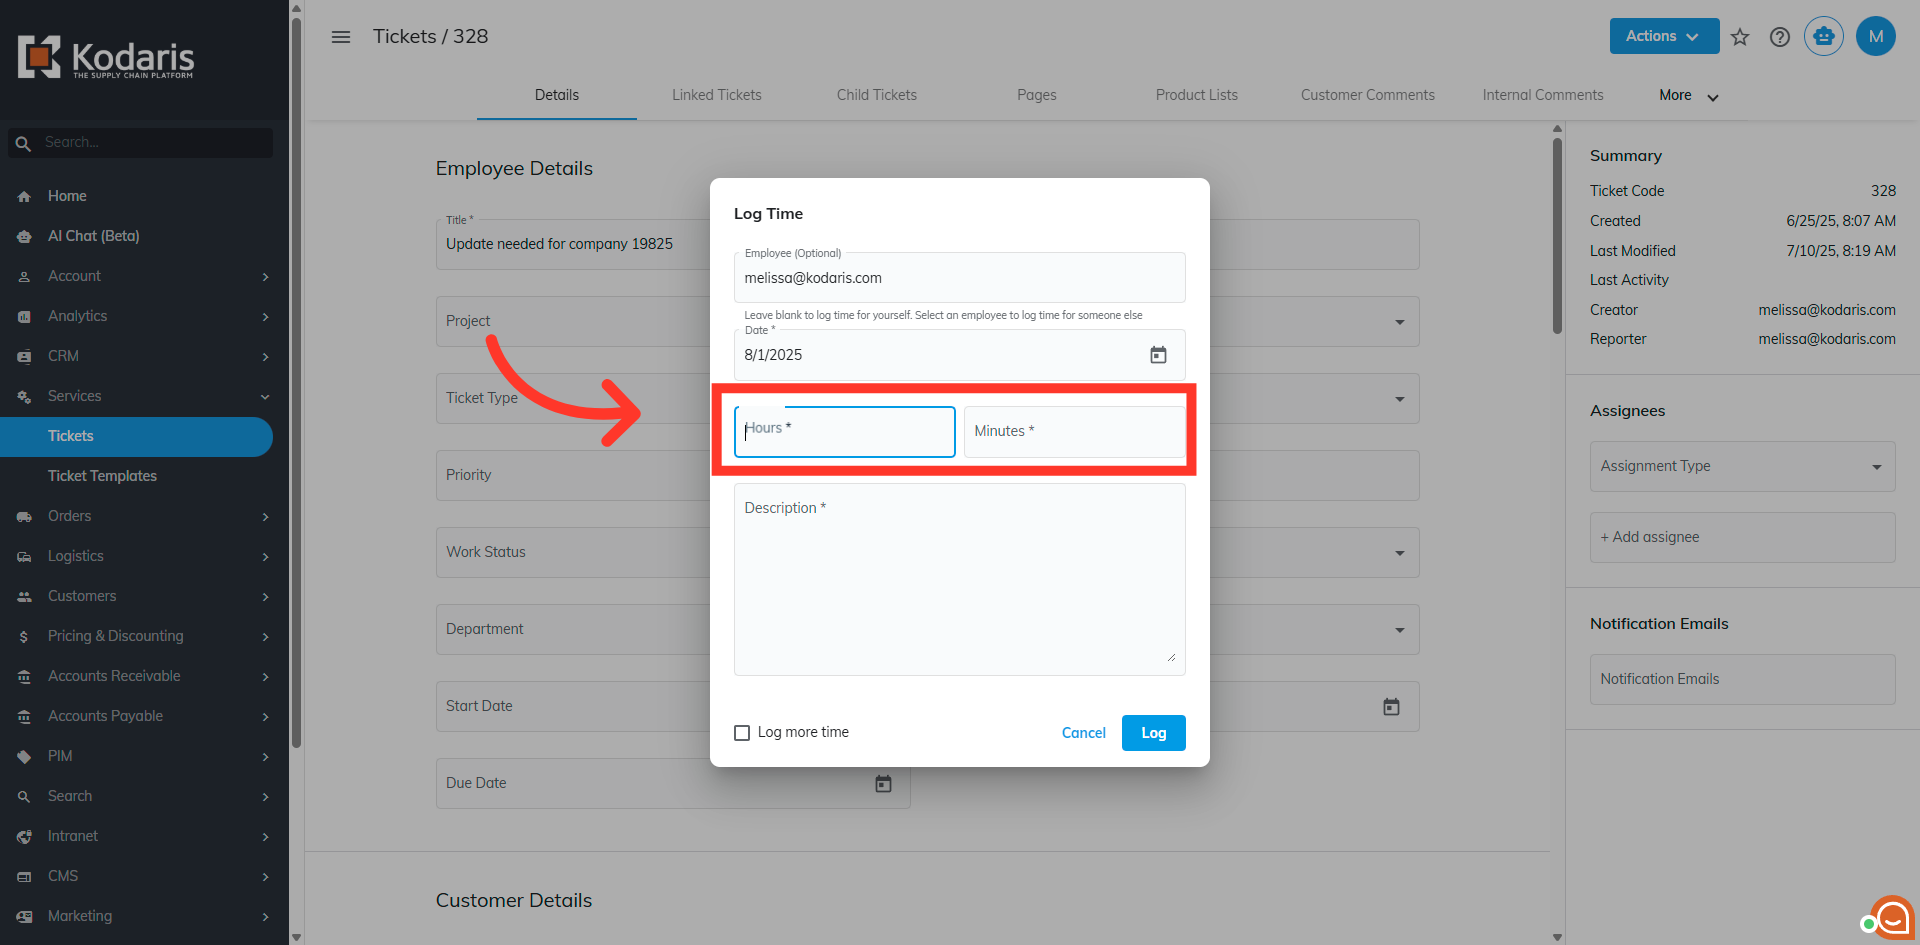
Add a description of the work done on the ticket.

If you need to log more time, check the check the "Log more time" box before clicking the Log button.
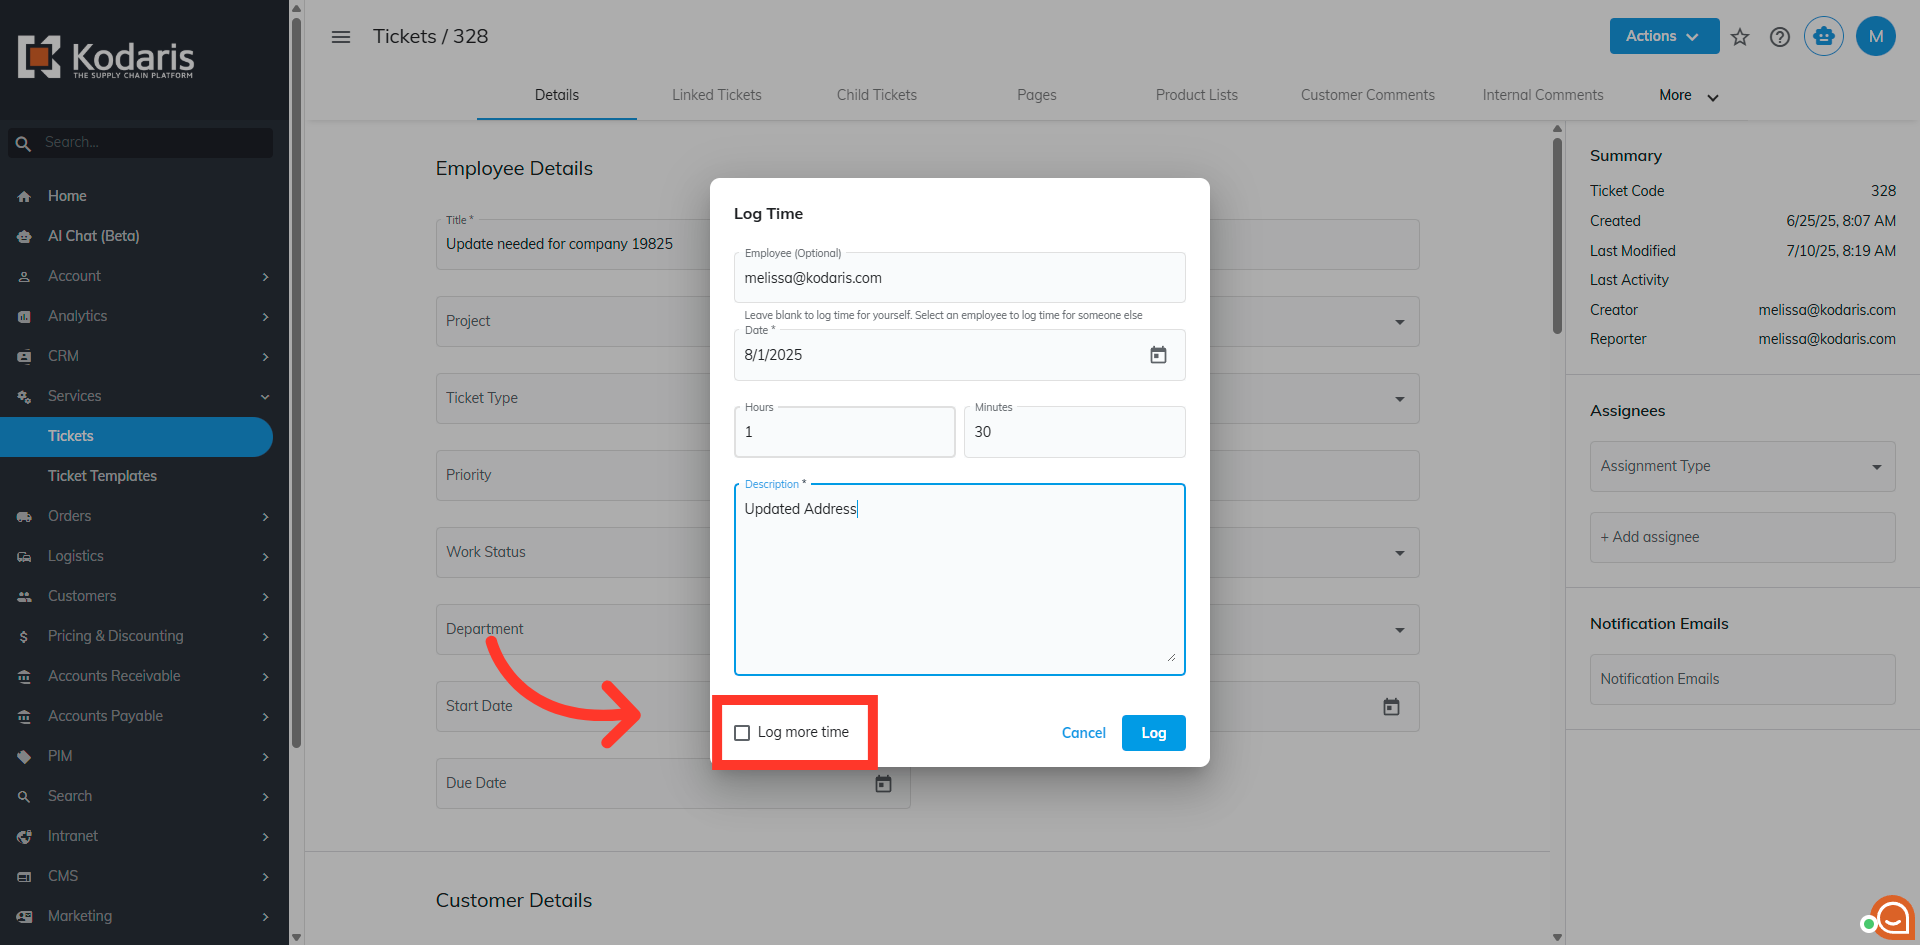
Once done, save the logged time by clicking on the "Log" button.

You will see a "Success! Your time has been logged." message when it has been logged to the ticket.
