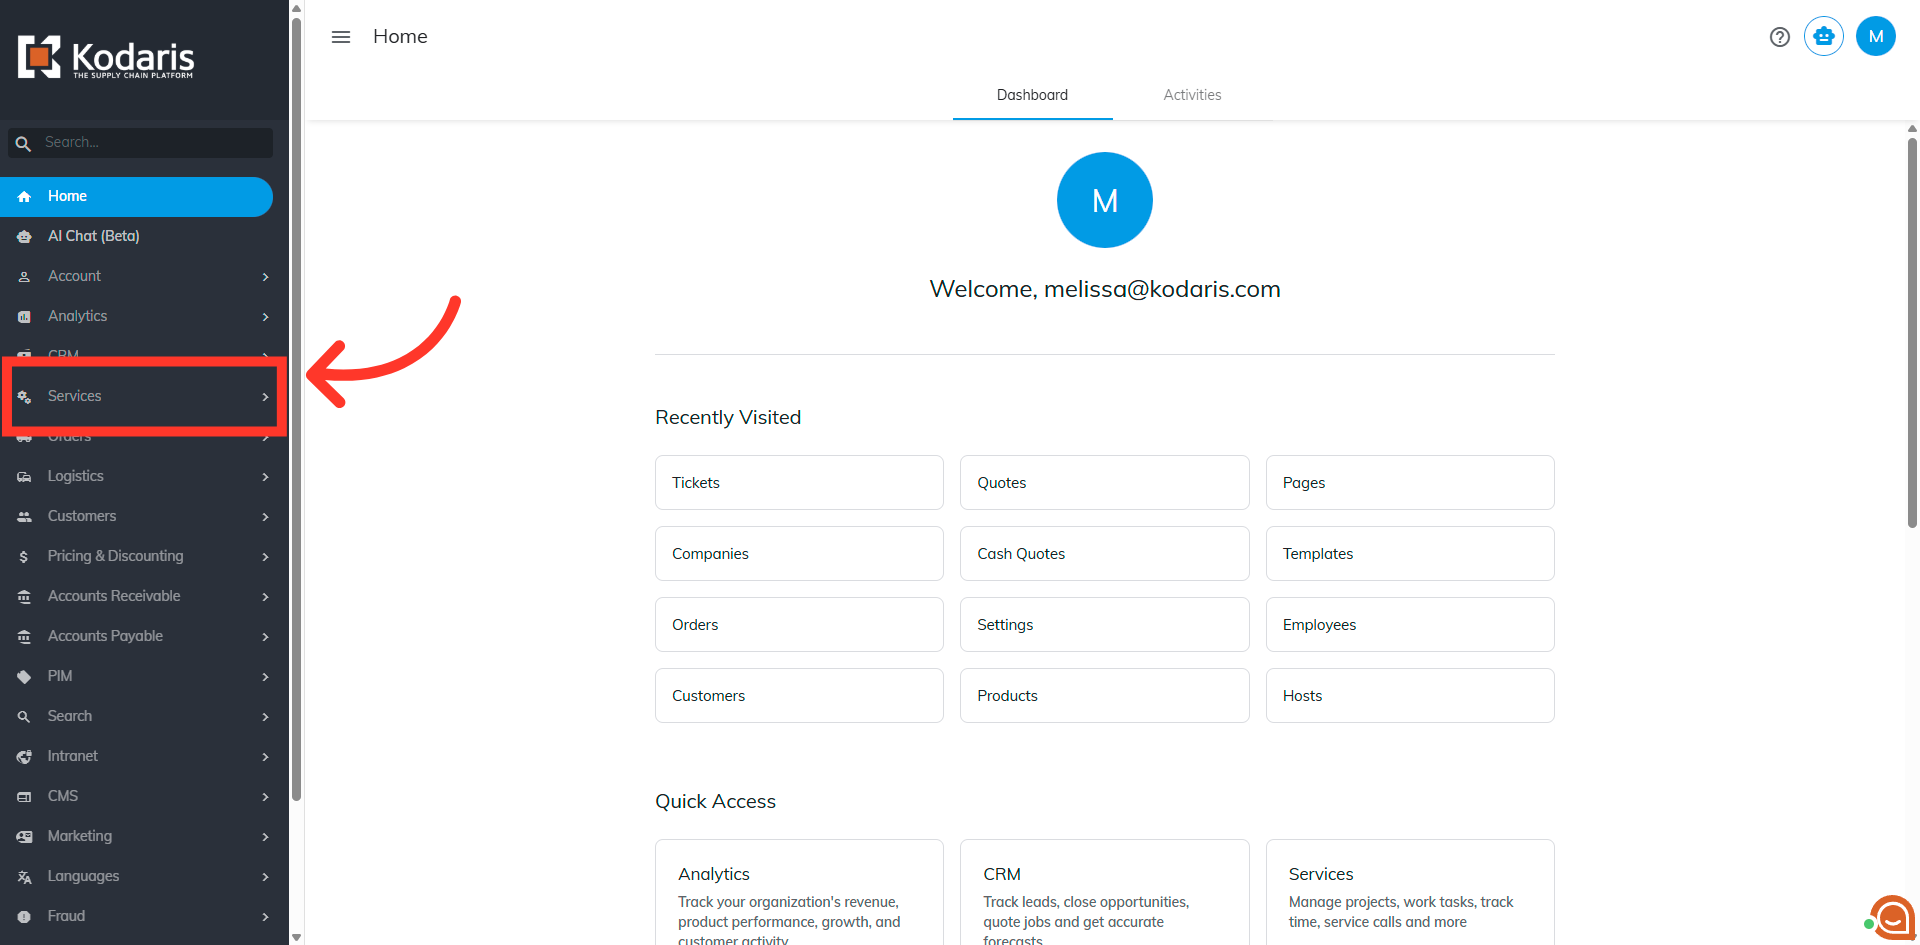
To assign a ticket to a company, navigate to the "Services" section in the Operations Portal.
Then, click "Tickets". In order to access "Tickets" you will need to be set up either as an "administrator" or a "superuser", or have the appropriate roles: "ticketView" and "ticketEdit".

Search for the ticket in the "Search" field.
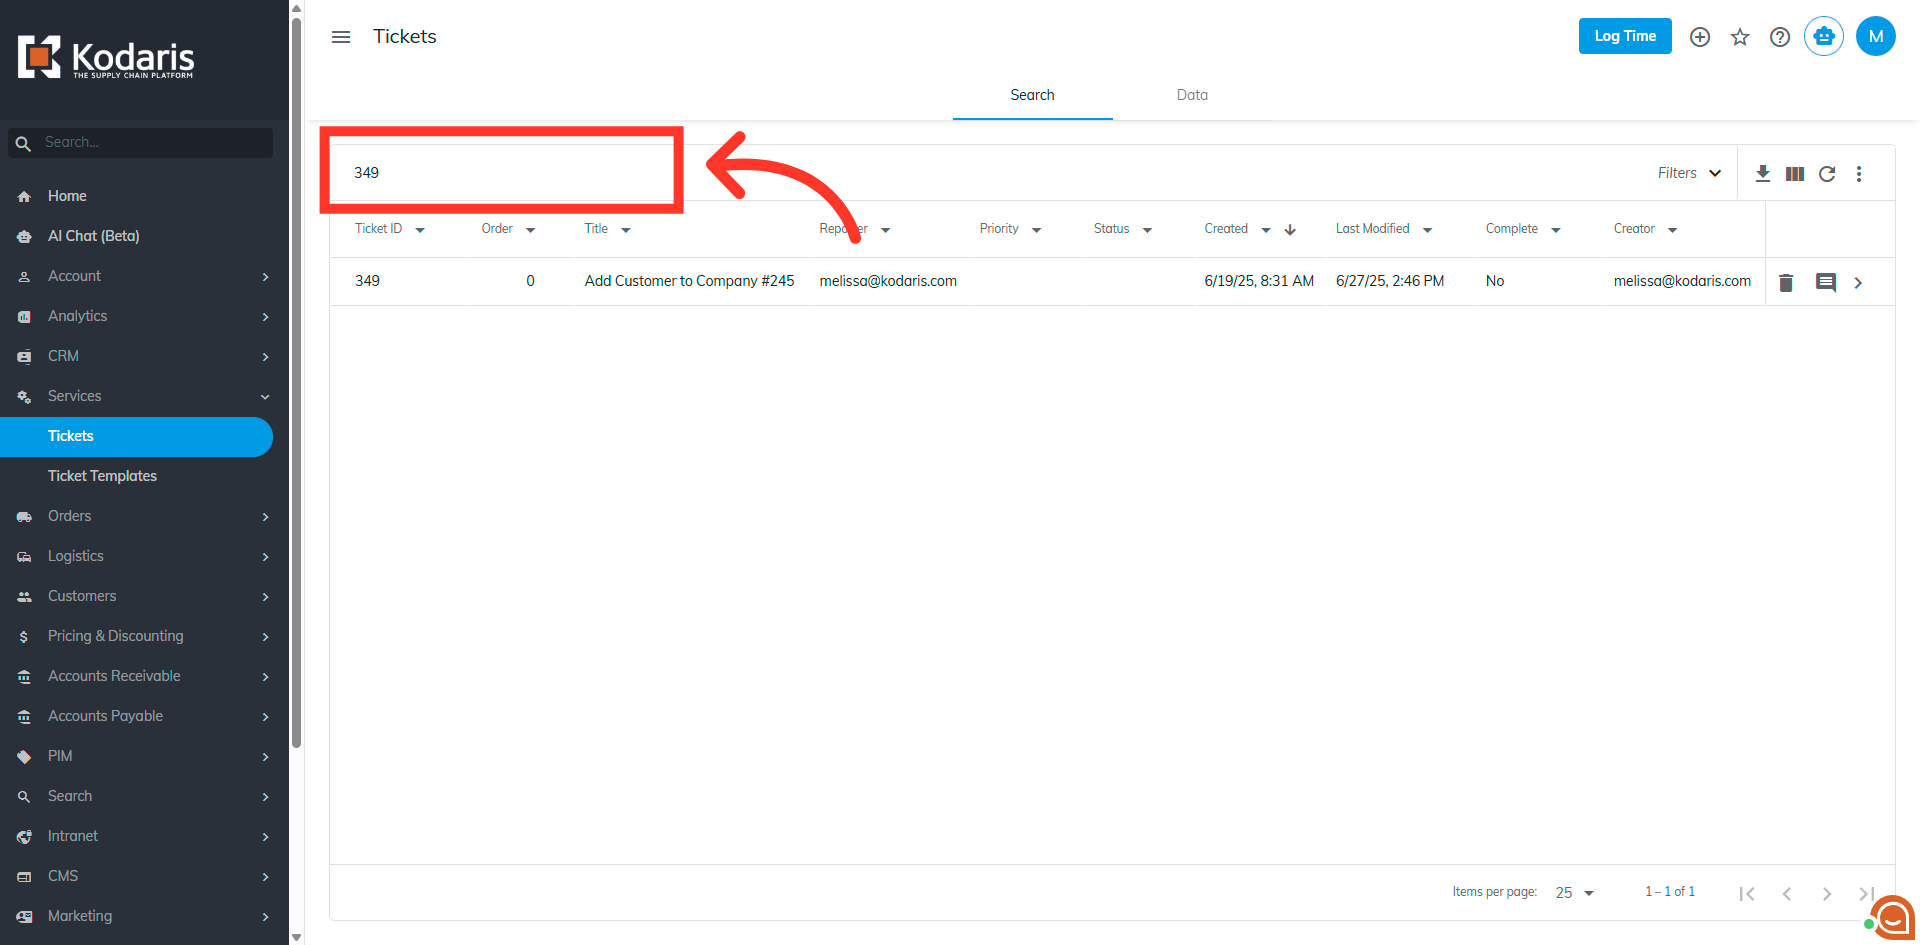
Click the more details icon to go to the ticket's details page.

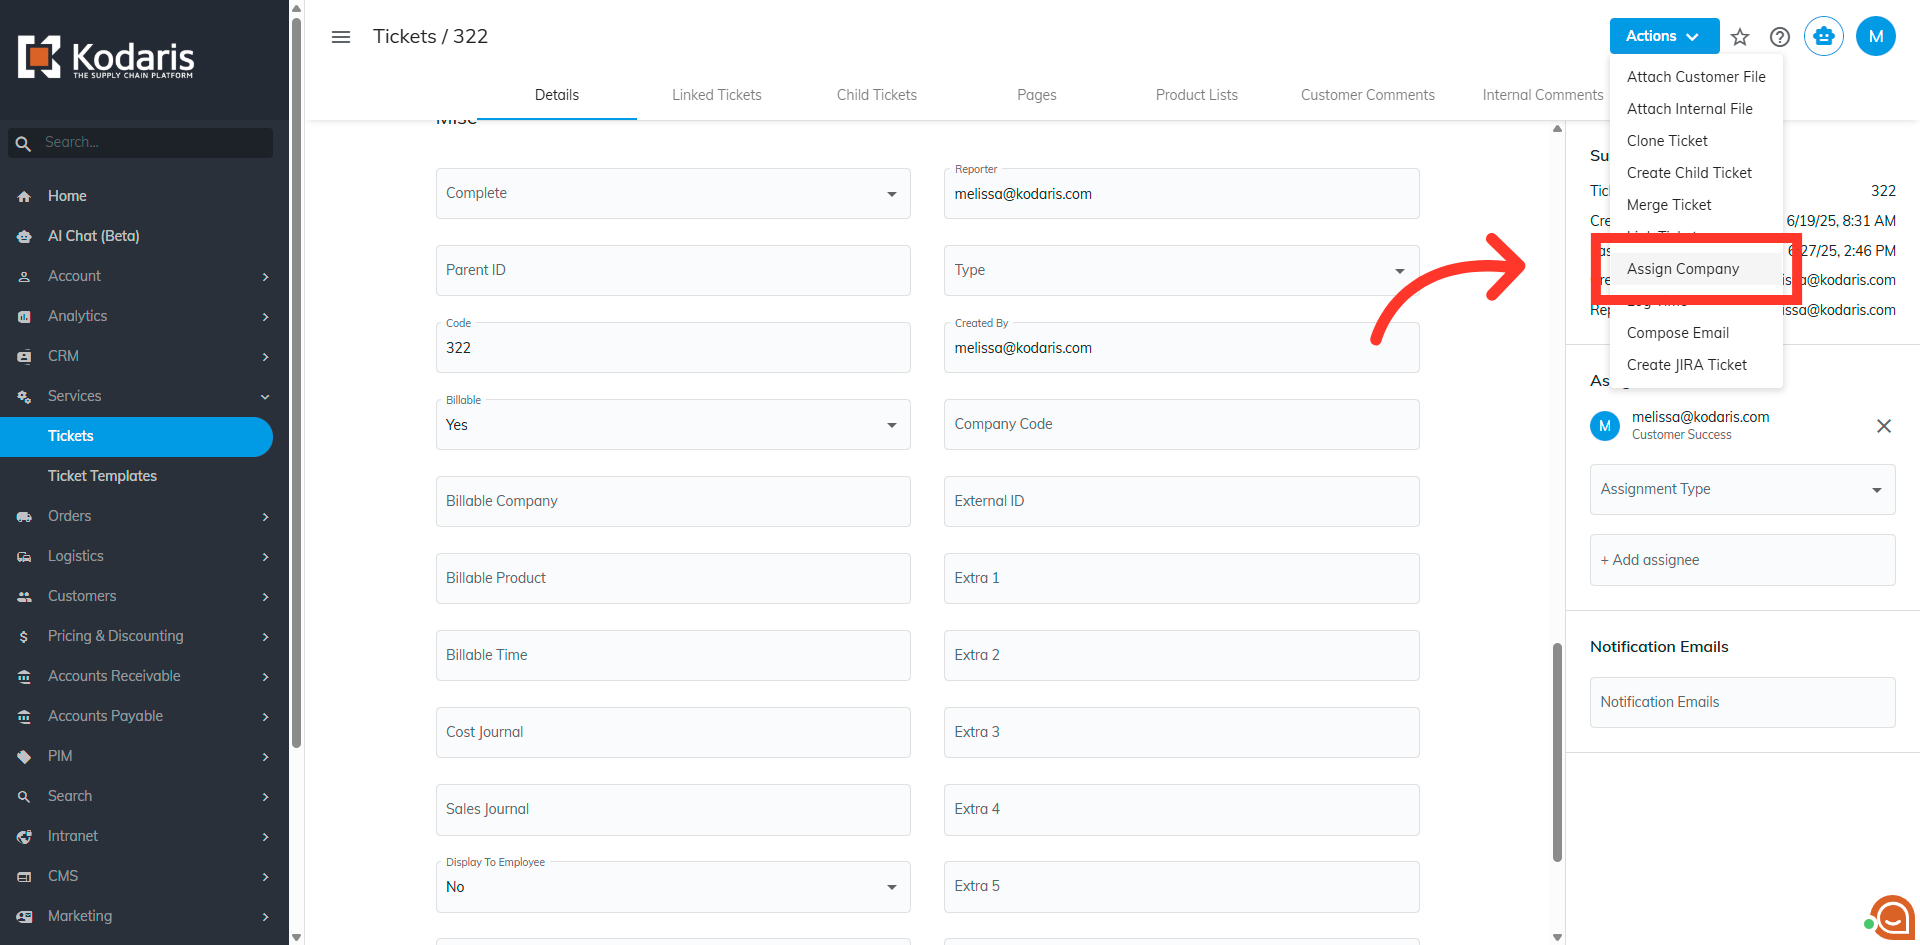
Now, click the "Actions" button.

Then, select the "Assign Company" option.
Type to search for the company to be assigned here.

Select the company from the list.

Click "Assign" to assign the ticket to the company.

A "The ticket has been assigned successfully" message will appear once successful.

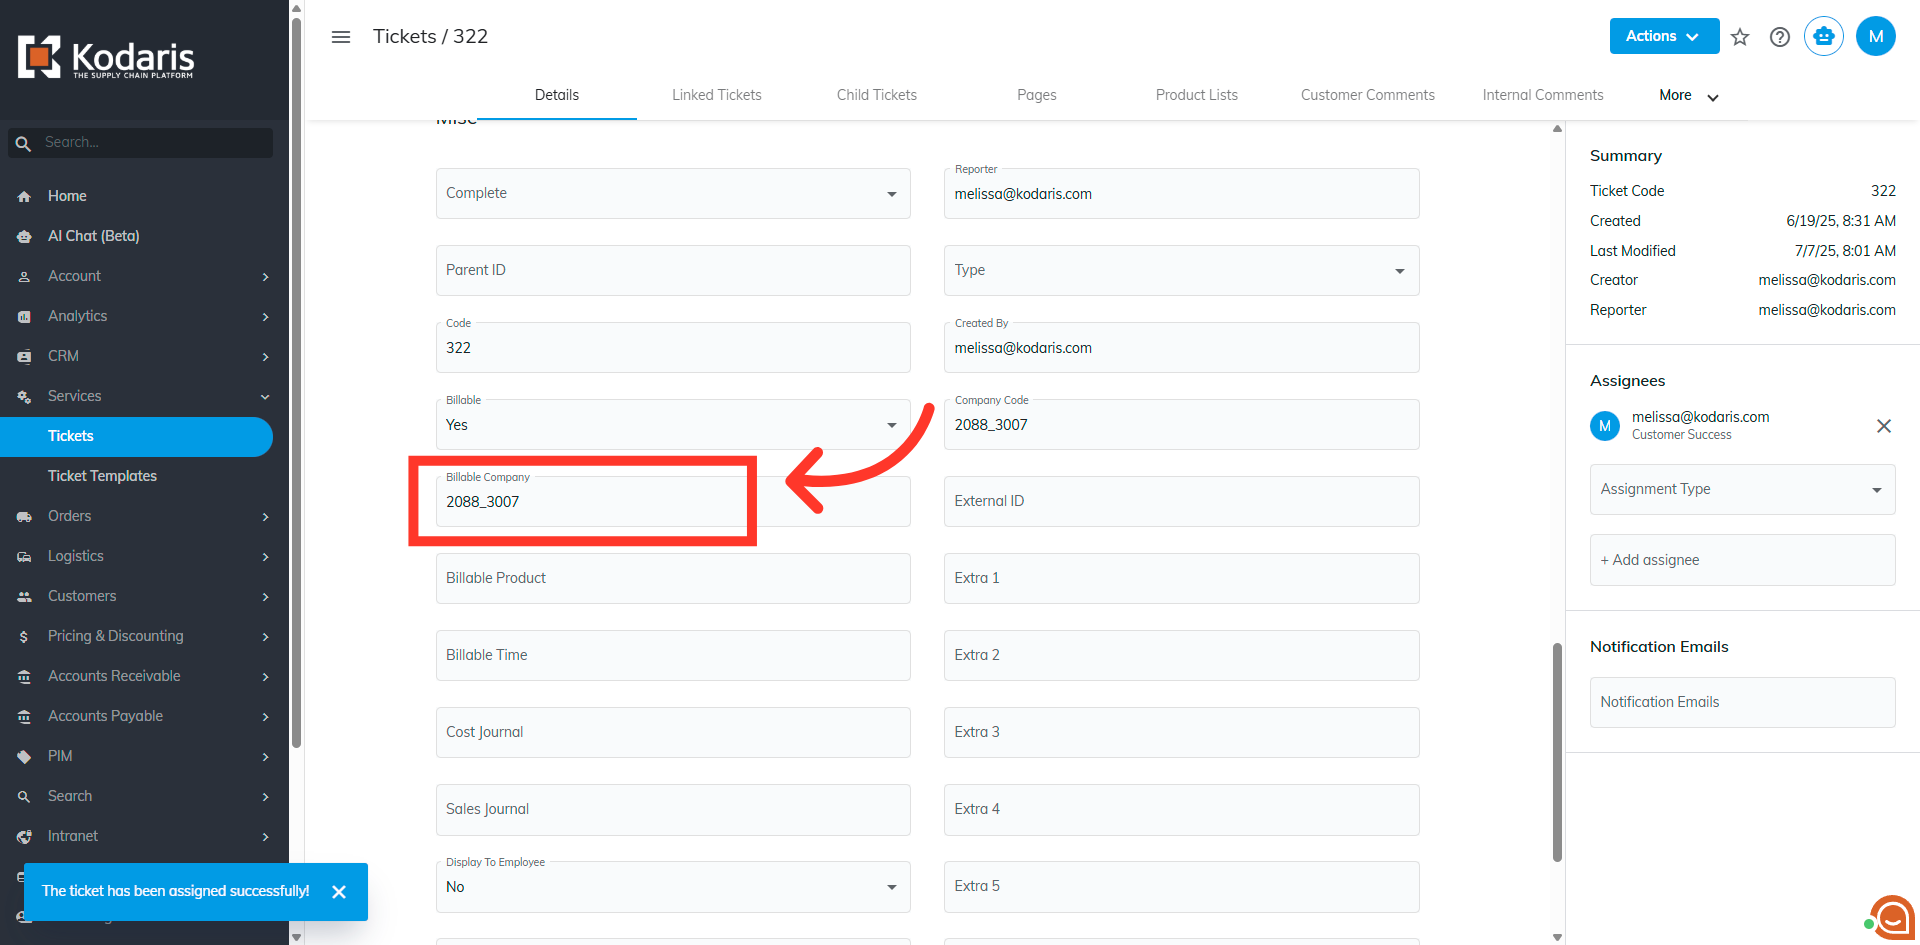
To check, scroll down to the Billable Company field and you will see that the ticket has been assigned to a company.