To add an assignee to a ticket, navigate to the "Services" section in the Operations Portal.

Then, click "Tickets". In order to access "Tickets" you will need to be set up either as an "administrator" or a "superuser", or have the appropriate roles: "ticketView" and "ticketEdit".

Look for a specific ticket in the "Search" field.

Click the more details icon to go to the details page of the ticket.

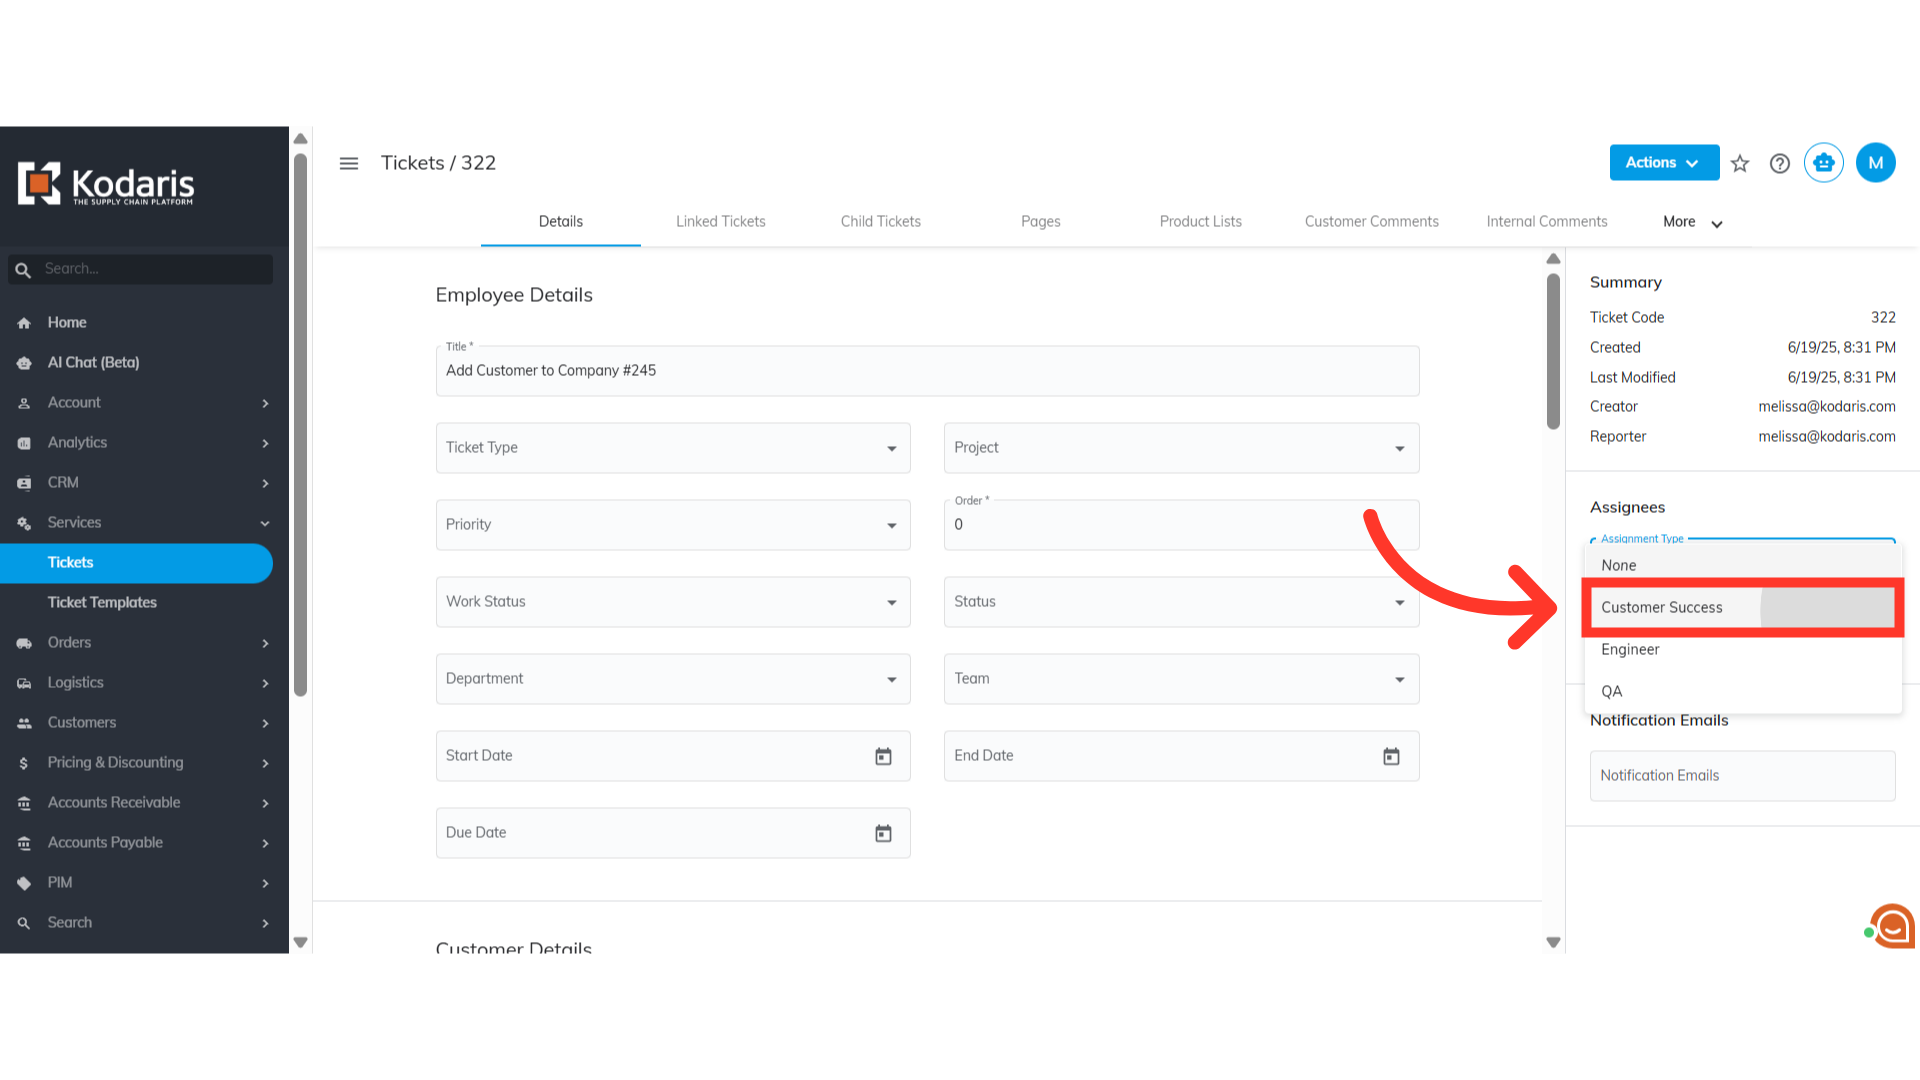
Look for the Assignees section and click the "Assignment Type" dropdown.

Here, you can select the assignment type of the assignee. While the assignee type does not need to be assigned to a user, it can be helpful with tracking tasks and statuses. If you are assigning a type, this needs to be done before assigning the ticket to a user.
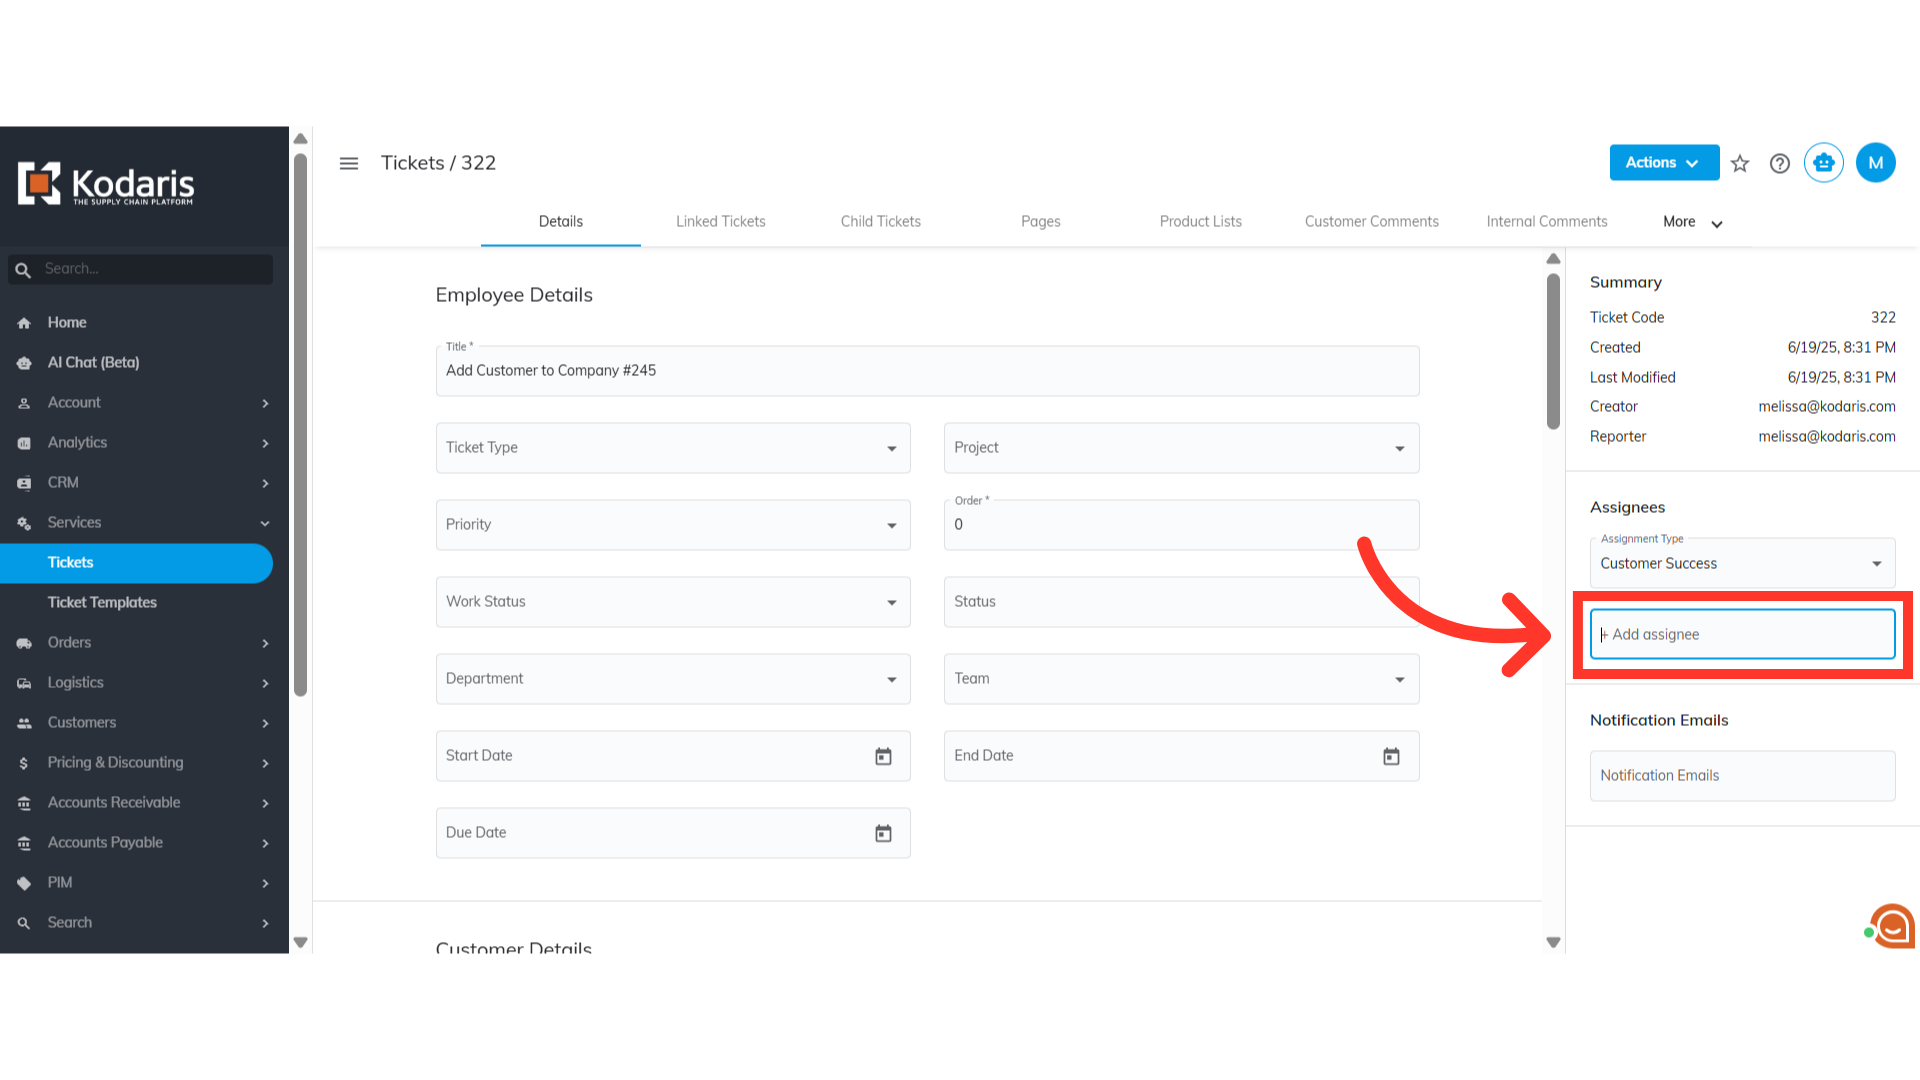
Next, click the "+Add assignee" field.
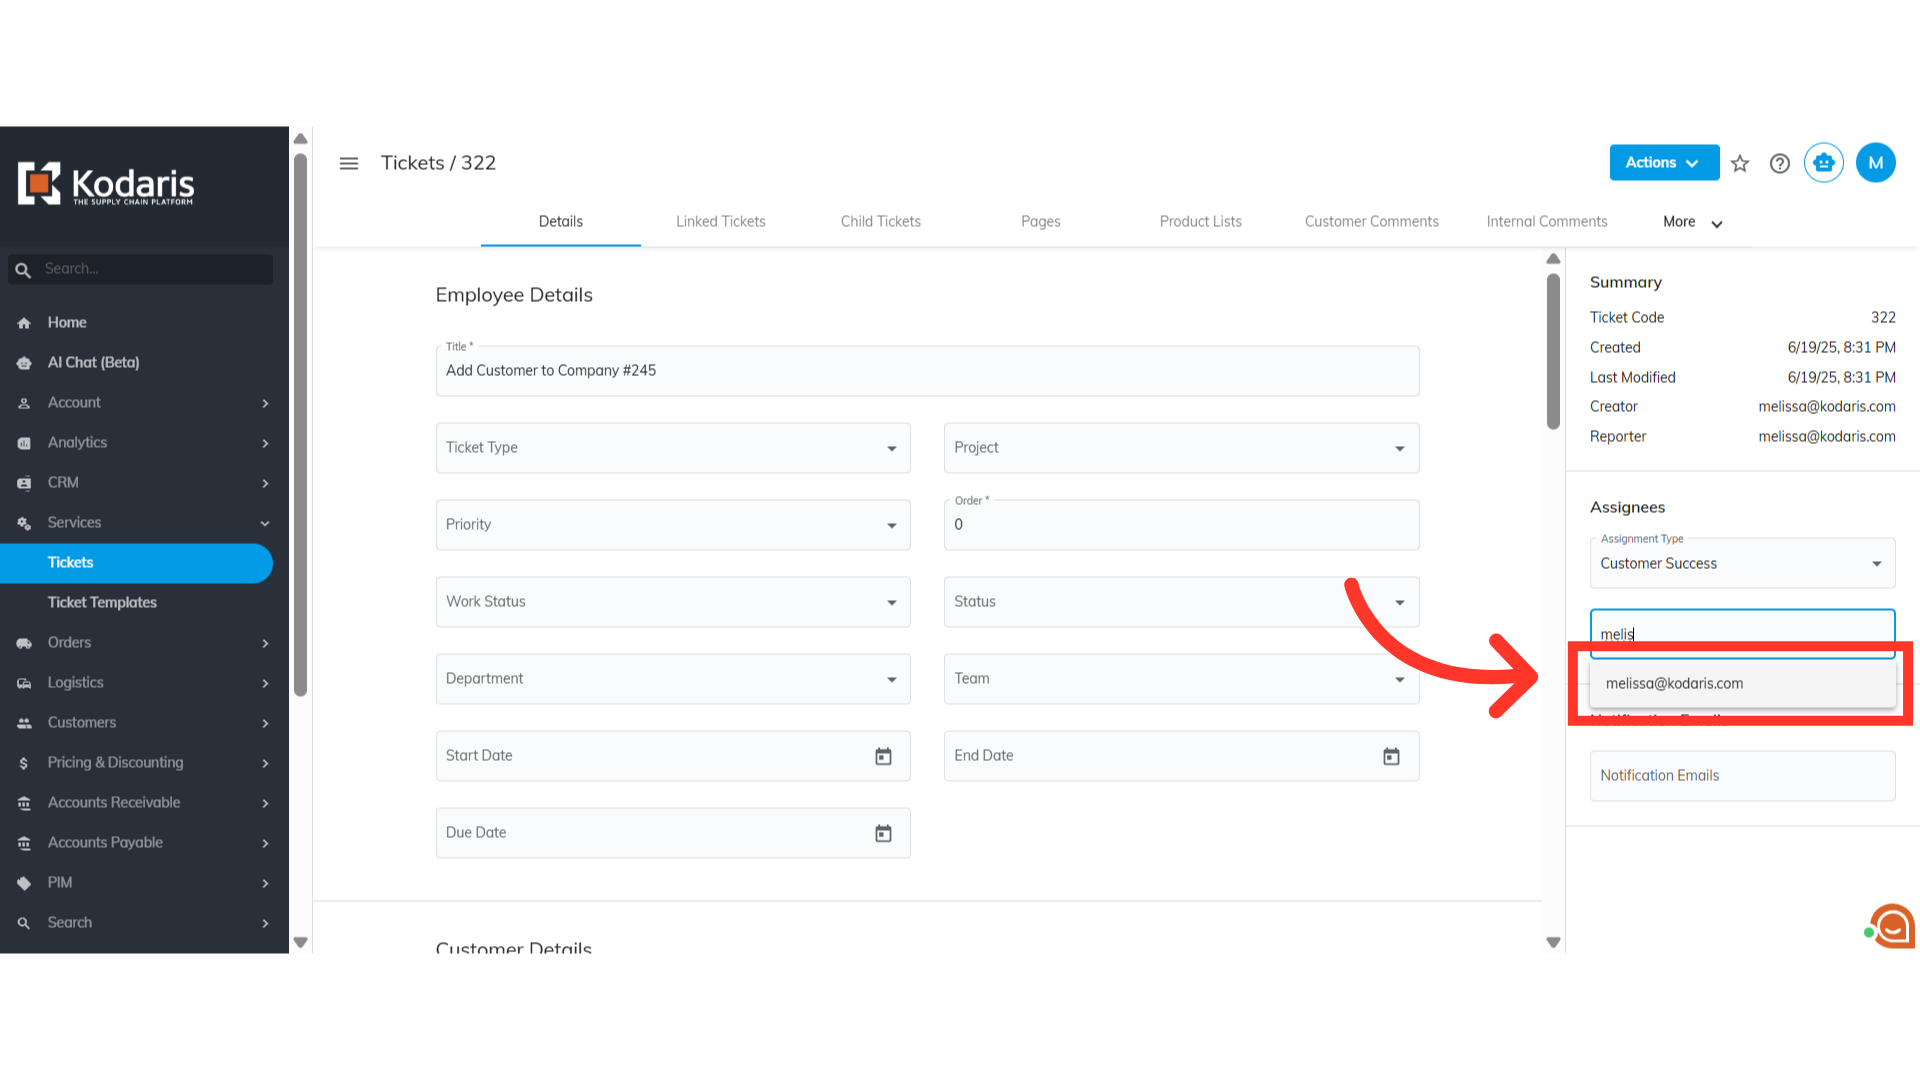
Search for the assignee here. You can type in the name of the assignee you would like to assign.

Select the assignee from the list.
The assignee has been added to the ticket. You can also assign multiple assignees to a ticket. All assignees who are assigned to a ticket will be listed here.
