To create and update vendor pricing by import, navigate to "Accounts Payable" section of the Operations Portal.
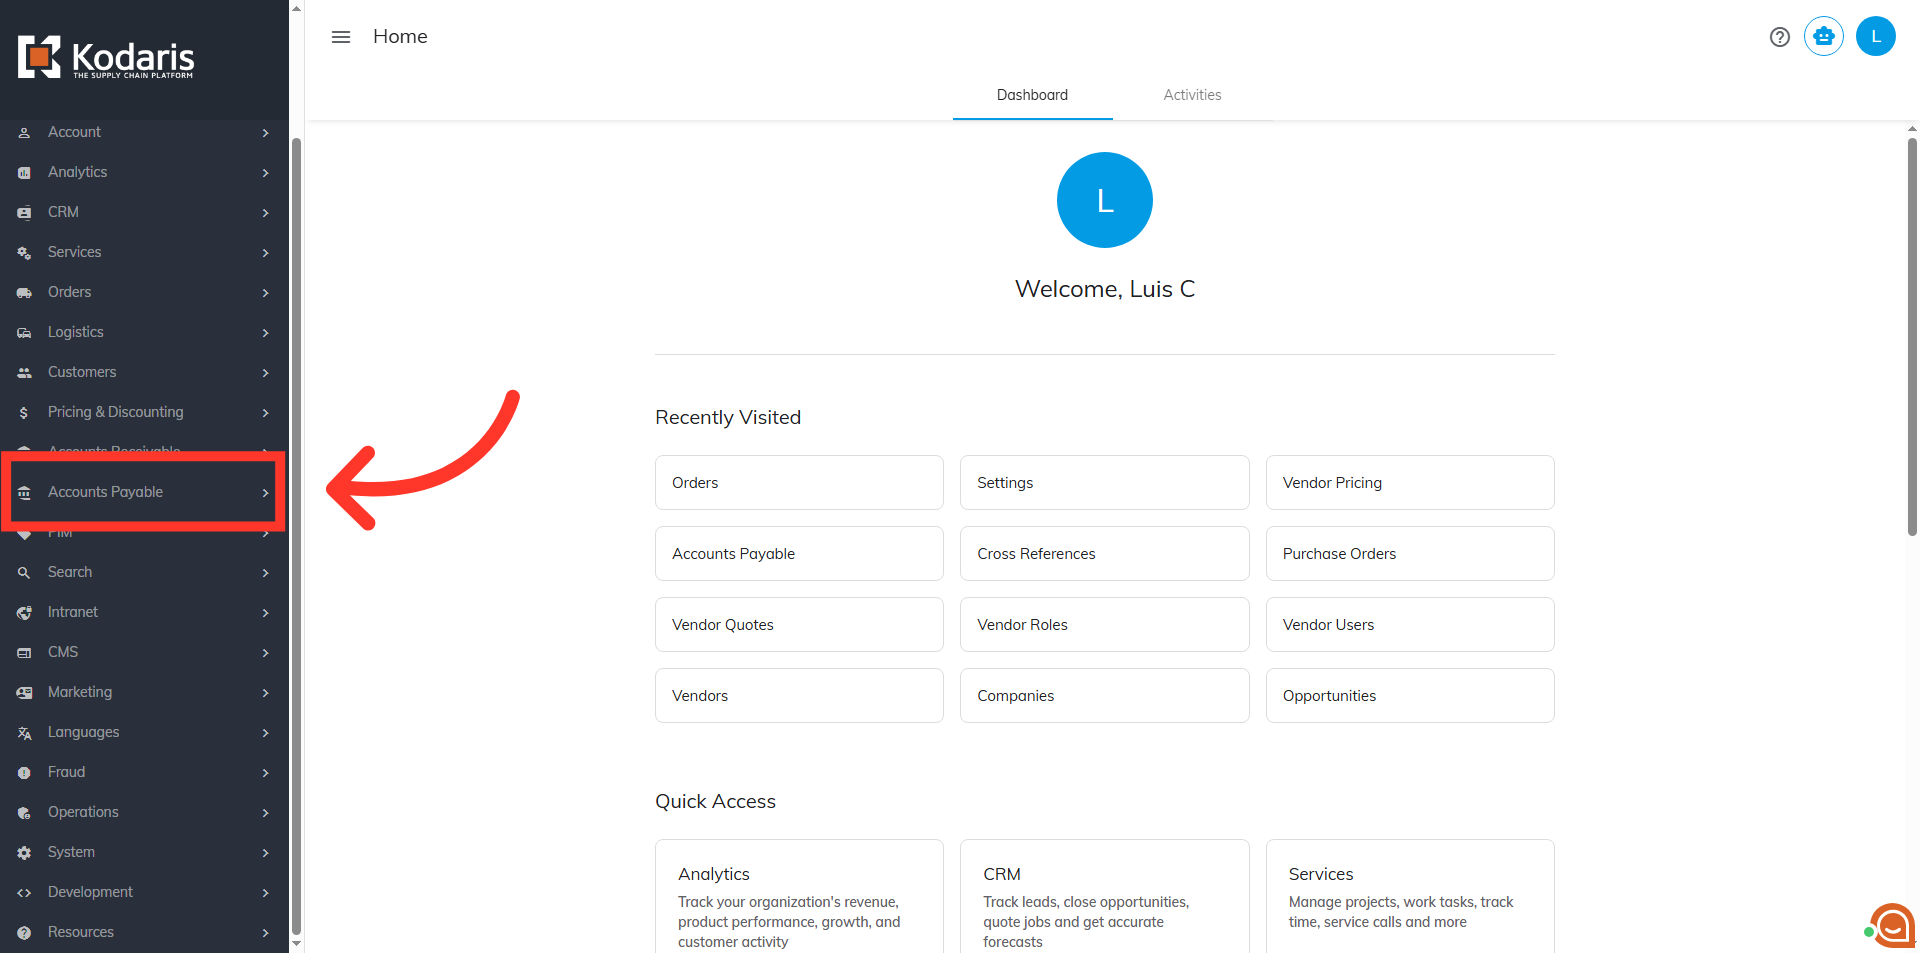
Then, click "Vendor Pricing". In order to access the "Vendor Pricing" screen you will need to be set up either as an "administrator" or a "superuser", or have the appropriate roles: "vendorProductPriceView," and "vendorProductPriceEdit.
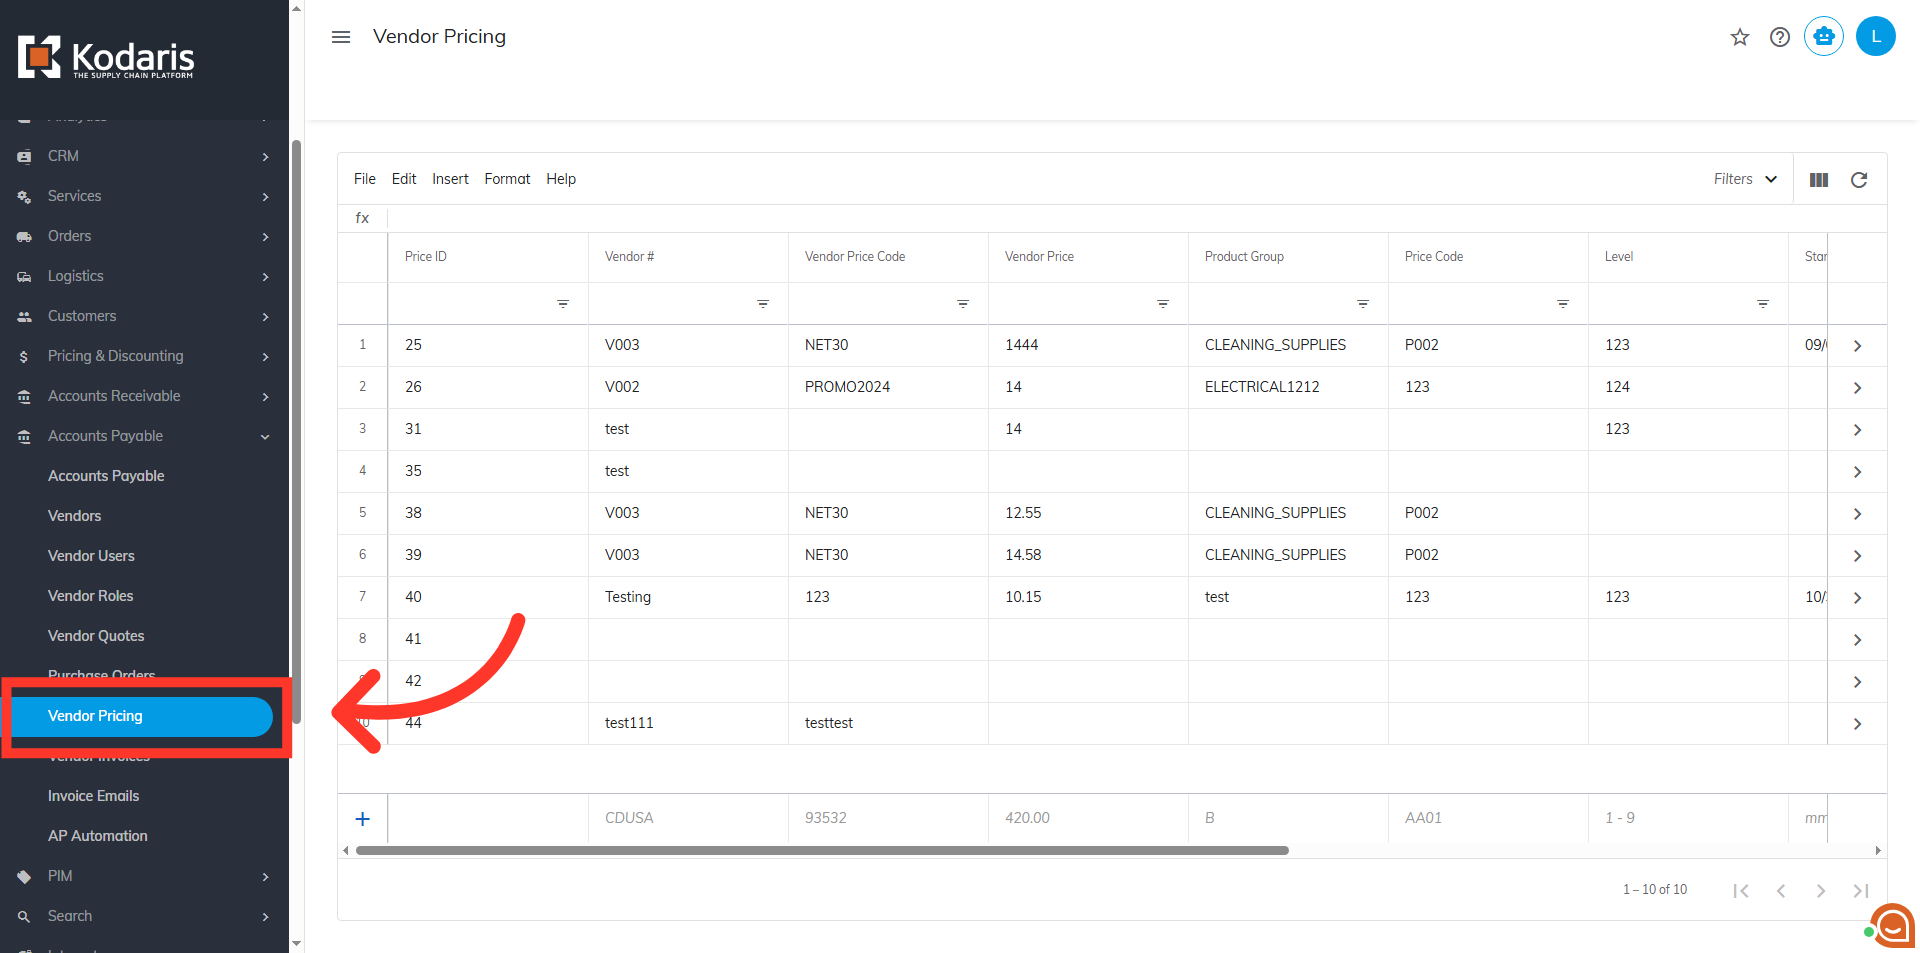
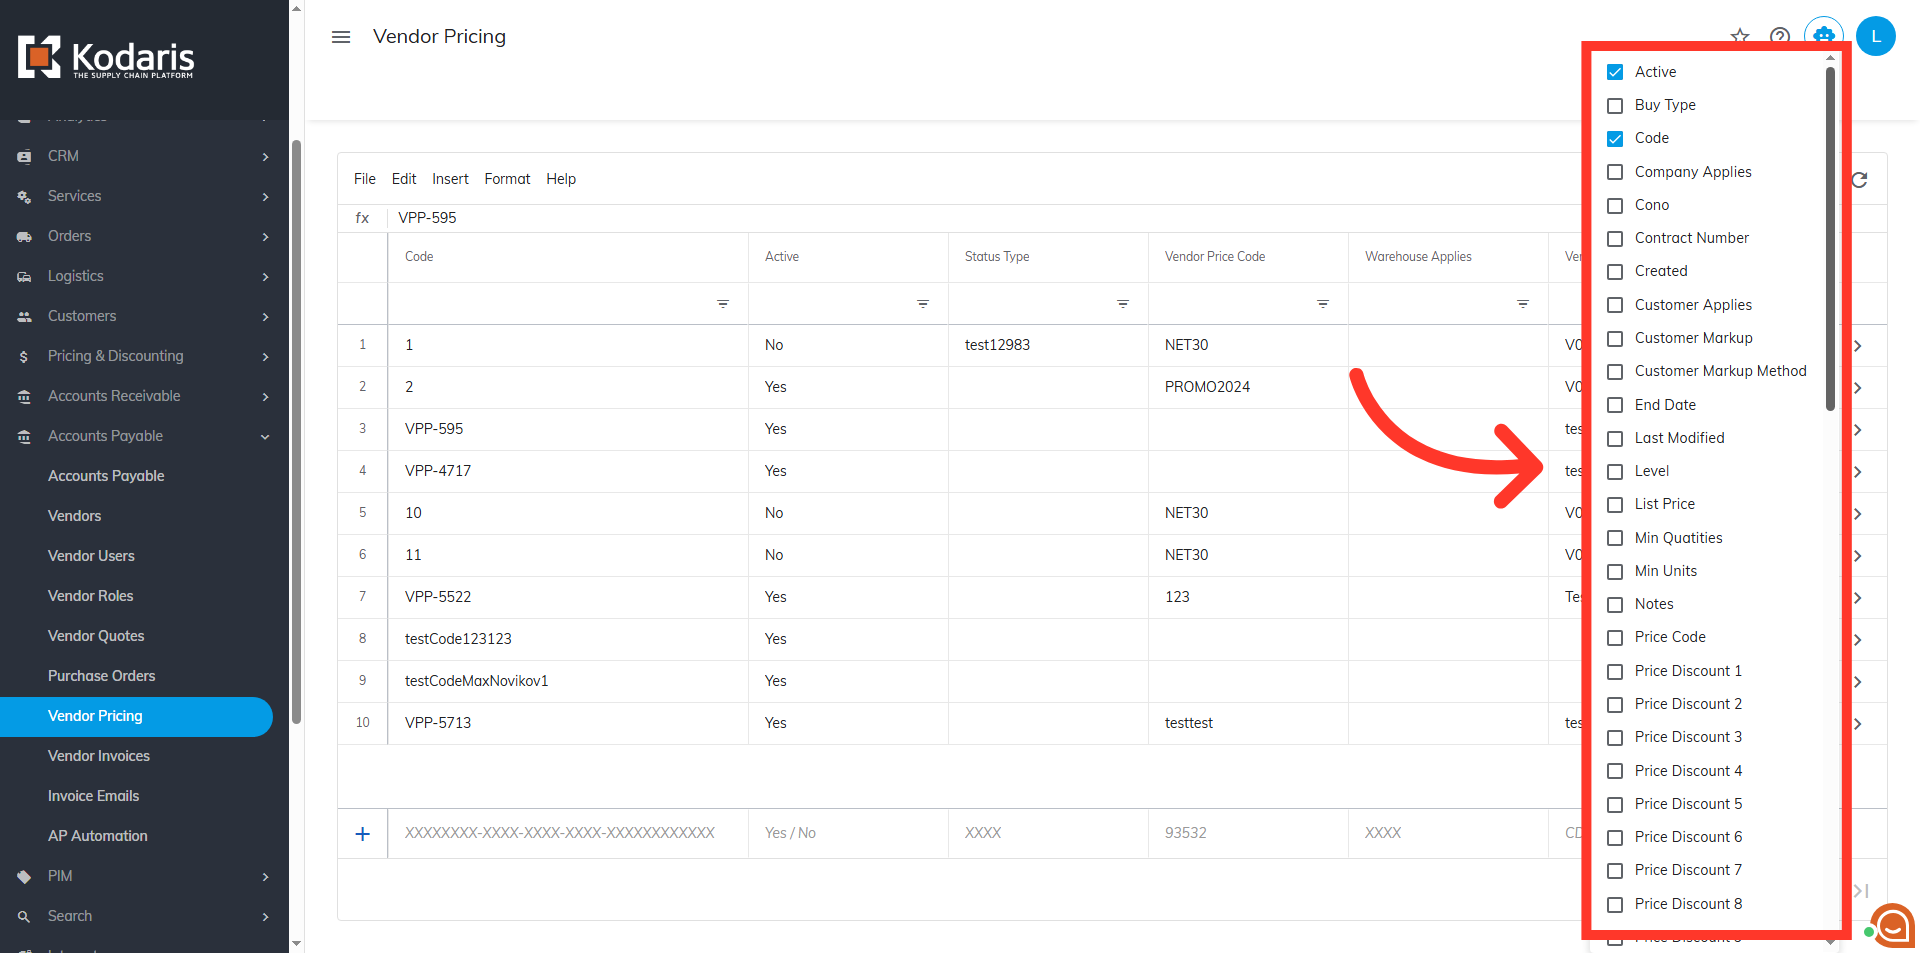
Click the "Show/Hide Columns" icon to add and remove columns from the screen.
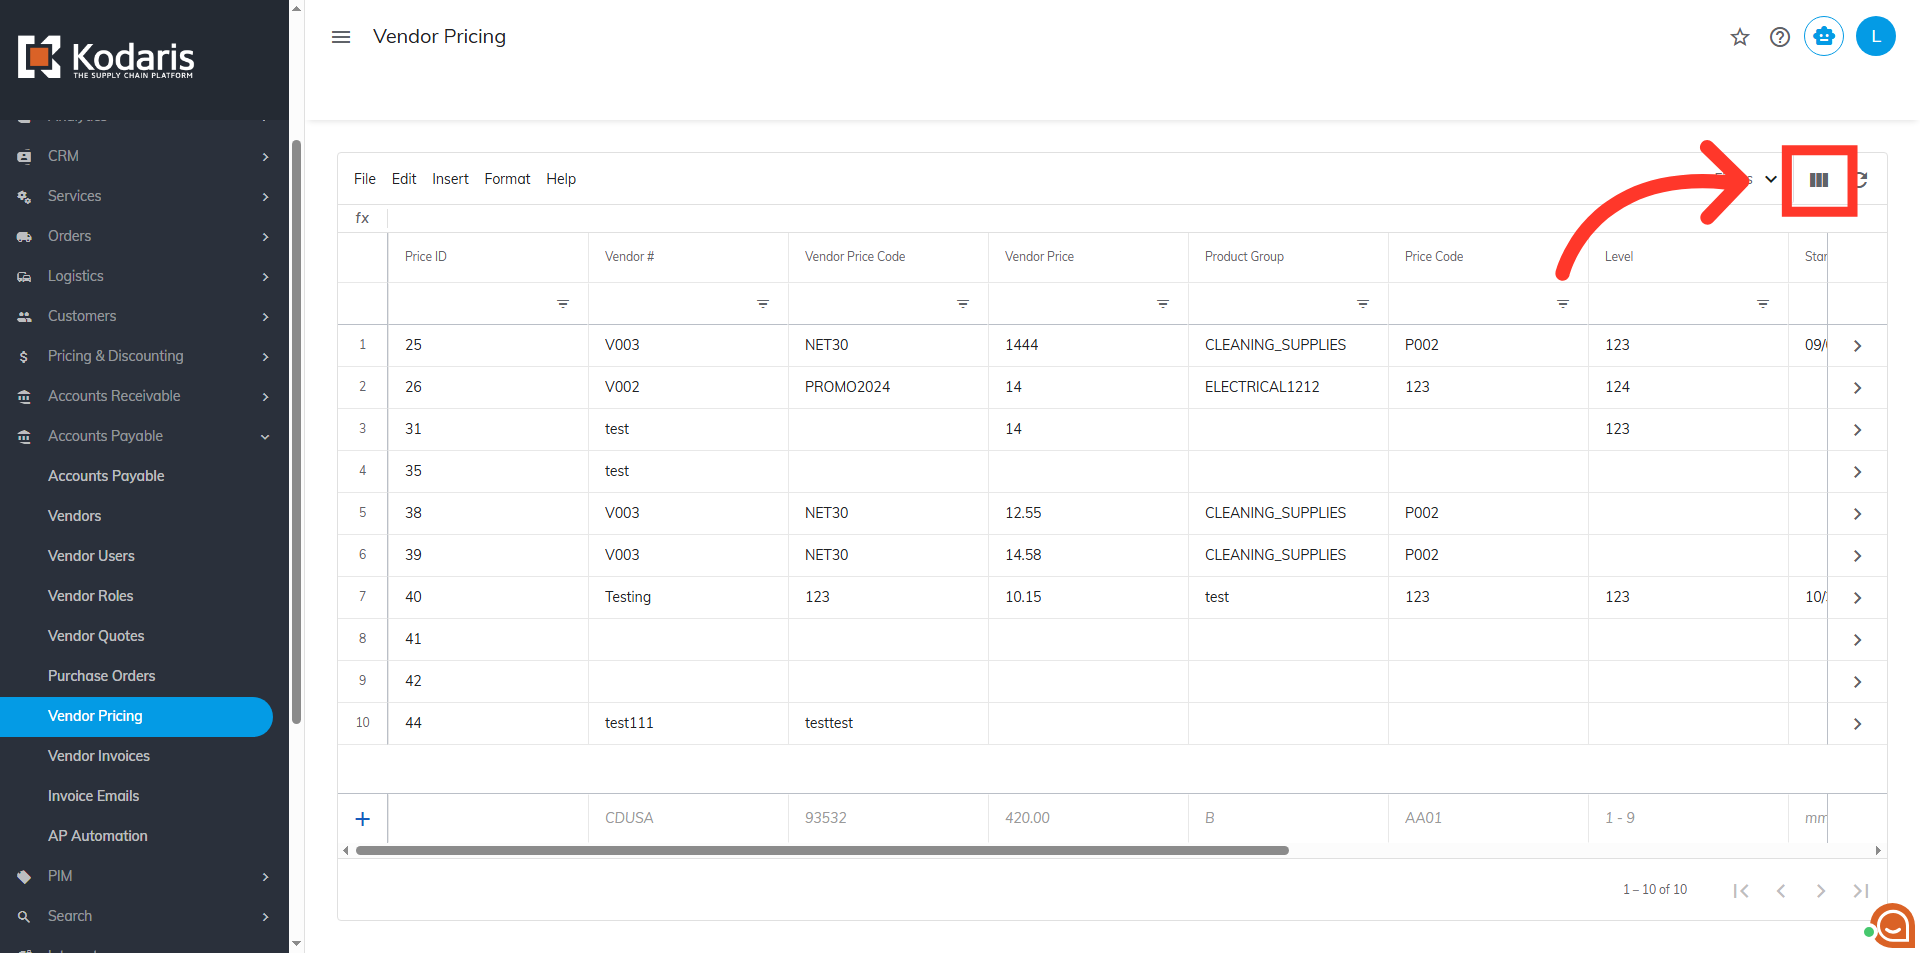
If you would like to export a file that can be used for importing vendor pricing information, you will need the "Code" and "Vendor Price" columns added to the grid. You can also include any other helpful columns if you would like. Uncheck any columns that are not needed to simplify the export file.
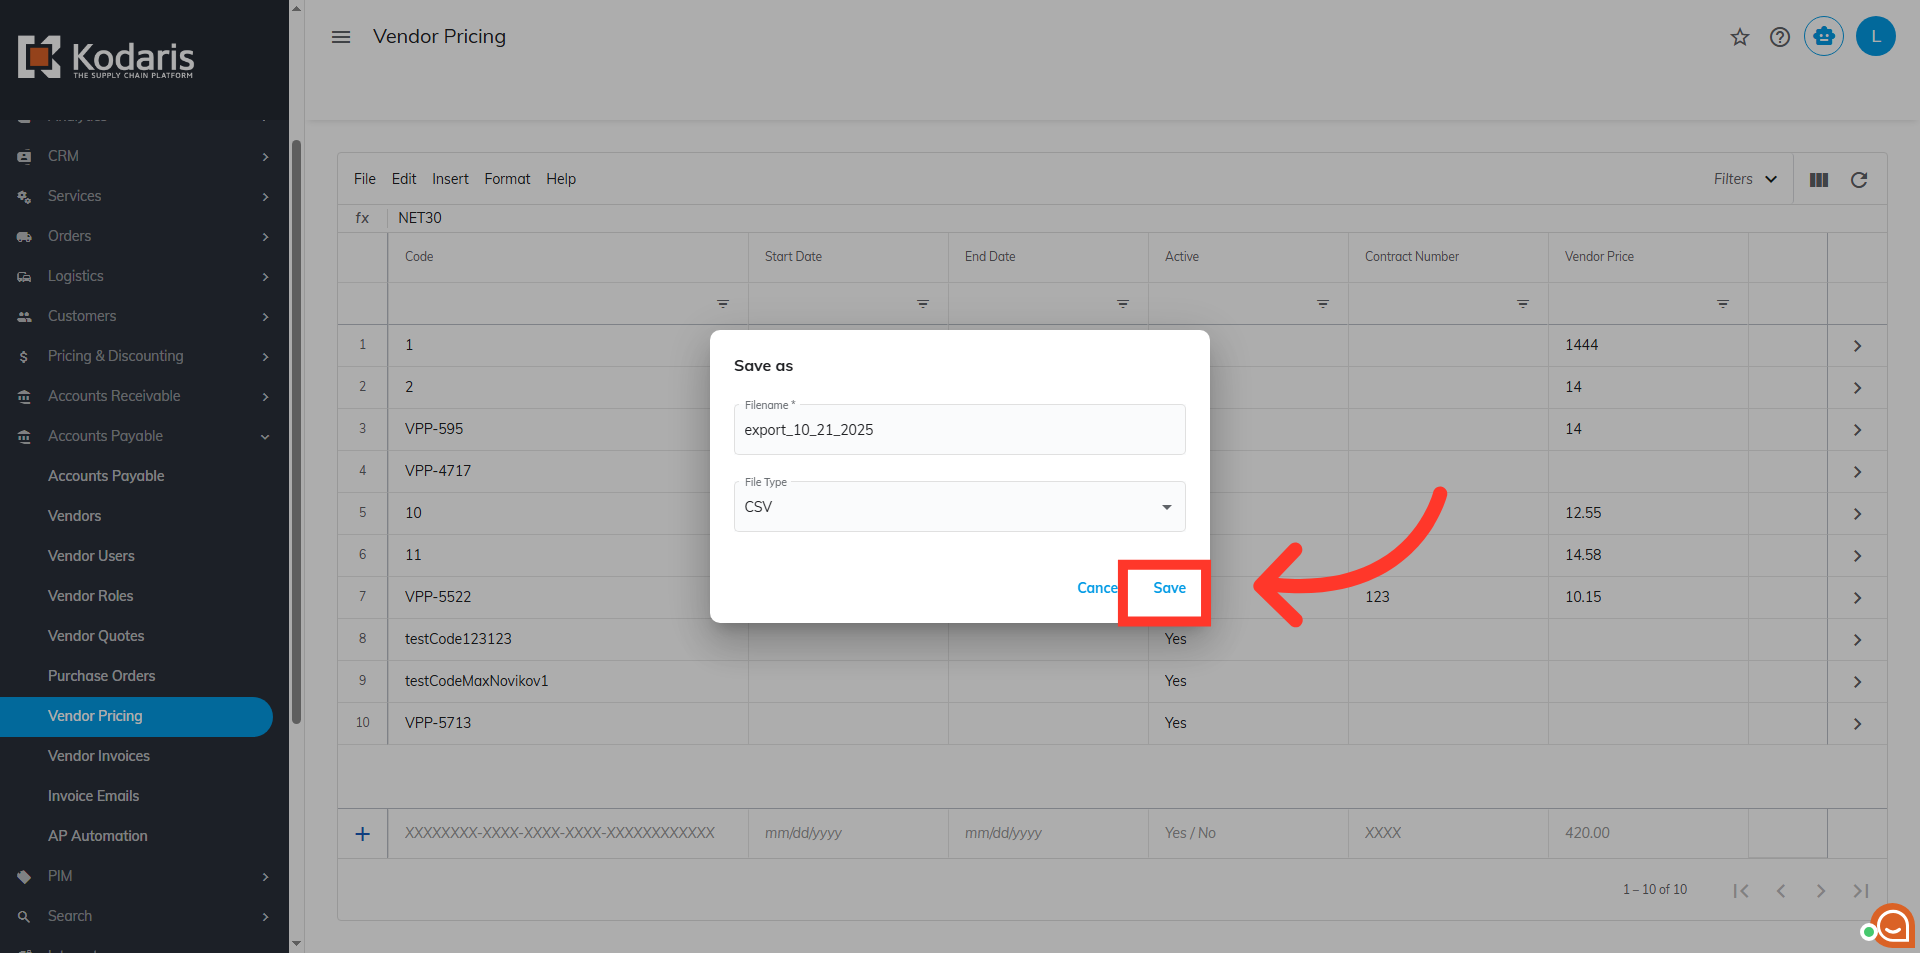
Now, click the "File" menu.
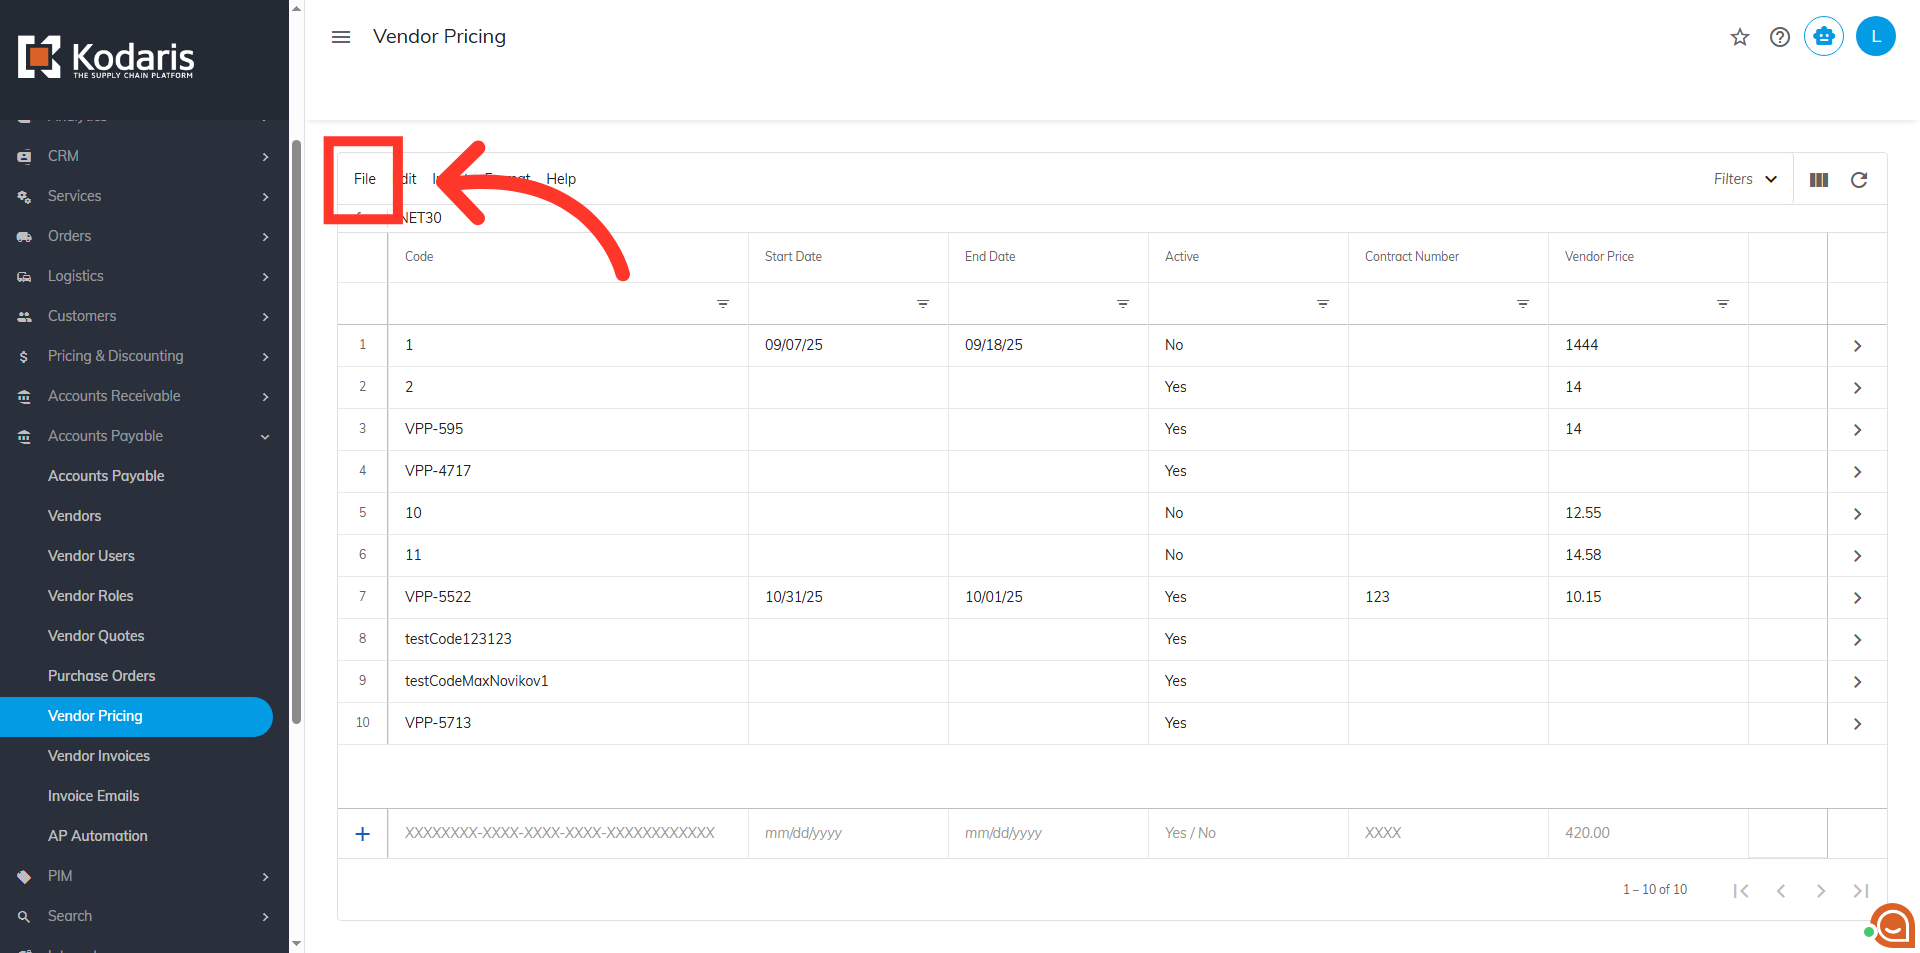
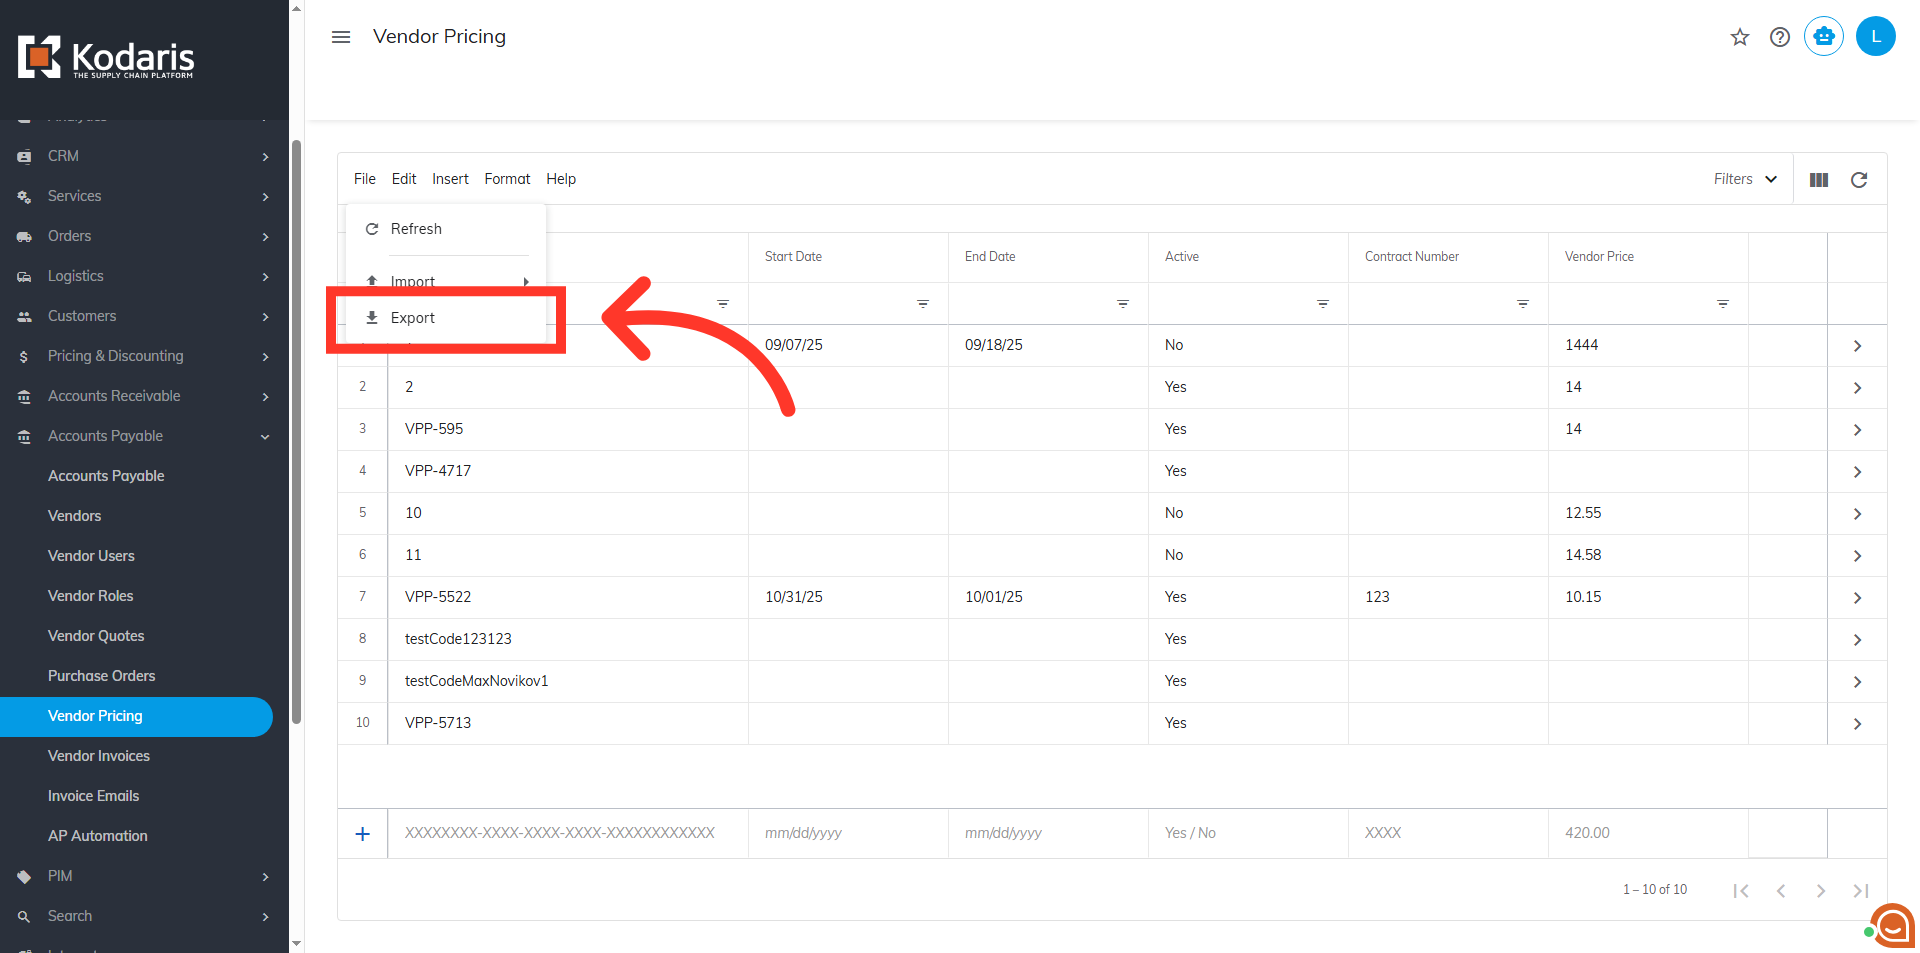
Then, select the "Export" option.
You can rename the file here if preferred.
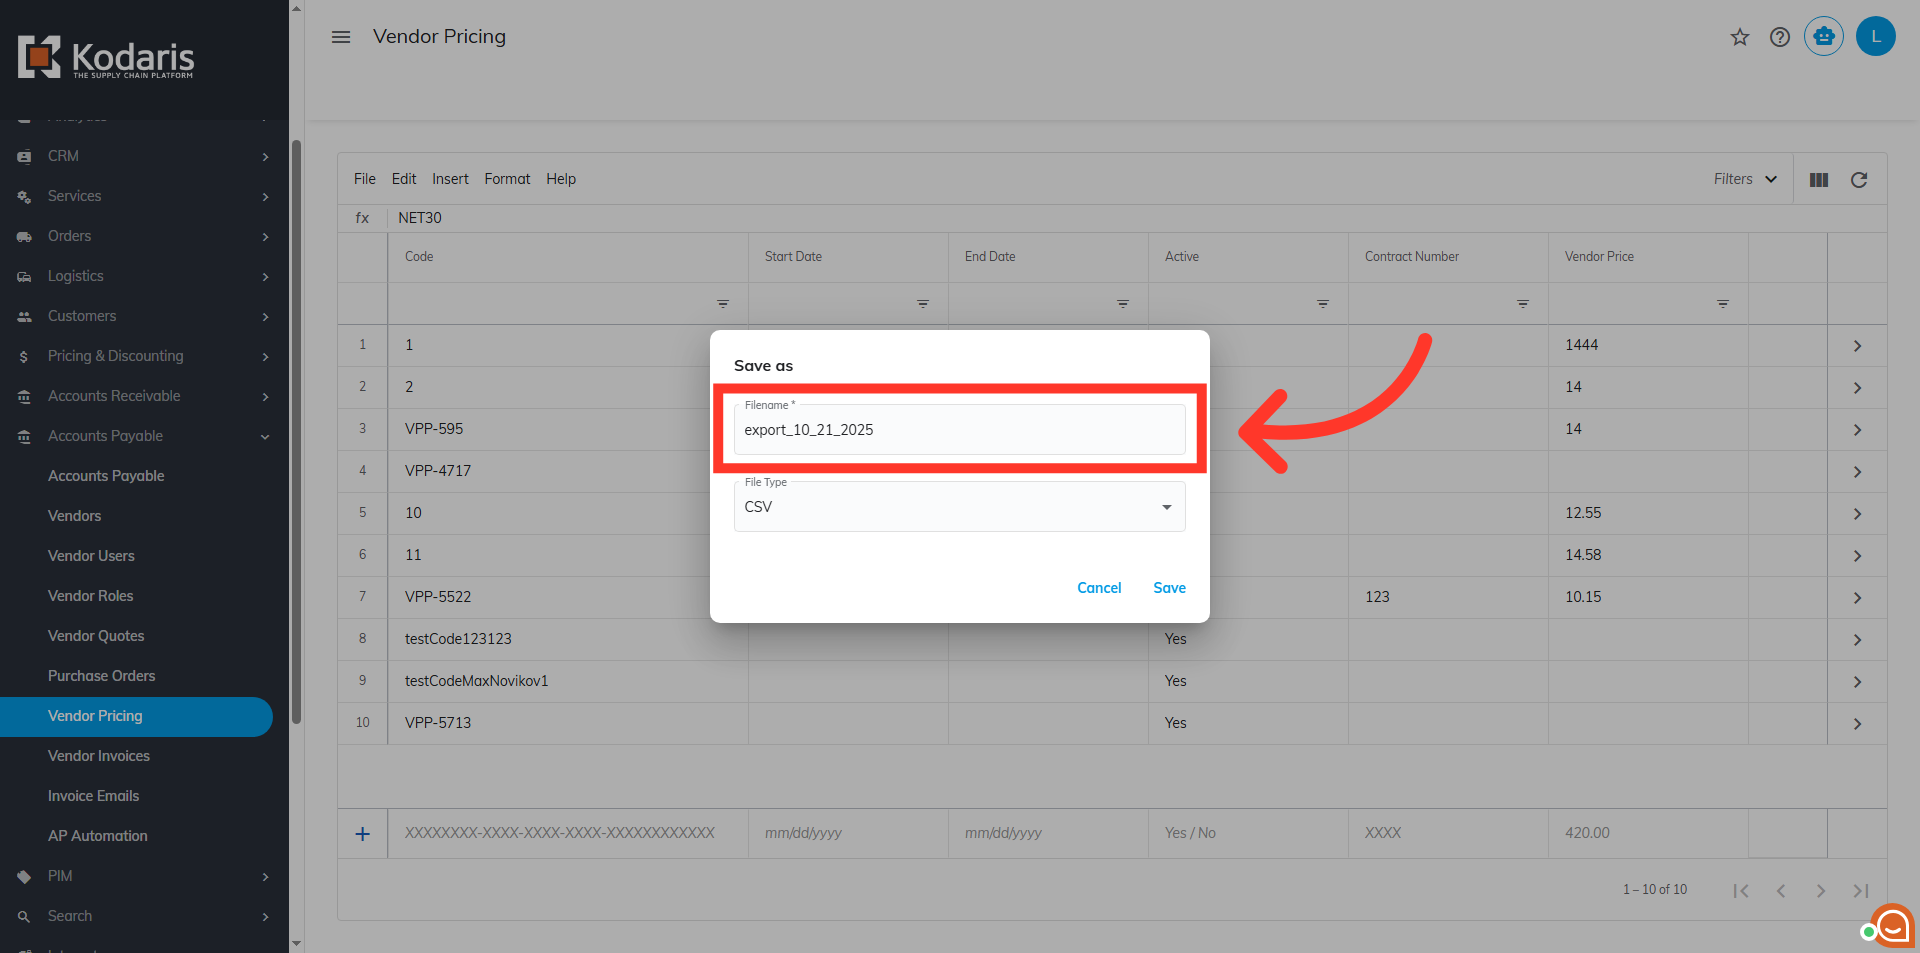
Then, click "Save".
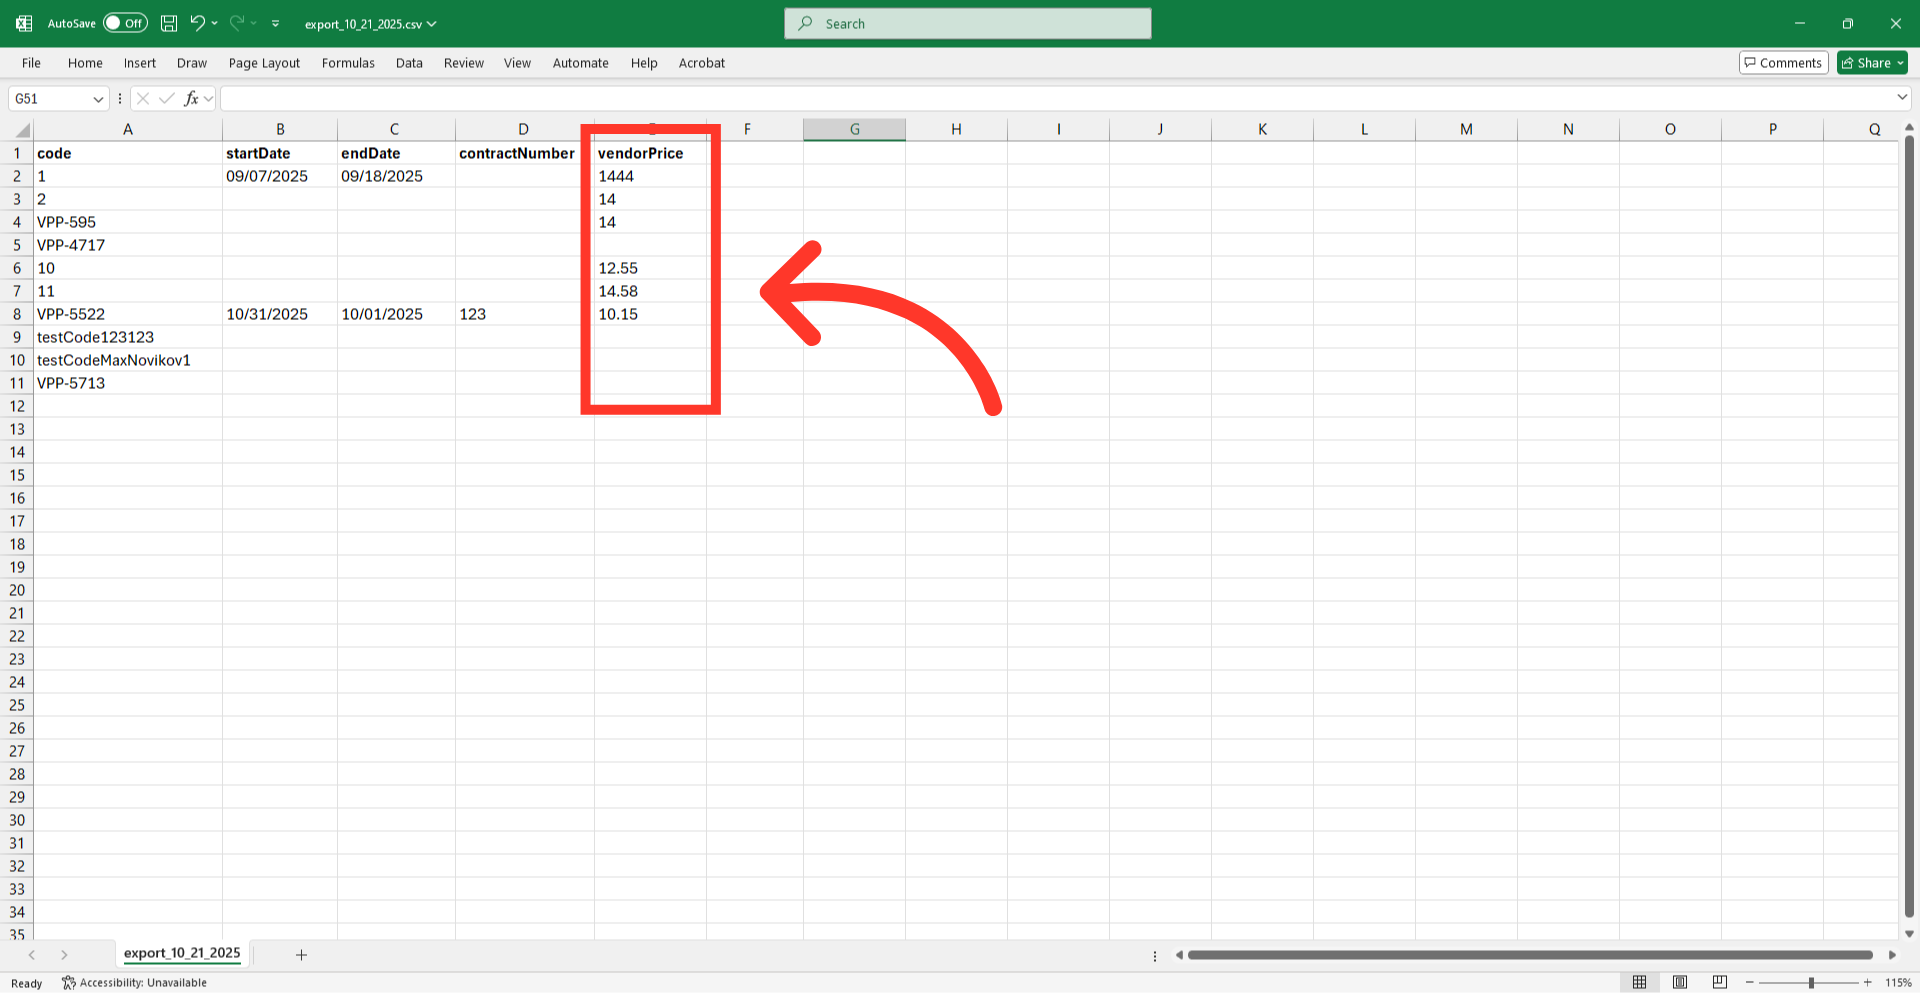
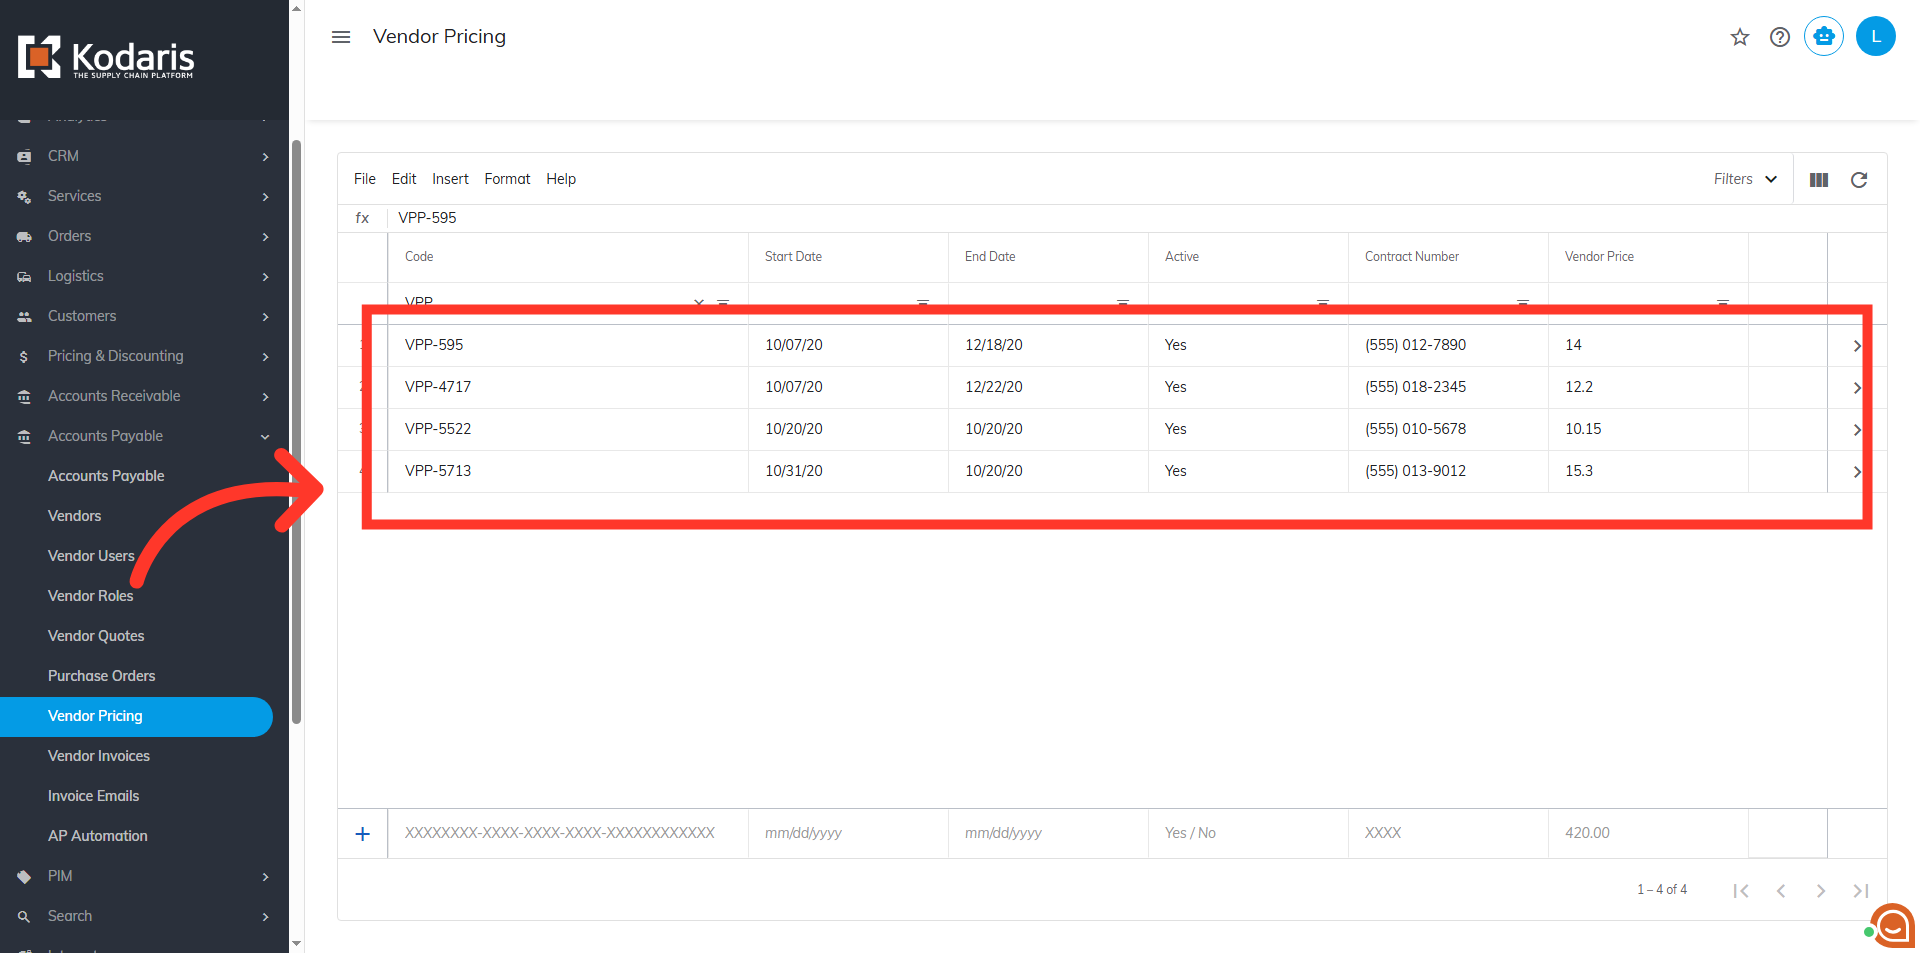
This is an example export showing the header row and other columns. This export can be used as a template for creating or updating vendor pricing.
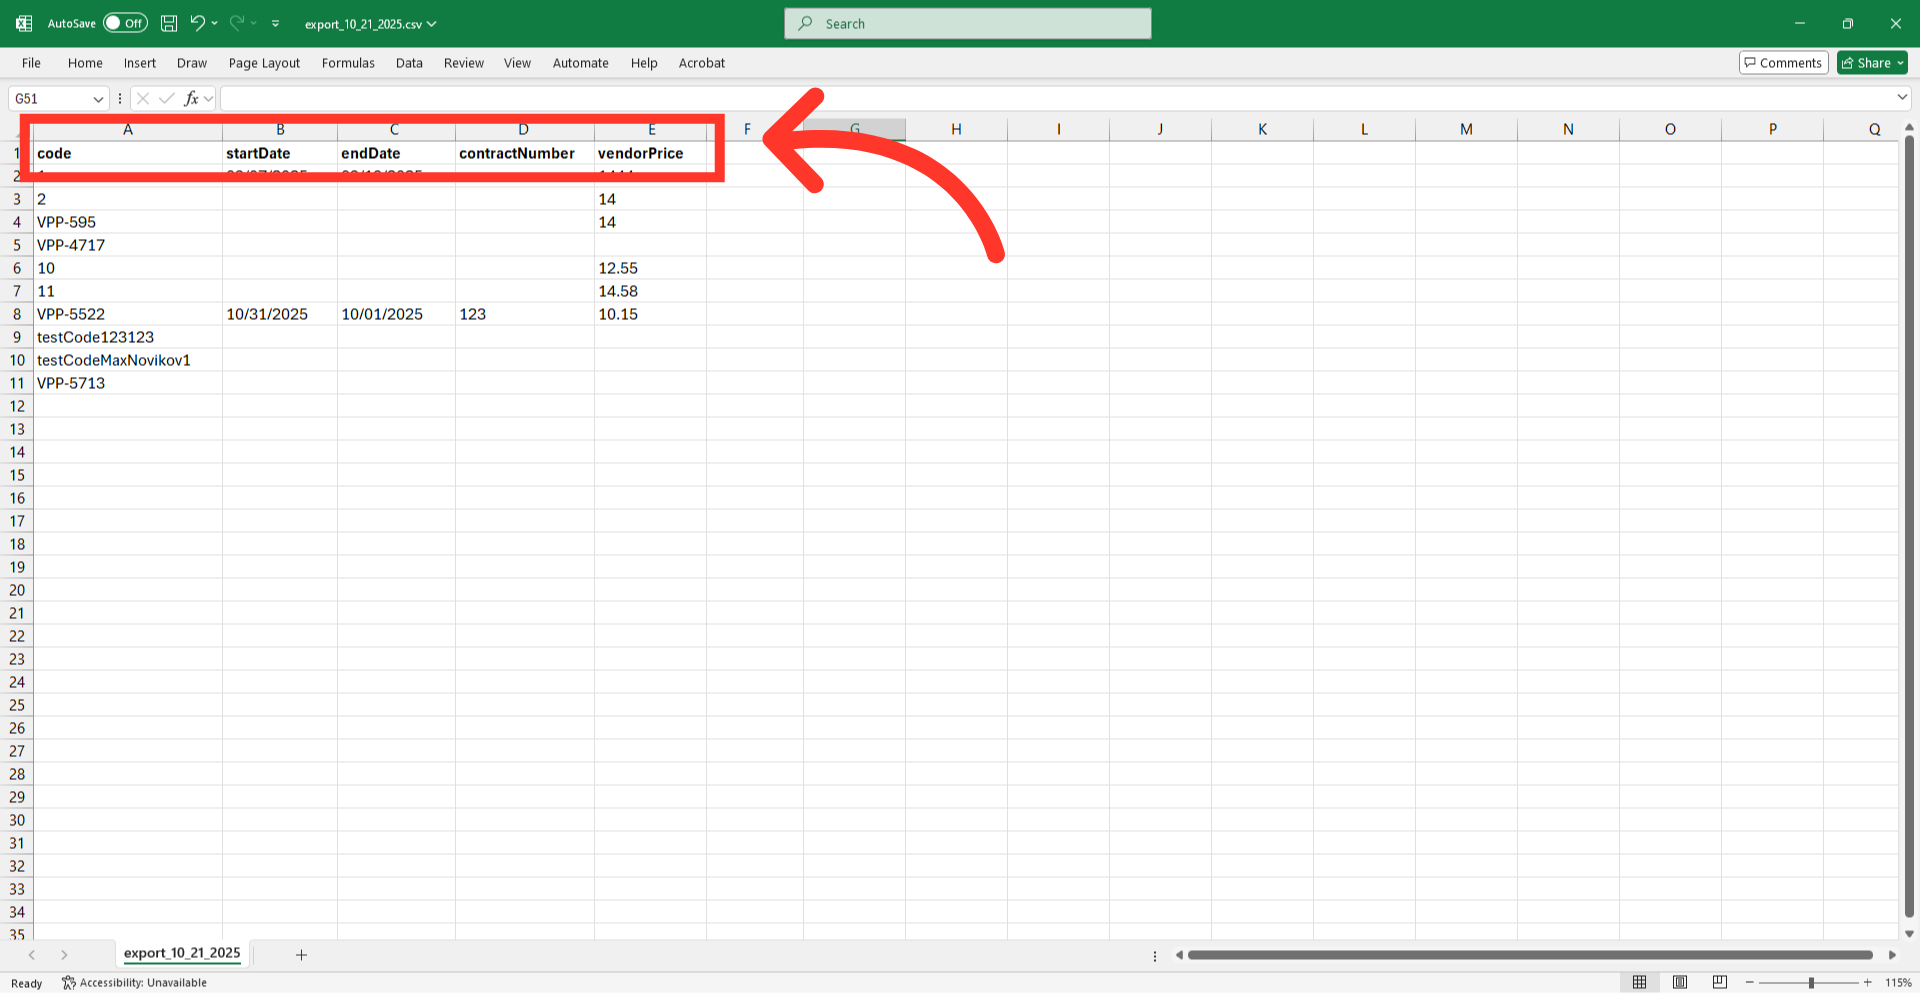
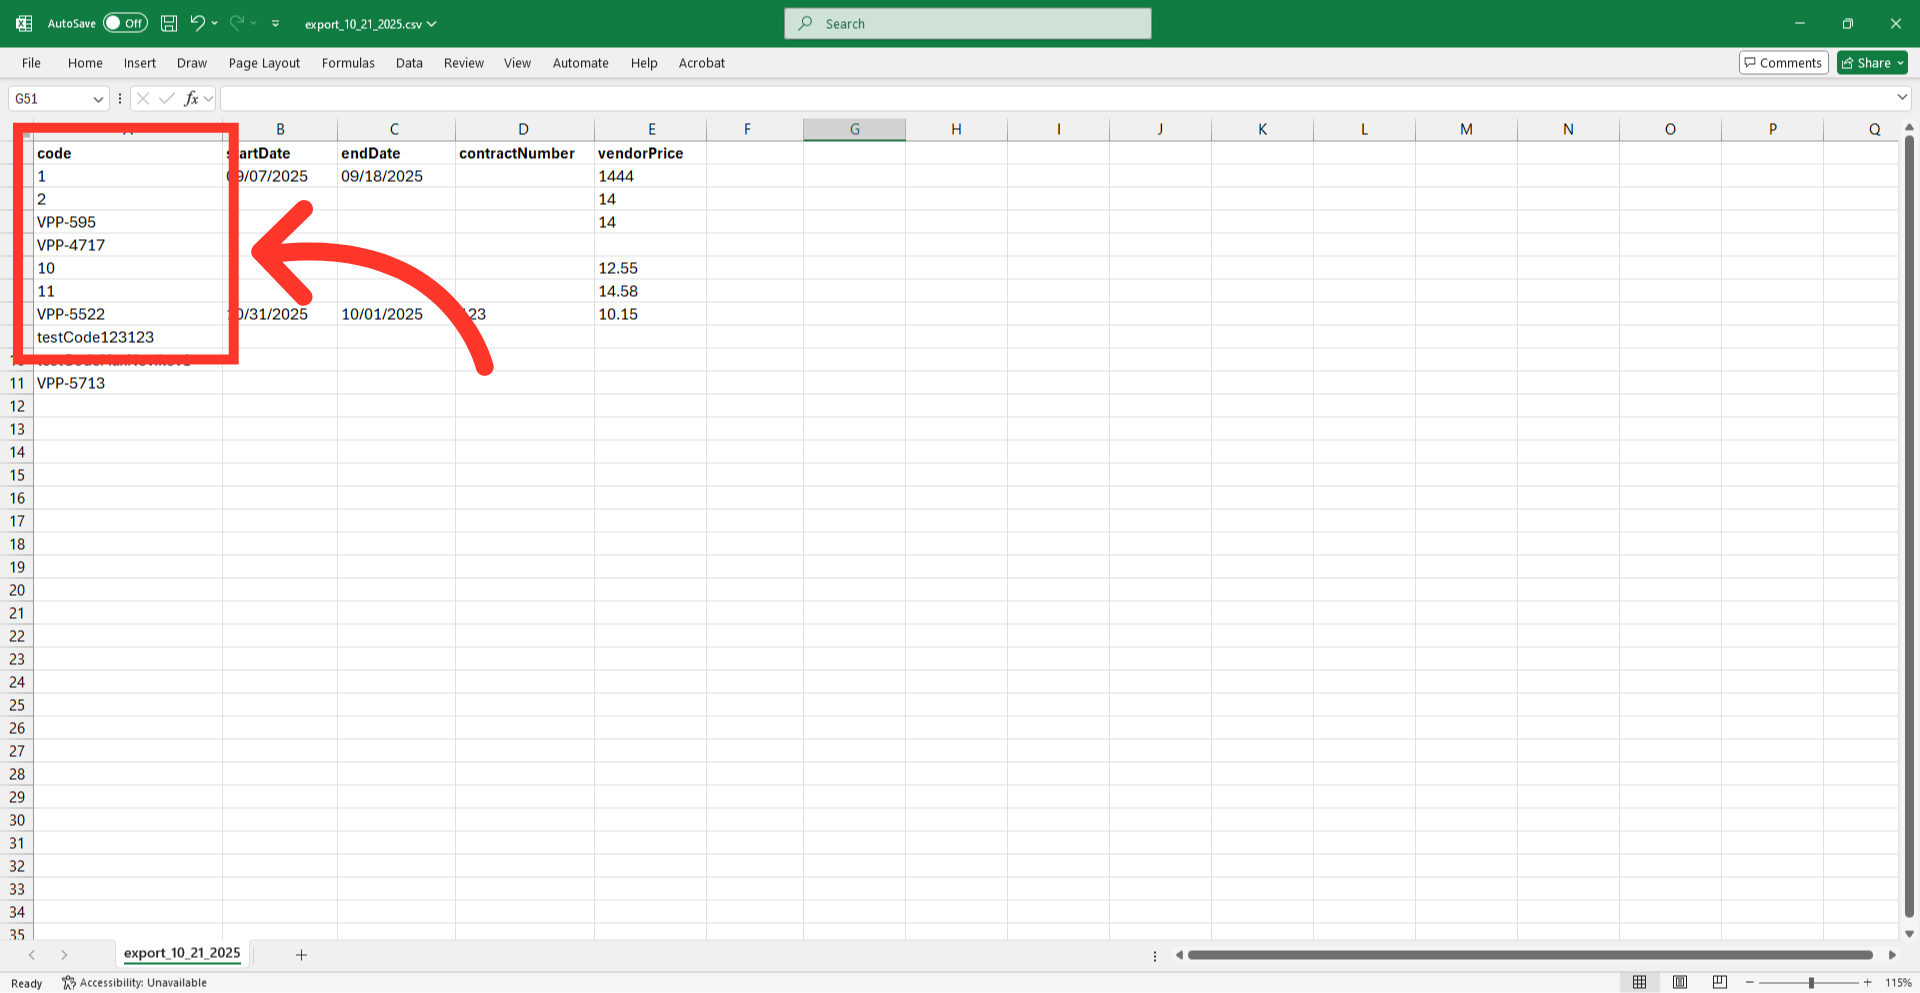
The "code" column contains the unique identifier for each vendor pricing record. When importing vendor pricing data, the "code" is required as it is the identifying factor for matching information. If you are creating a new vendor pricing record, this cell can be left empty and the code will be auto-populated. If you would like to populate a new code, be sure that it is a unique code that doesn't already exist in the system.
"startDate" column contains the effectivity dates when a vendor's pricing agreement becomes active. The date format needs to match the example in the export, MM/DD/YY.

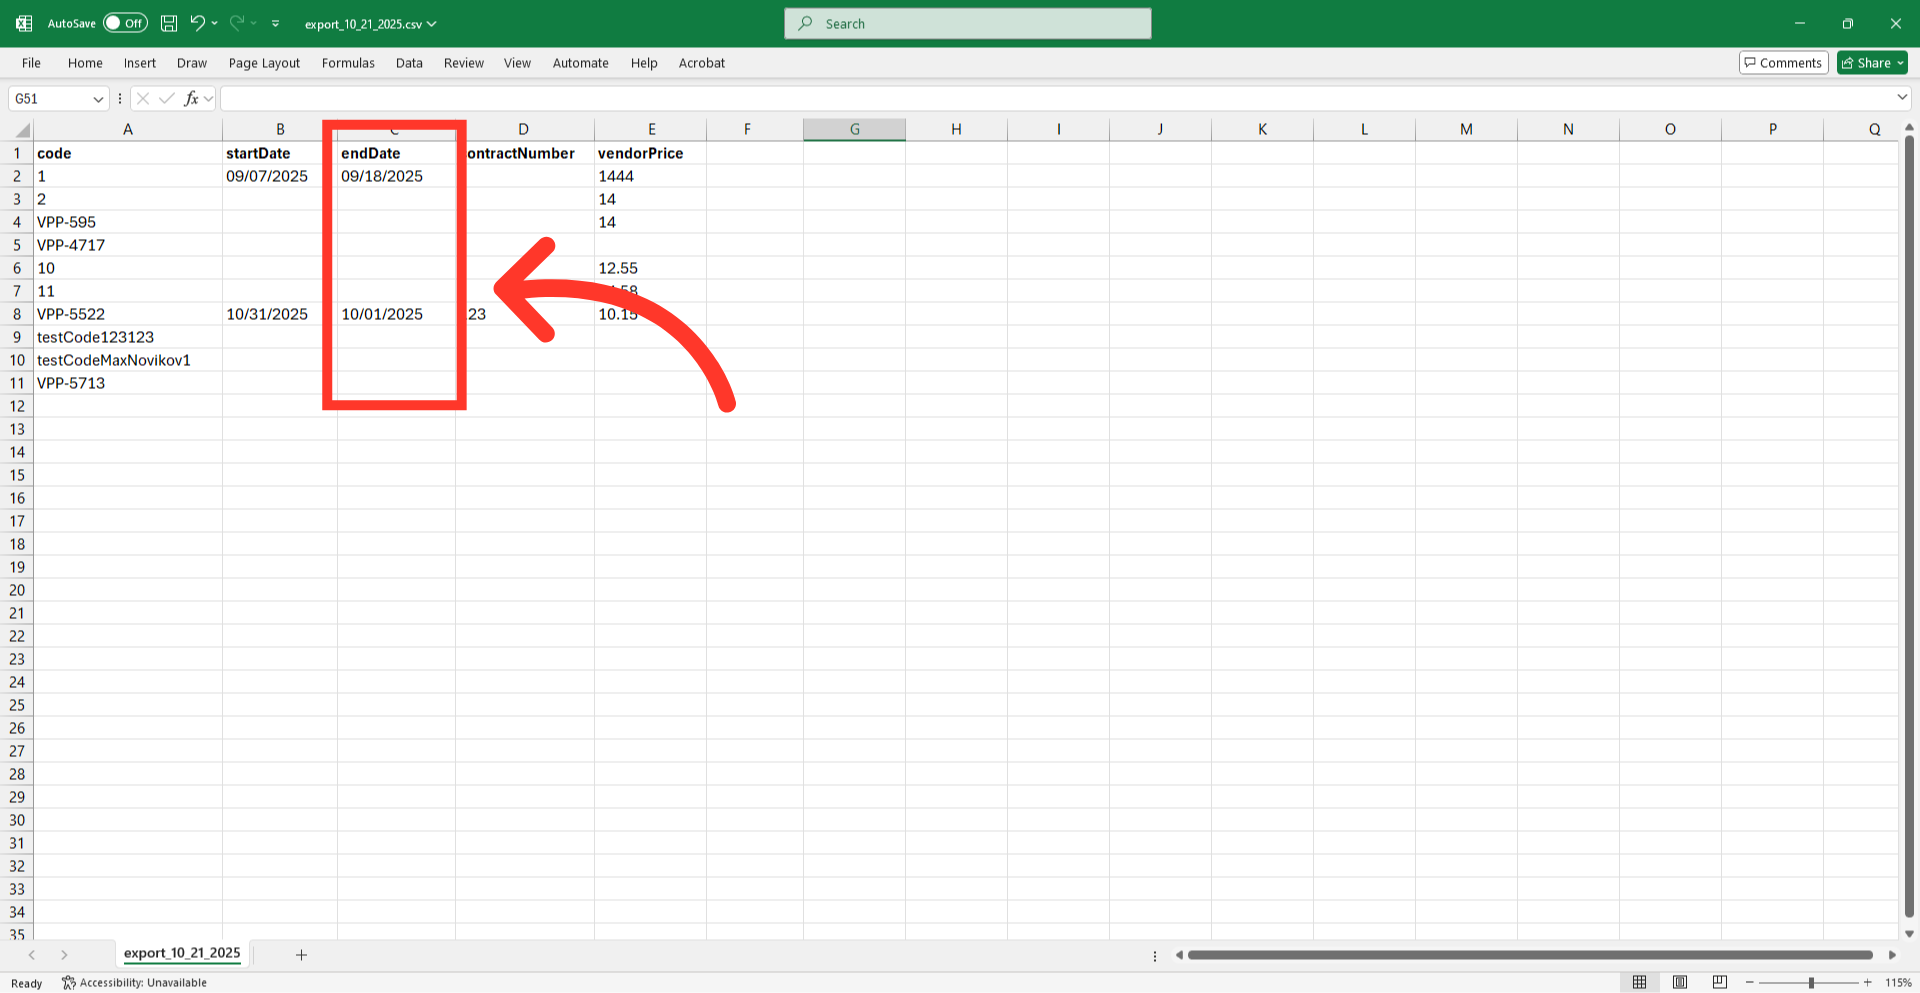
"endDate" column contains the expiration dates when a vendor's pricing agreement becomes inactive. The date format needs to match the example in the export, MM/DD/YY.
"vendorPrice" column contains the cost amount charged by the vendor for the specific item.
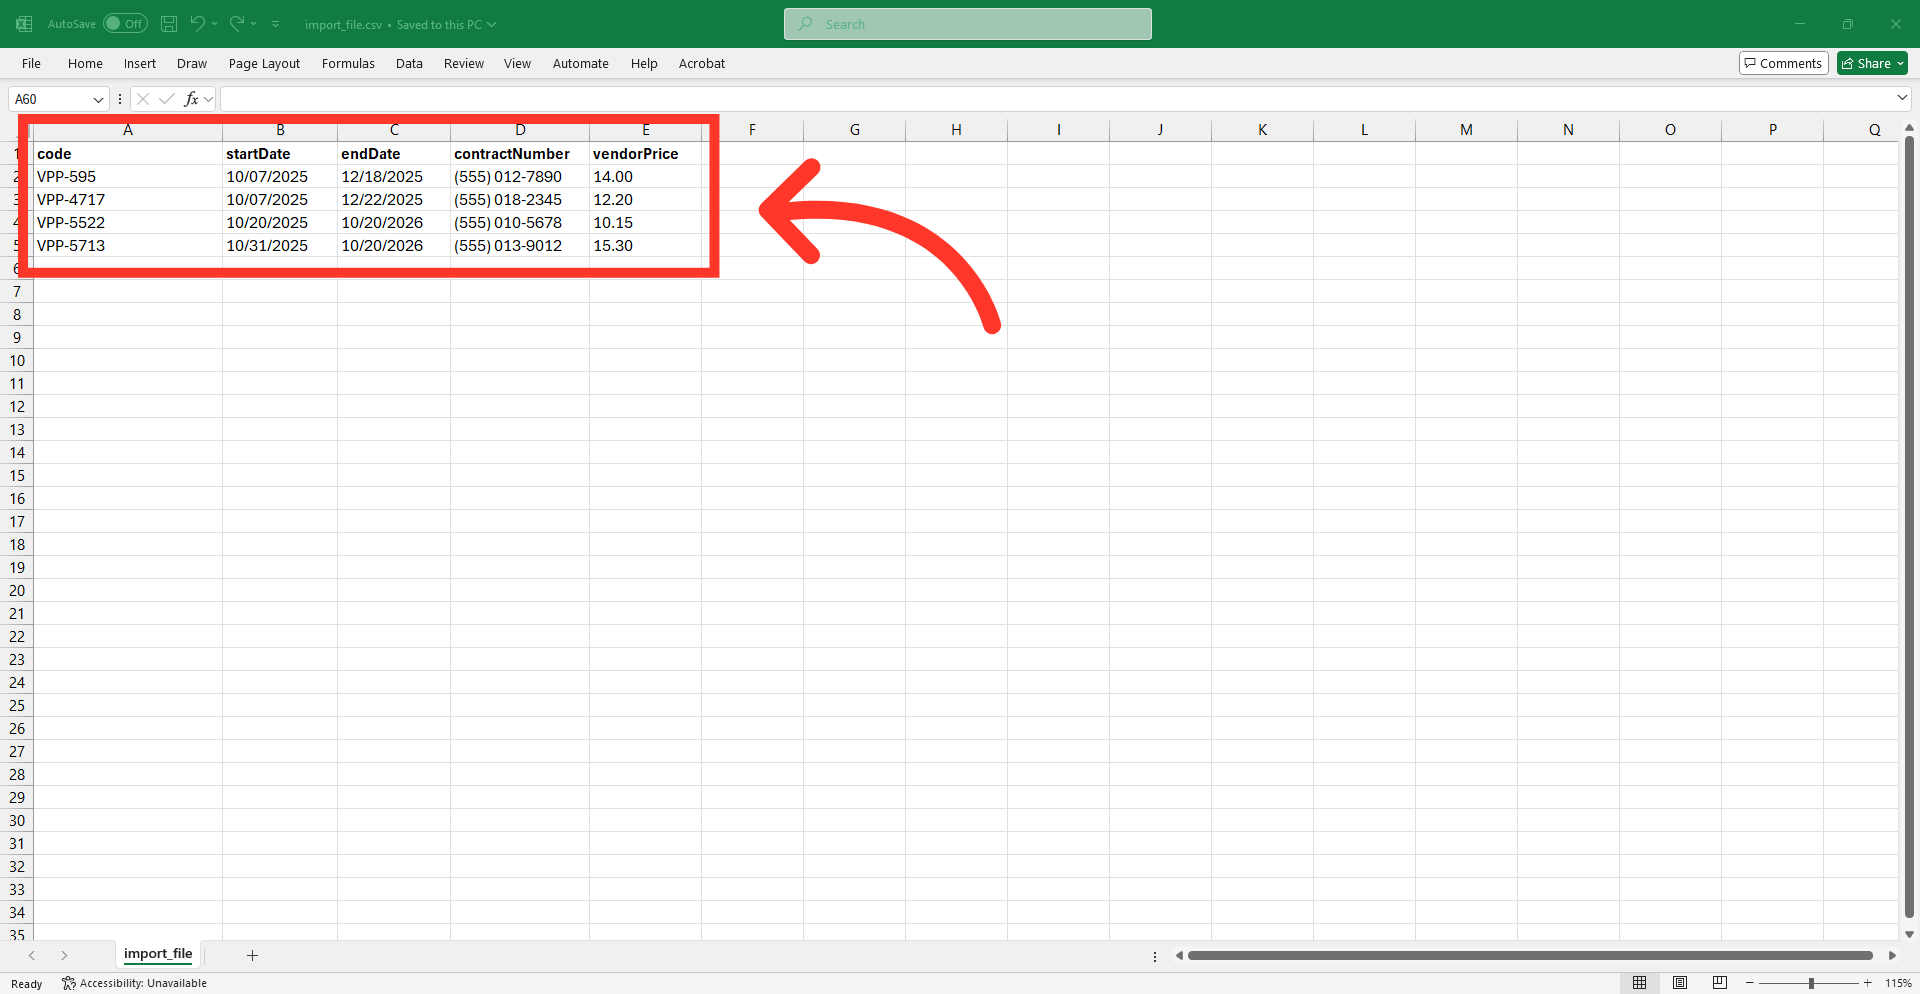
Add new entries or update the existing vendor pricing data. Once you have entered the data that you would like to add to the system, save your spreadsheet as .CSV file which is spreadsheet compatible and your file is ready to import. Be sure the spreadsheet you are using only contains the data that you would like to update by import. If you remove data from a cell, the data imported into the system will be blank for that field for that code.
Once the the spreadsheet is ready for import, go back to the "Vendor Pricing" screen, then go to the "File" menu.
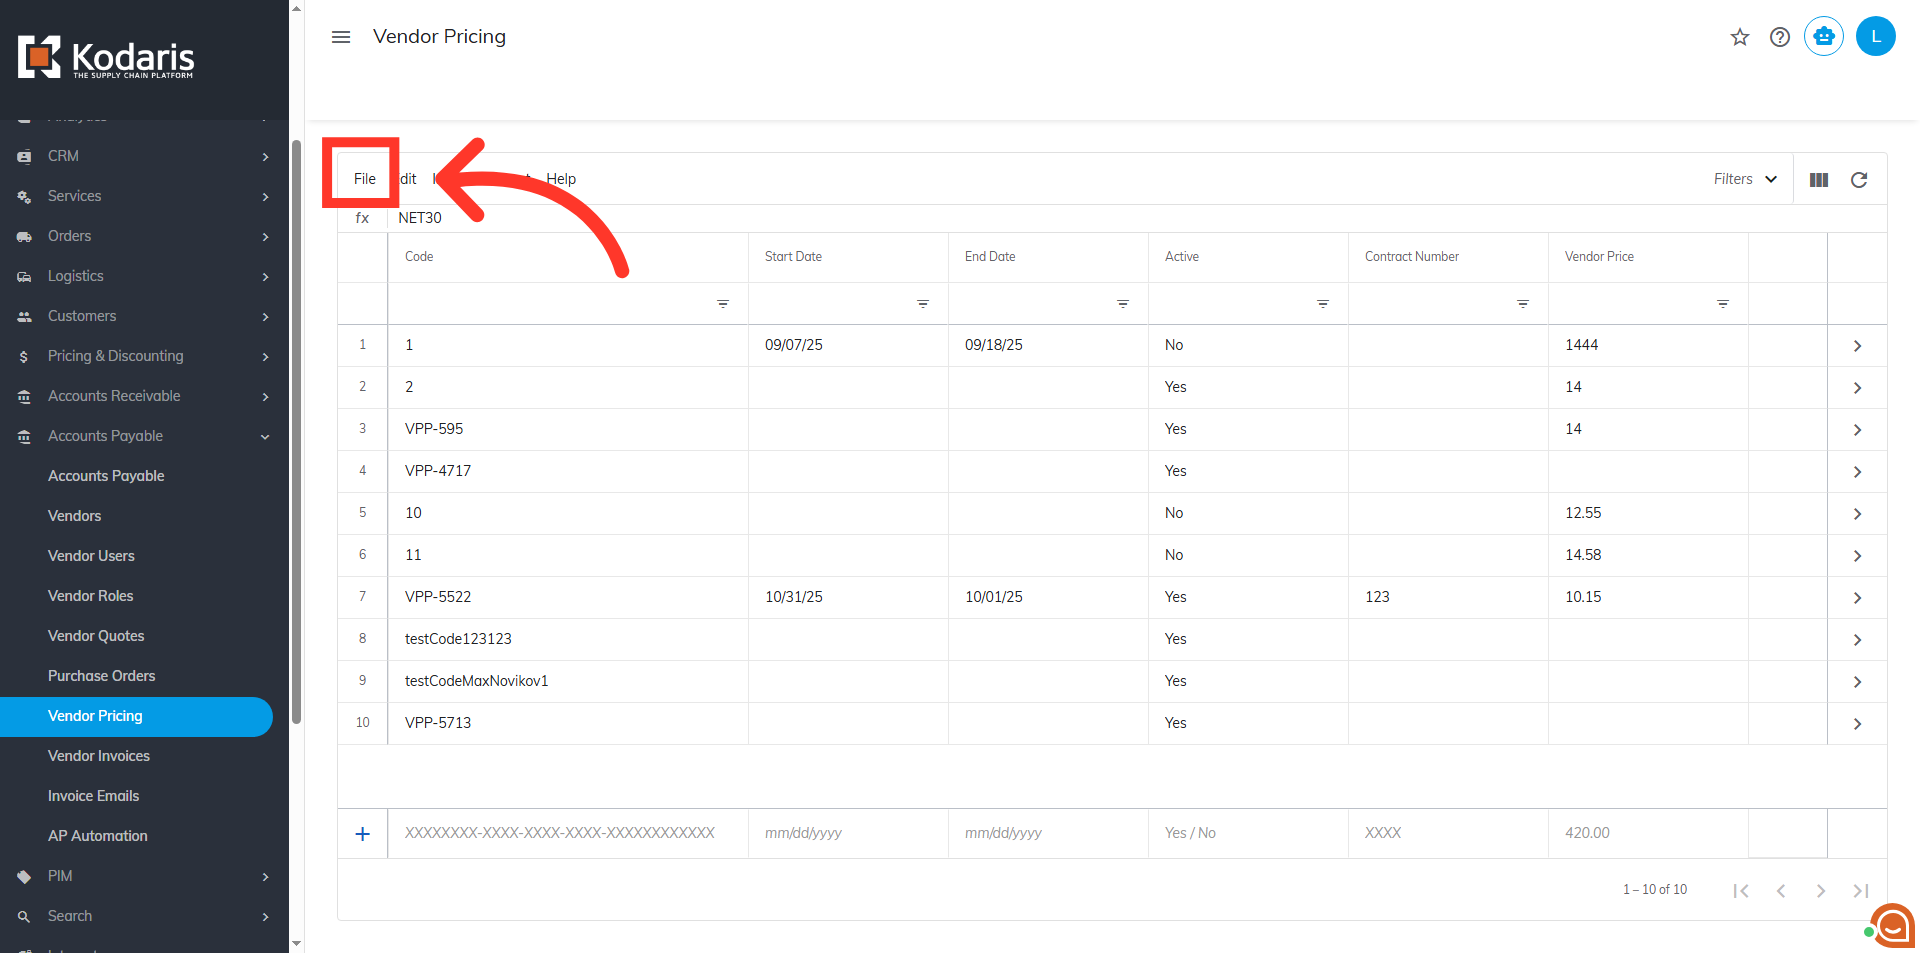
Then, click "Import".

Choose your preferred import option. "Create & Update" will create any new vendor pricing record included in the spreadsheet and also update existing with the data in your spreadsheet. "Create Only" will only create new vendor pricing record with the data in your spreadsheet. "Update Only" will only update existing vendor pricing recor with the data in your import. Since we are creating and updating information, we will want to choose the "Create & Update" option.

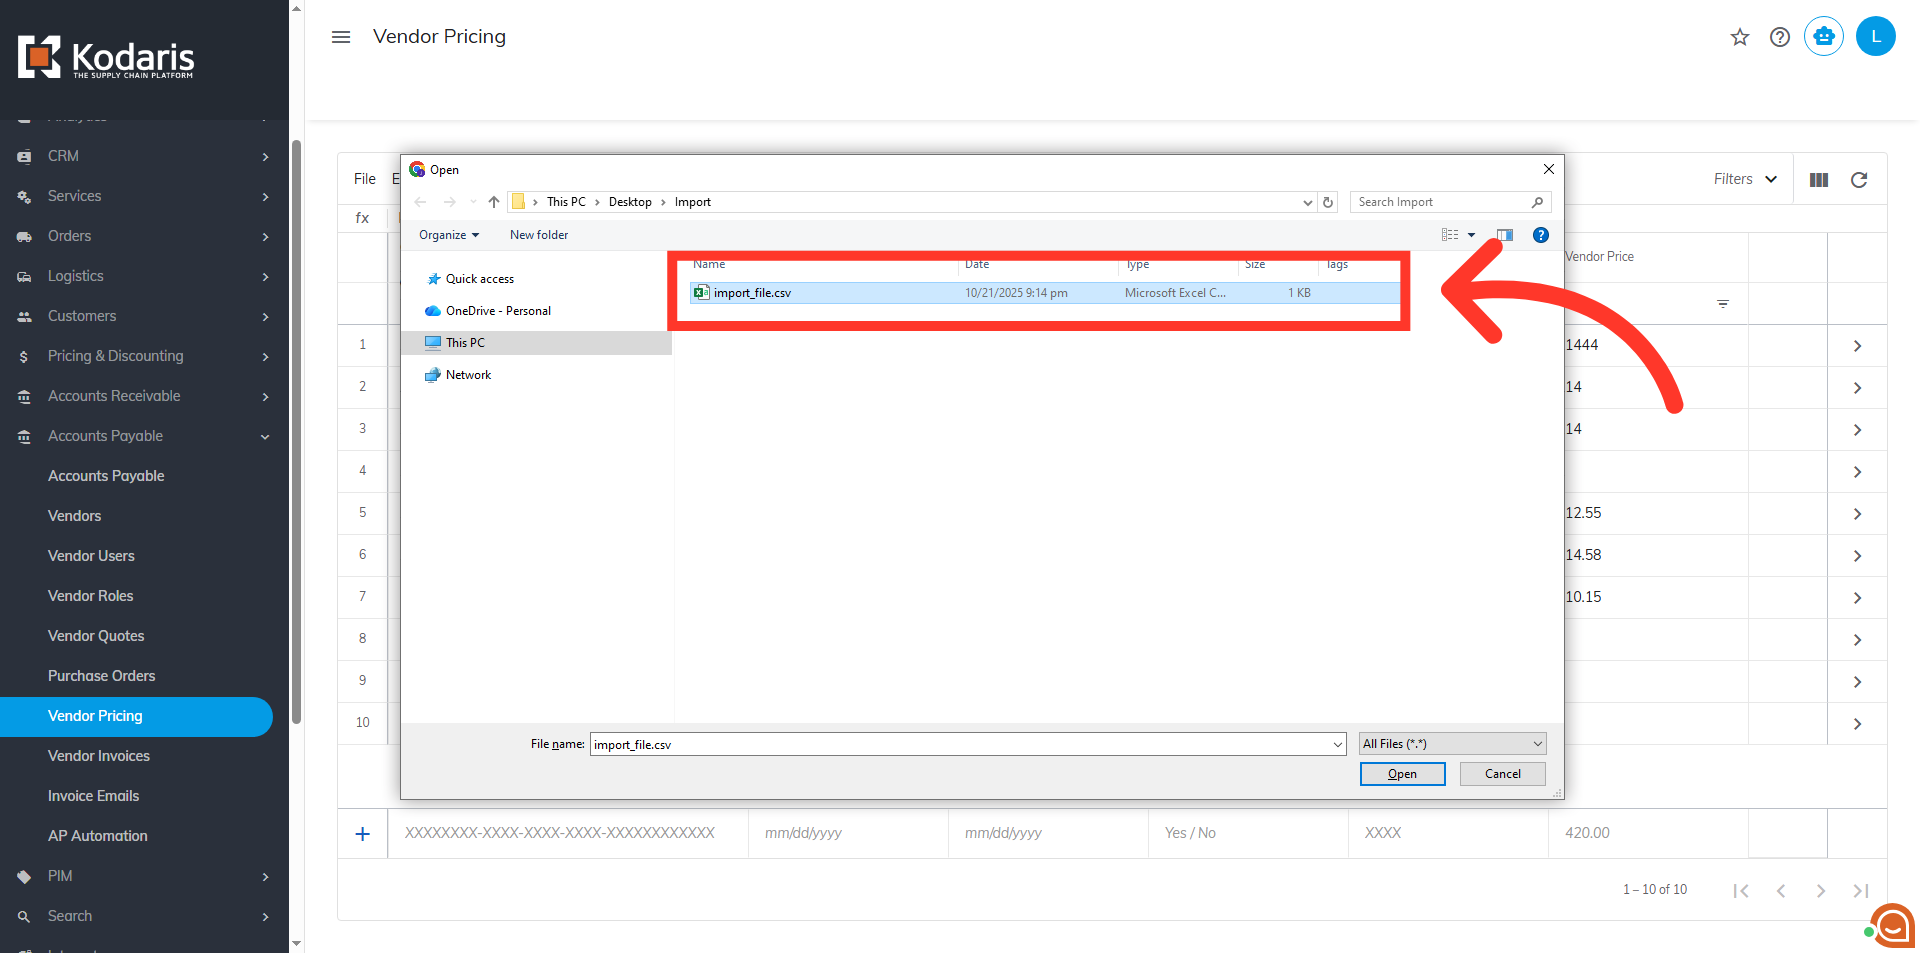
Once you click "Create & Update", you will be prompted to choose and upload a file from your computer. Choose the .CSV file you would like to import. Please be sure that you select the correct file, as there are no rollbacks for imports.
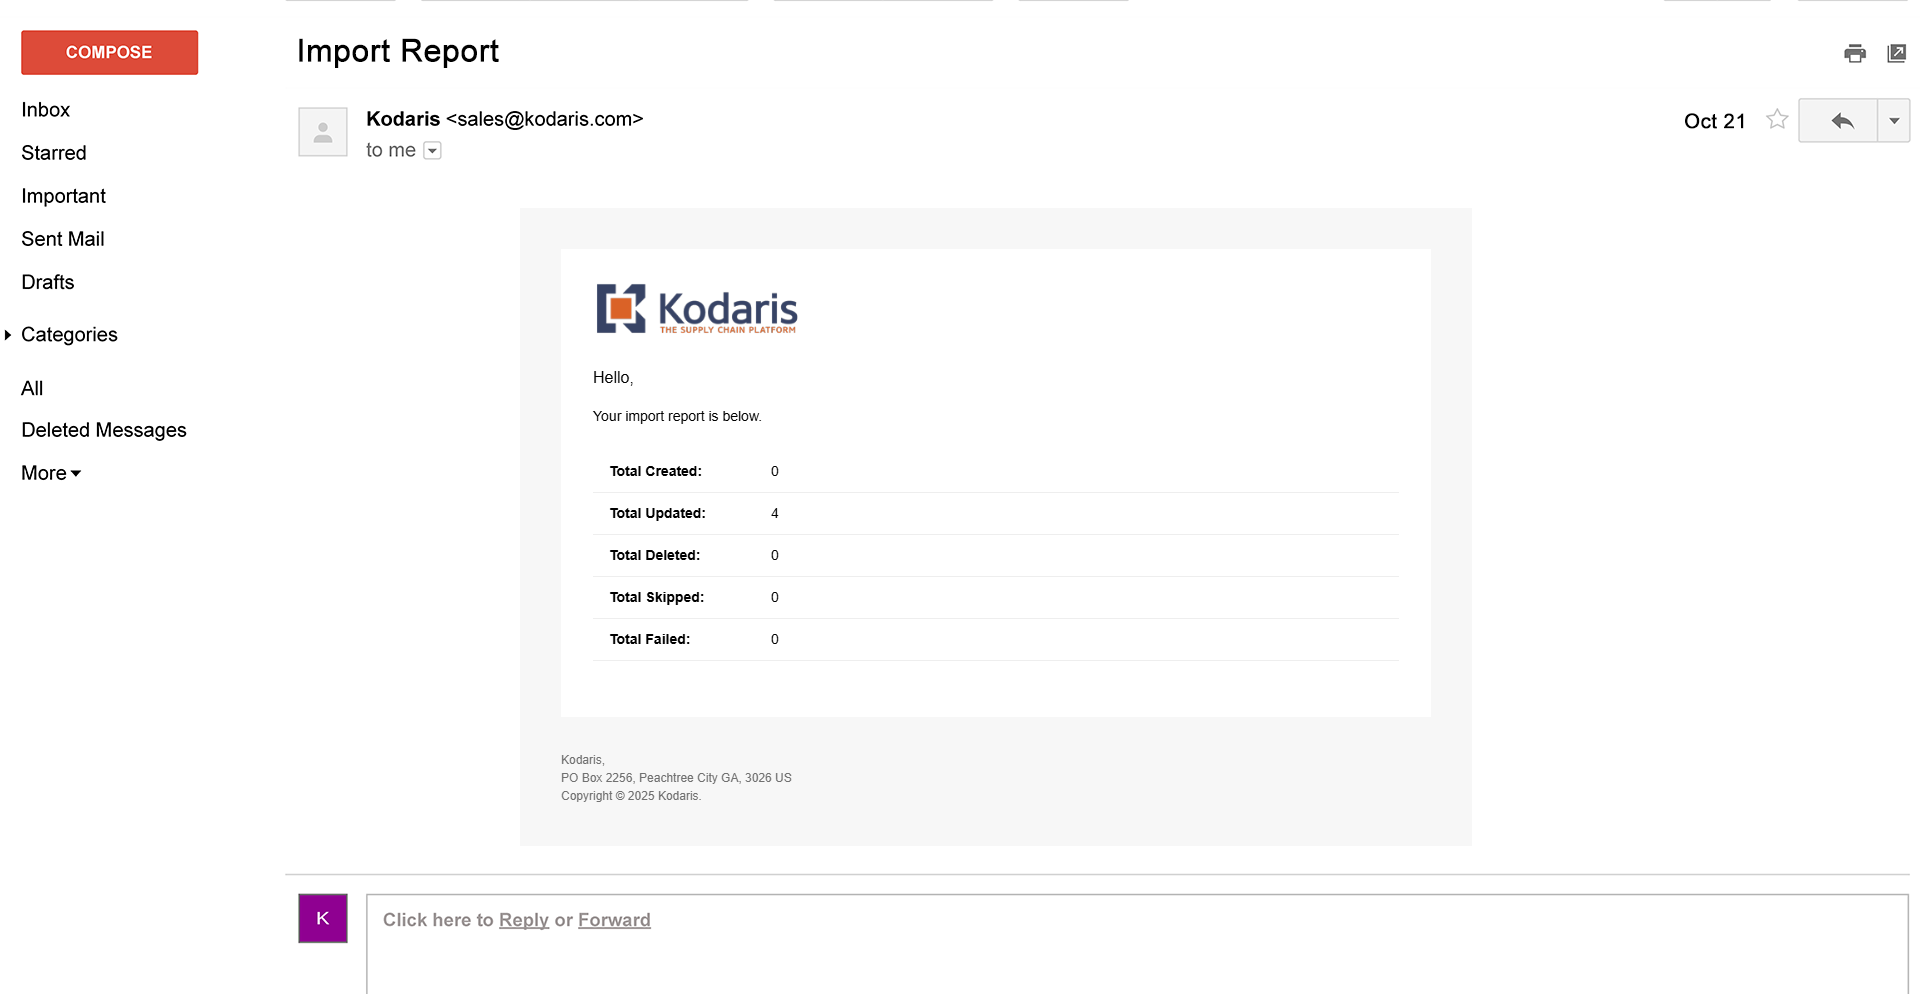
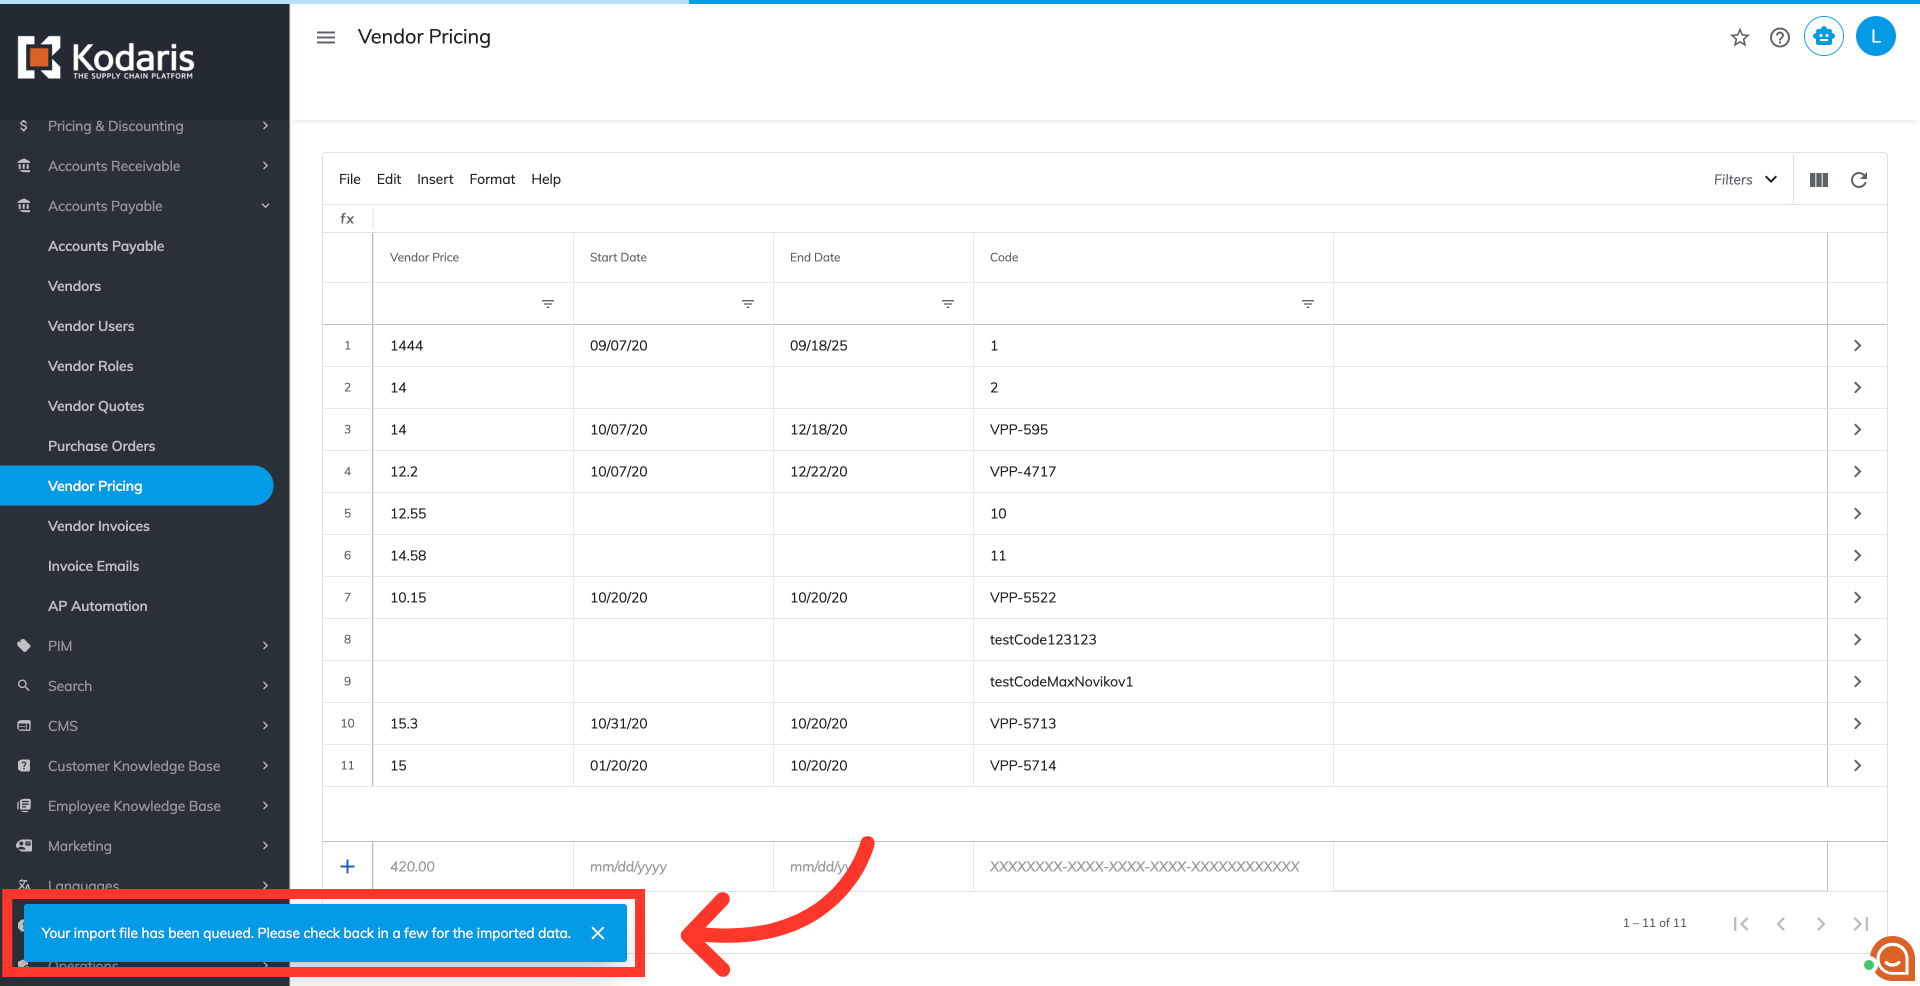
An import message will appear letting you know that the import file is in process and to check back in a few minutes for the imported data. If you are importing large amounts of data, it may take a short amount of time to complete. The import will continue to run in the background.
Once the import has finished, confirm the updates on the vendor pricing screen
An email report will also be generated once the import is successful.