Users can update existing company product lists through CSV file imports. This bulk import method allows you to quickly update product lists rather than manually adding each product individually. To do this, navigate to the "CRM" section in the Operations Portal.
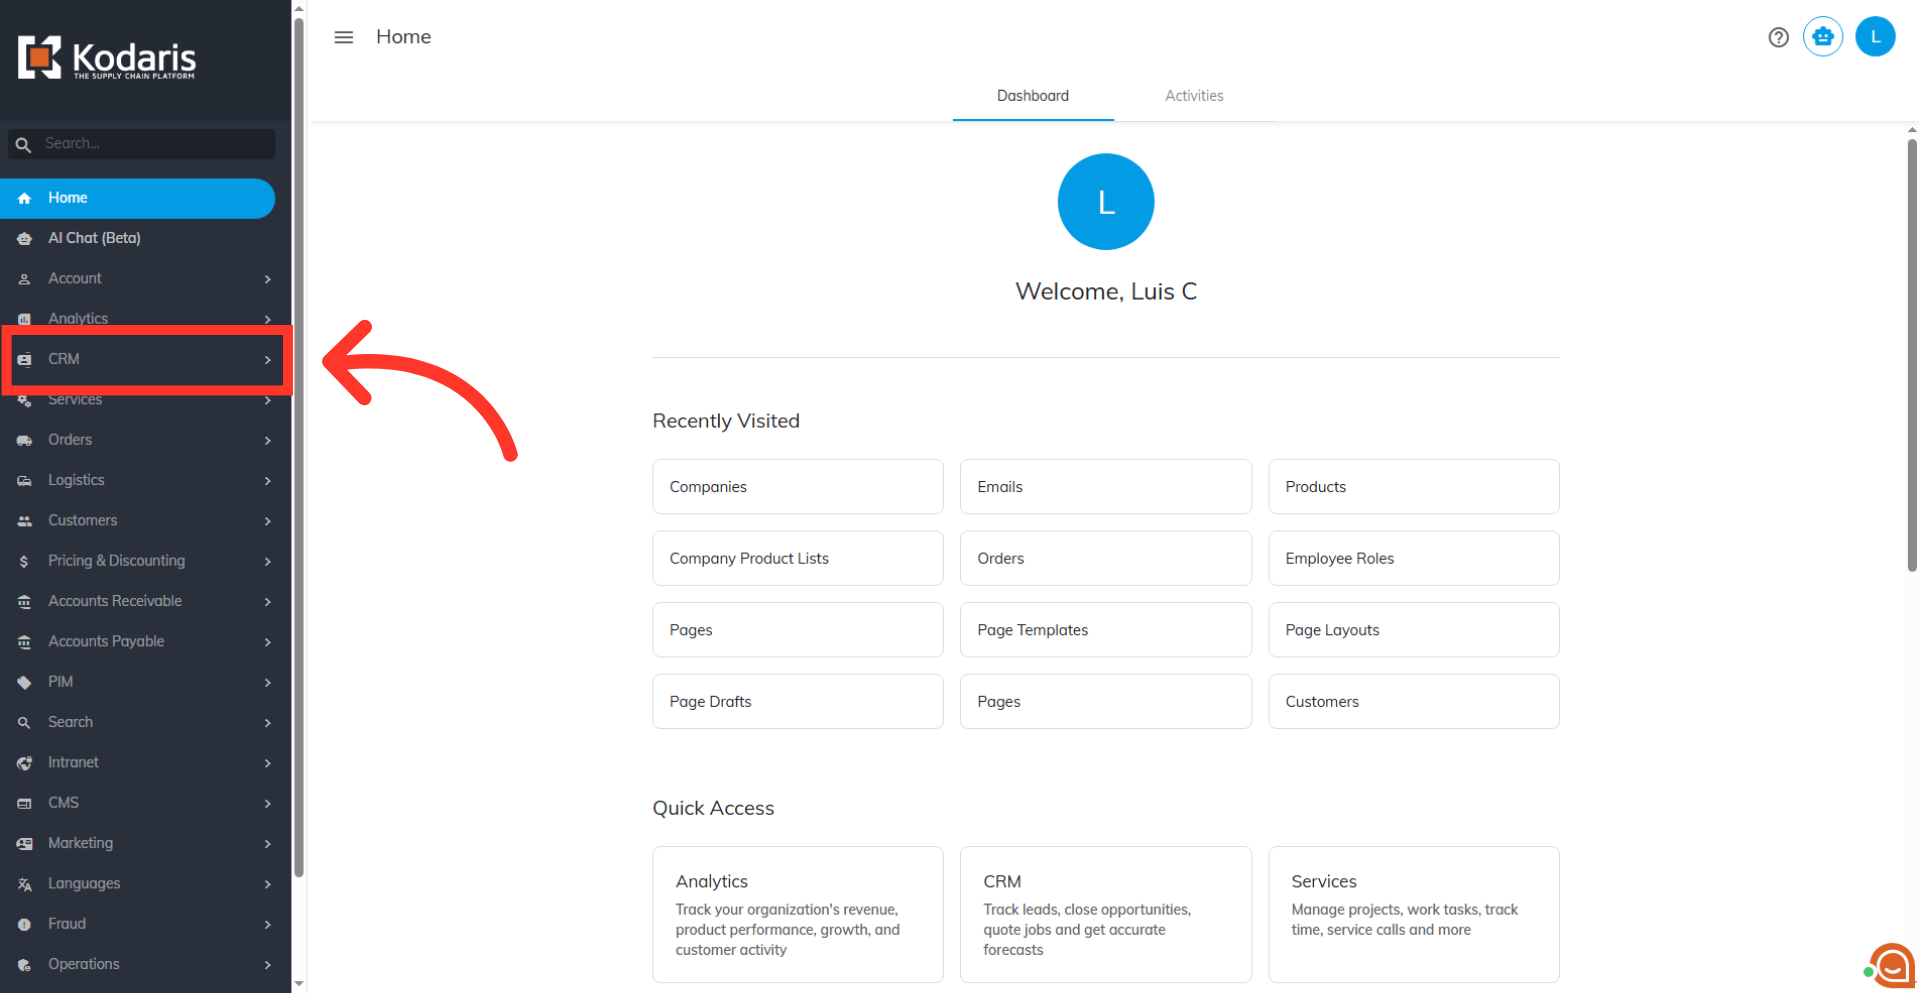
Then, click on the "Companies" screen. In order to access "Companies" screens you will need to be set up either as an "administrator" or a "superuser", or have the appropriate roles: "companyView," "crmCompanyView," "companyEdit," "crmCompanyEdit," and "dispatch." along with "importEdit" and "importView". These last two roles are needed for importing.

Enter a keyword in the search field to find the company the product list is associated with.
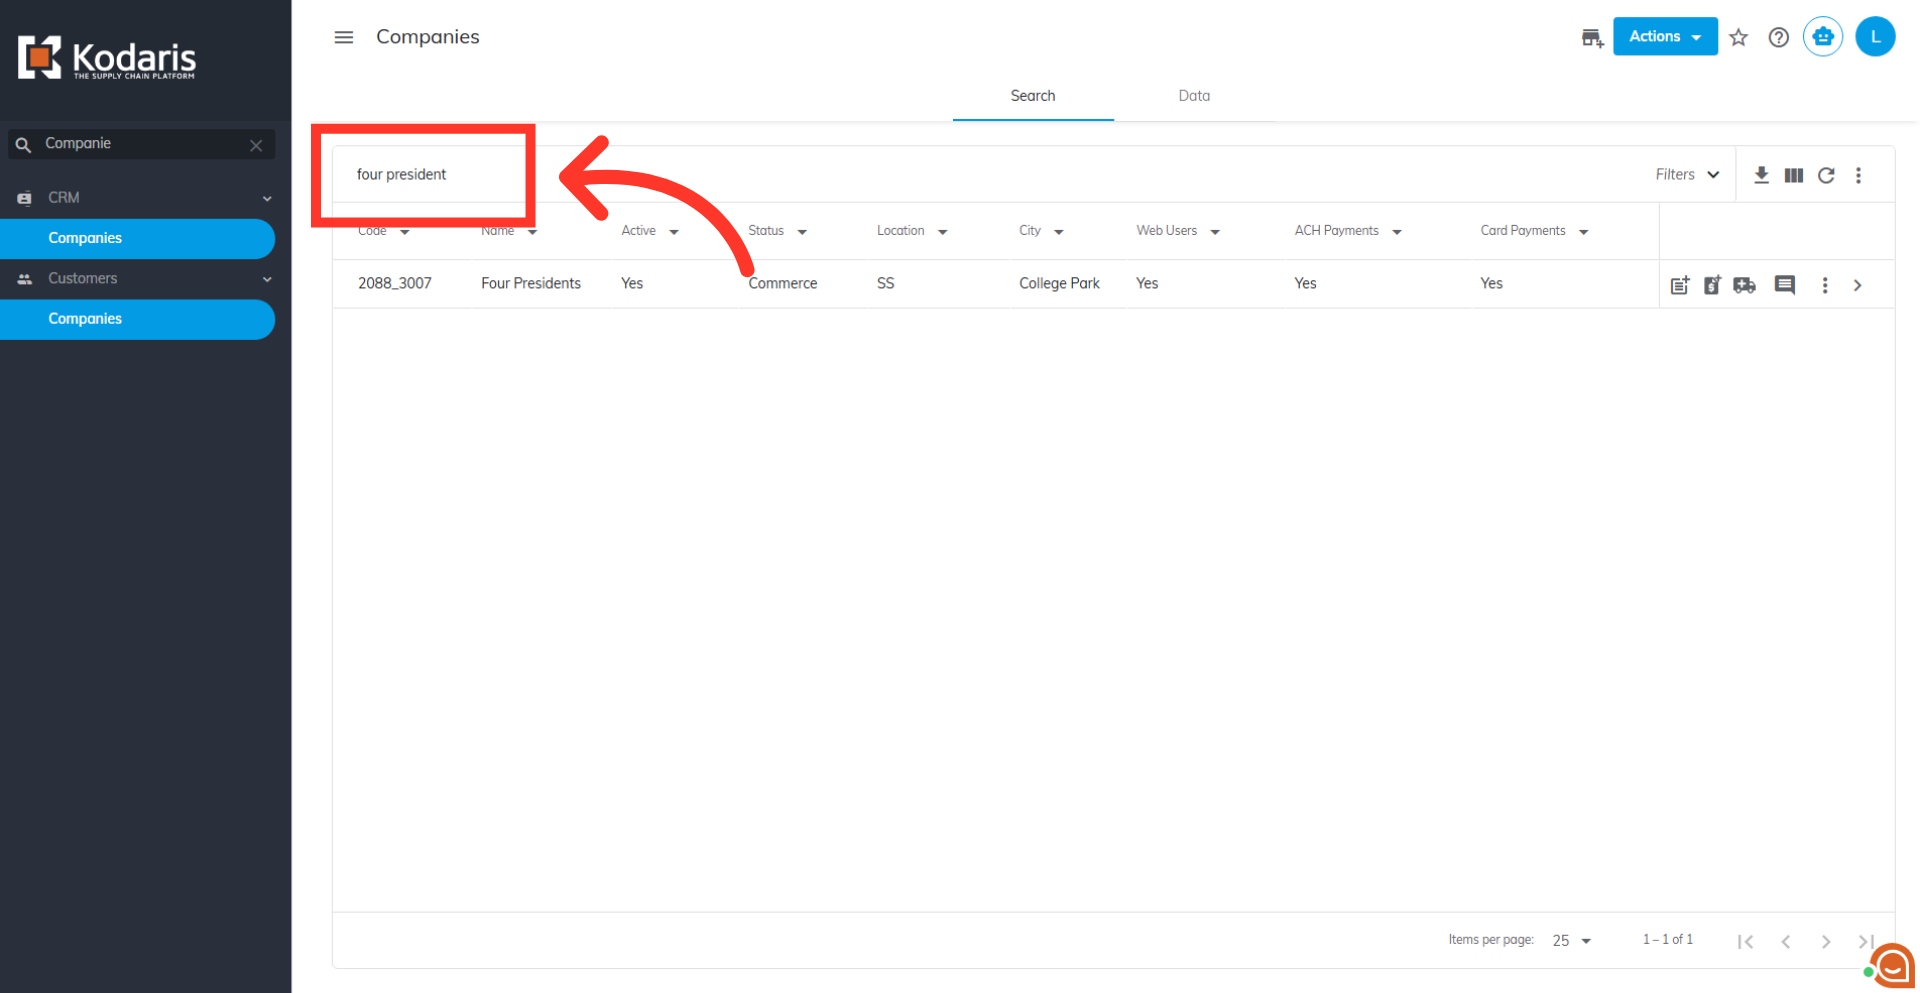
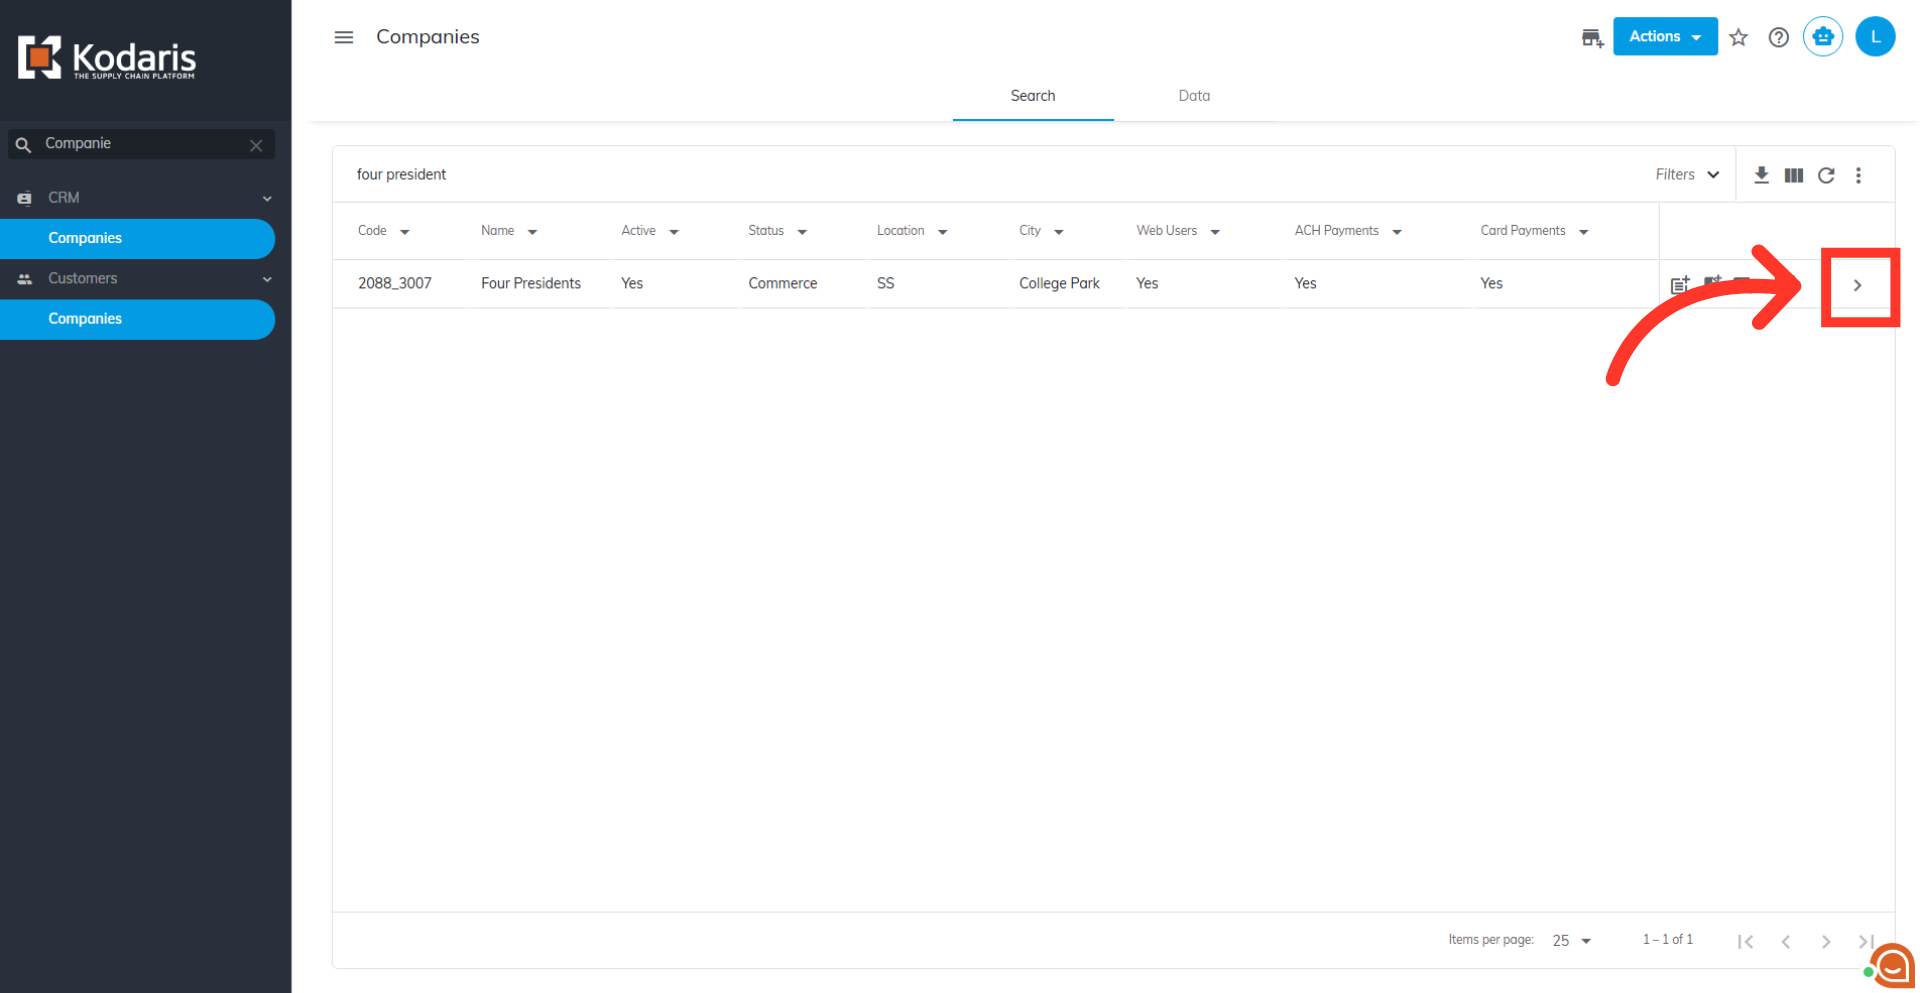
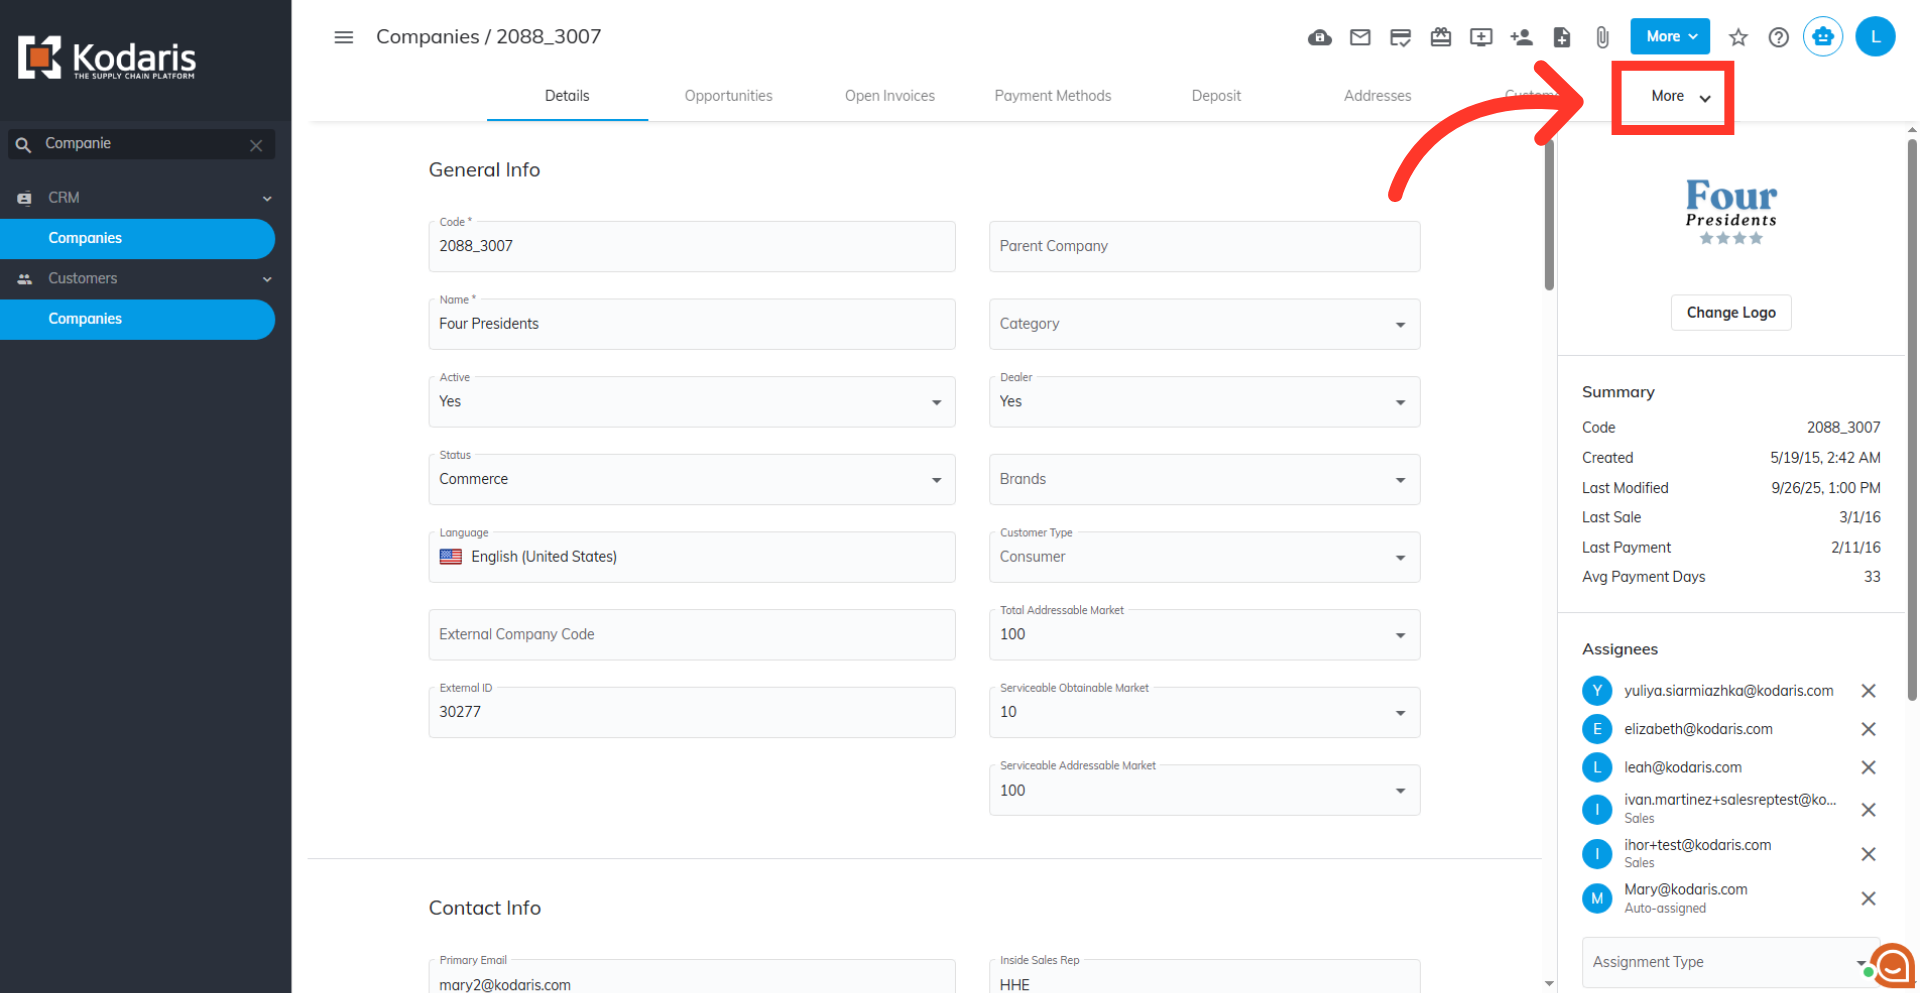
Click on the more details icon to view the company details screen.
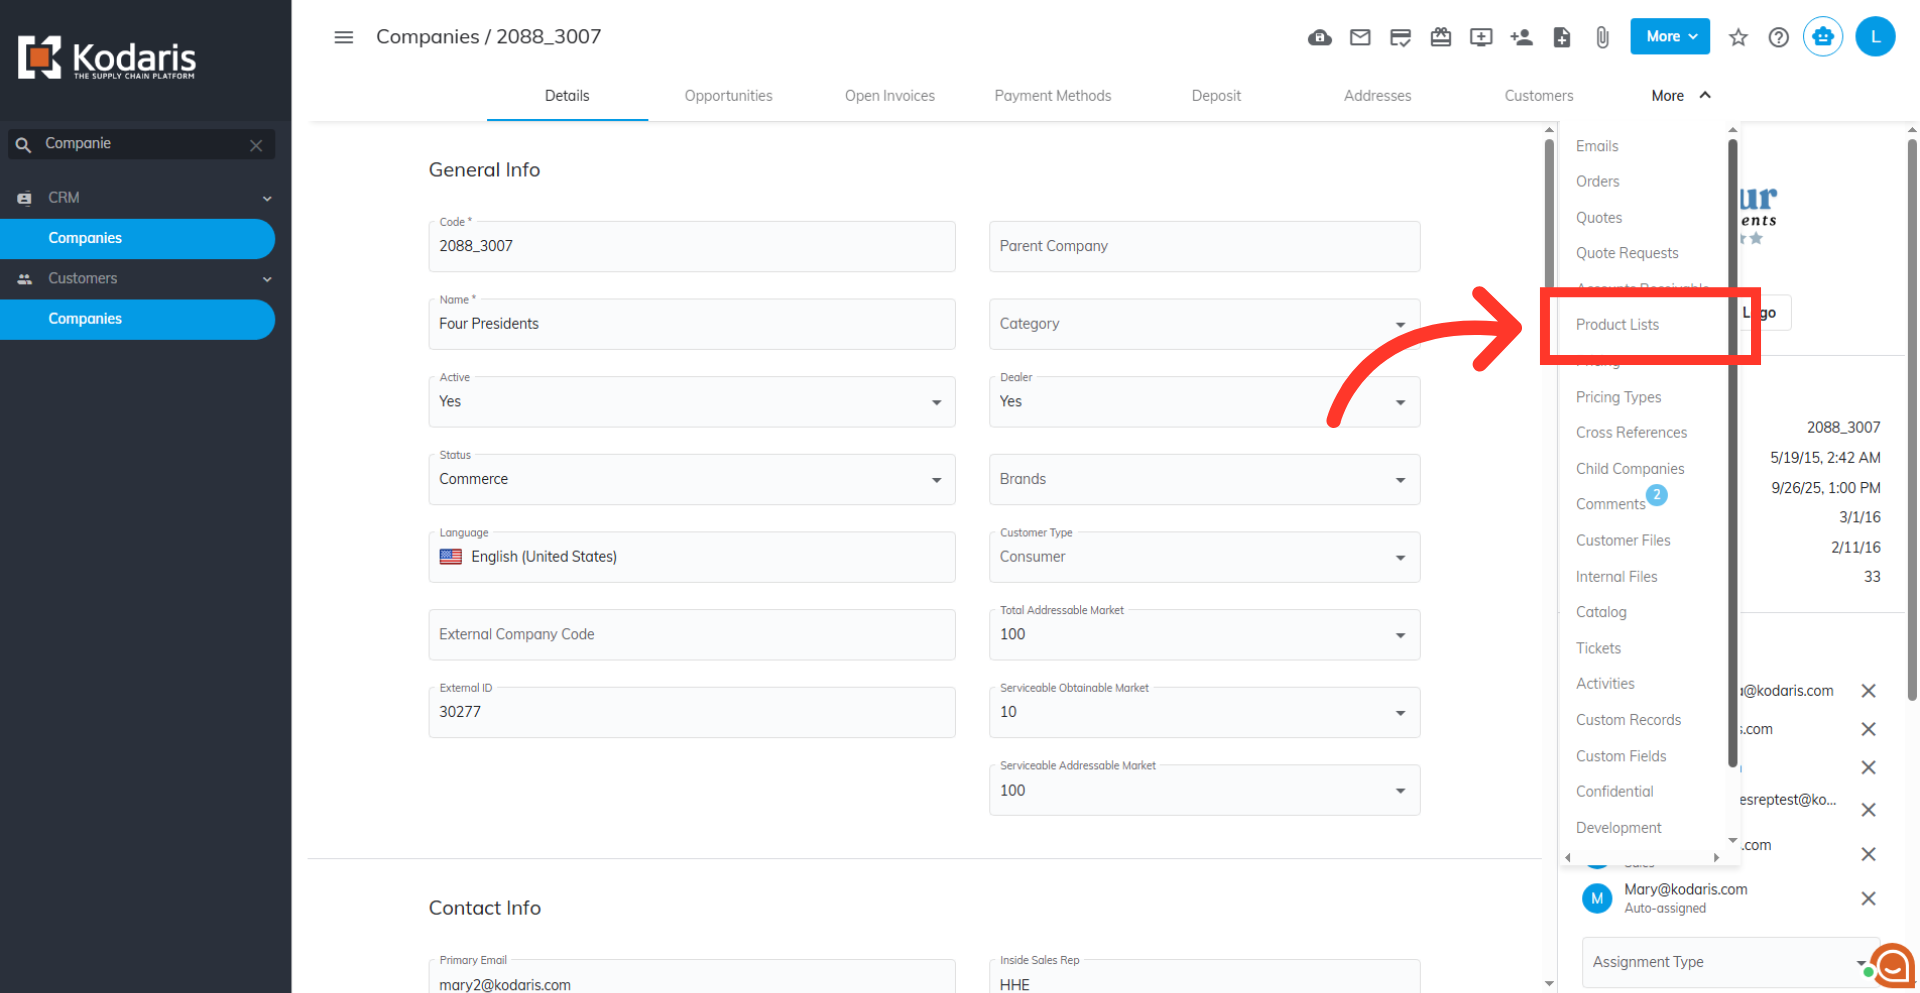
Click the "More" dropdown to find the "Product Lists" tab.
Go to the "Product List" tab.
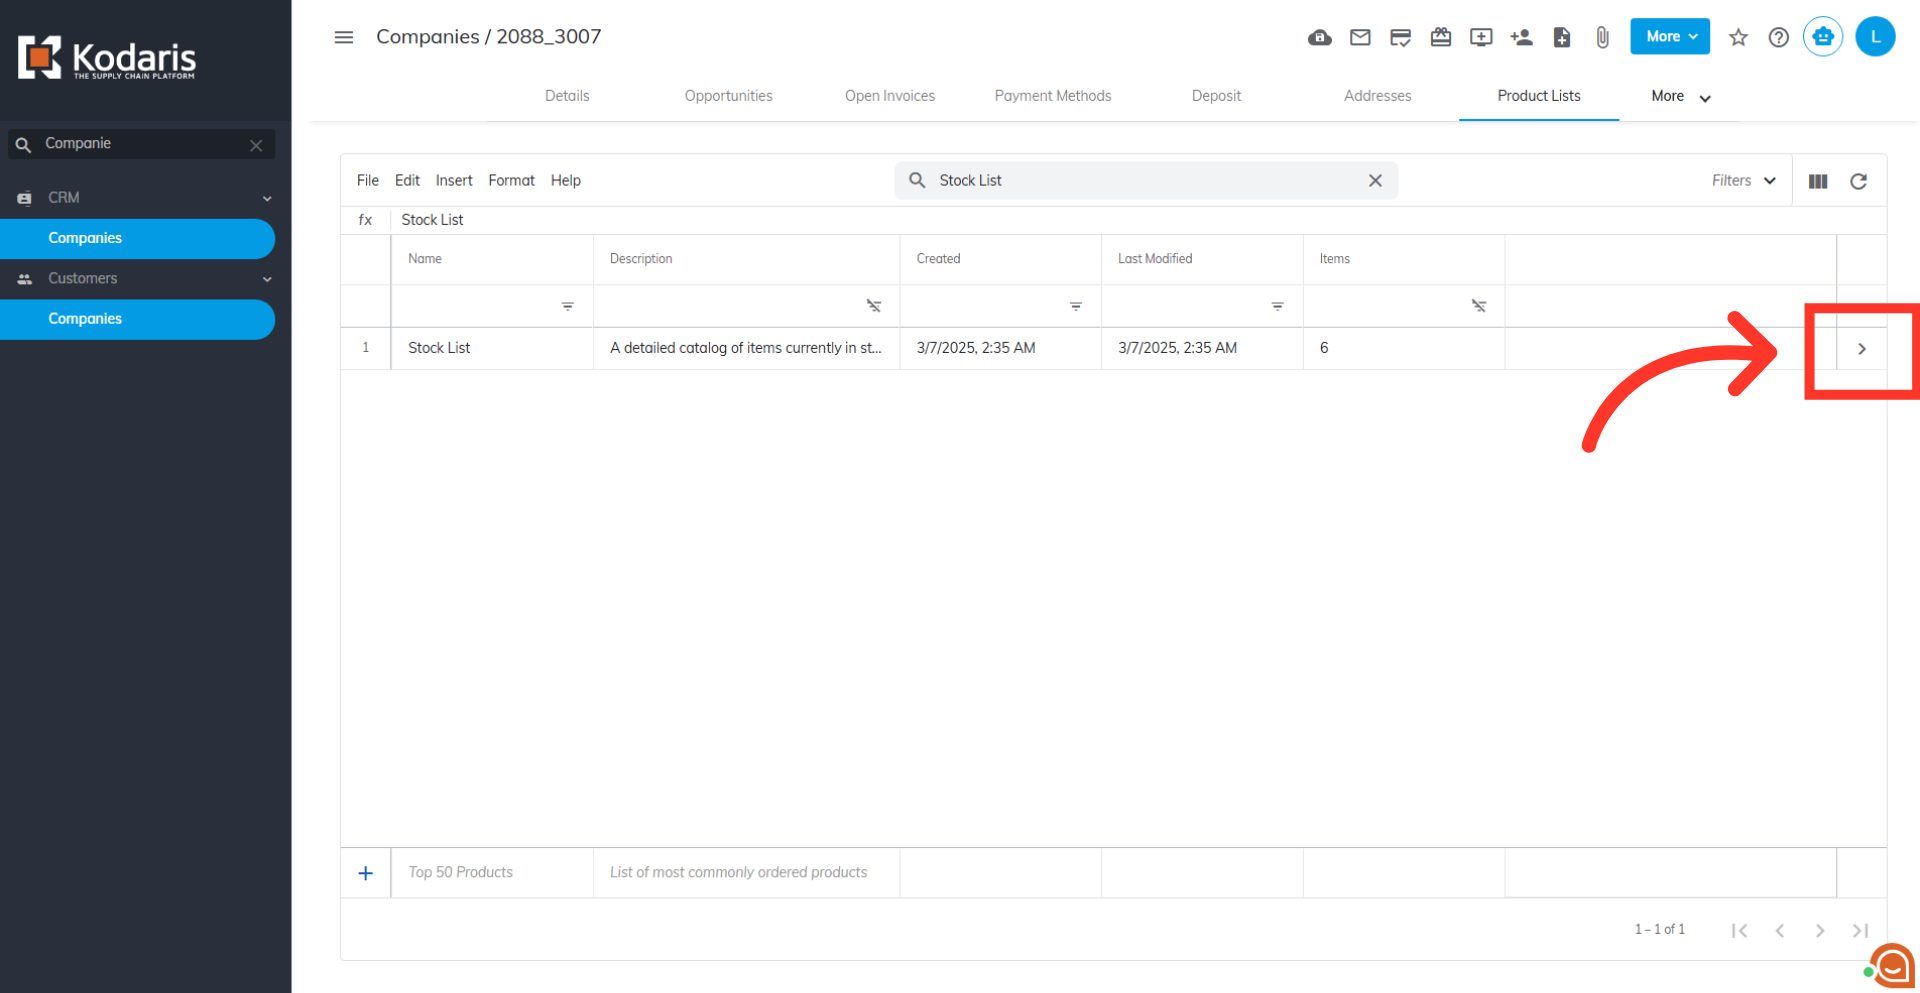
Find the product list you would like to update, and click on the more details icon to view the list items.
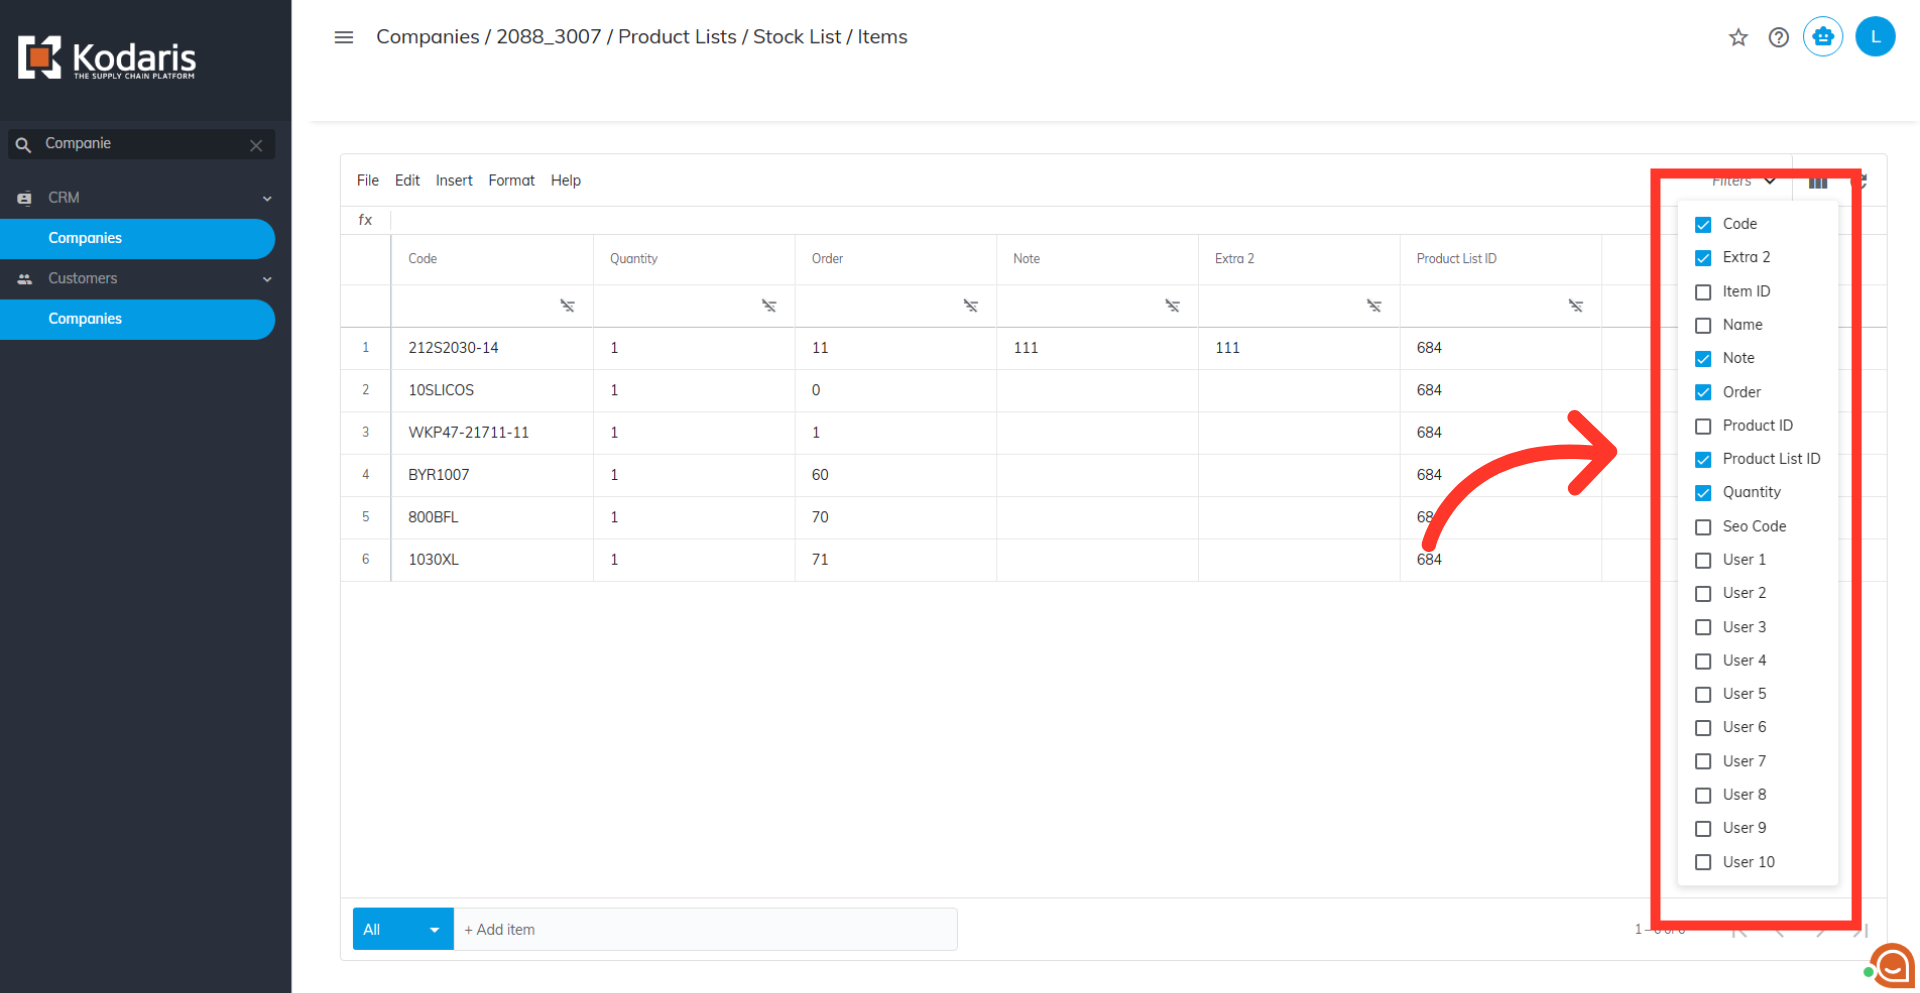
Click the "Show/Hide Columns" icon to select any columns you would like to add to the screen.
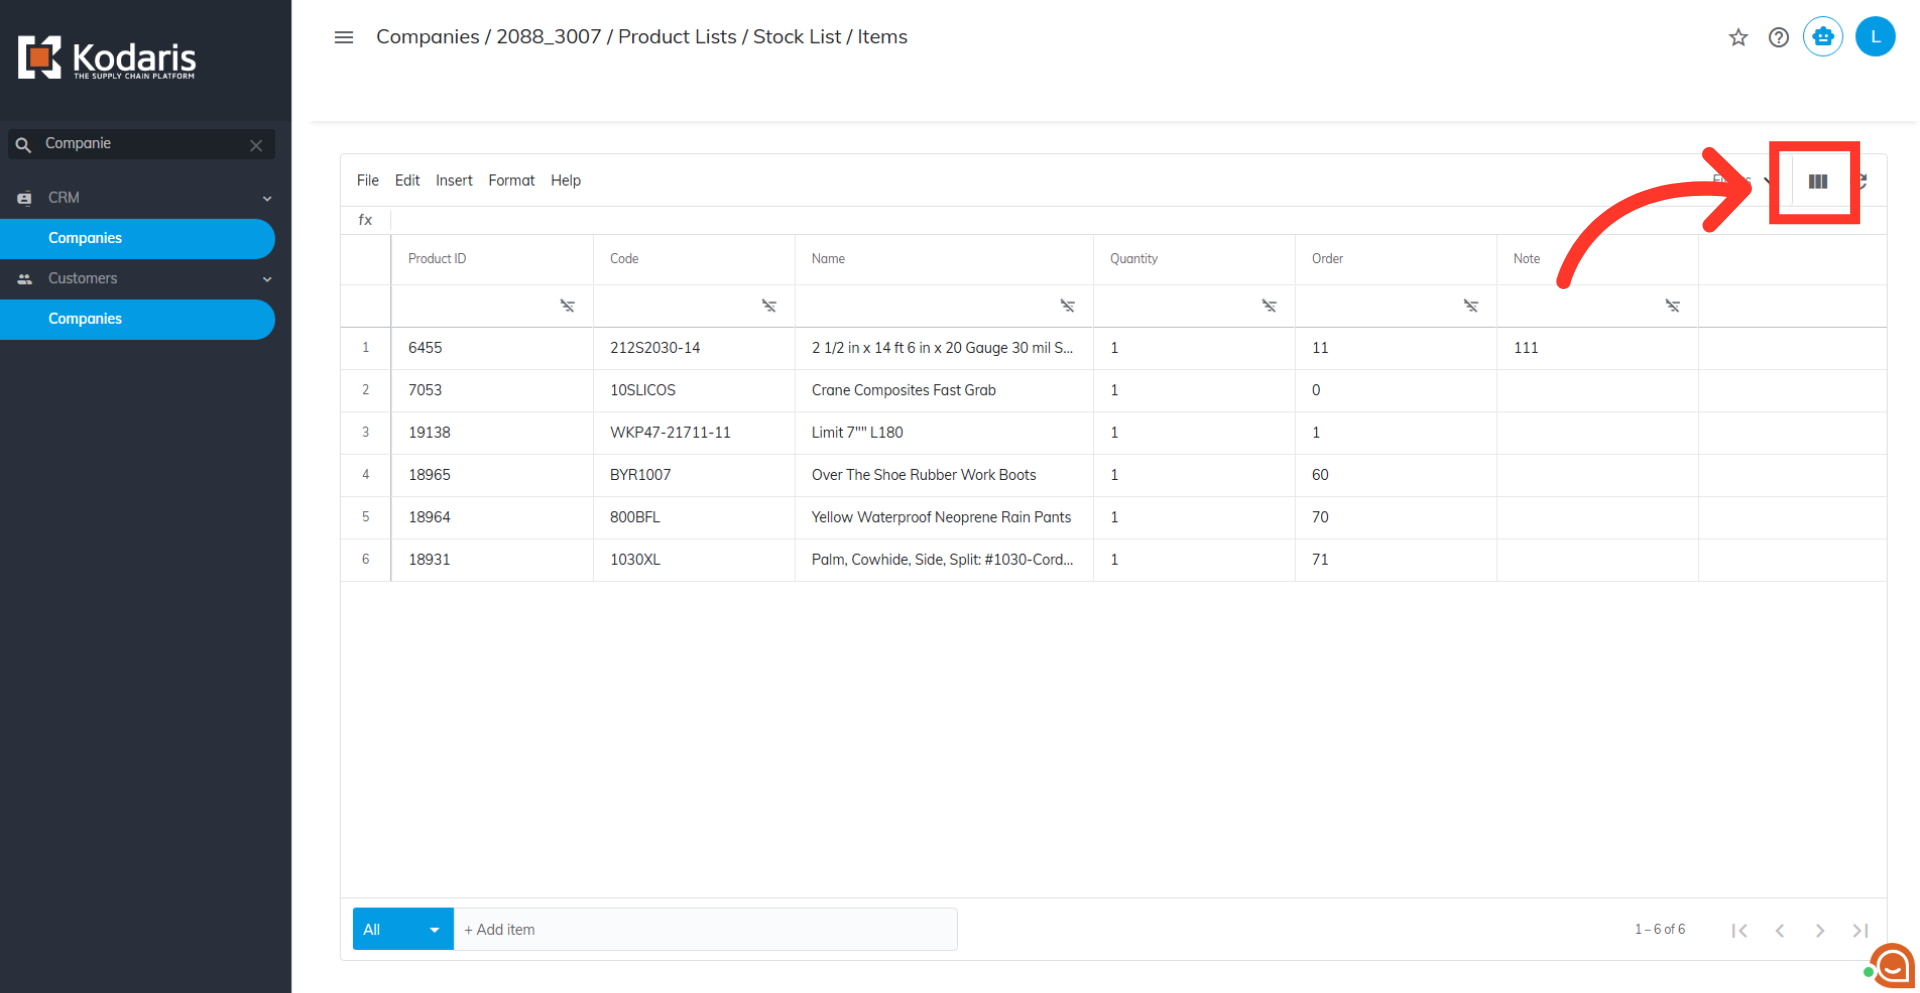
To export a file that can be used for importing data, the "Code" and "Product List ID" are required columns for importing and need to be added to the grid. You can also include other helpful columns such as "Quantity", "Order", and "Note". Uncheck any columns that are not needed to simplify the export file.
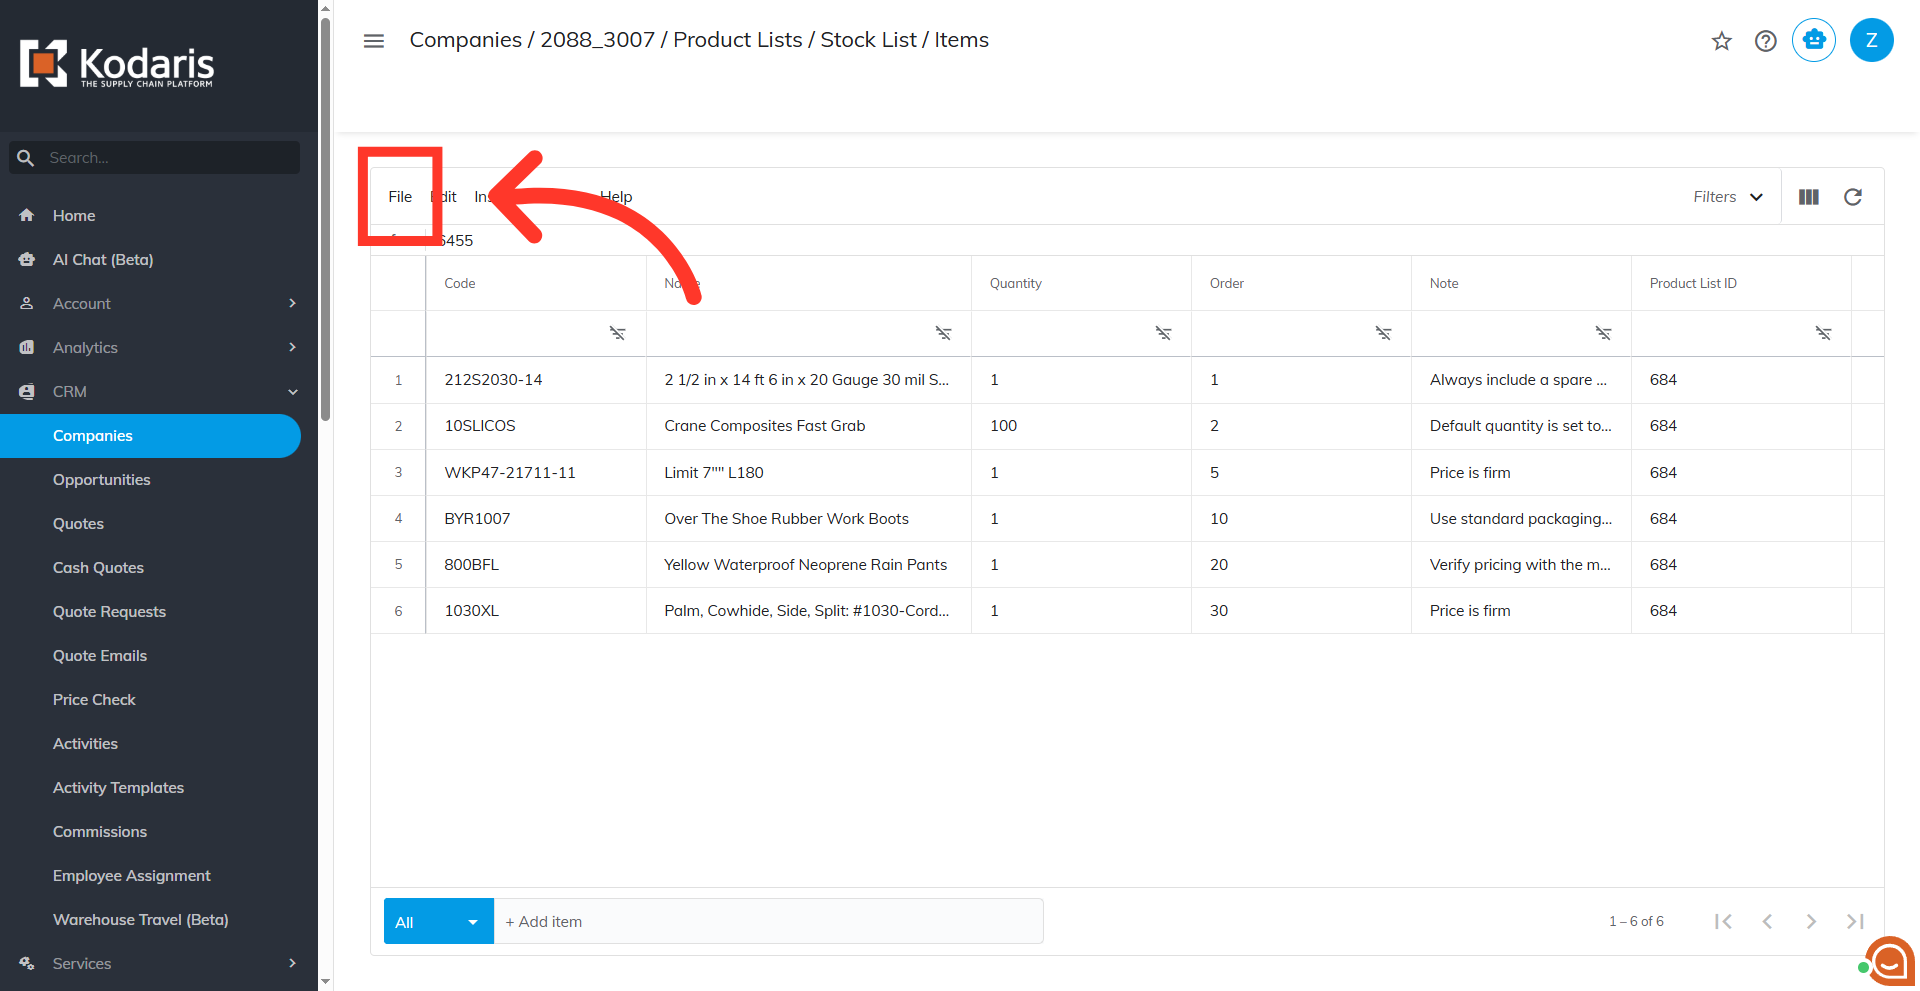
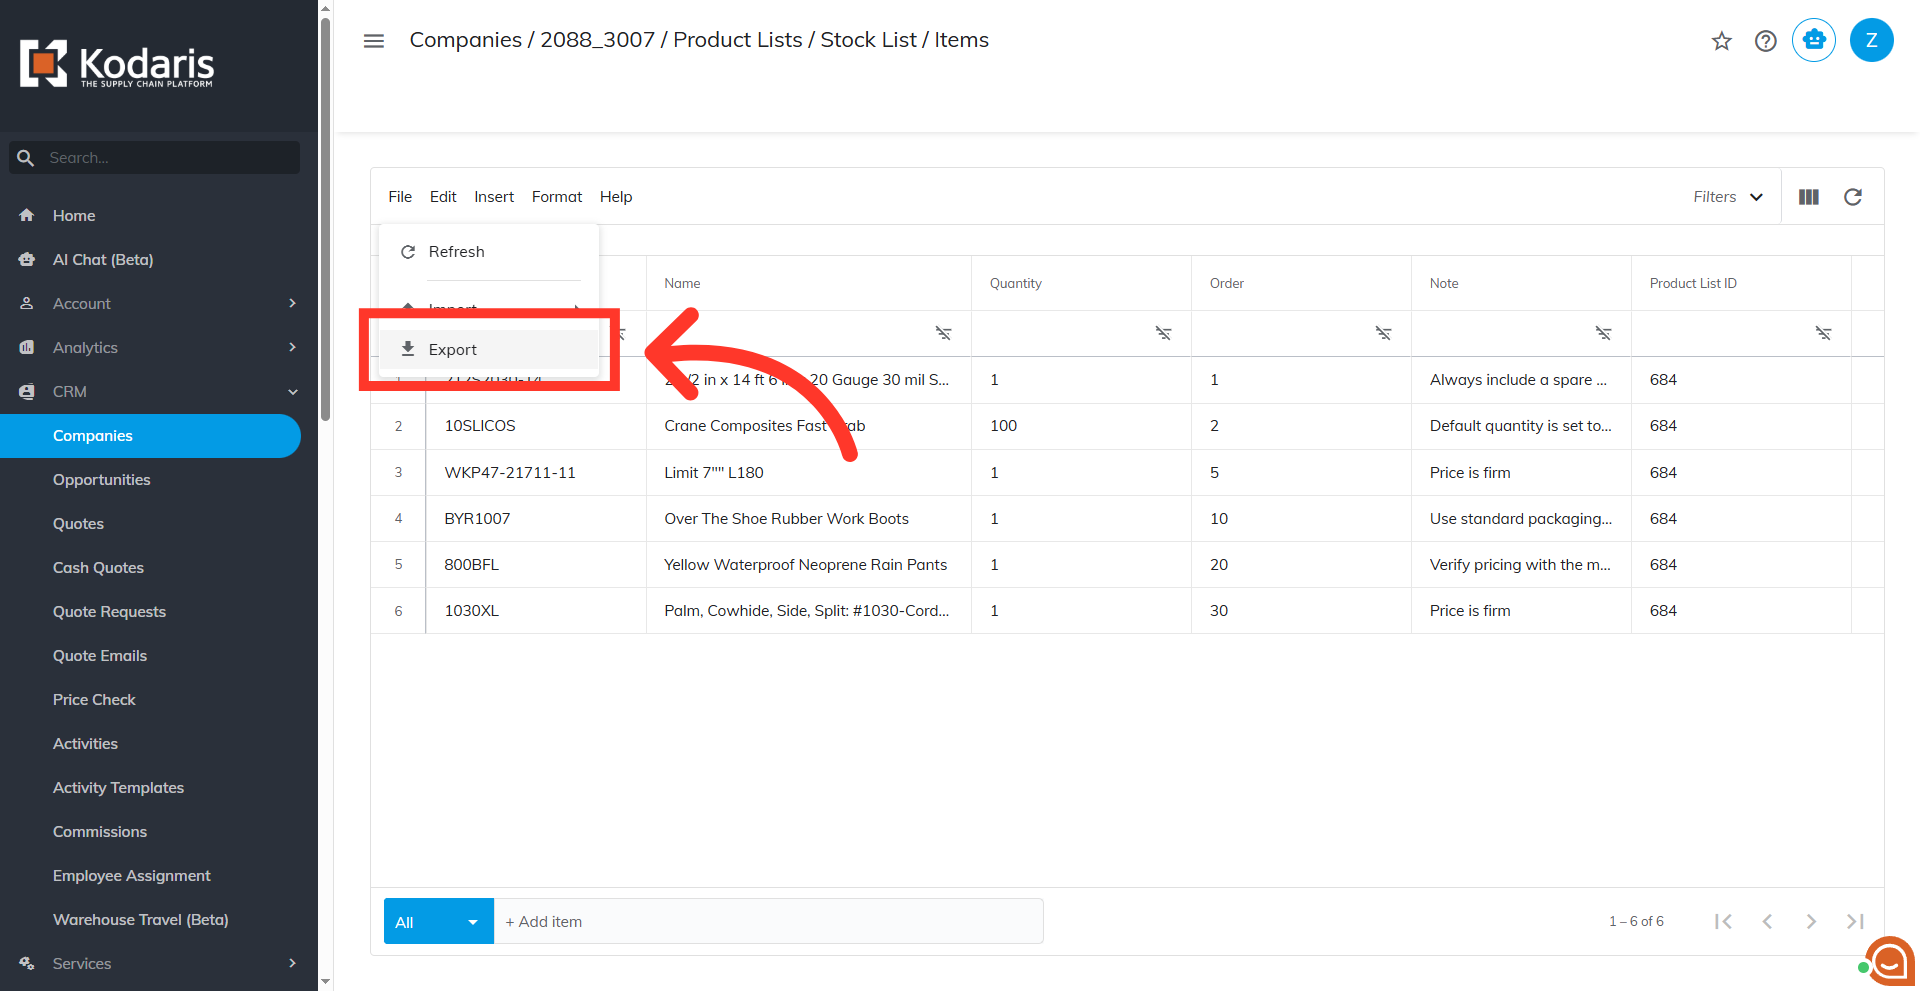
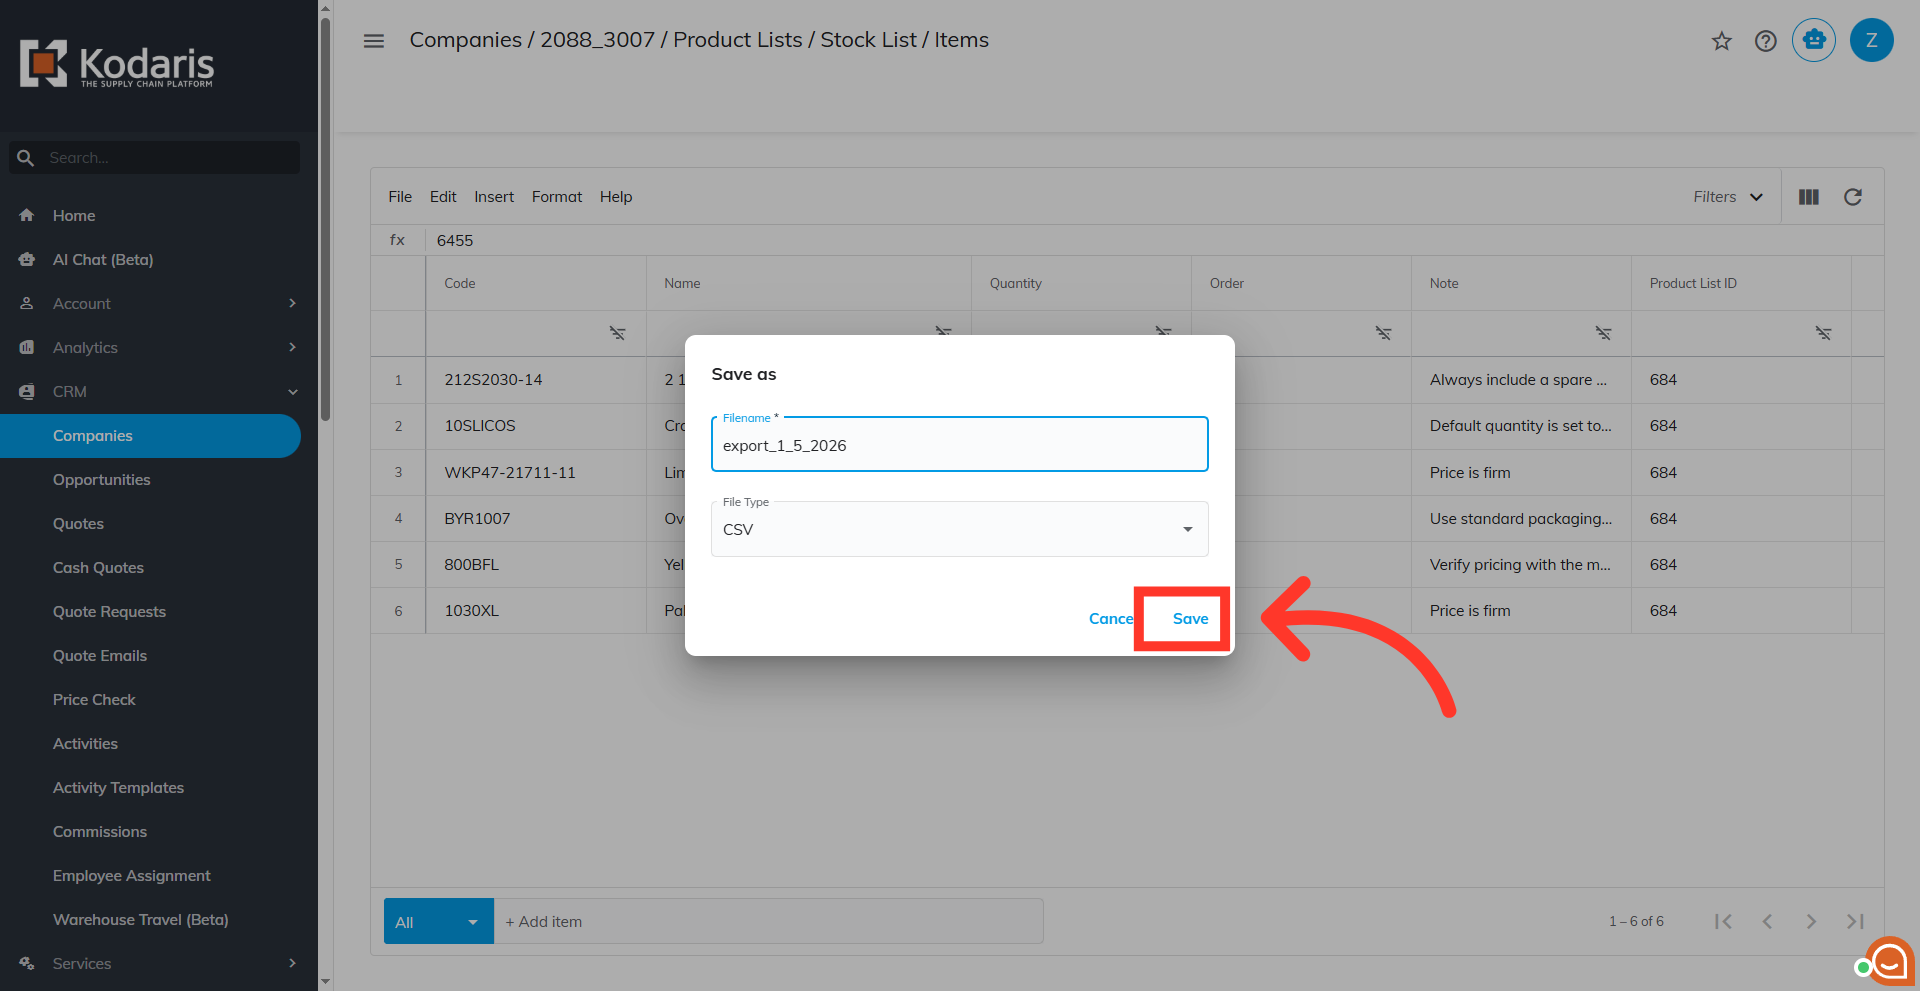
When ready to export, click "File".
Click the "Export" option.
A "Save as" dialog box will appear. If you would like to rename your export, click in the filename field to type and enter the name of your file.
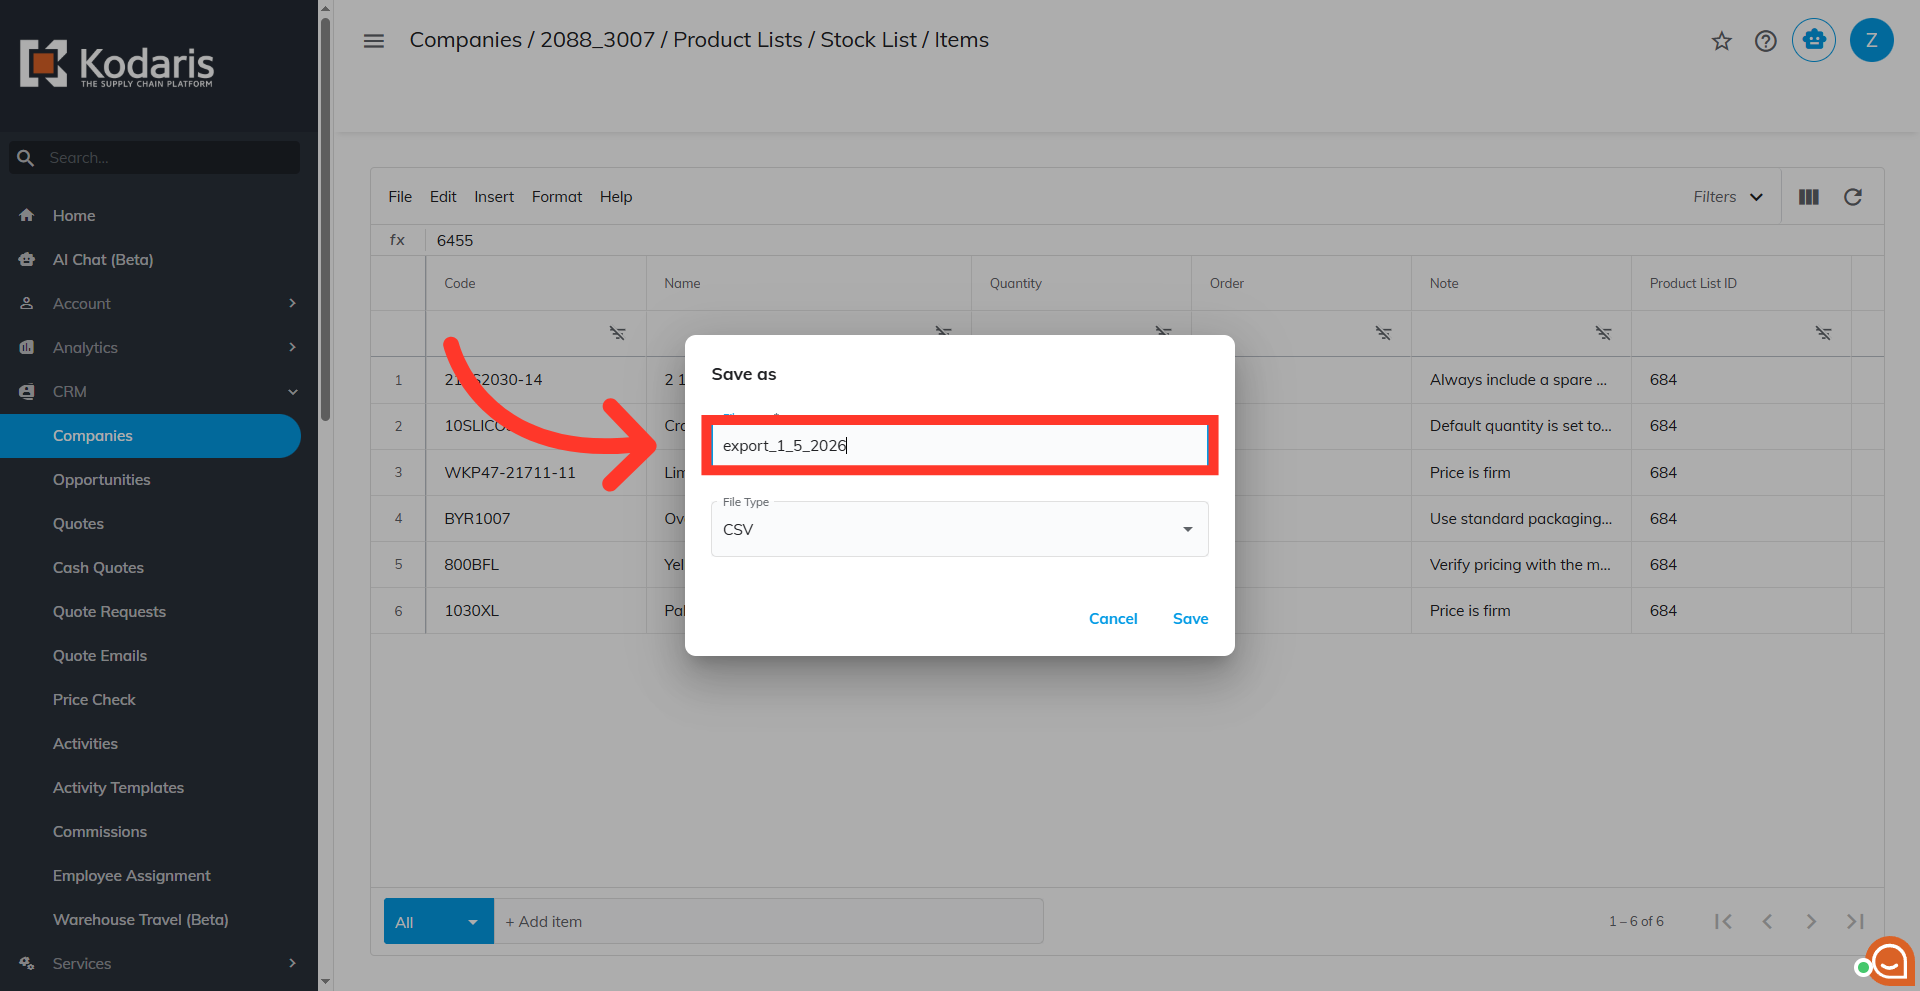
Then, click on the "Save" button. The file will be saved to your computer.
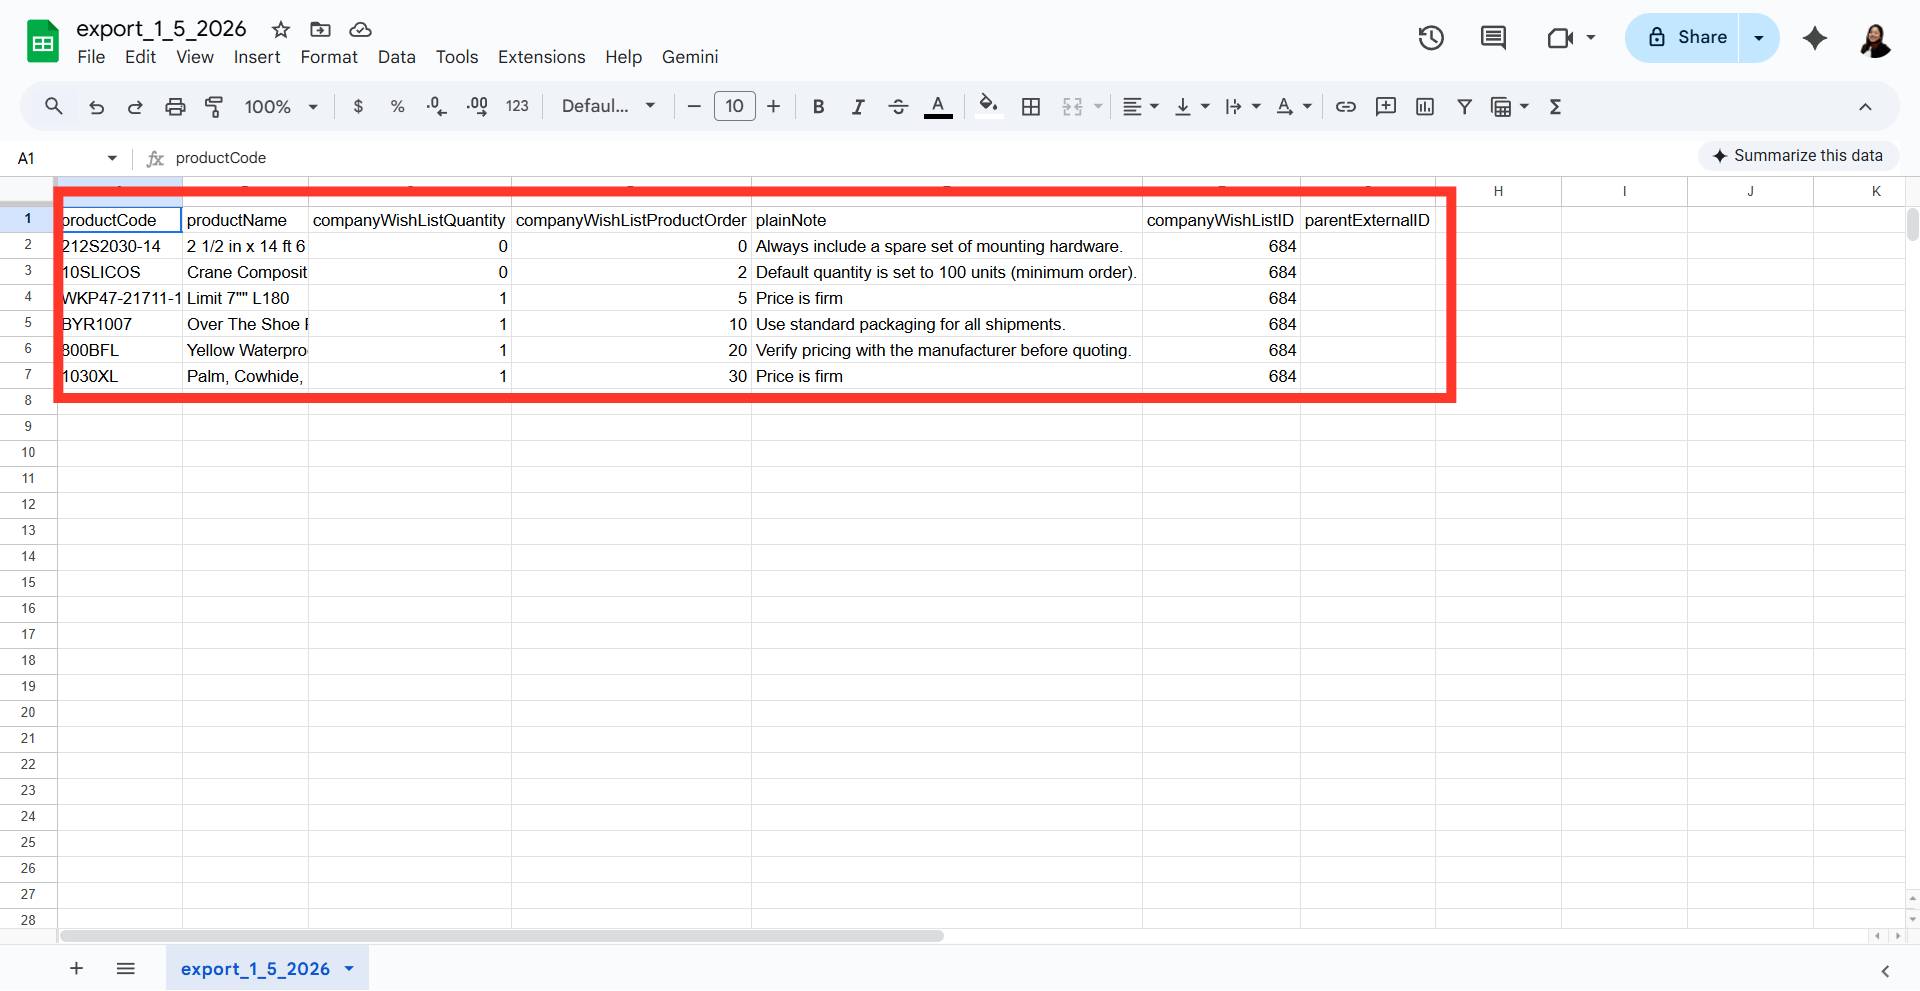
Here you can see an example export that includes the required columns "Code" and "Product List ID" along with any other columns chosen. Any data included with the export will also be in the spreadsheet.
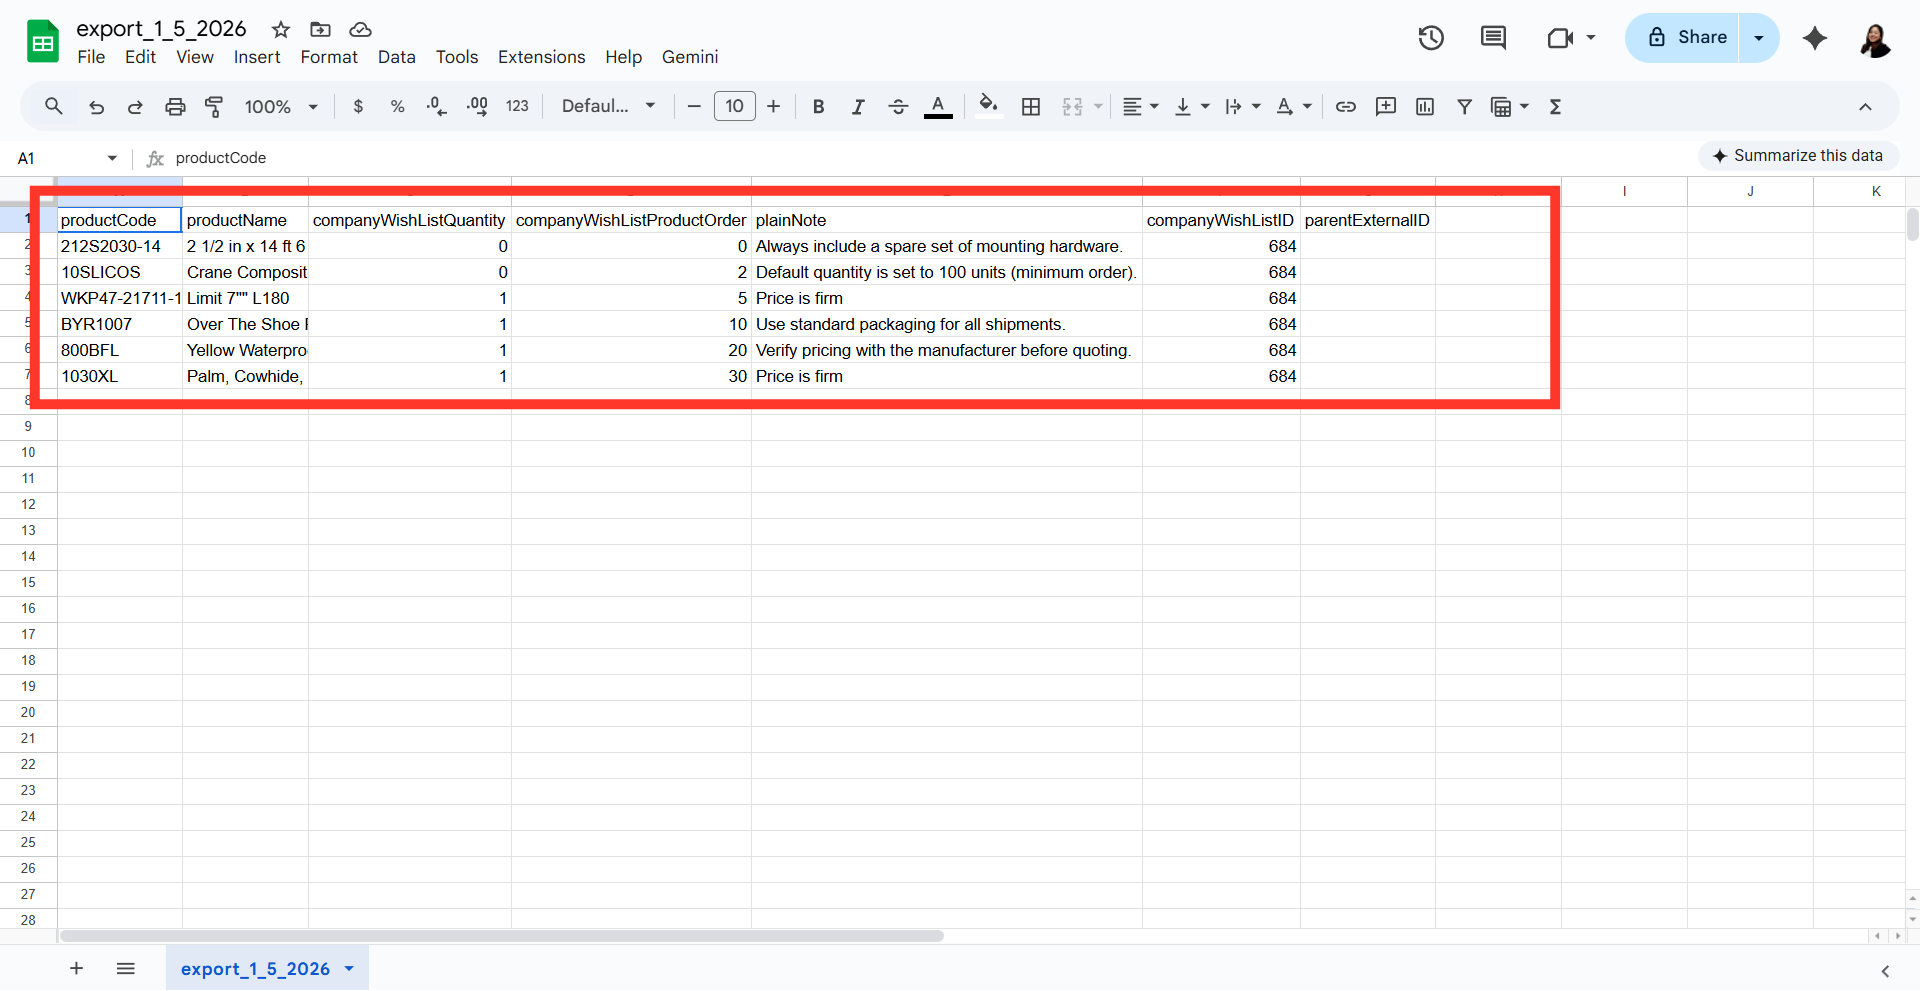
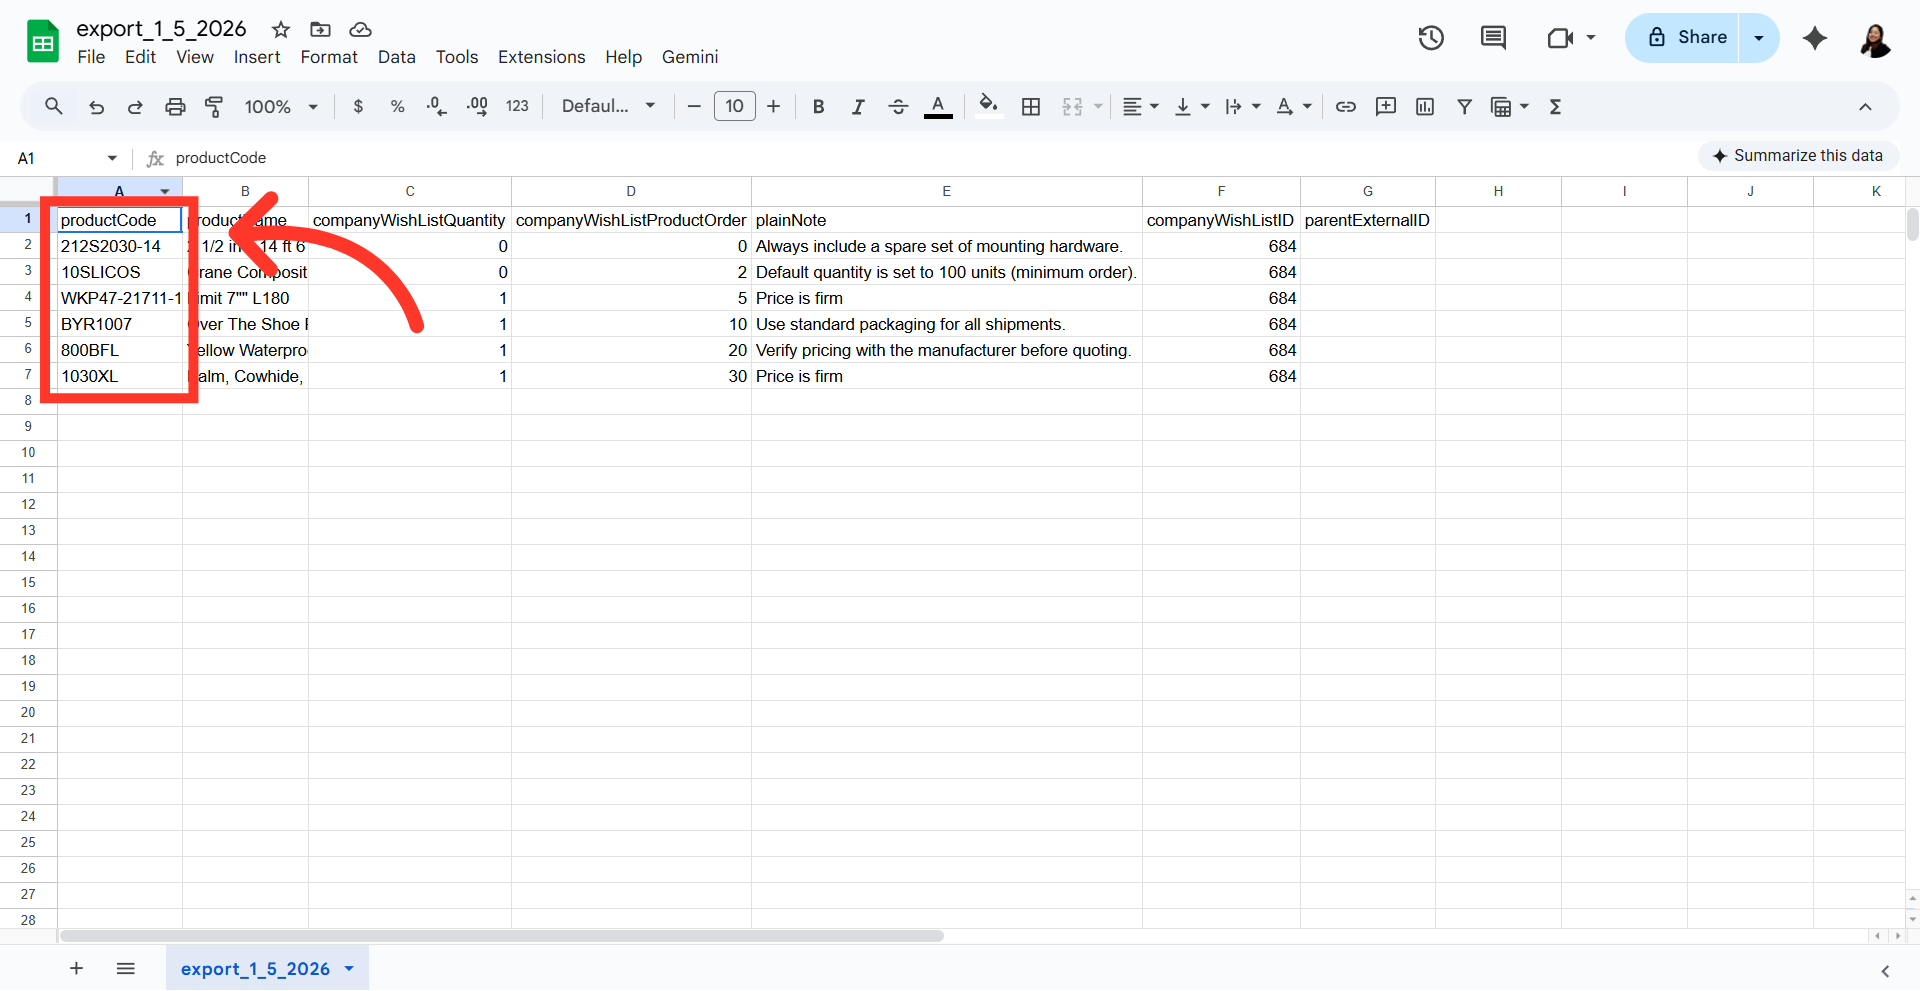
The "productCode" column contains the product code. When importing product data, the "ProductCode" is required as it is the identifying factor for matching information.
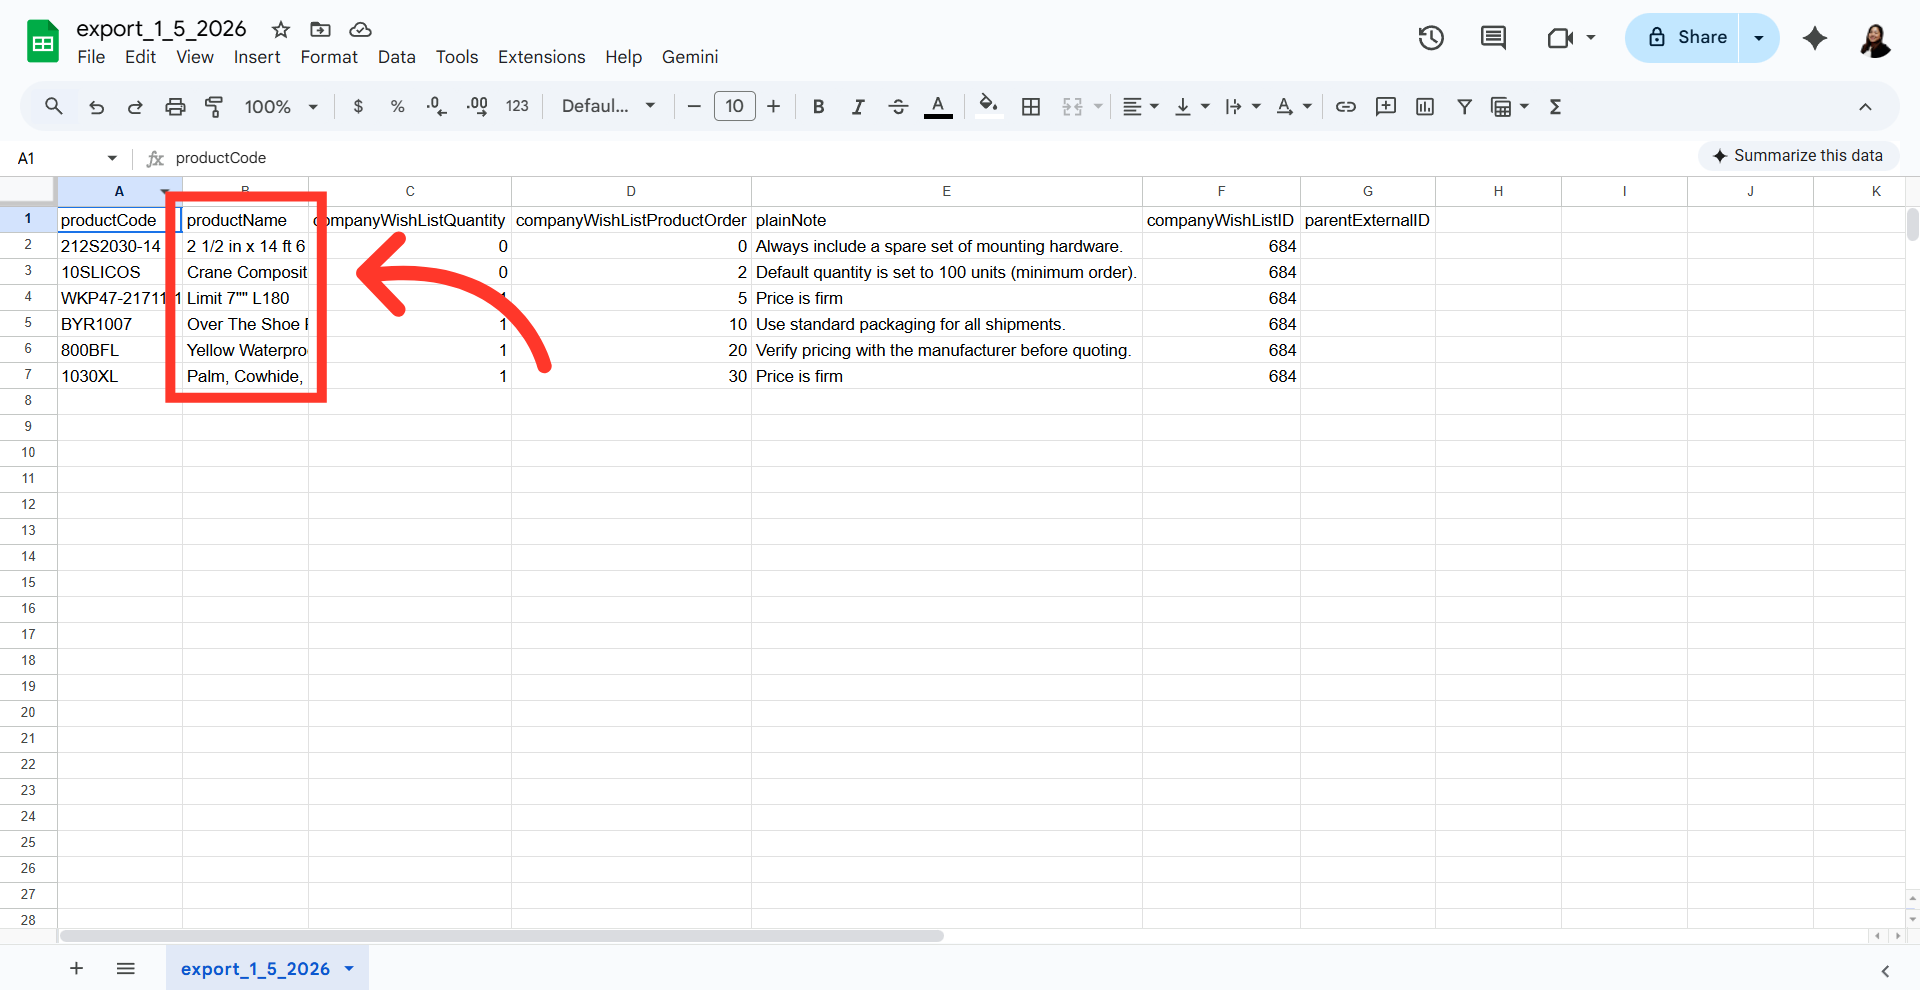
Though "productName" isn't required for import, it can be helpful in identifying the items you're updating in the spreadsheet. The name can be updated by import.
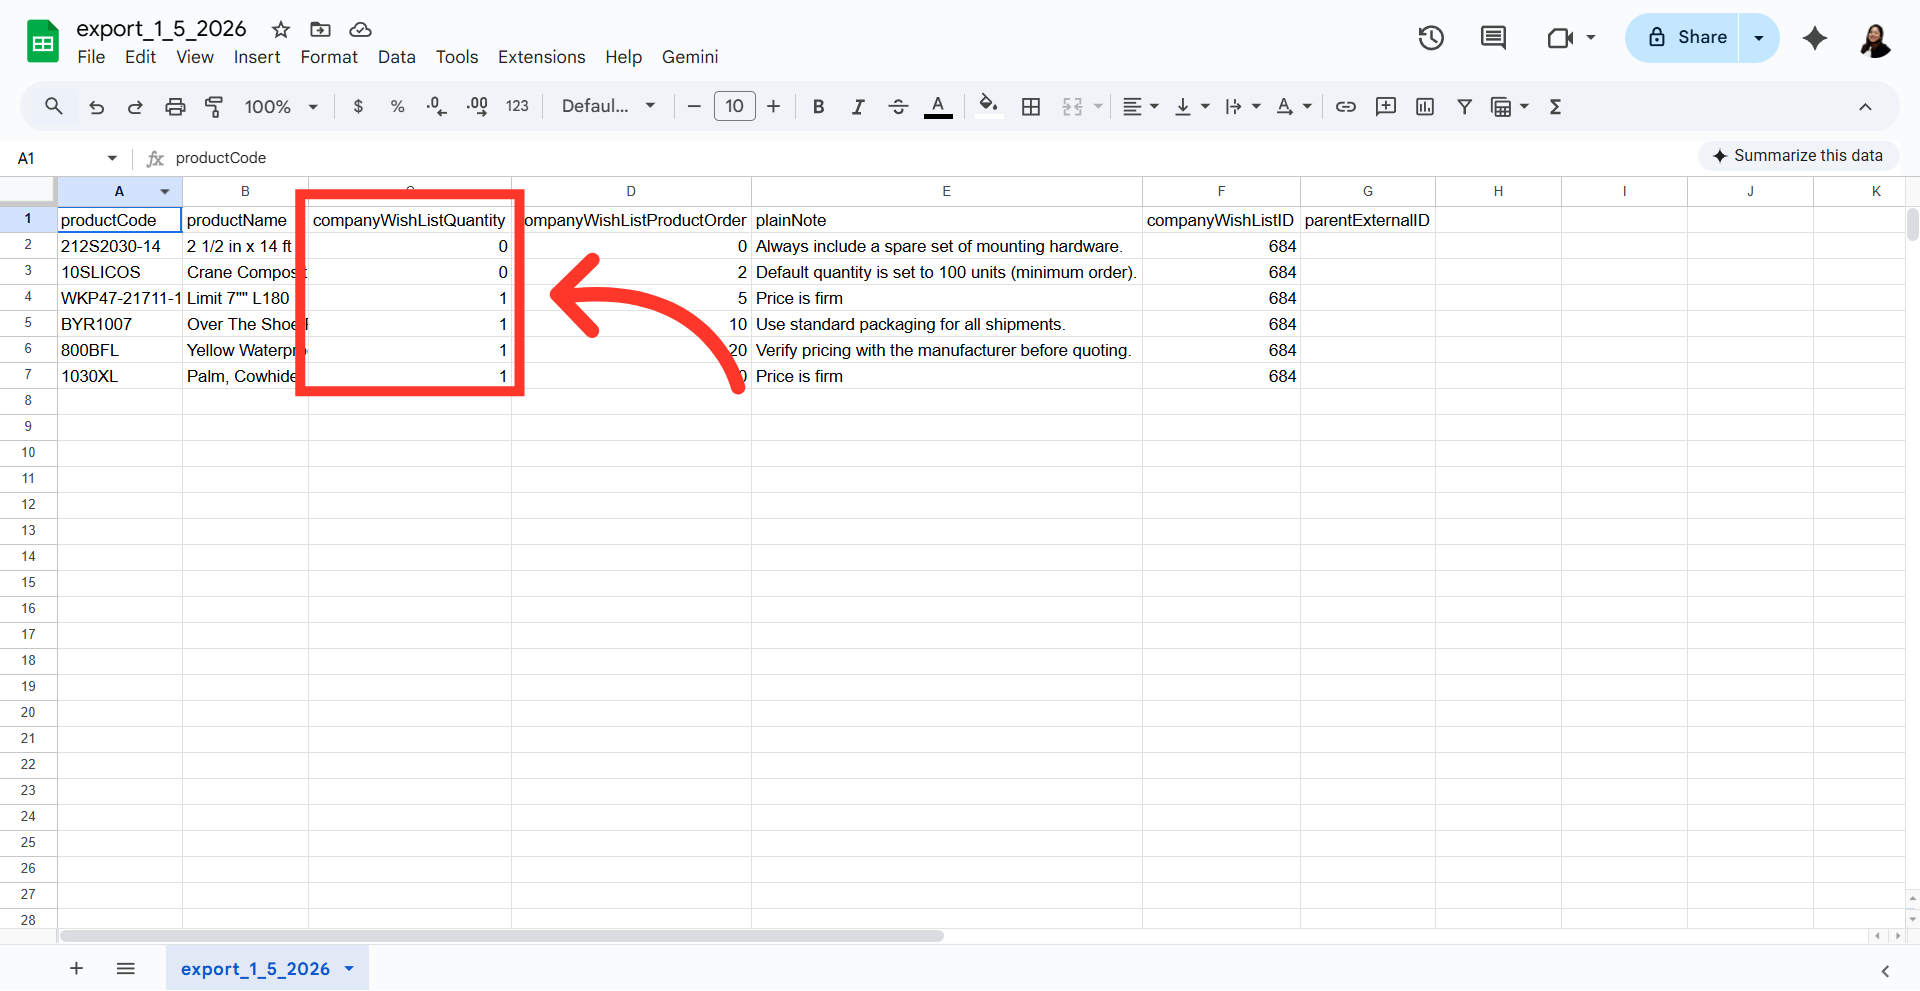
"companyWishListQuantity" is the product quantity. This is a numerical value and can be updated by import.
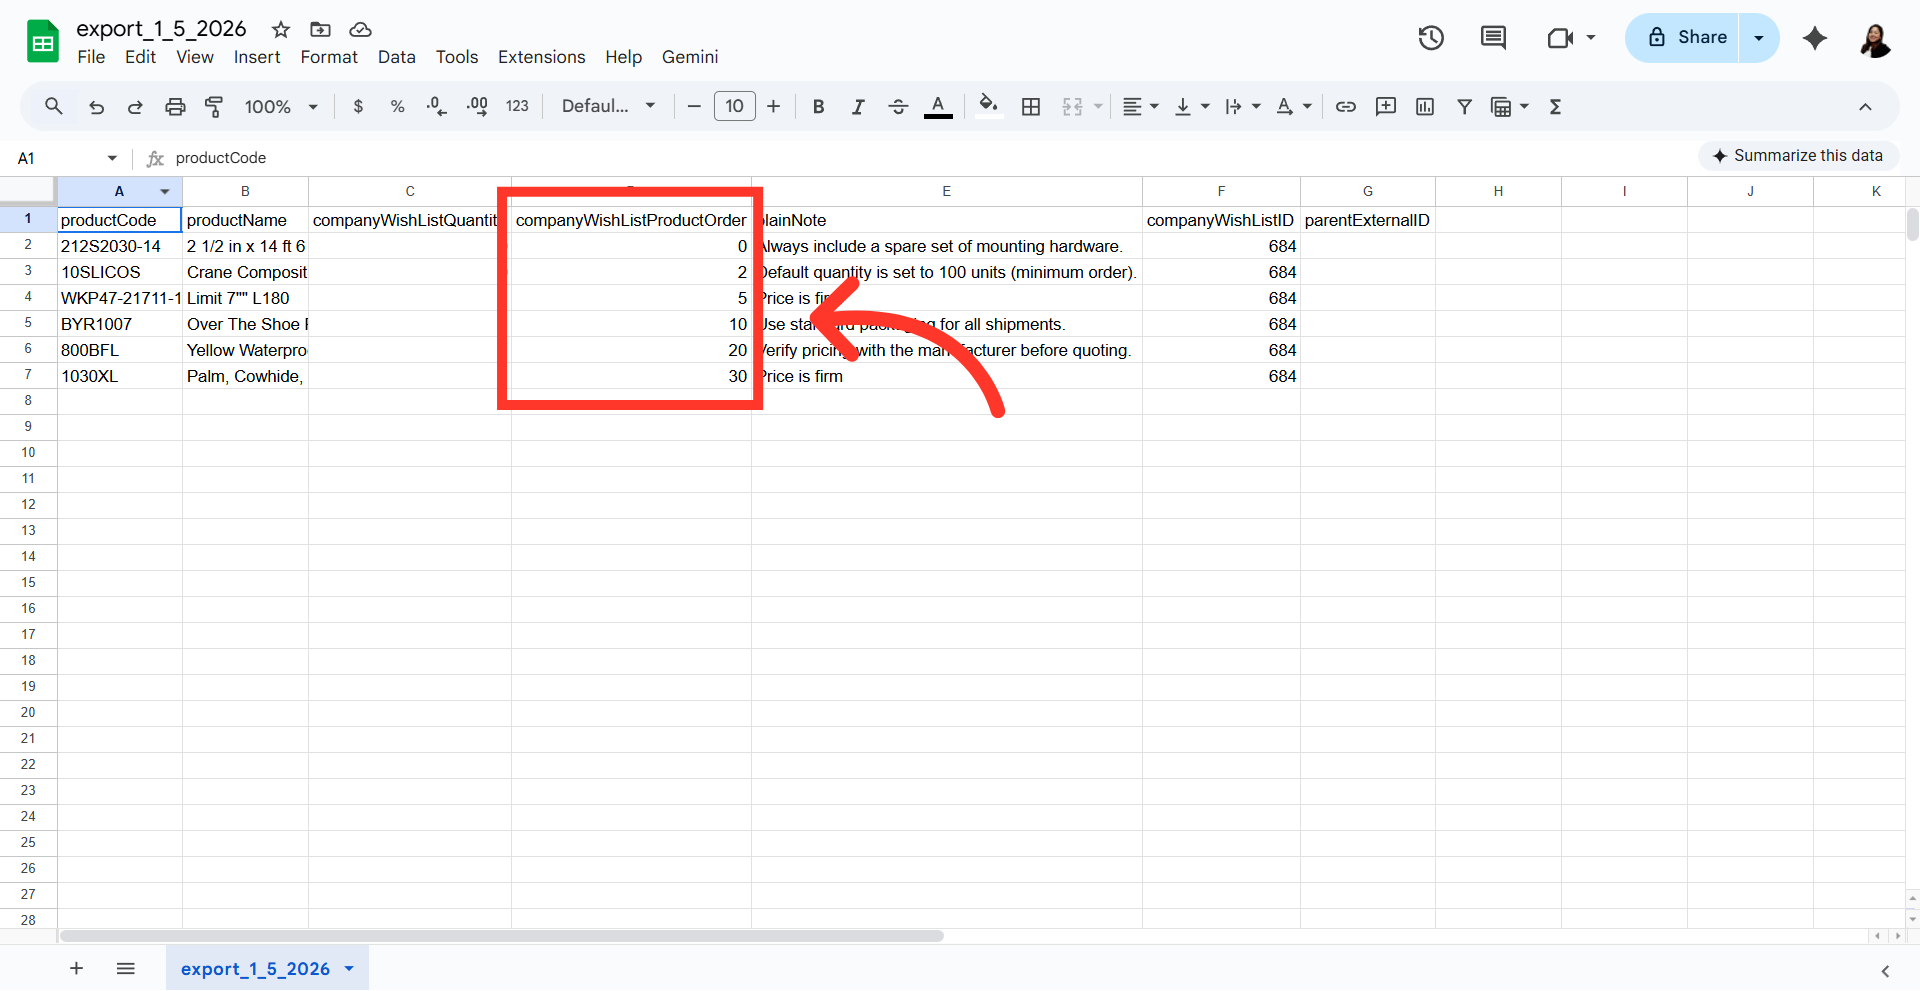
"companyWishListProductOrder" can also be updated by import. This can help order the products in your product list. The lower the value entered, the higher the product will be placed on the list.
"plainNote" is the note field, and can be updated by import. If updating note information with this import, the existing note in the system will be overwritten with the data that is being imported in the spreadsheet.

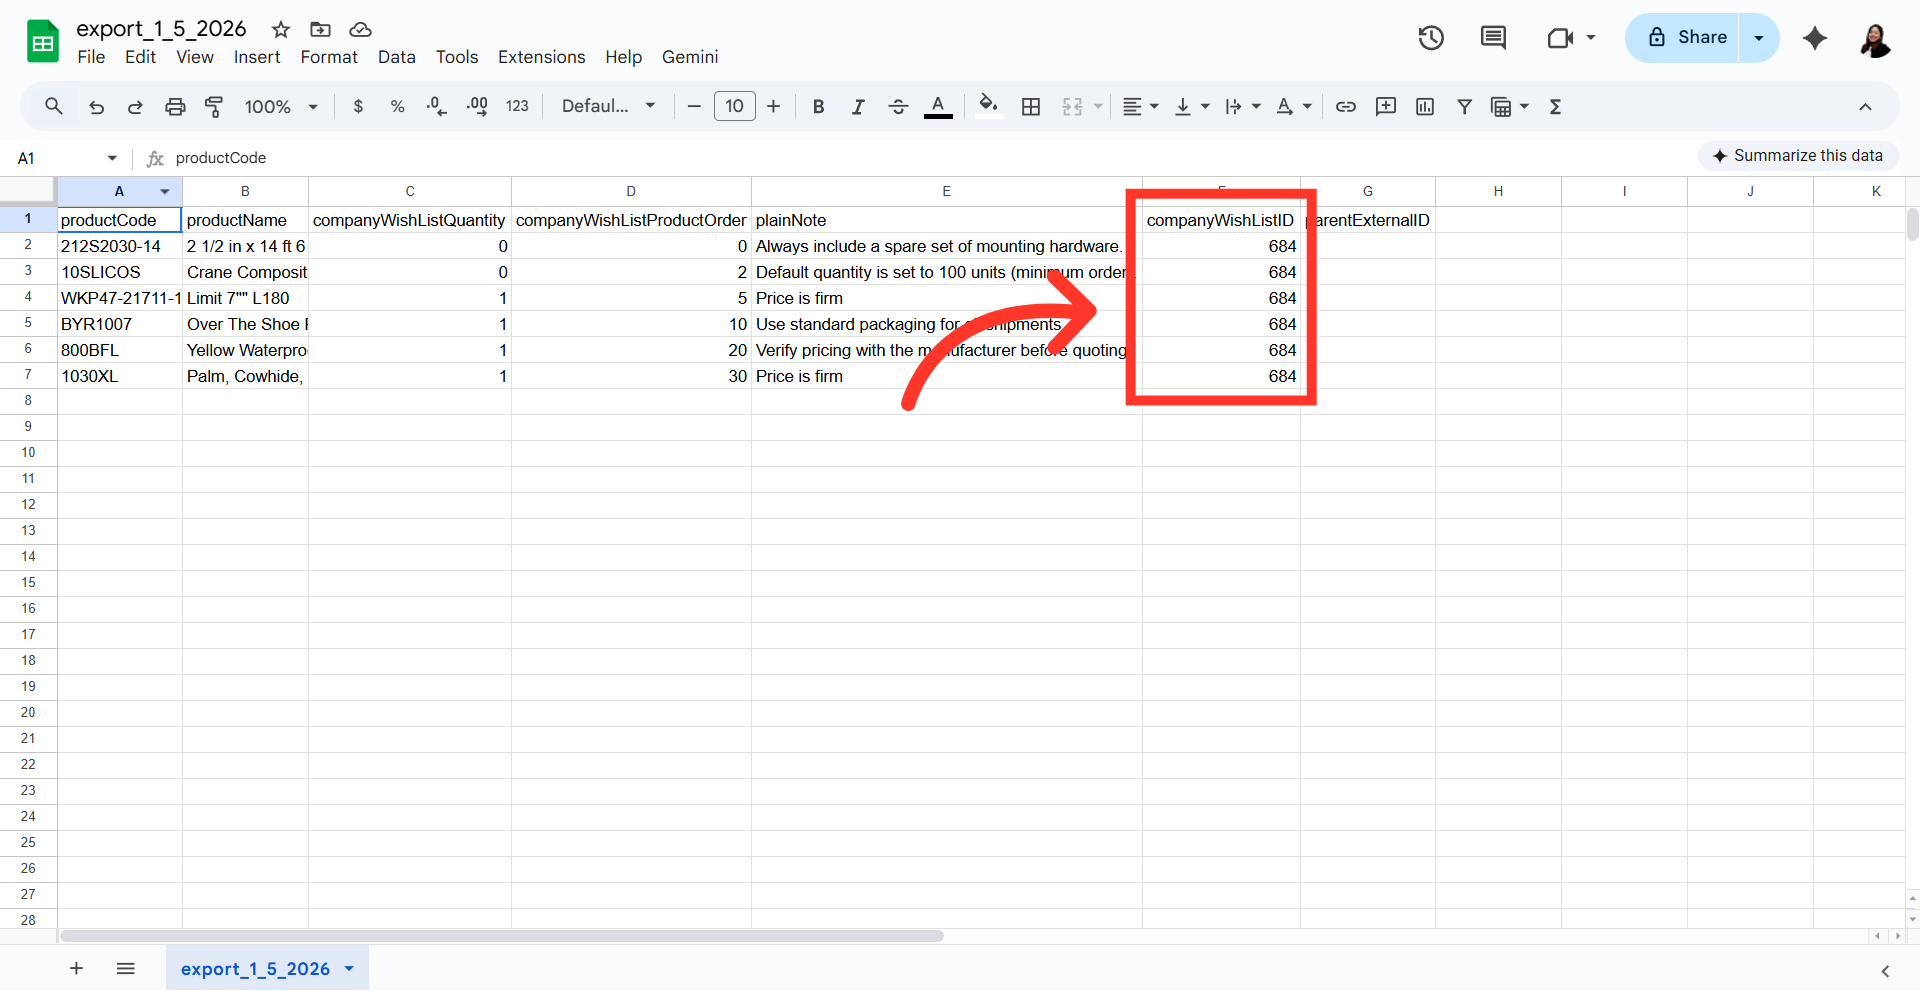
The "companyWishListID" is the "Product List ID" and is required when importing.
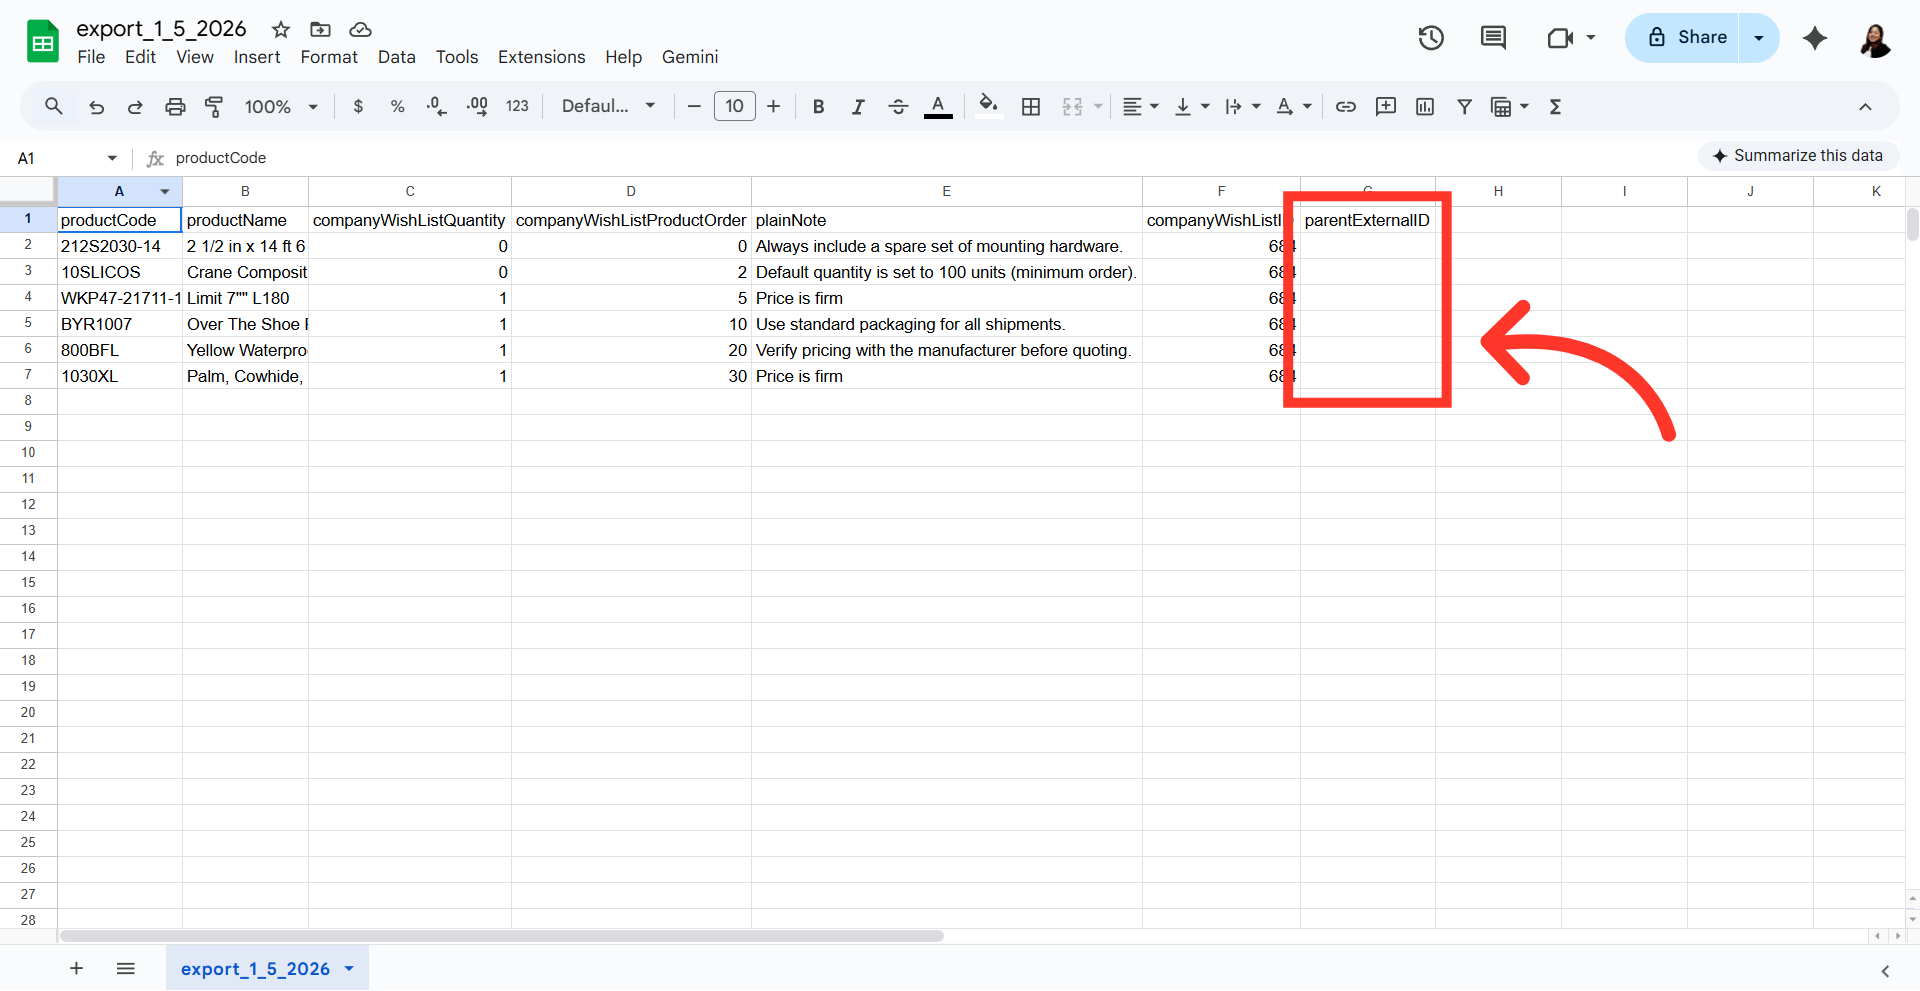
The "parentExternalID" column is included with the export by default. This column is not needed for this import and should be removed from the spreadsheet before importing.
After updating the needed changes in the export, save as a CSV file. Ensure the spreadsheet contains only the data intended for the update. If a cell is empty when importing, the import will remove any existing data.
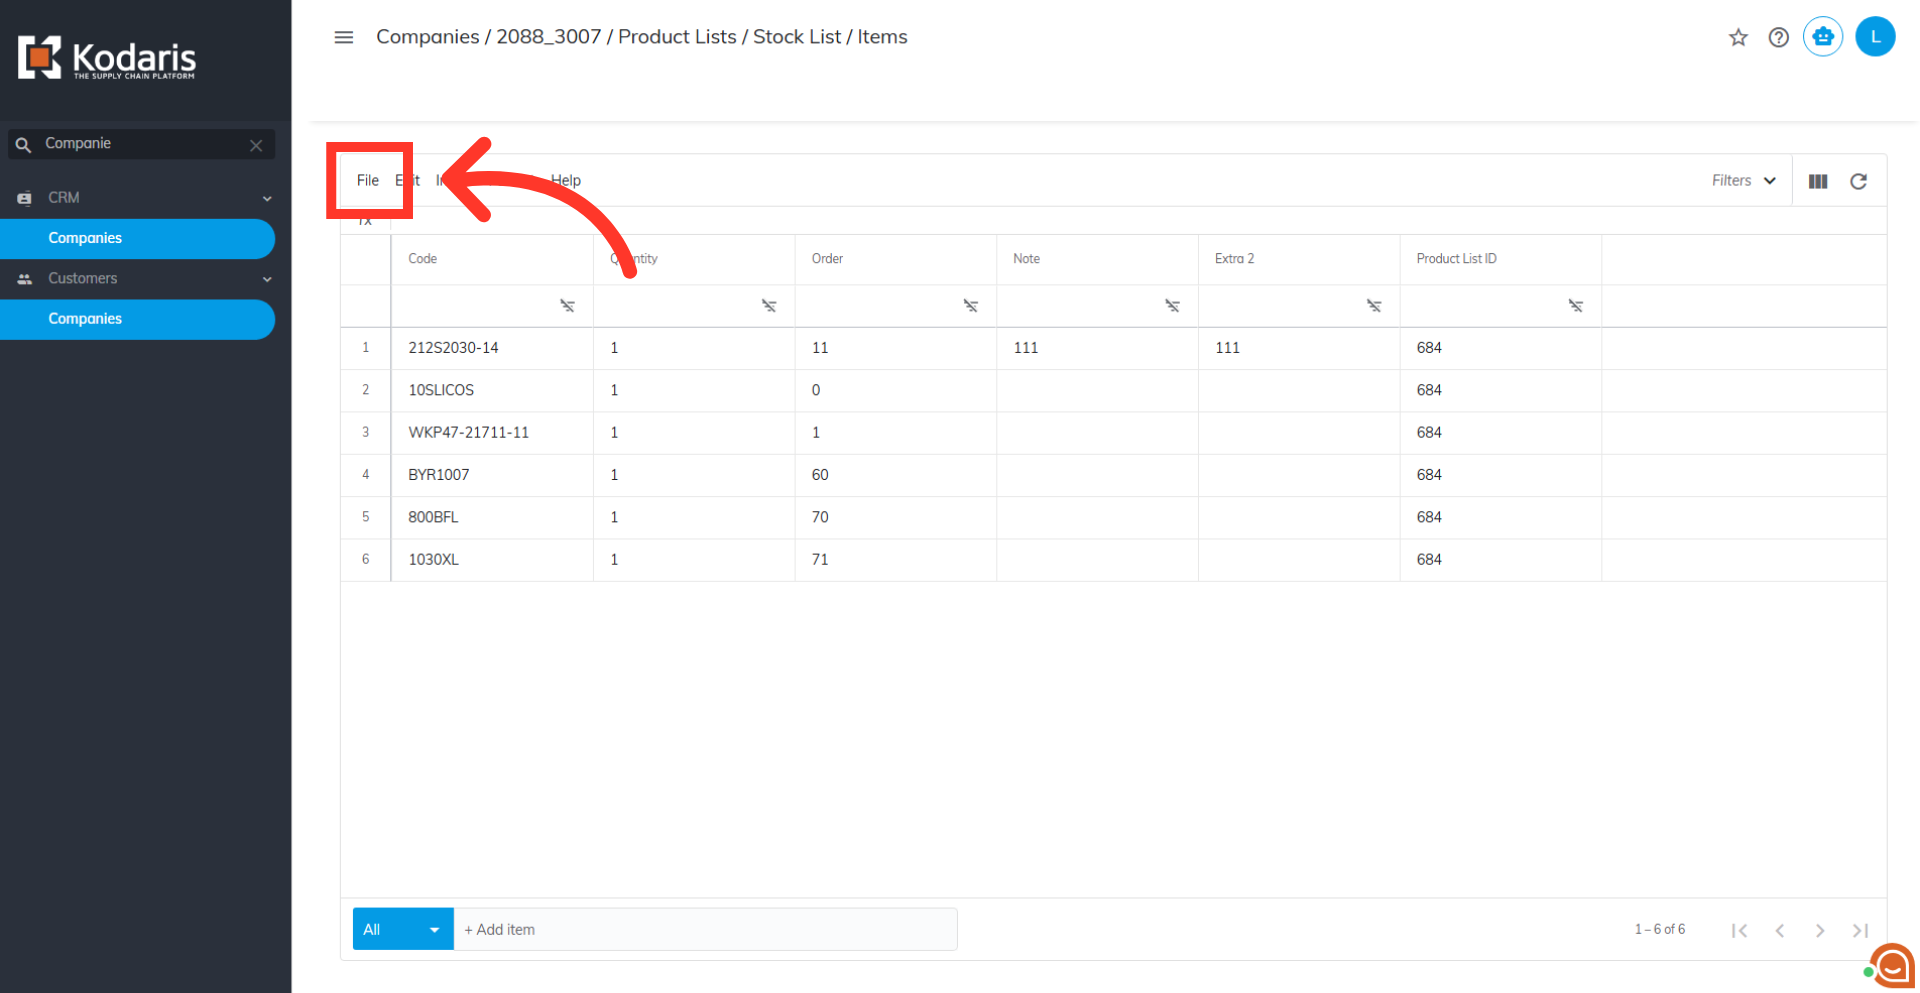
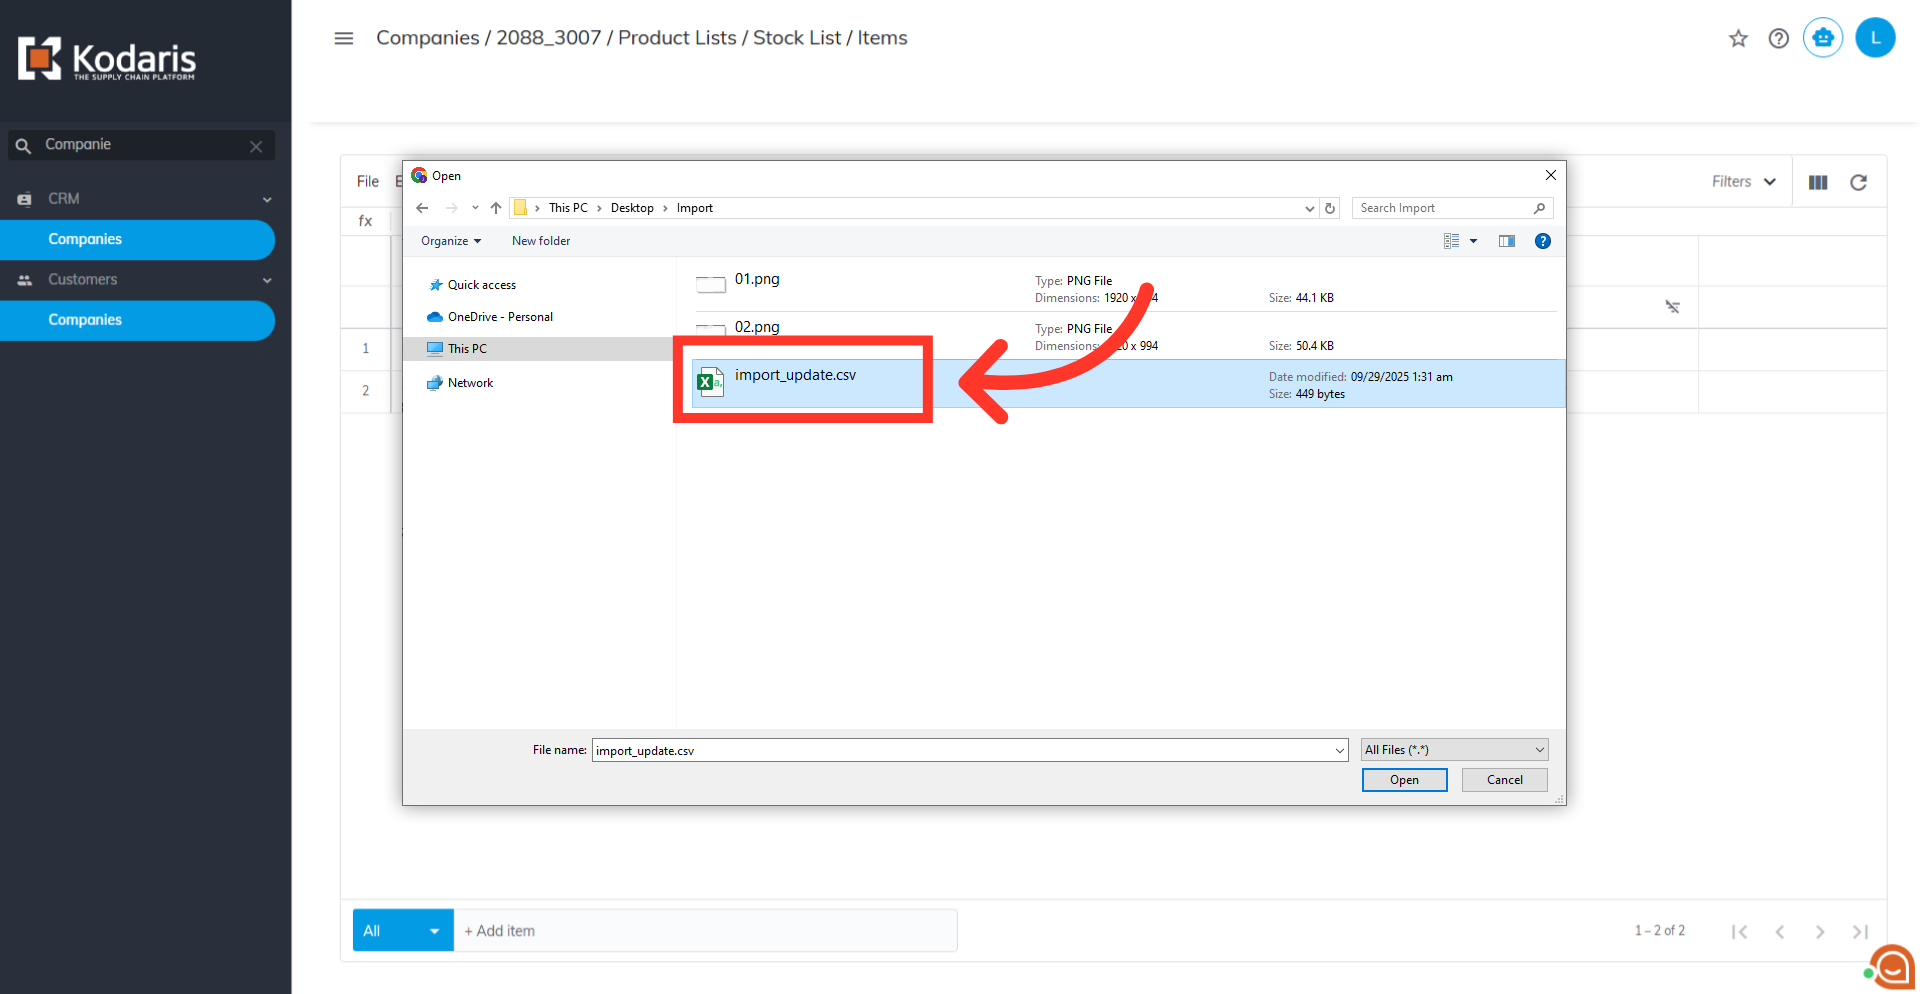
Now that your file is ready to import, go back to the "Product List Items" screen and click the "File" menu.
Now, select "Import" option.
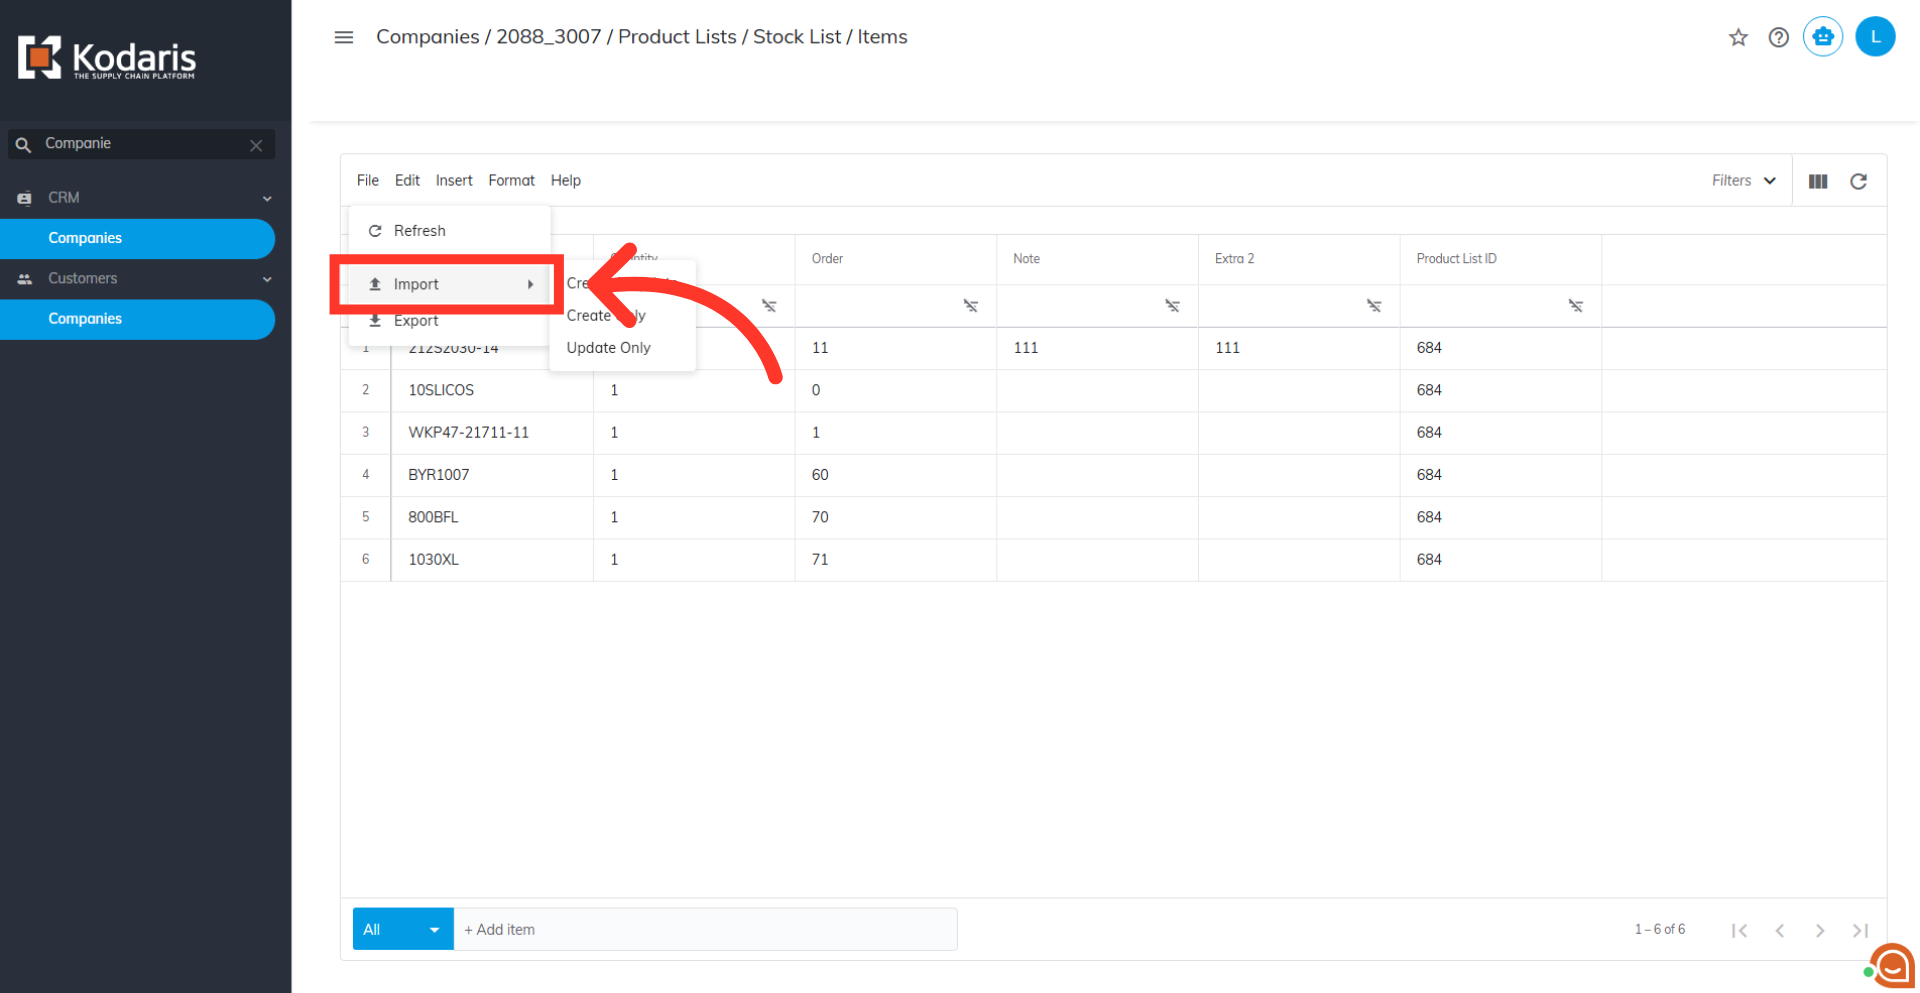
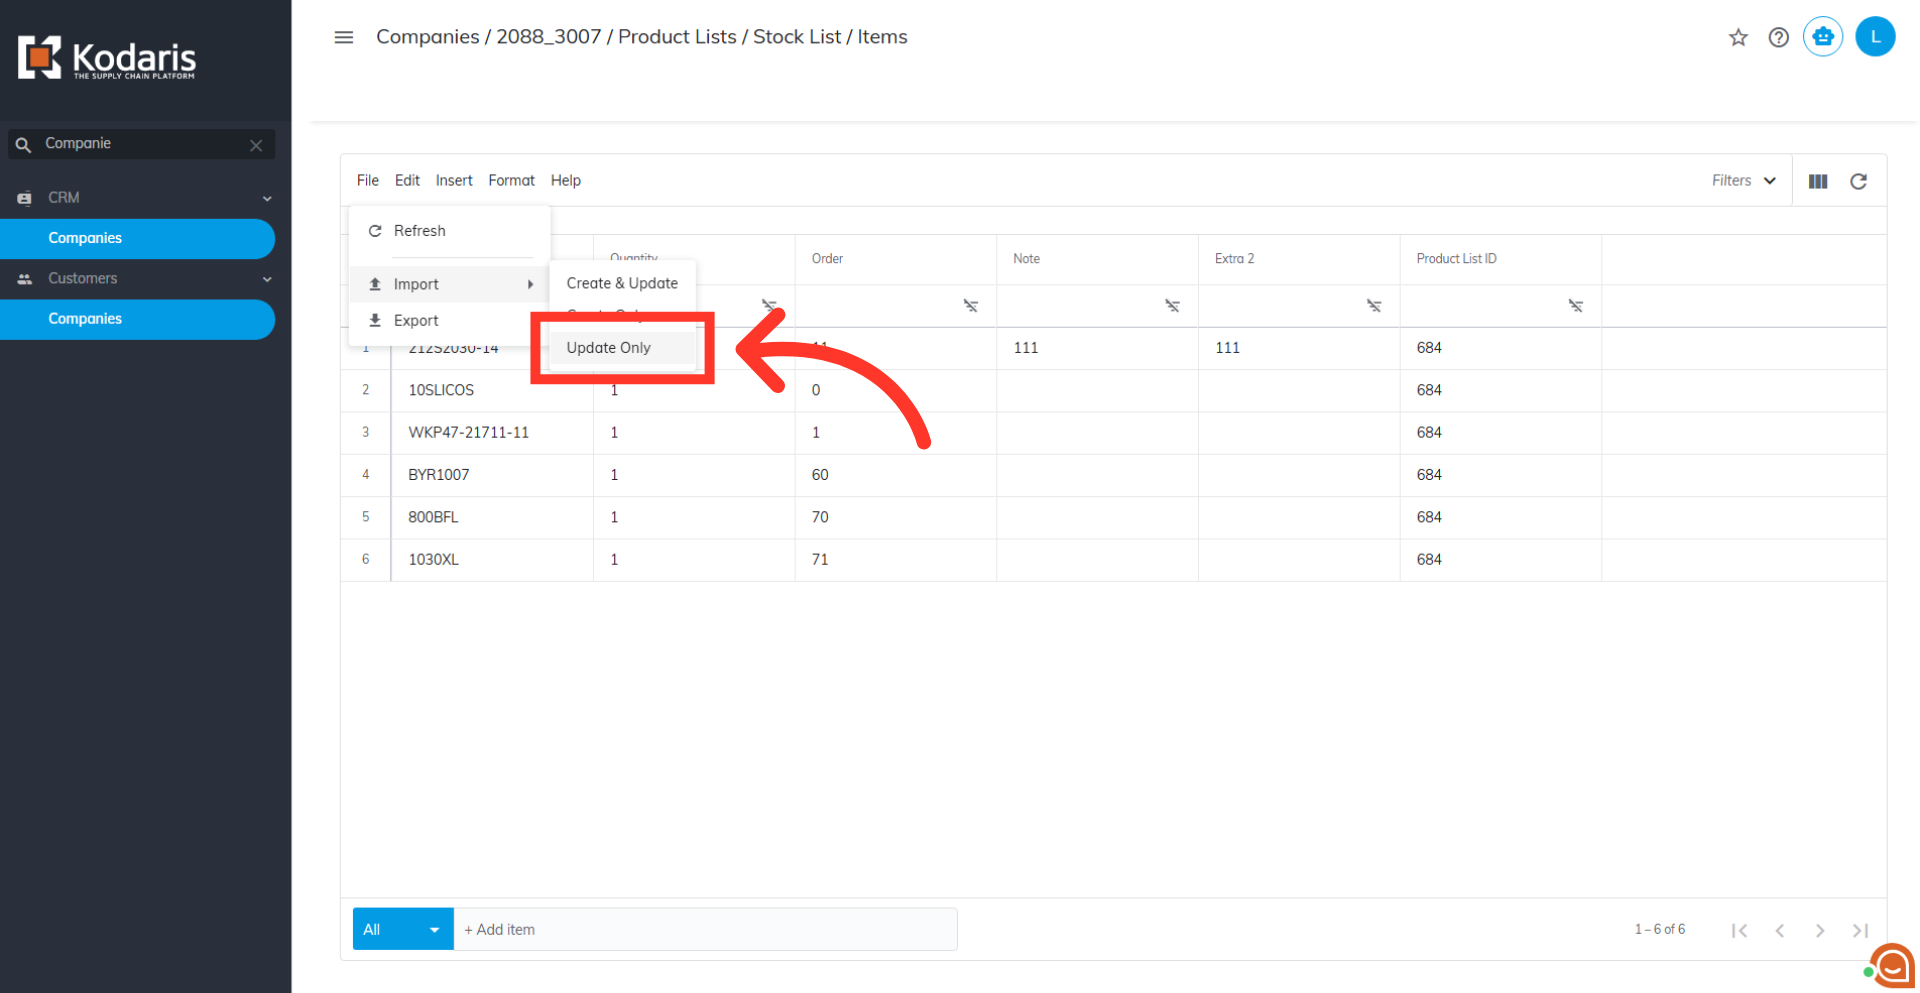
Since you are only updating data from the existing products in the list, select the "Update Only" option. You can select "Create & Update" if you are also adding new products along with the updating.
Choose the prepared CSV file for the import
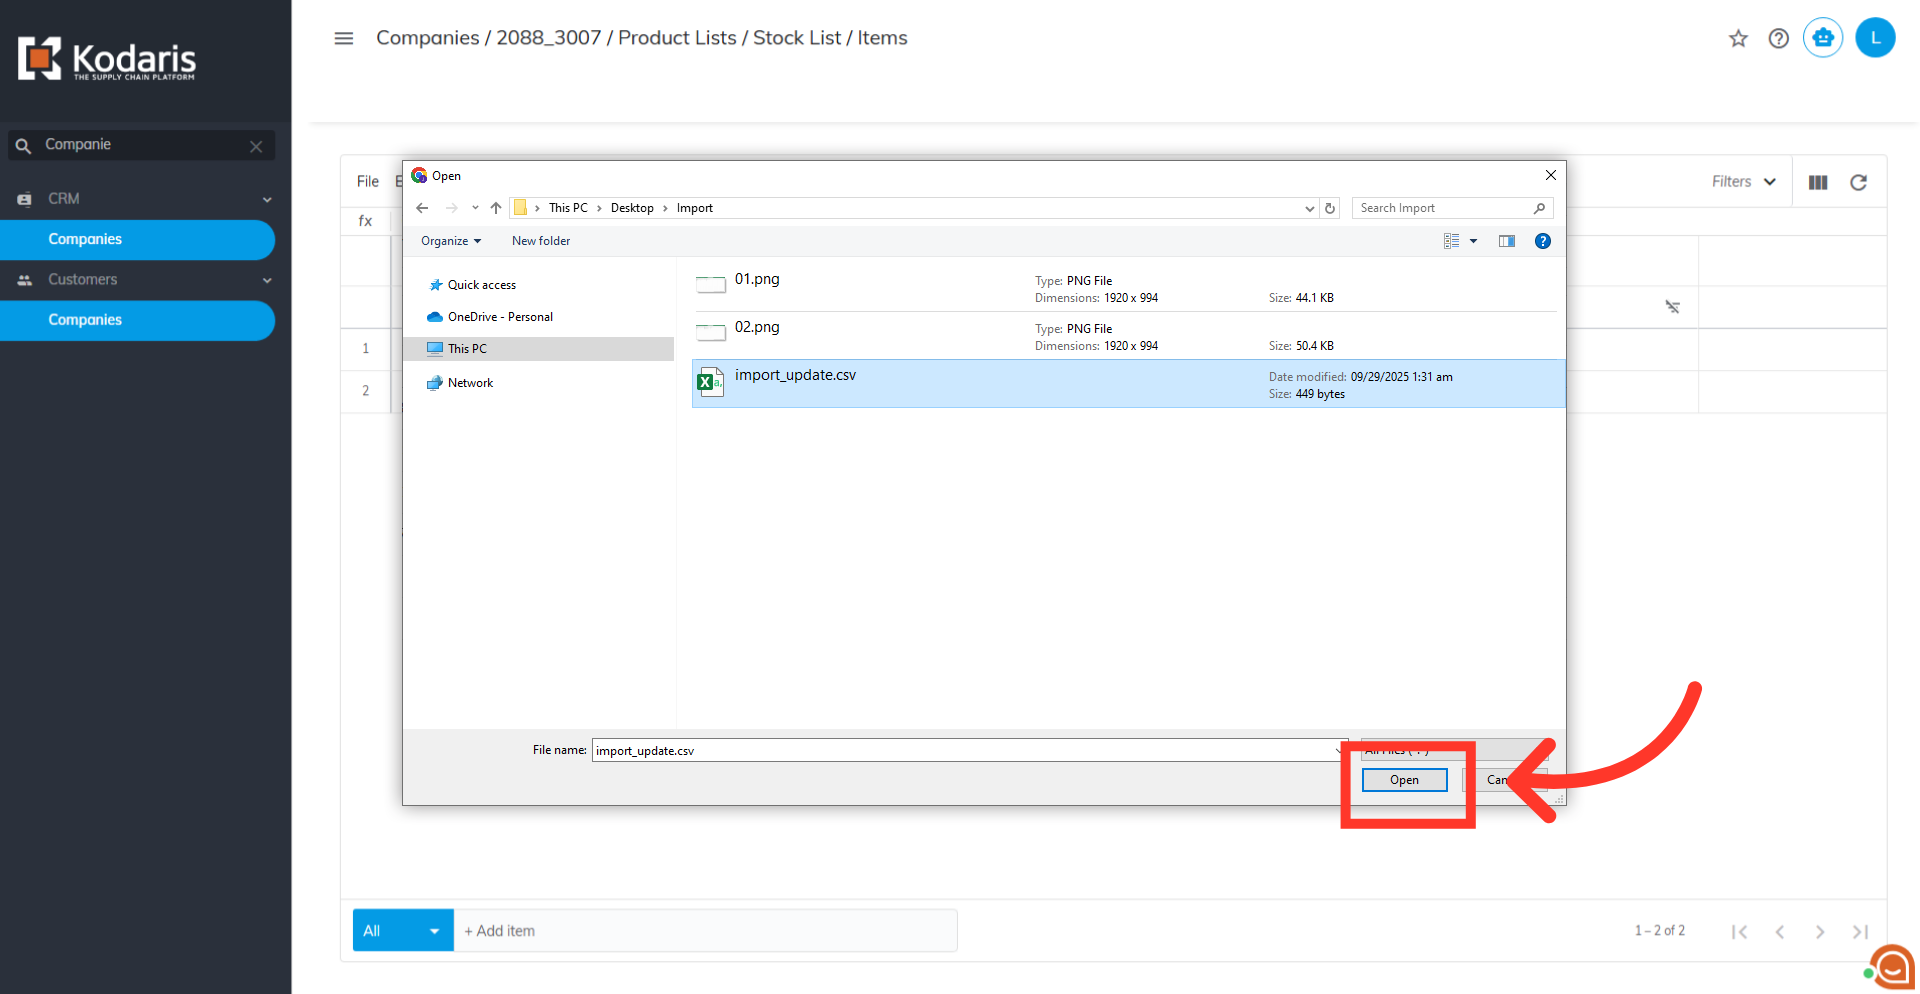
Click "Open". The import will run in the background. Allow a few minutes for the data to be imported, and note that larger imports may take longer.
When the import is done, refresh the product list items screen to see the updated list.
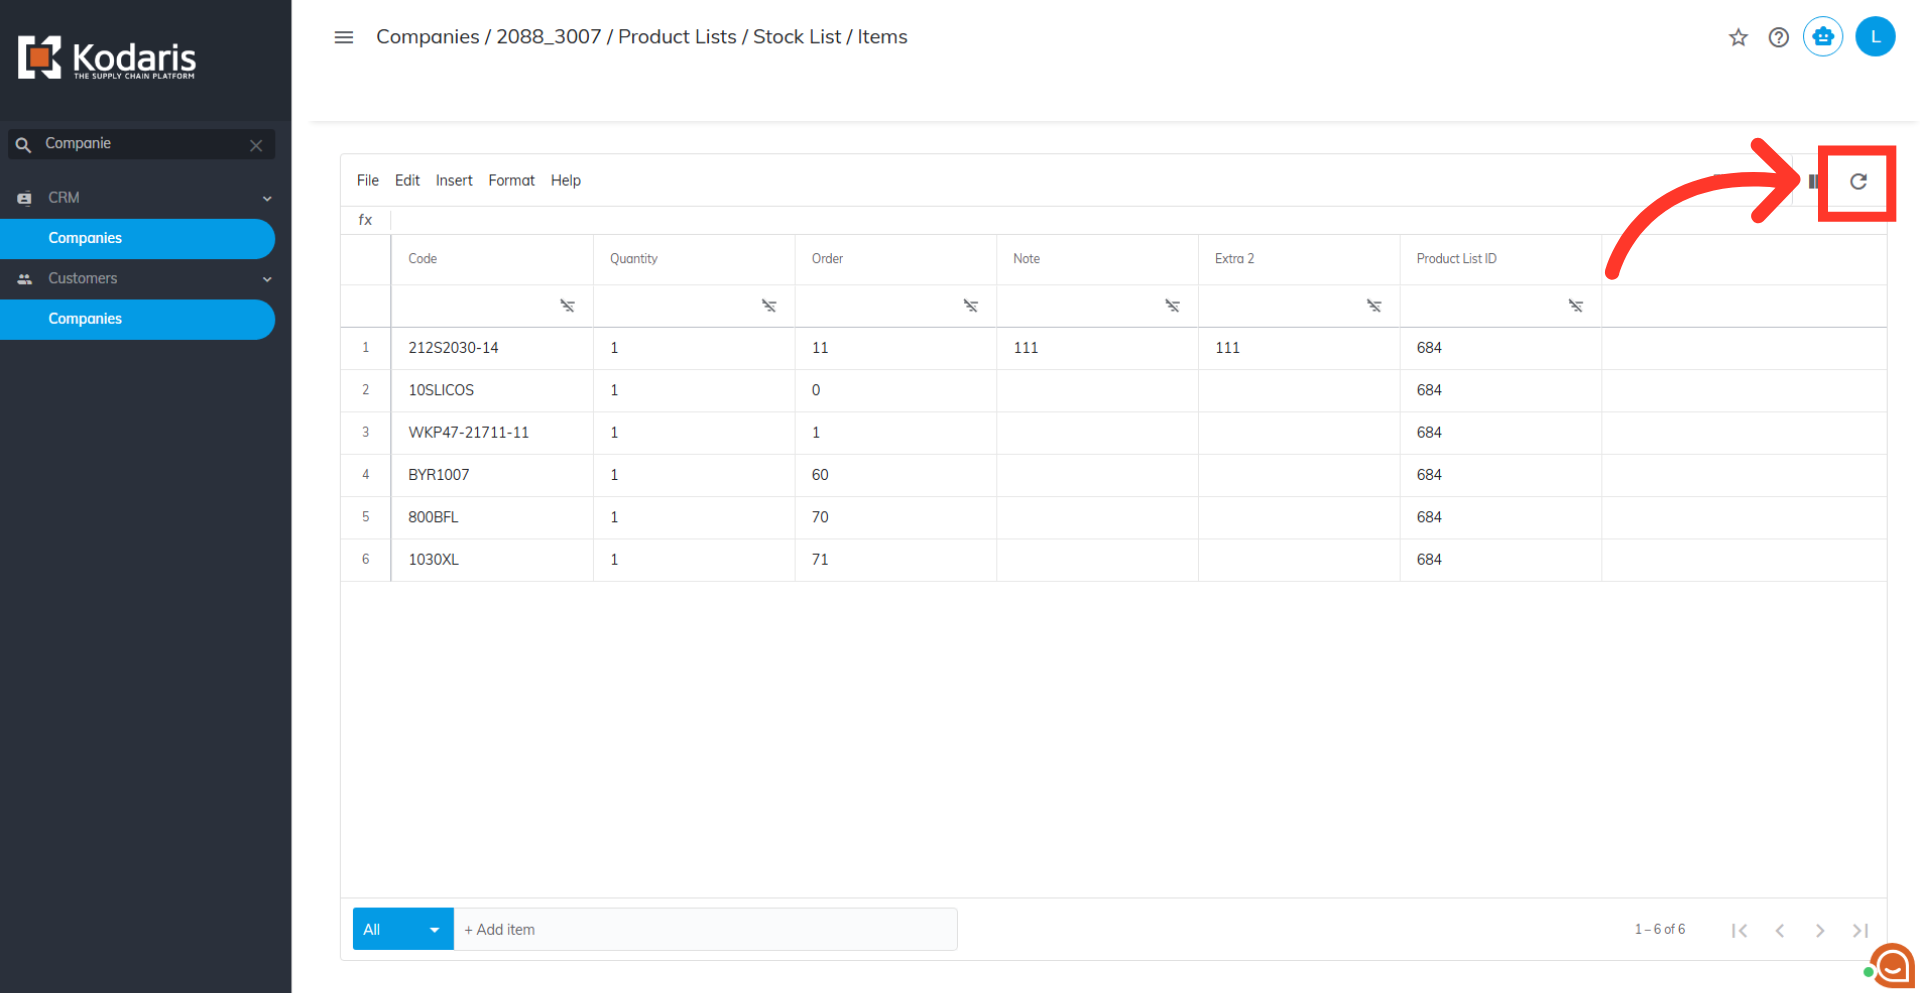
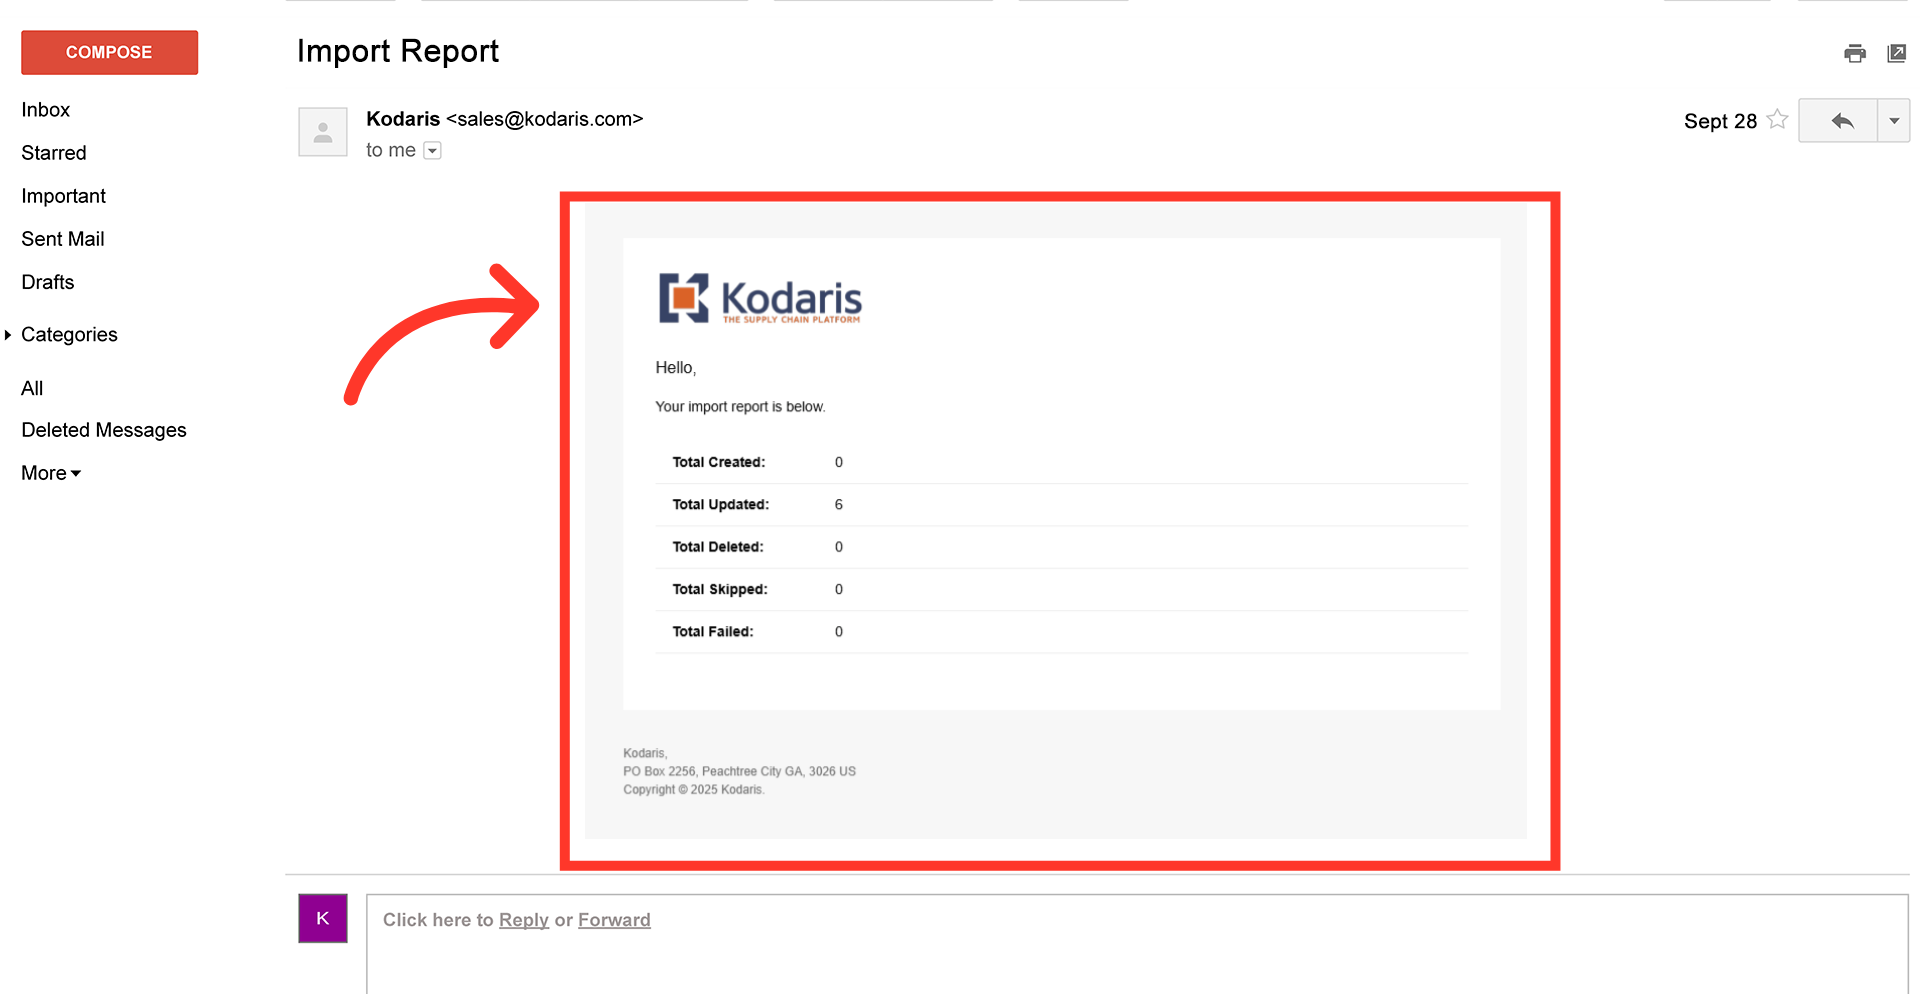
An email report will also be generated once the import has completed.