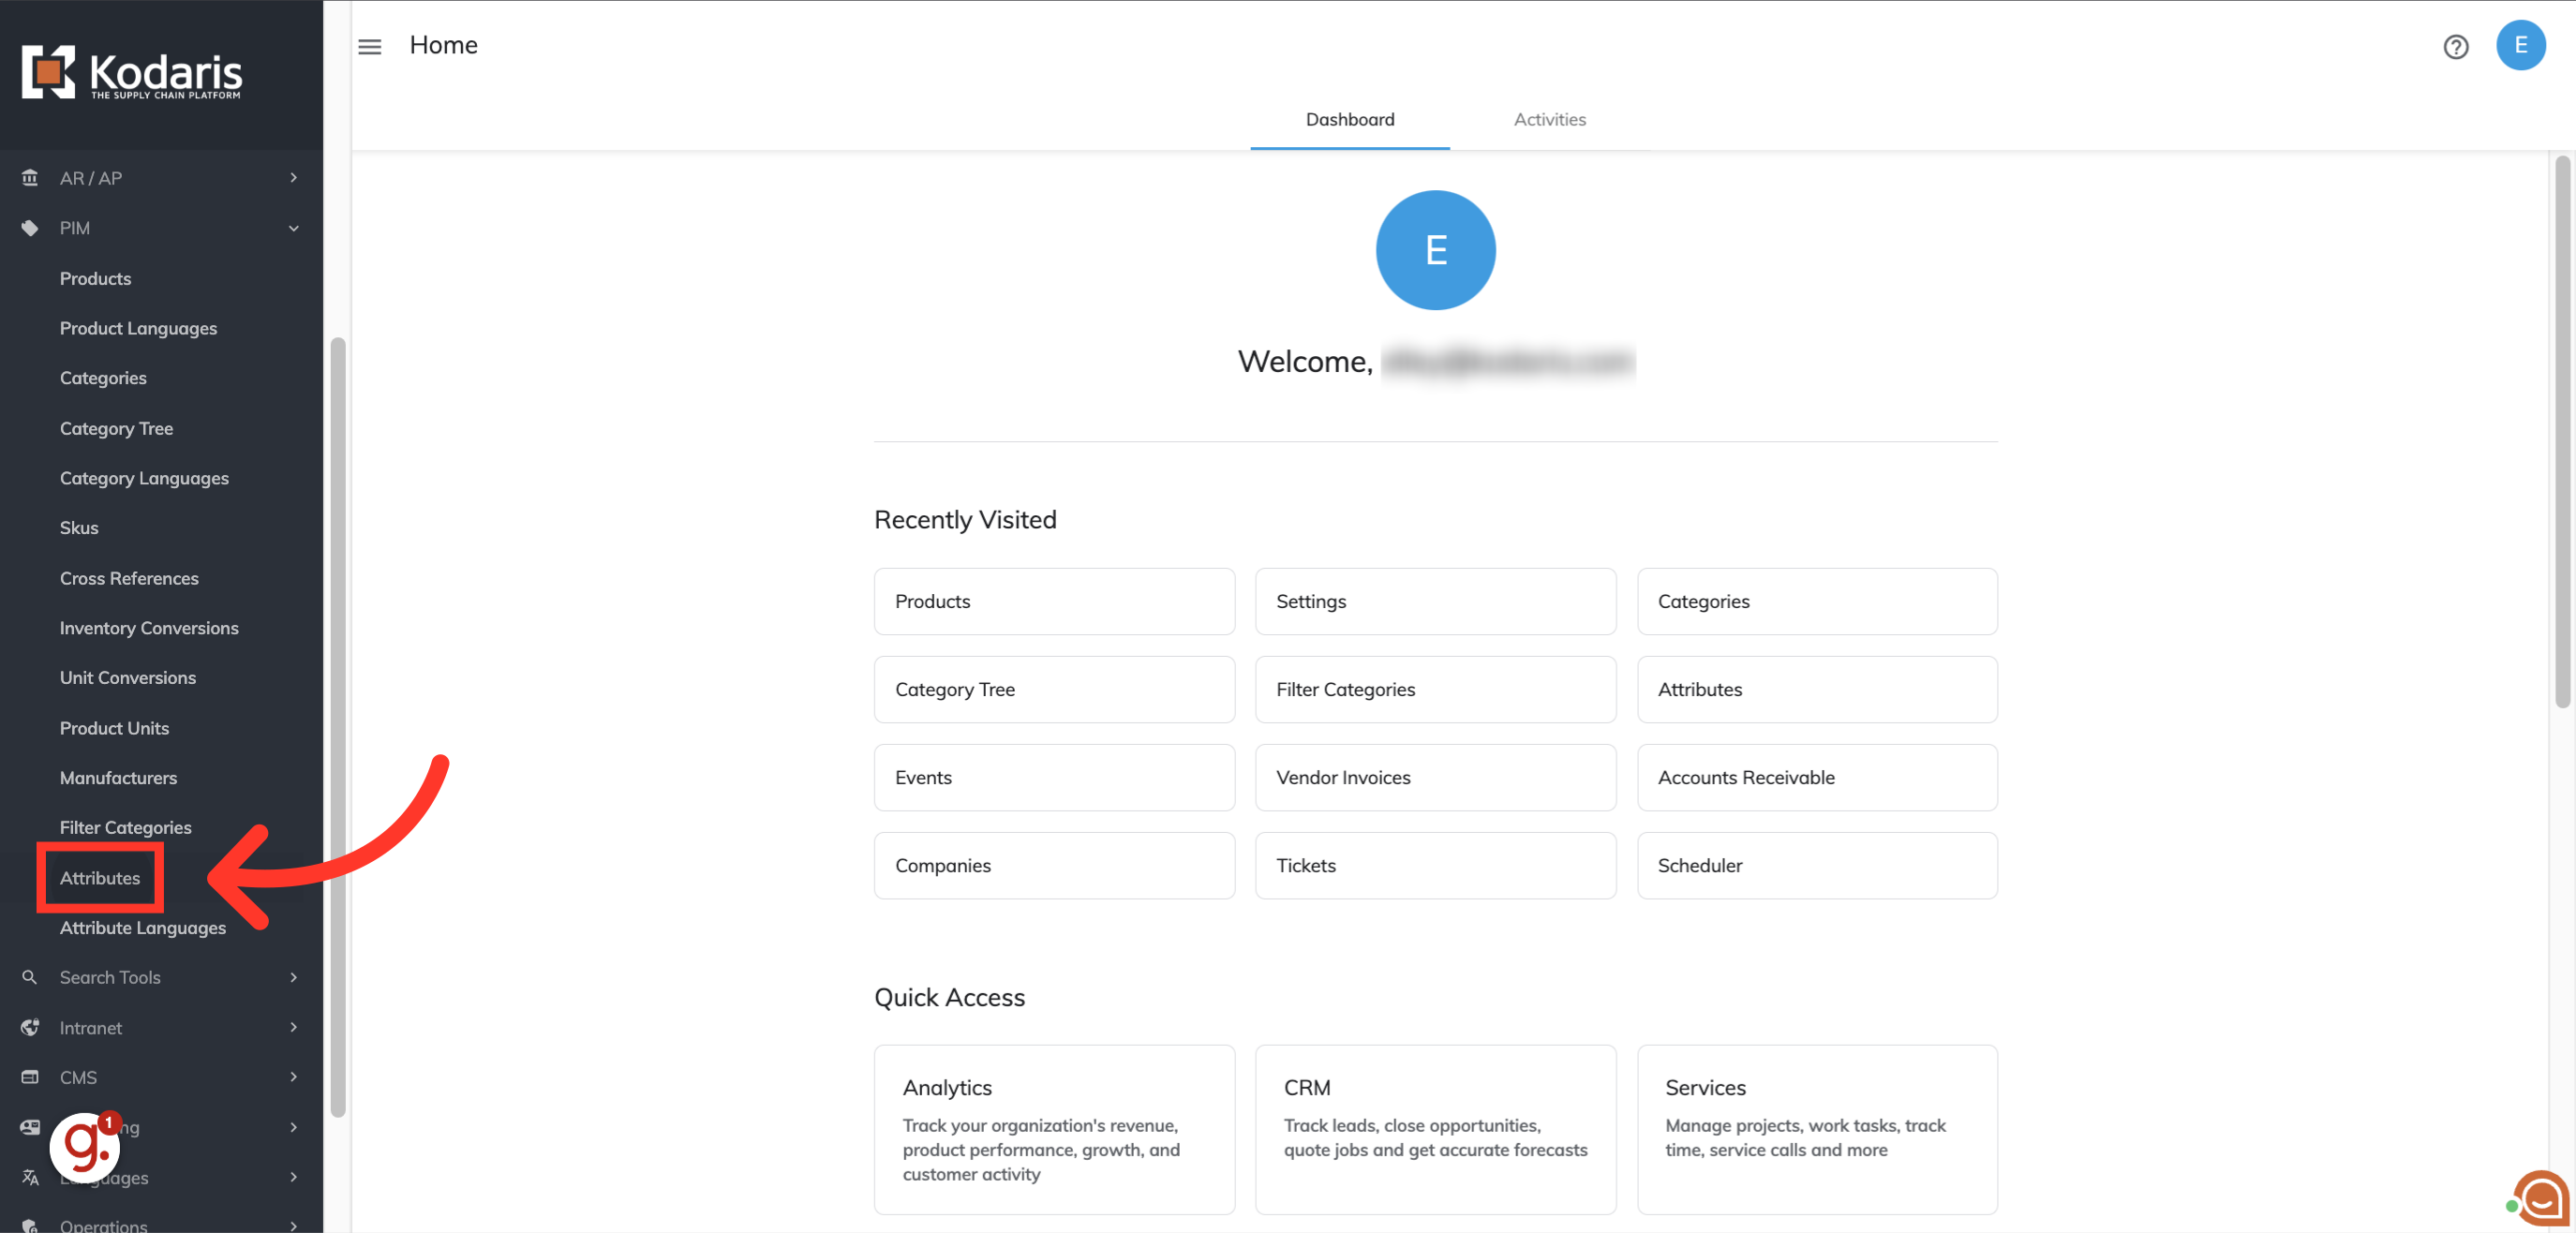
To quickly create multiple attributes that belong to different filter categories, navigate to "PIM" in the operations portal.

Click "Attributes".
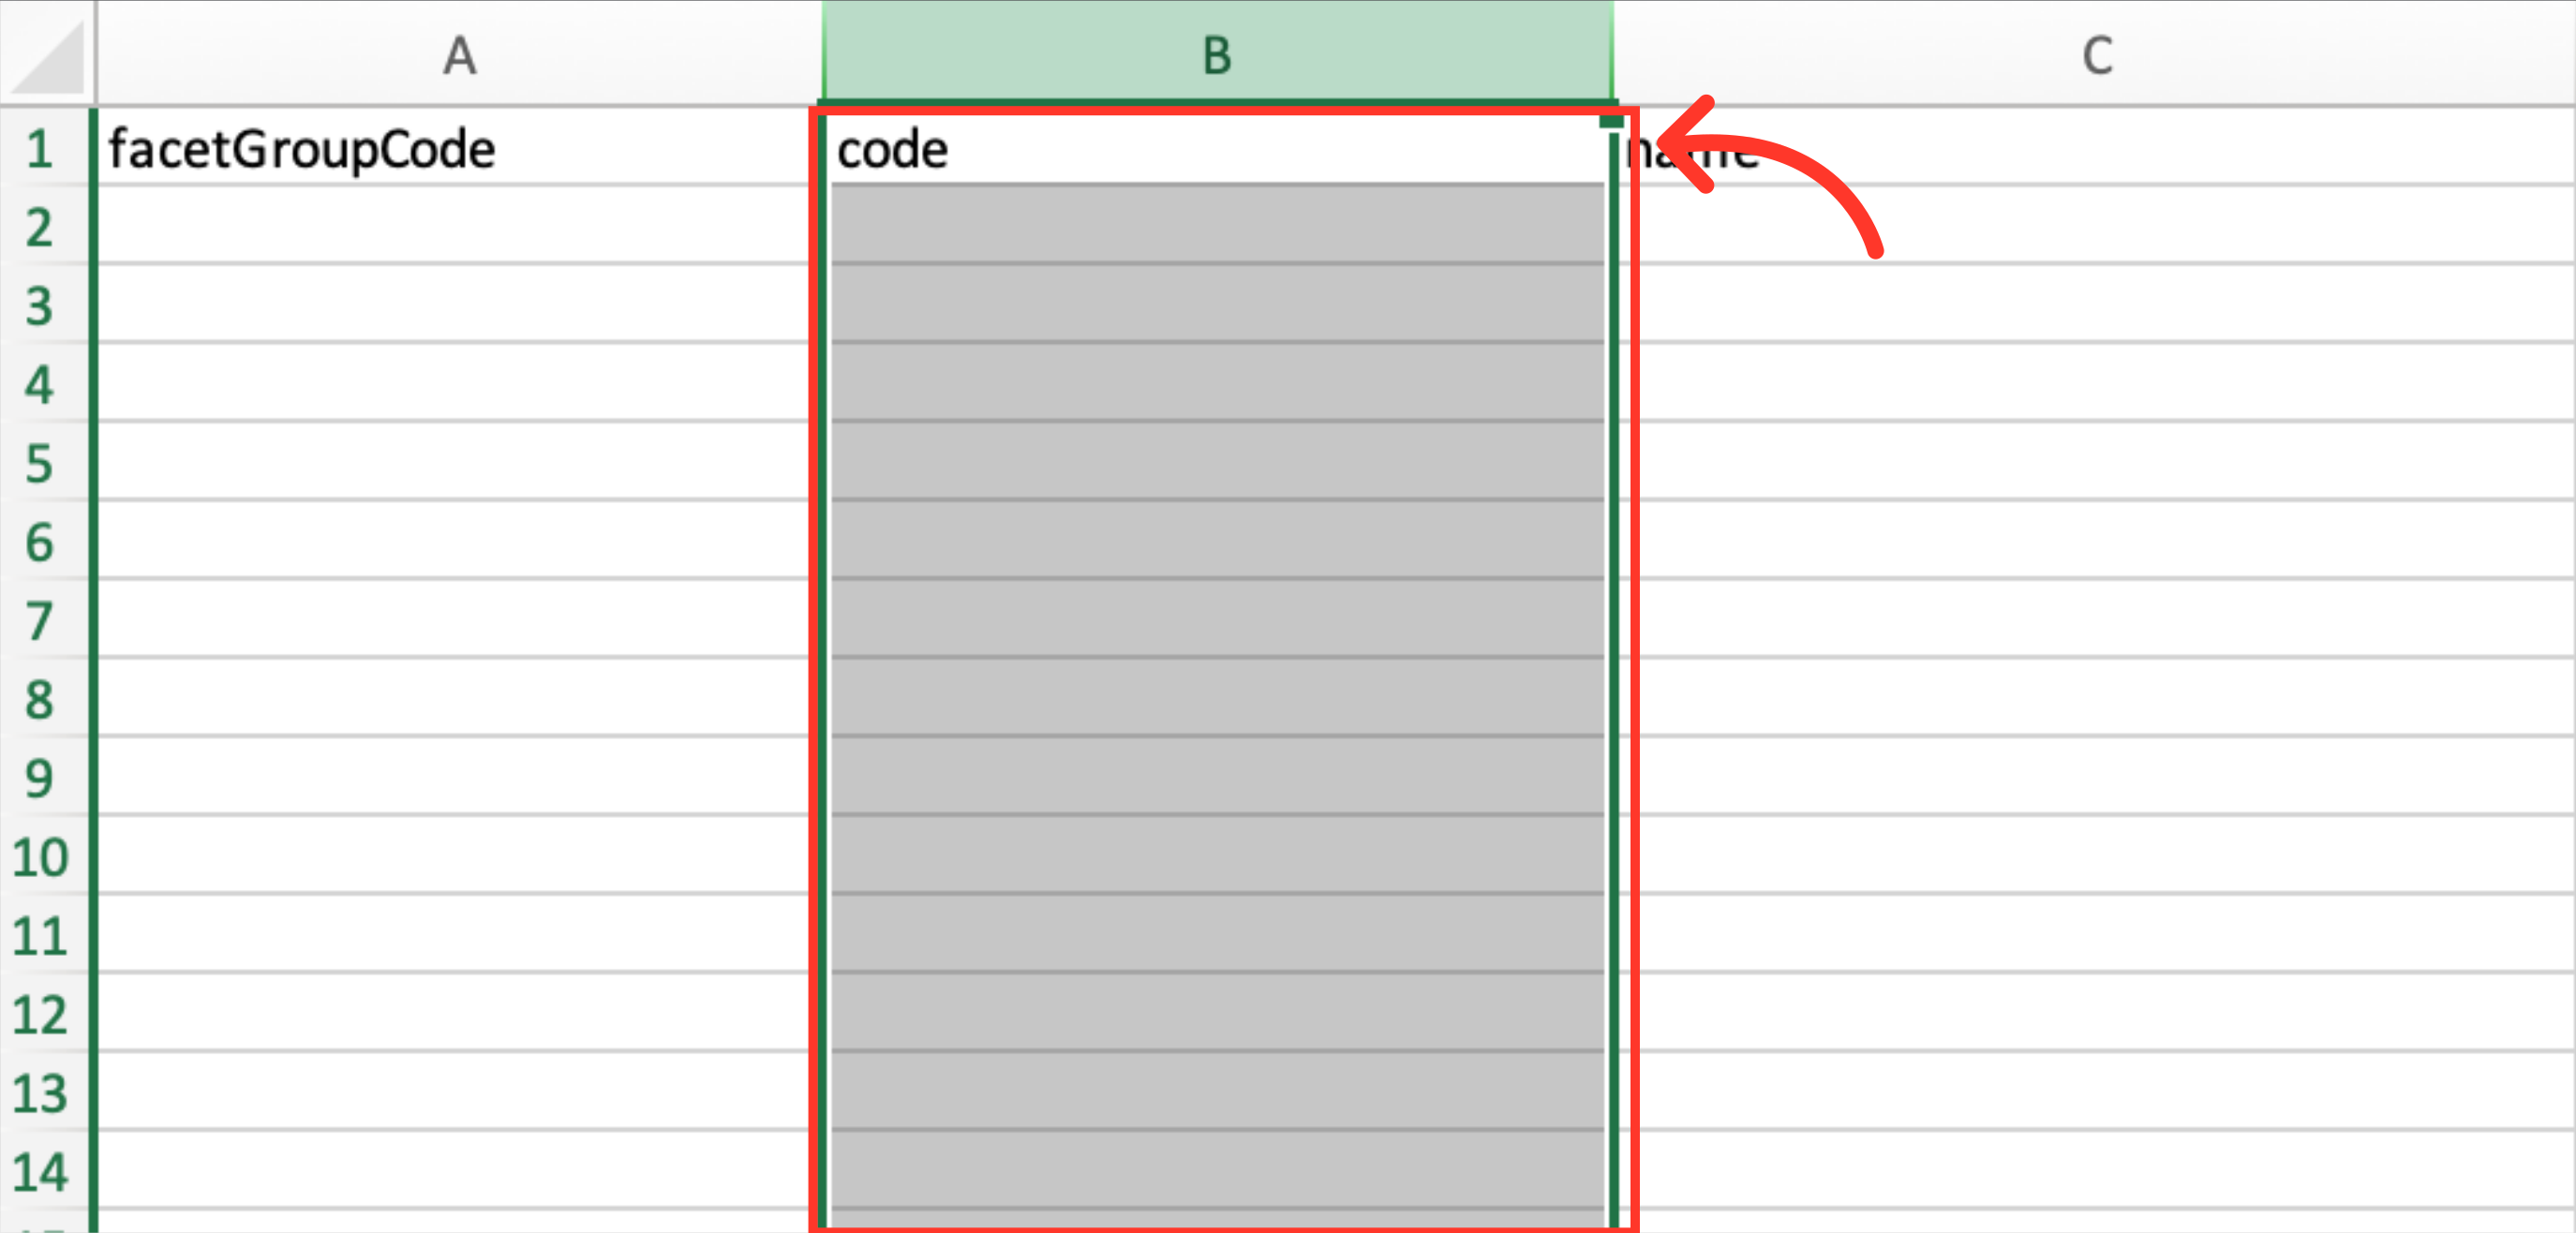
Click on the "Show/Hide Columns" icon and choose the columns that are needed for your import. When creating attributes by import on this screen, the required columns are Filter Category and Code. In this case, we are exporting: Filter Category, Code, and Name.

To export the data in the grid, click "File".

Click "Export". This export will have the header row for importing data back into the system when using the "Attribute" screen.

Click "Save" to save the file to your computer. You can also choose to rename your export before clicking save, by clicking into the field and typing the name. If you are exporting a large amount of data, it may take a small amount of time to complete the export. The file will download and save to your computer.

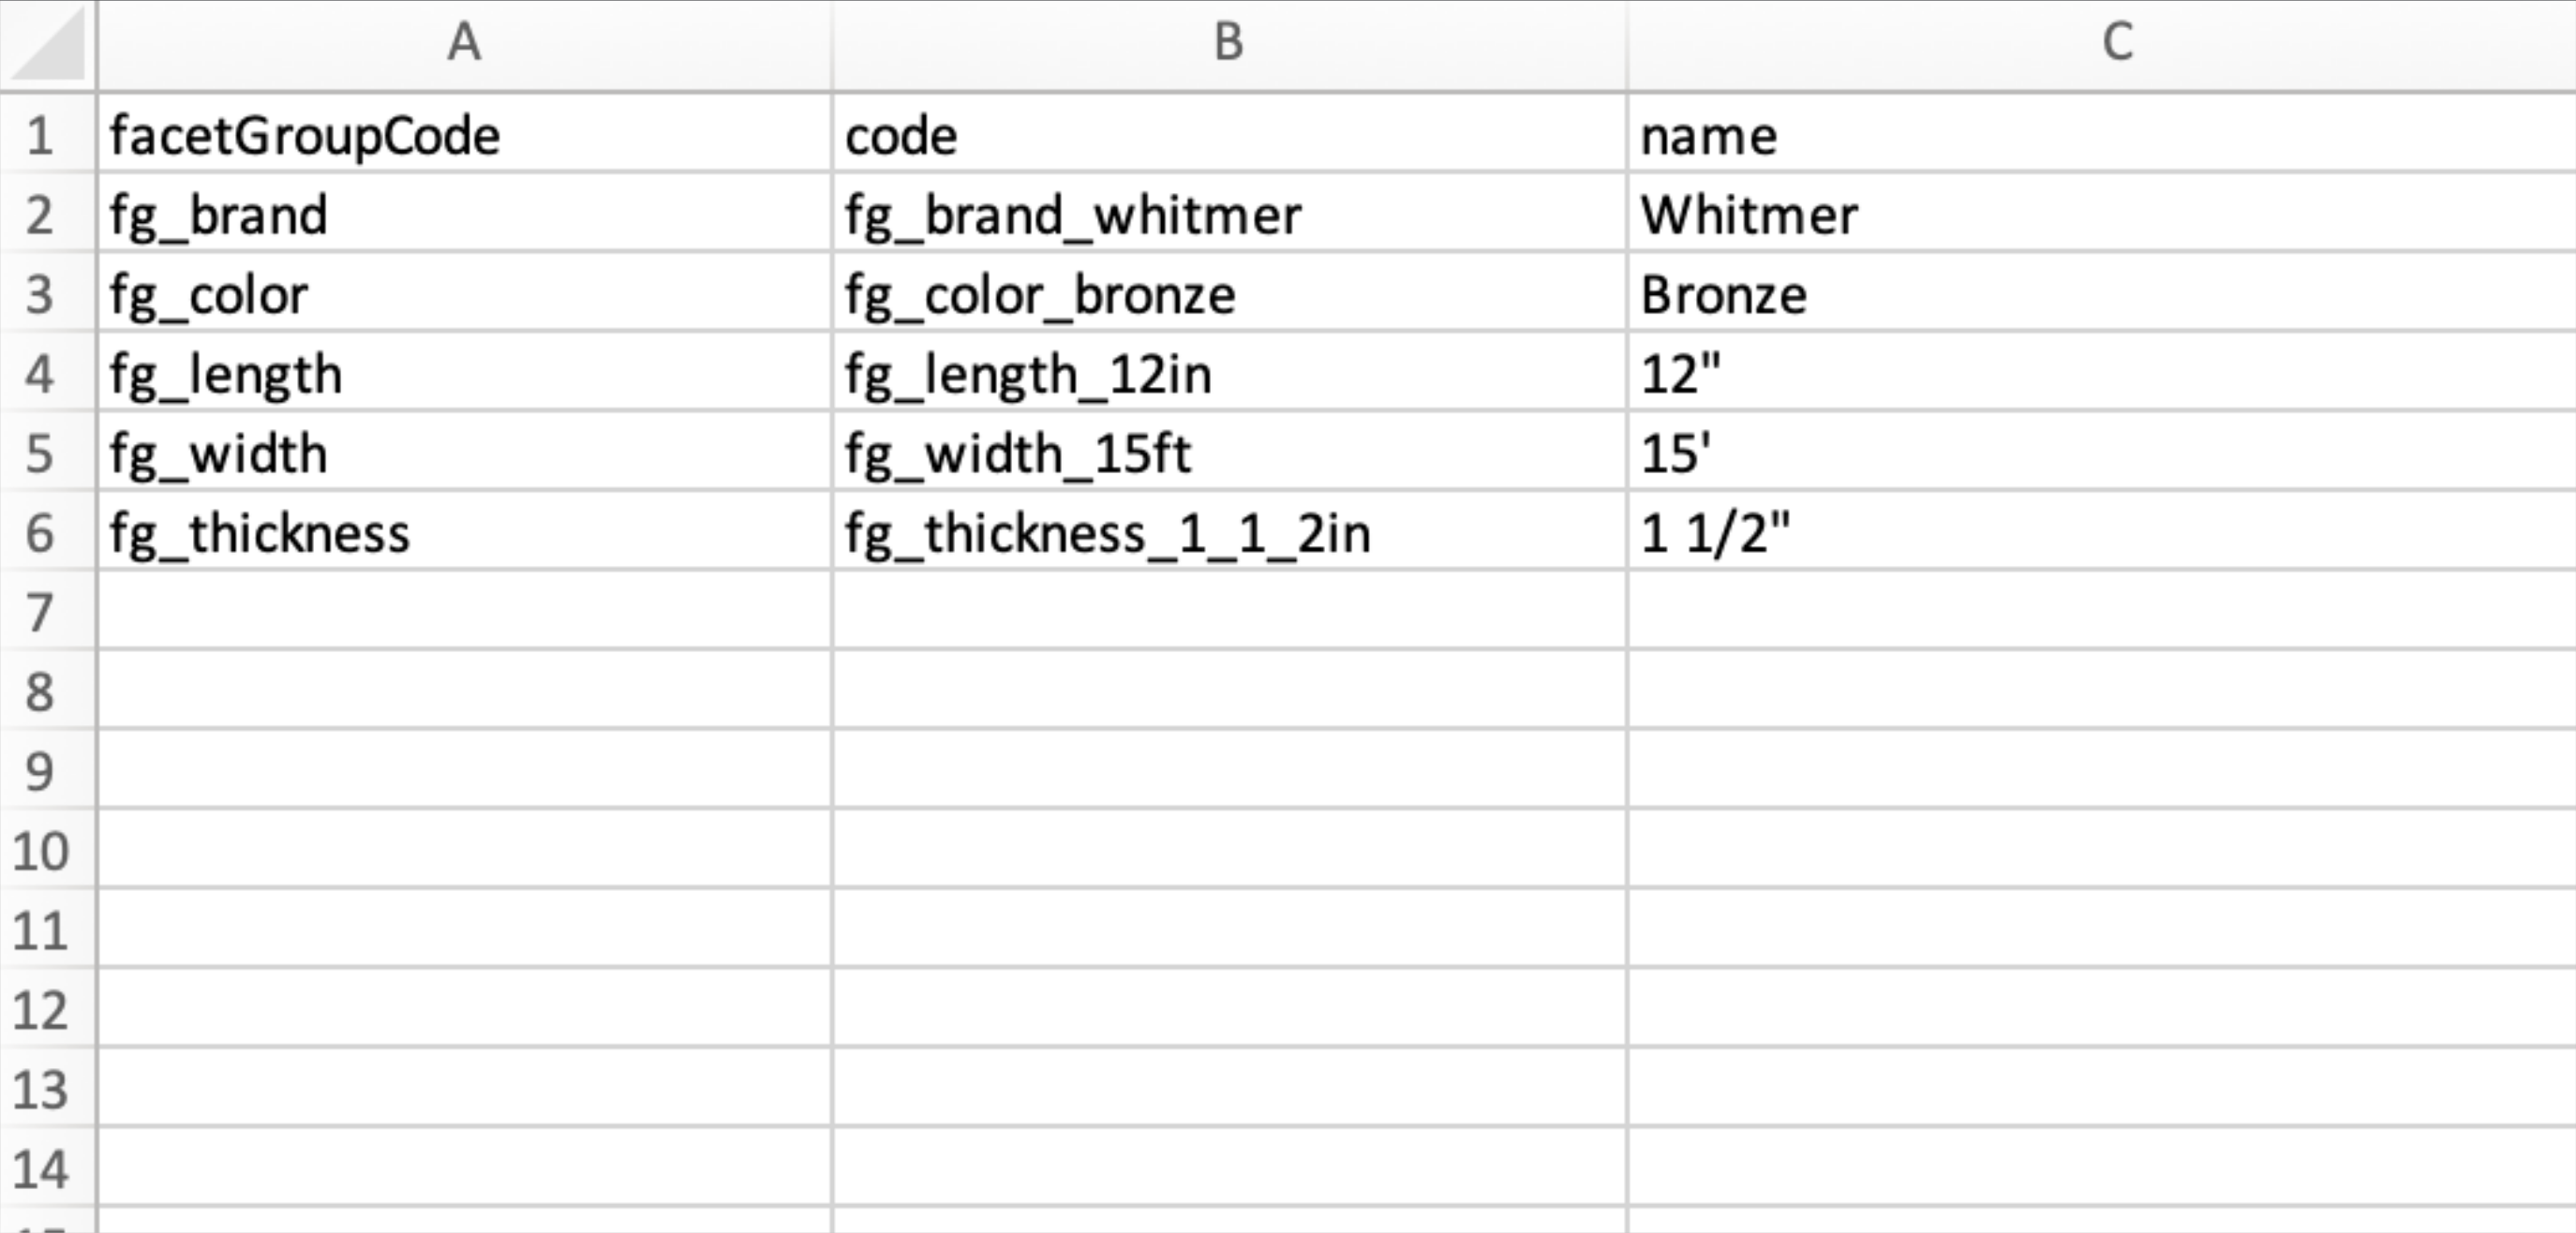
You can see in this sample export, you now have the header row that is needed to import data and also the data from the attributes grid. Since we are only creating attributes at this time, all data can be deleted - but keep the header row in the spreadsheet for your import.

The "Filter Category Code" is entered in the "facetGroupCode" column, ie: fg_brand. Filter categories need to be set up before creating your attributes.

The "code" column is used for the attribute code. When creating attribute codes, it is helpful to follow a consistent pattern. Attribute codes cannot contain special characters, and need to begin with fg_. An underscore is not considered a special character.
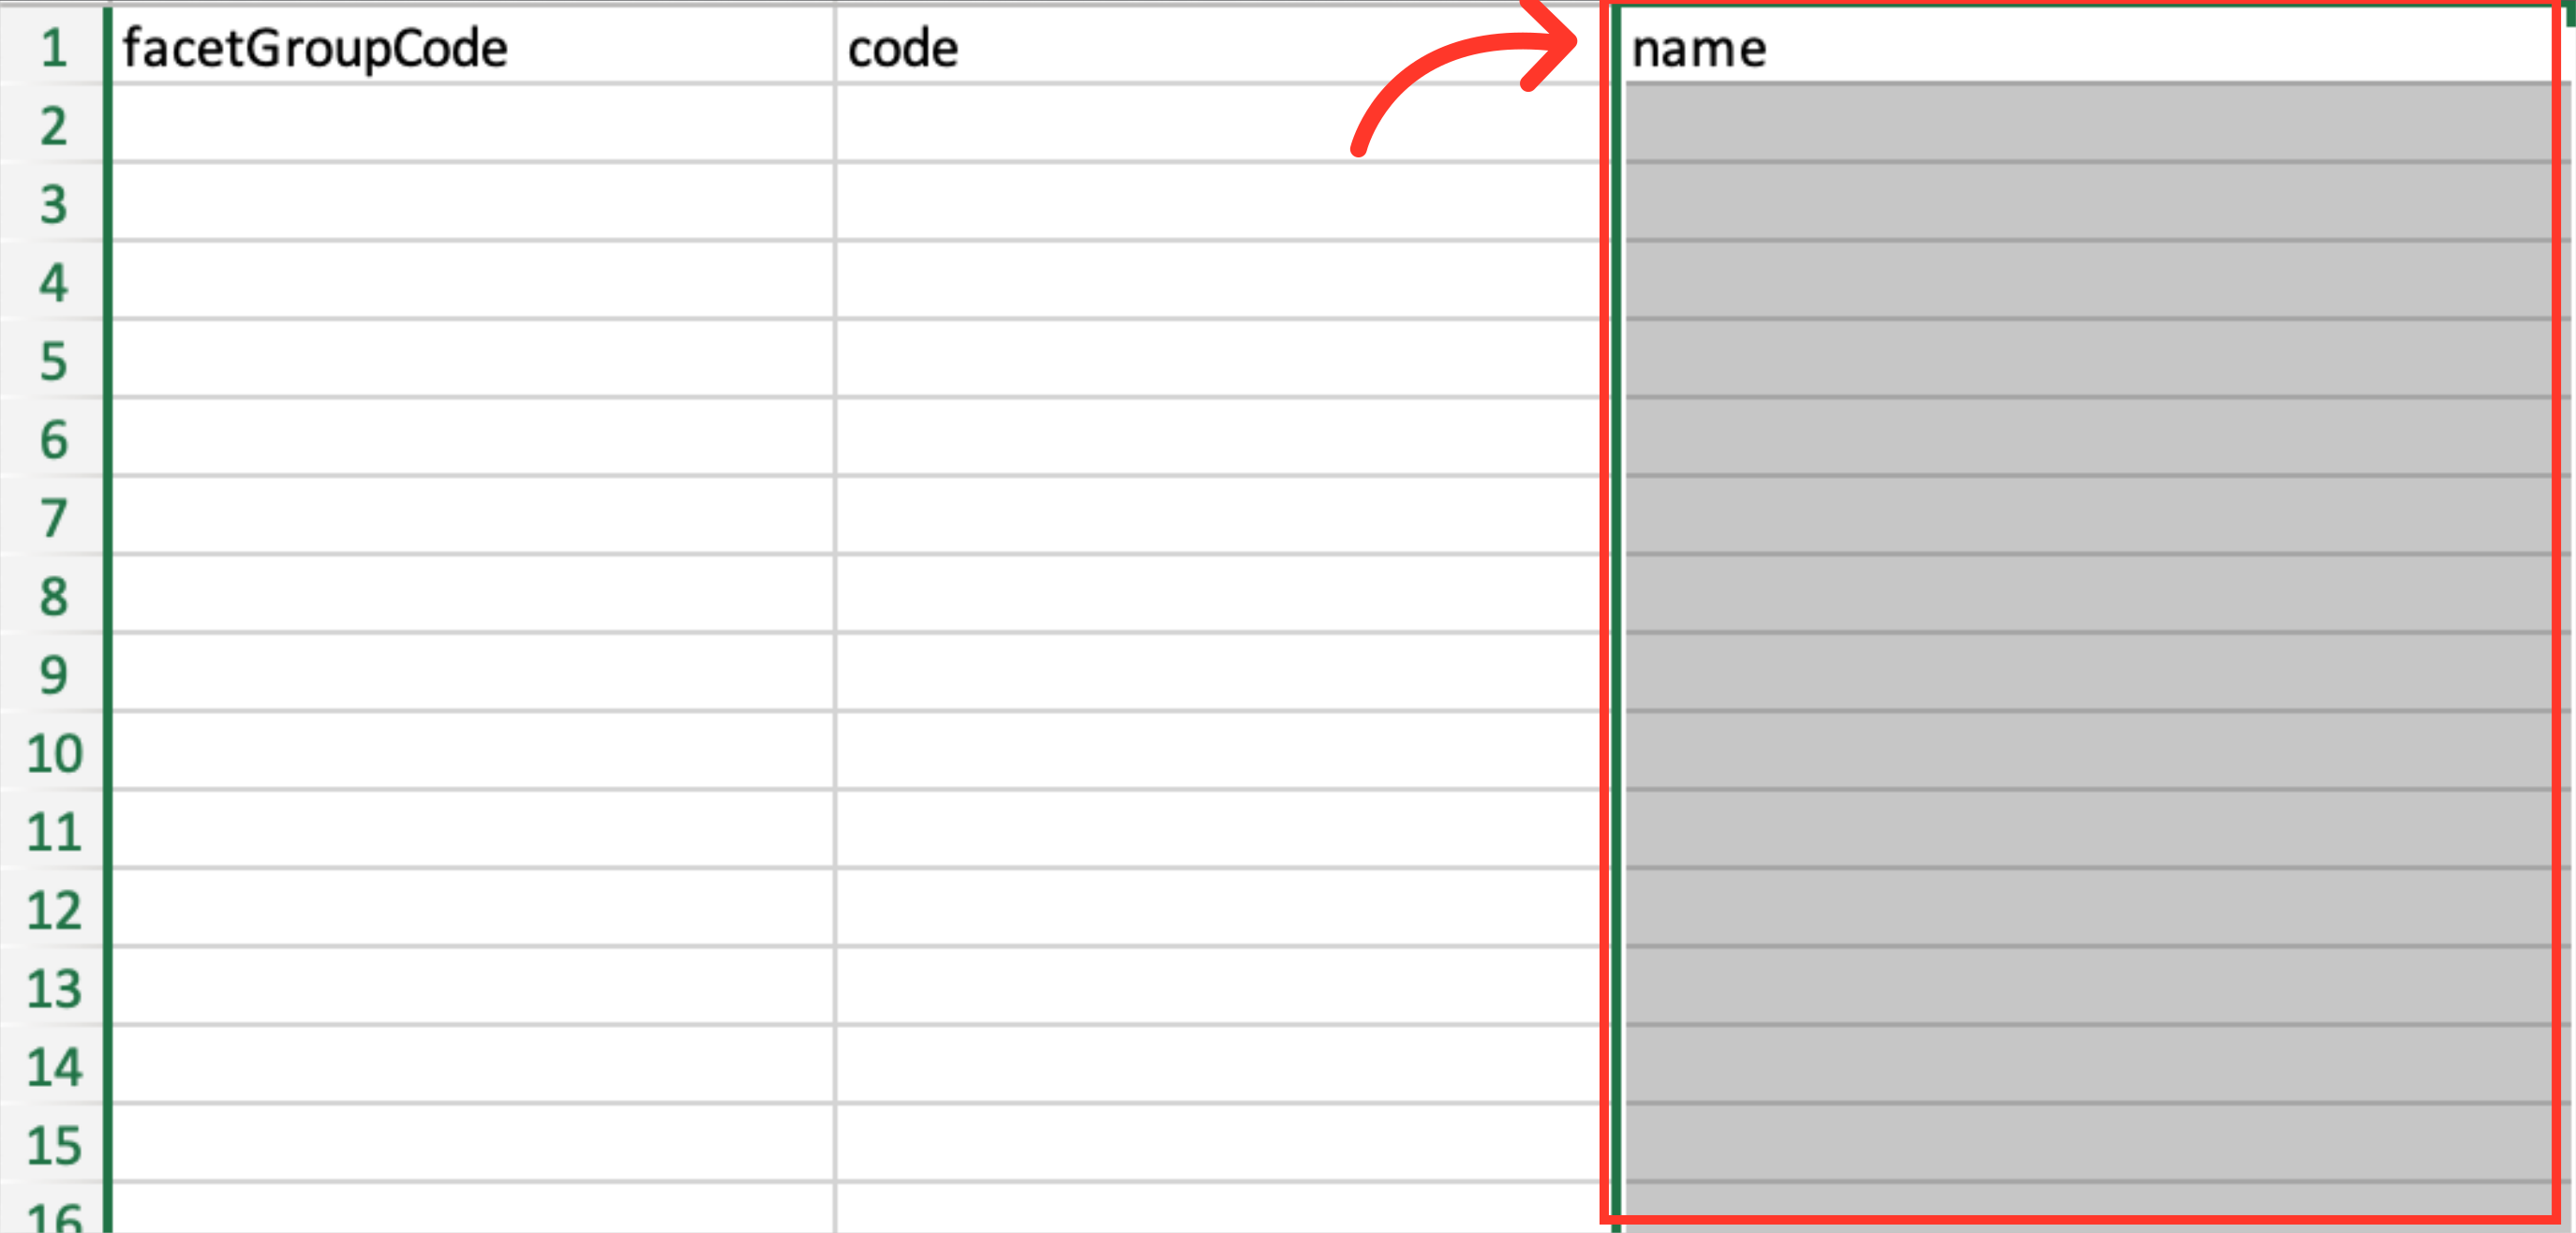
The "name" column is for the name of the attribute, and is visible to your customers. Attribute names can contain special characters.
Once you have entered the attributes that you would like to create, save your spreadsheet as .CSV file which is spreadsheet compatible, and your file is ready to import.
To import your updated spreadsheet, click "File".

Click "Import".
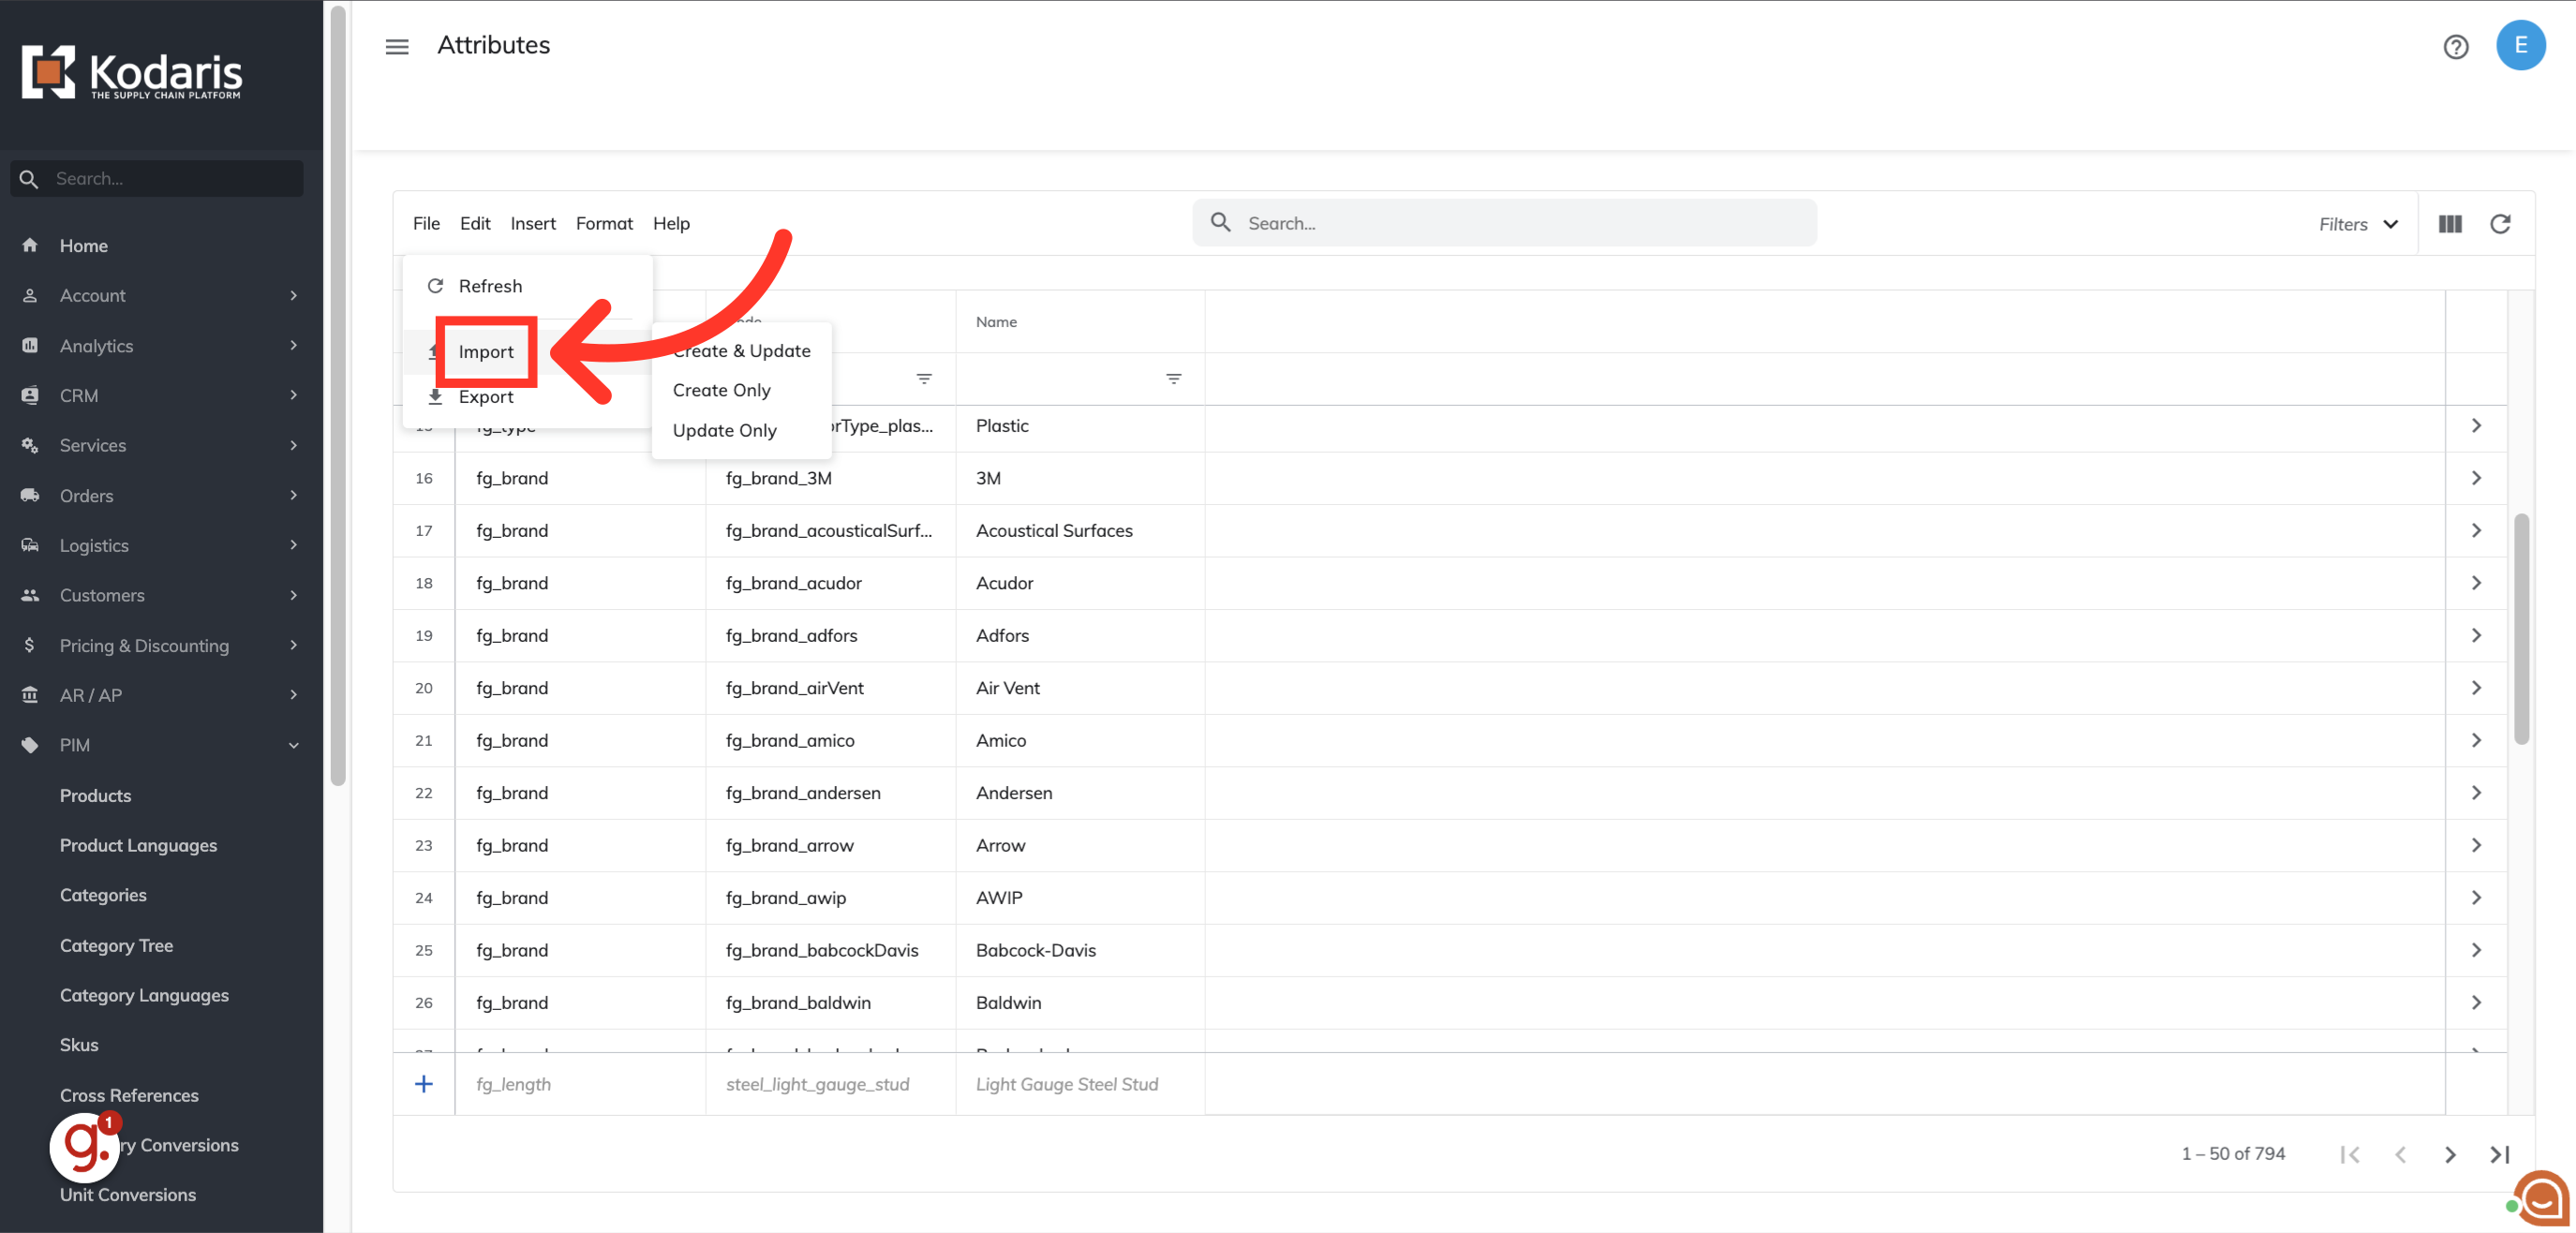
Choose your preferred import option. "Create & Update" will create new attributes and also update existing attributes with your import. "Update Only" will only update existing attributes with your import. "Create Only" will only create new attributes with your import. Since we are only creating attributes with this import, we want to select "Create Only".

Once you click "Create", you will be prompted to choose and upload a file from your computer. Choose the .CSV file you would like to import. Please be sure that you select the correct file. An import message will appear letting you know that the import file is in process and to check back in a few minutes for the imported data.

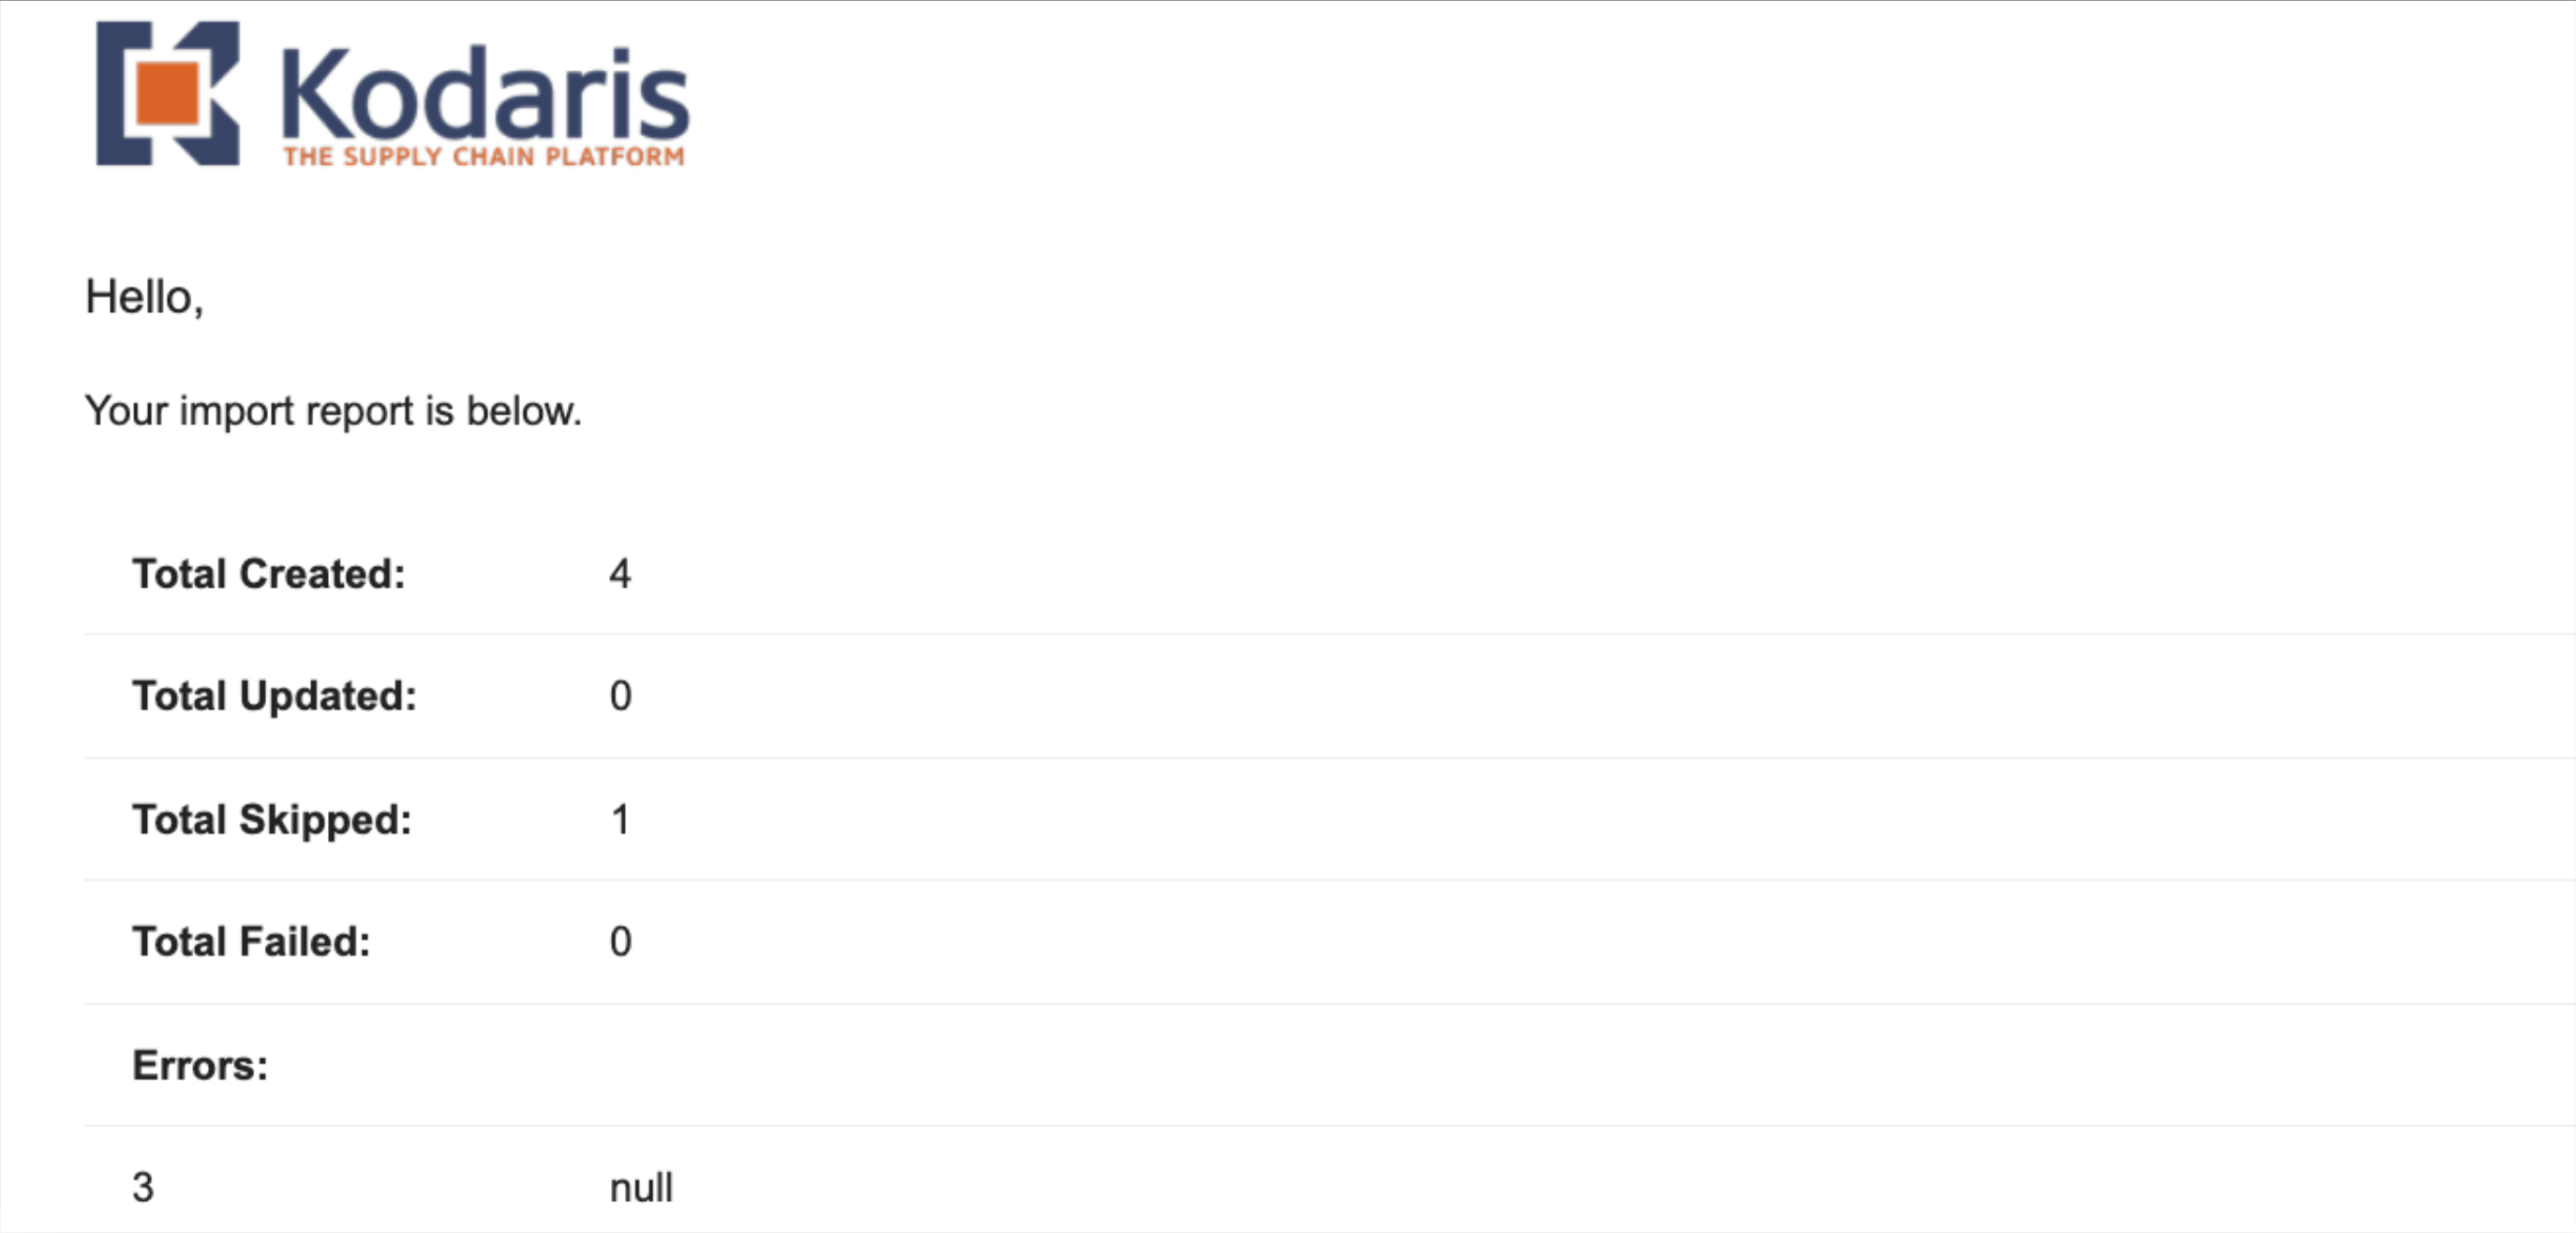
Once the import is complete, you will receive an email with the report of your import.