To adjust the start and end dates for a campaign, navigate to the "Campaigns" screen within the "Marketing" section of your operations portal. To view or update campaigns, users must be an "administrator" or "superuser," or have both "campaignView" and "campaignEdit" roles.

Use the search bar or the column filters to find the campaign you want to edit. Enter a keyword to narrow down the list, then, find the campaign you want to edit from the filtered list. You can use the search and filter options on each columns to narrow down your list further.

After finding a campaign, open its detailed screen to update its details, adjust its active status, or manage products.

To set a start date for your campaign, click into the "Start Date" field. Type in the date in a numeric format, month, day and year.
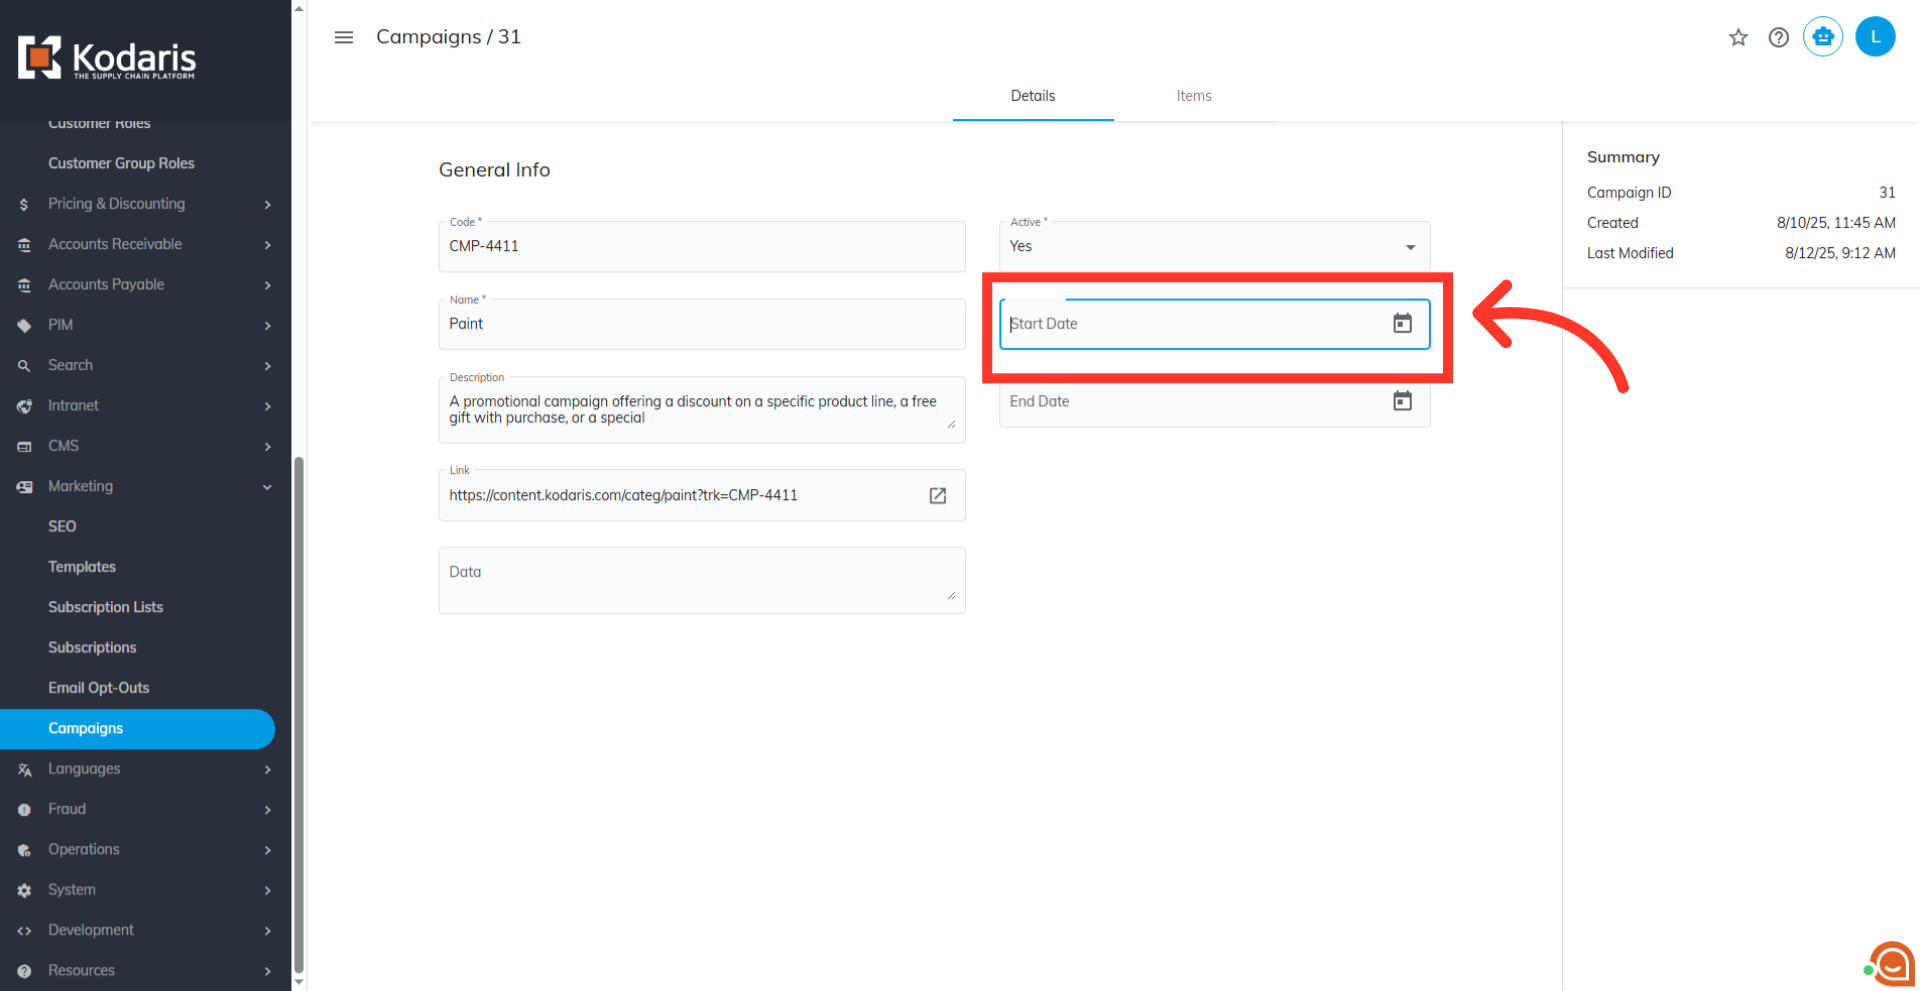
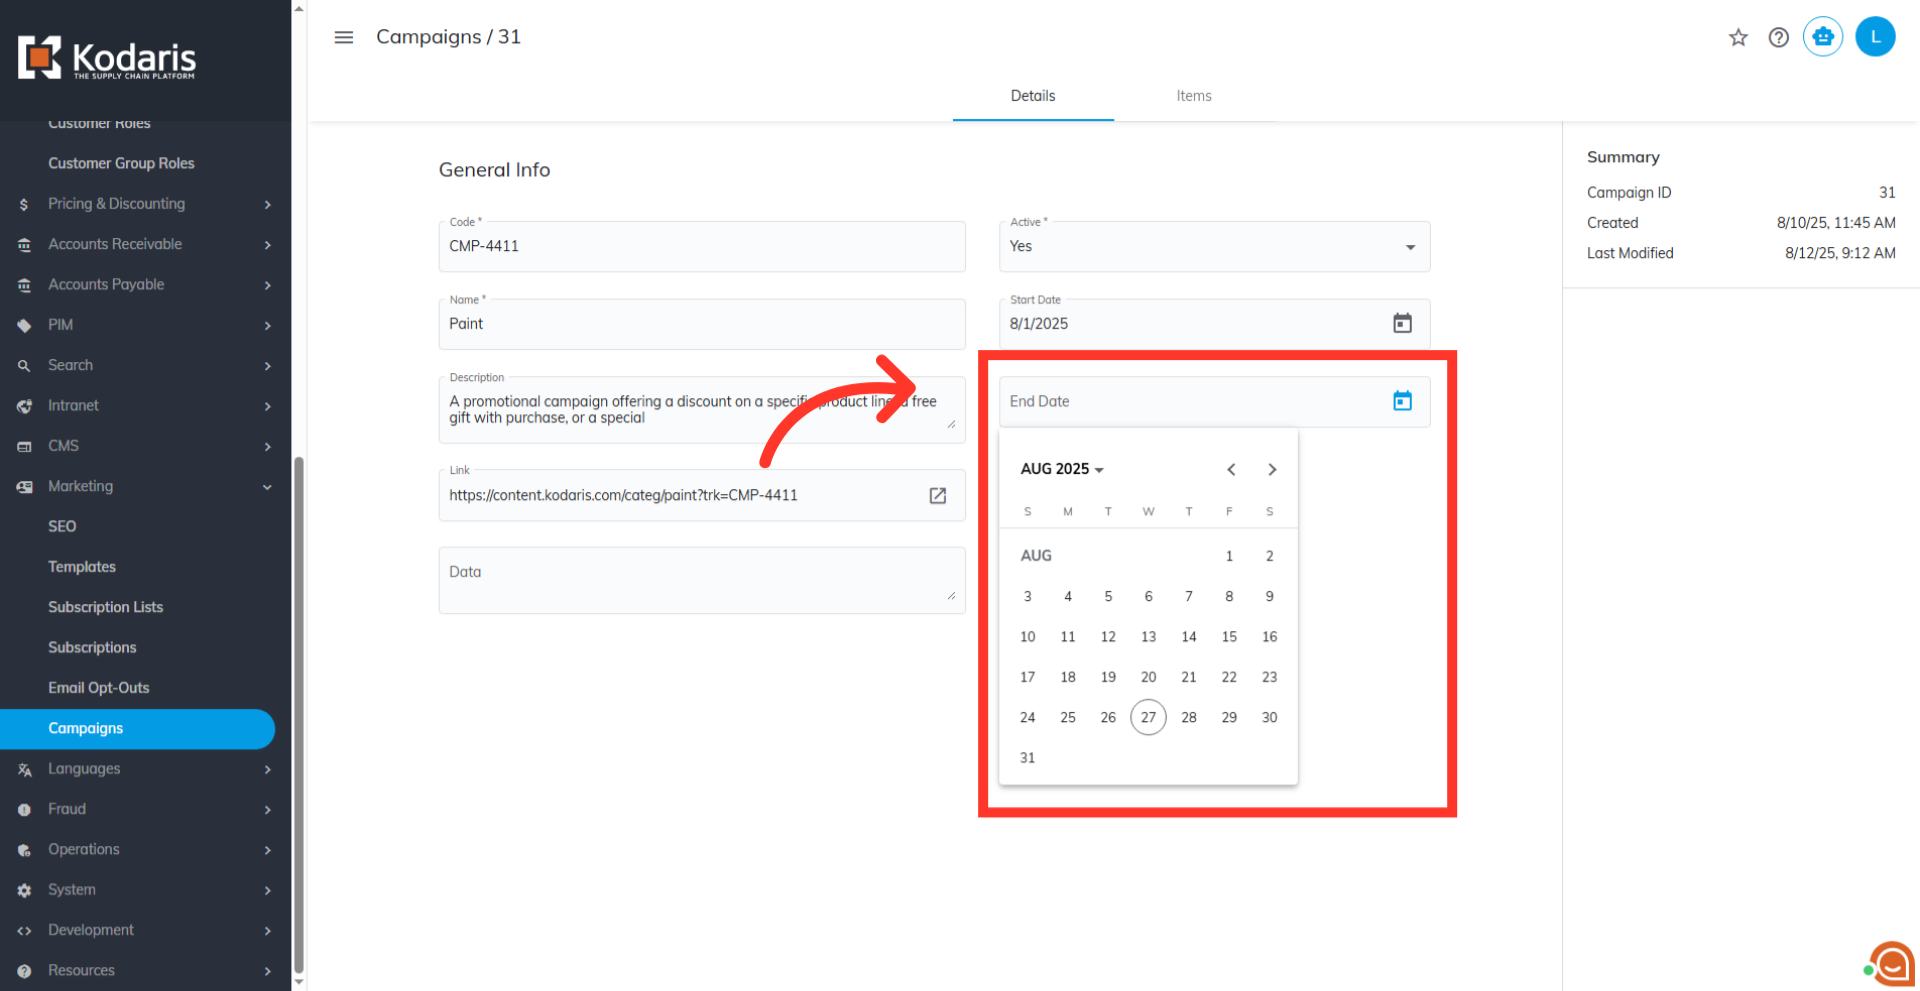
You can also use the calendar icon to find and pick a specific date.

To set an end date for your campaign, and click into the "End Date" field. ou can either type the date directly in a numeric format MM/DD/YYYY or use the calendar to select the date. Once you select the dates, they'll be saved automatically.