At the top of the Open Invoices screen, your customer’s total account balance will be at the top.

To the right, you’ll see different periods with their corresponding balances.
If you click on the checkbox for a specific period, it’ll display all the invoices associated with the indicated time period. These period labels and days in length can be configured to match your ERP or even configured to be different than your ERP to provide an enhanced user experience for your customer.

The Open Invoices grid layout is completely customizable in many different ways. Each customer has the option to customize their display to their liking. What you see in this example is simply the default view in the Customer Portal.

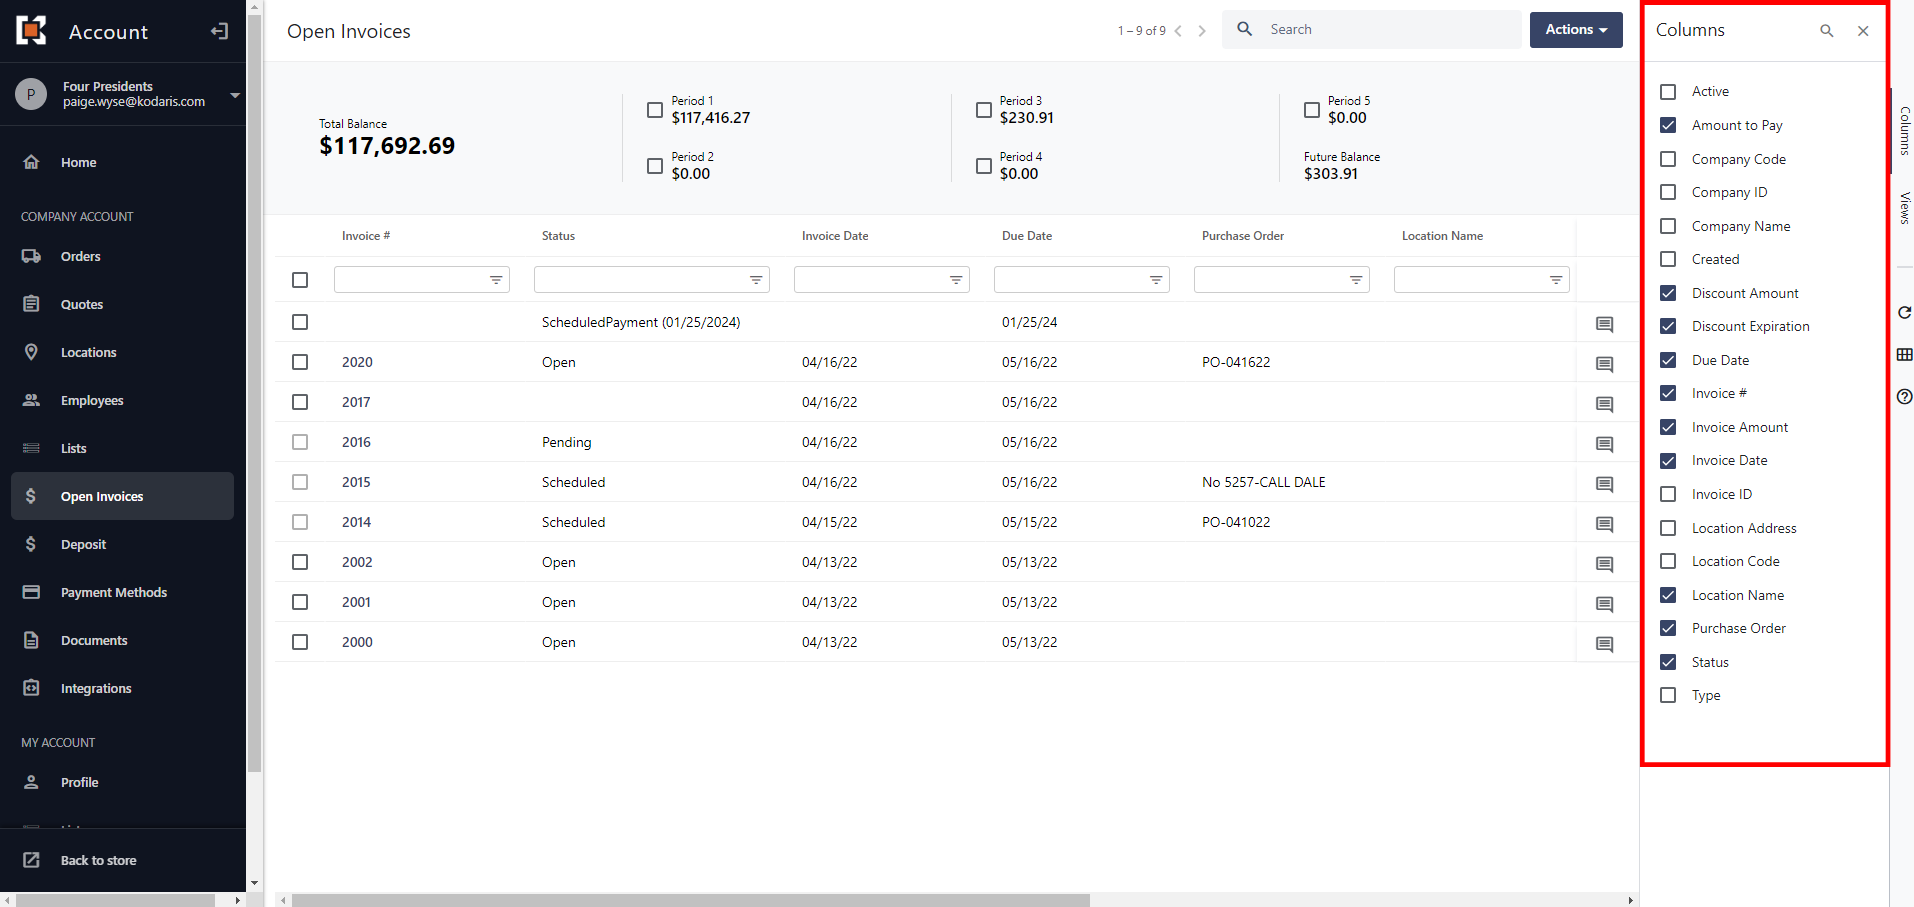
First, your customers can change what information they want to view within the grid columns. To choose what information to display, select “Columns” on the far right-hand side of the screen.

This will show your customers a list of all the different columns that are available to view on this Open Invoices screen.
To display a certain column, select its checkbox. To remove a column from the display, deselect the checkbox. The portal will update in real-time.
Another option for customization is to rearrange the order of the displayed columns. To do this, click on the column and drag it to your desired location.

Each column is also completely sortable.
For example, if your customers want to view invoices by the most recent invoice or the oldest, they can click the small arrow next to “Invoice Date”. This sorting feature is available and specific to each column.

Every column also has its own filter system. For example, the “Due Date” column is filterable by specific dates and date ranges.
To access a column’s filter, click on the small funnel icon.

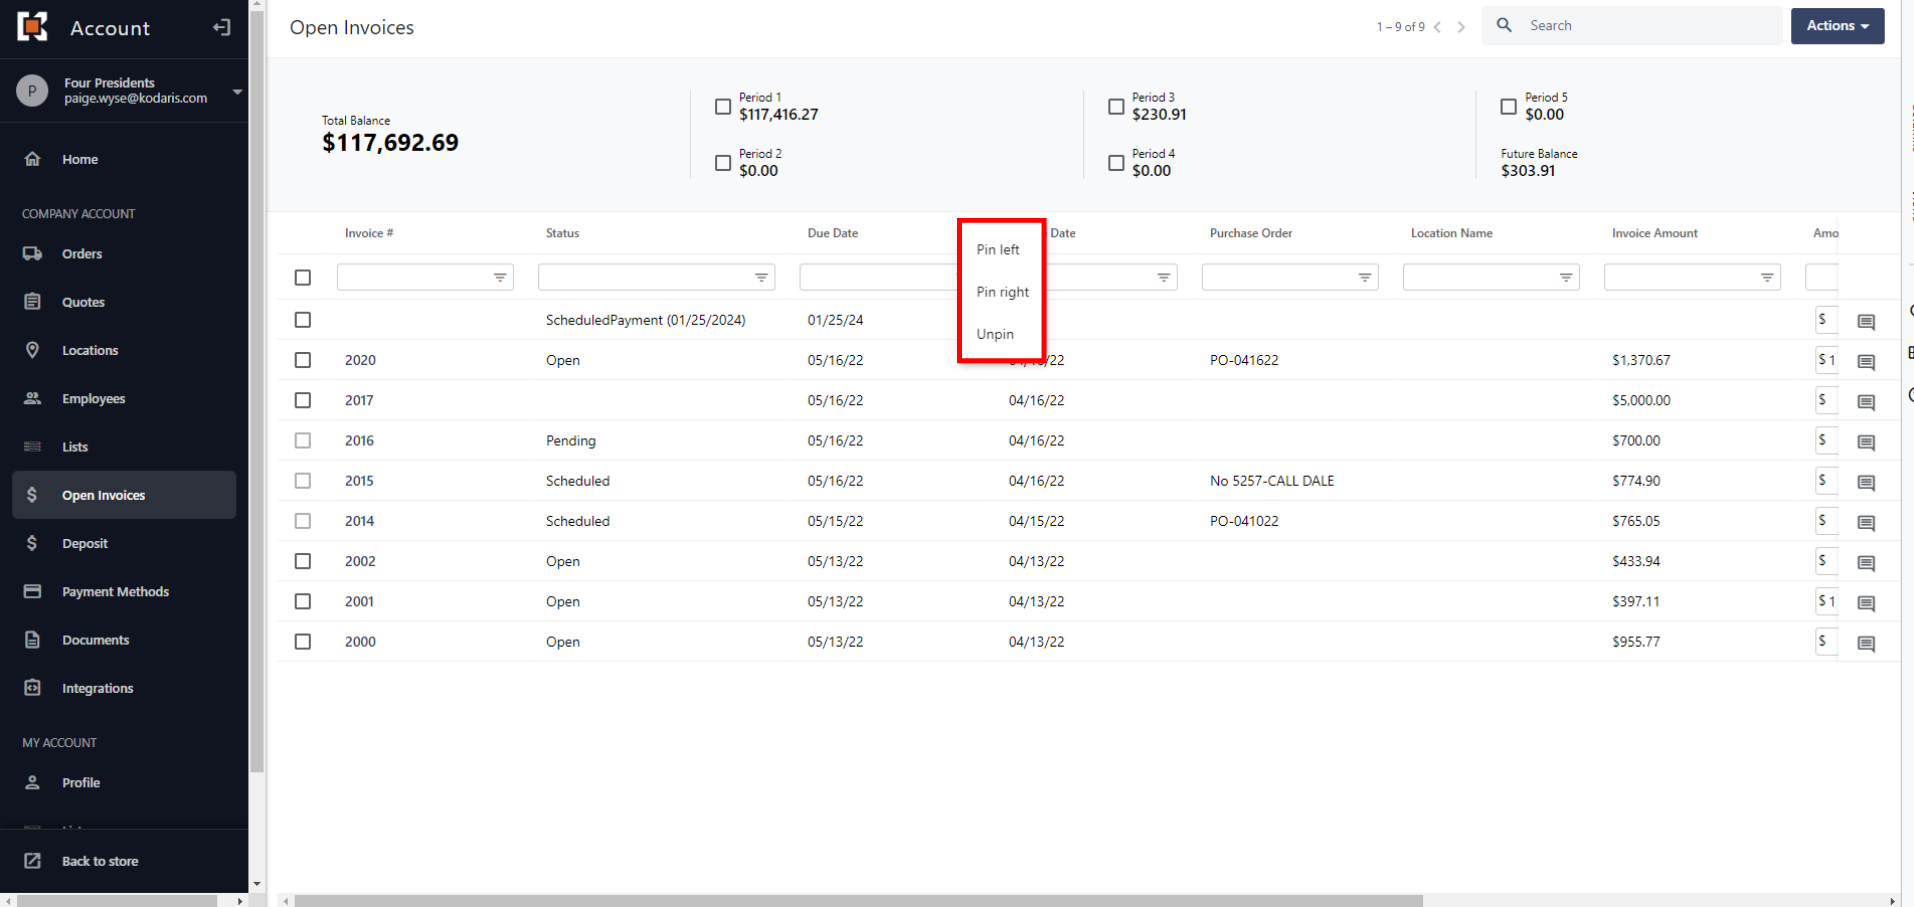
Your customers also have the option to pin columns so that a specific column is the first in the lineup or the last. To do this, click on the hamburger menu next to the column they want to pin.

It will then show options for your customers to pin the column to the left or right. If they’ve already pinned columns, they also have the option to un-pin.
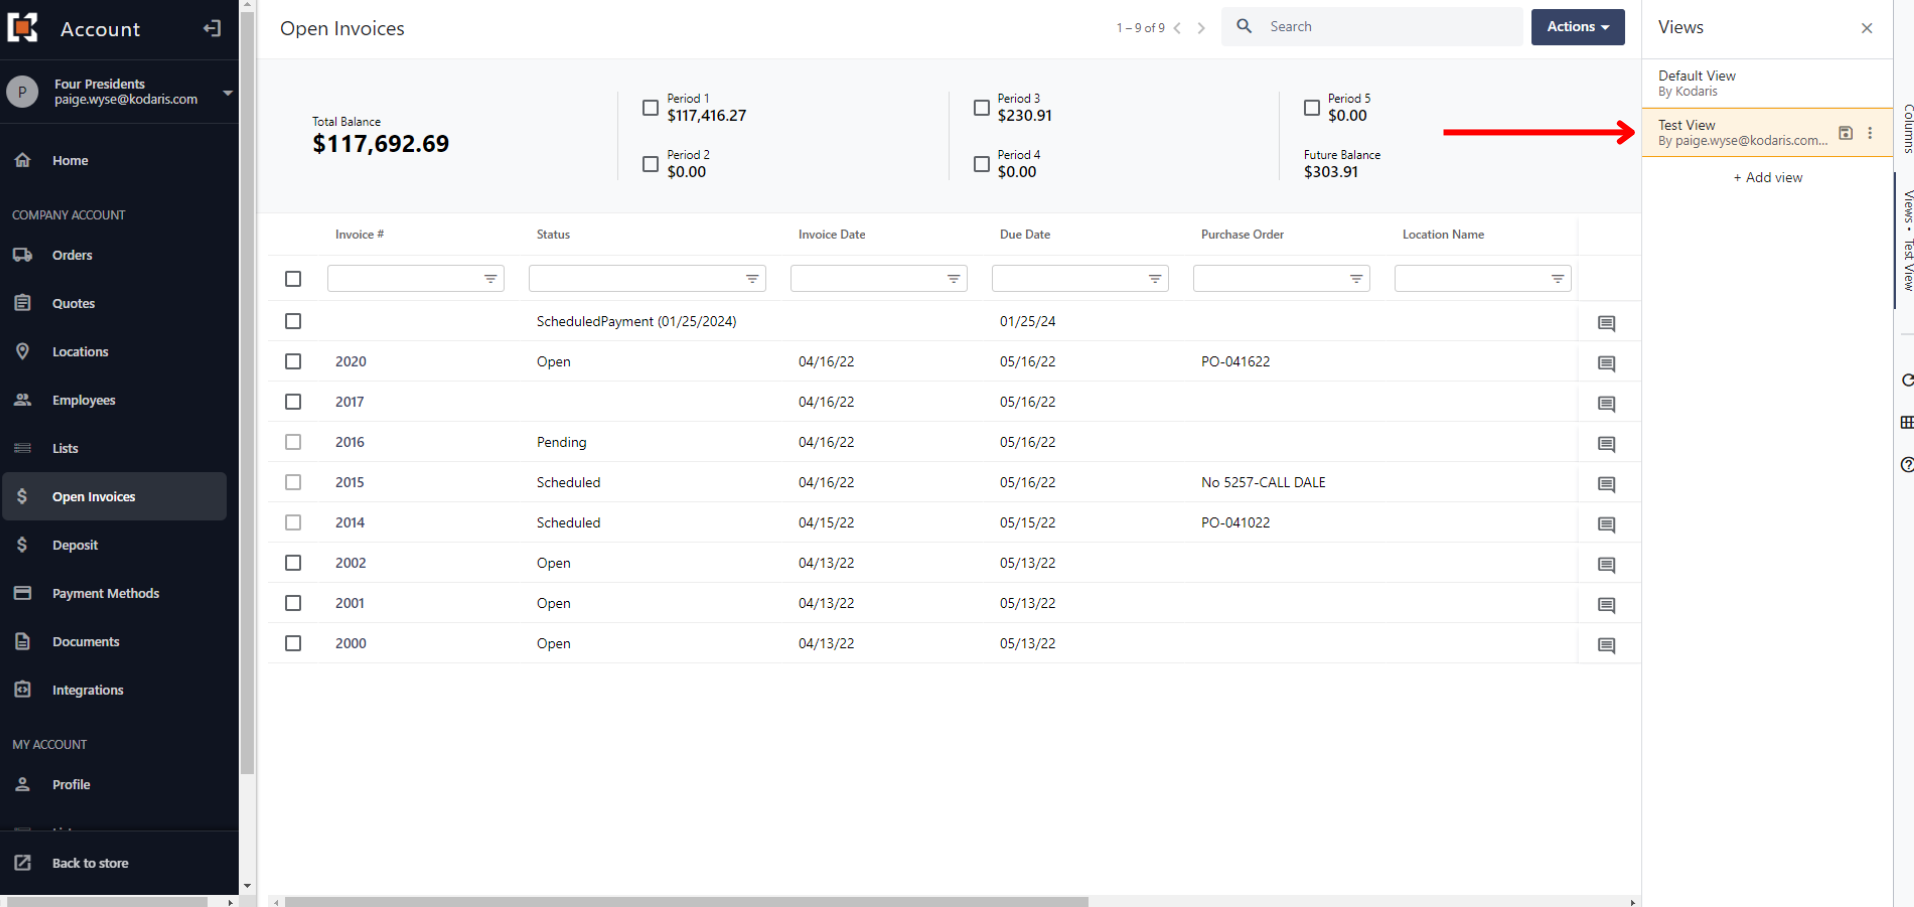
Your customers can also save their created view and screen layout. This is helpful so that they do not have to make modifications to their Open Invoices grid view each time they log in.
To save a view, click on “Views” on the right-hand side of the screen.

Select “Add View”.

From here, they can name the view that they created.
They can also save it as the default view by clicking “Default”. Once they select it as the default, it will automatically display in the portal every time they log in.
Account administrators have the option to share the view they’ve created with all employees who have accounts and can access their company’s Open Invoices screen. They can do this by selecting “Company - make this view available for your company”.

Once they select “Add”, they’ll now see the new view listed under “Views” with the name they assigned it.
Your customers also have the option to save multiple views so that they can click between them to utilize various displays.
To view a preview of an invoice, click on the number associated with the invoice wanting to be viewed.
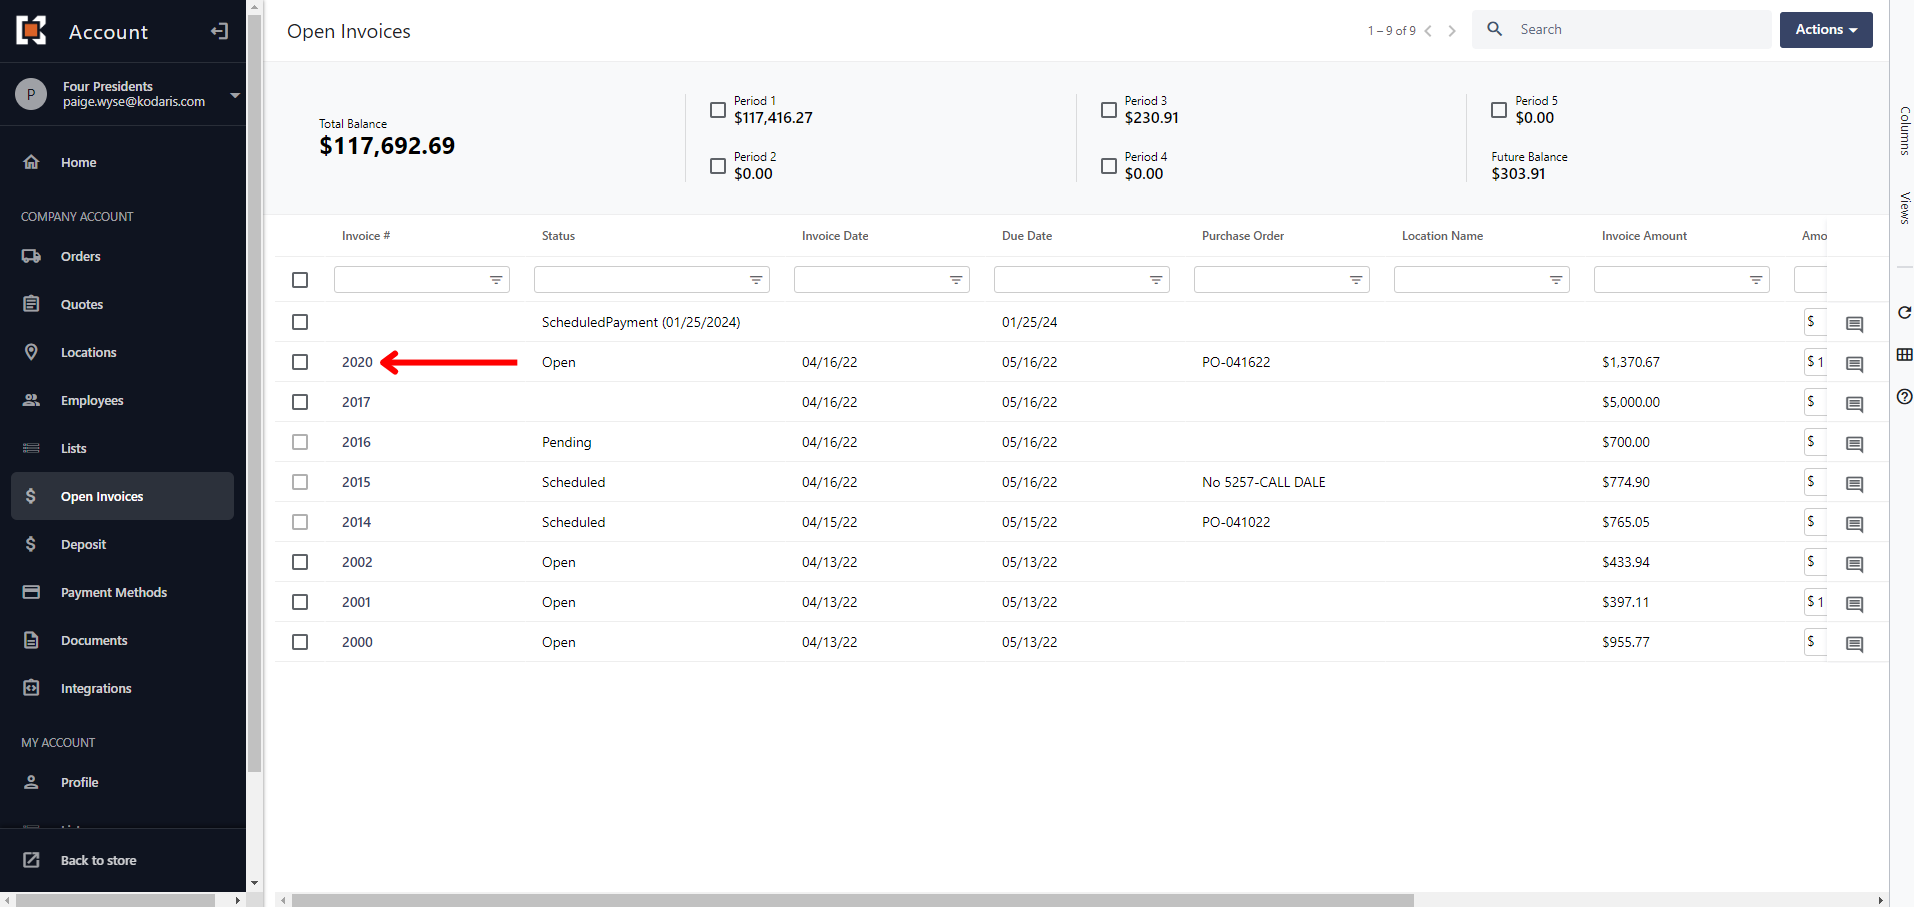
Doing this will bring up a copy of the invoice in the form of a document. From here, your customers can select “Print”, which will allow them to save the file and/or print a physical copy.
