As a Kodaris customer, you will set up an initial company admin account for each of your customers so that they can manage their accounts in a self-service fashion moving forward.
Typically, you’ll create one admin for each customer, and that person will be validated and approved by you.
Once the admin has access to their account, they have the ability to add other users to help manage their account, terminate existing users, assign permissions, etc.
This works similarly to other SaaS products, like Google Workspace and Microsoft 365, where it becomes a self-administering interface for your customers to do business with you. Our goal is to make the Customer Portal a fully self-service platform, limiting manual intervention.
As mentioned earlier, after you’ve assigned an admin to a customer account, the admin can then add another employee or user to help manage their account.
To do this, they will navigate to the “Employees” tab, and then select “Add Employee” in the top right-hand corner.
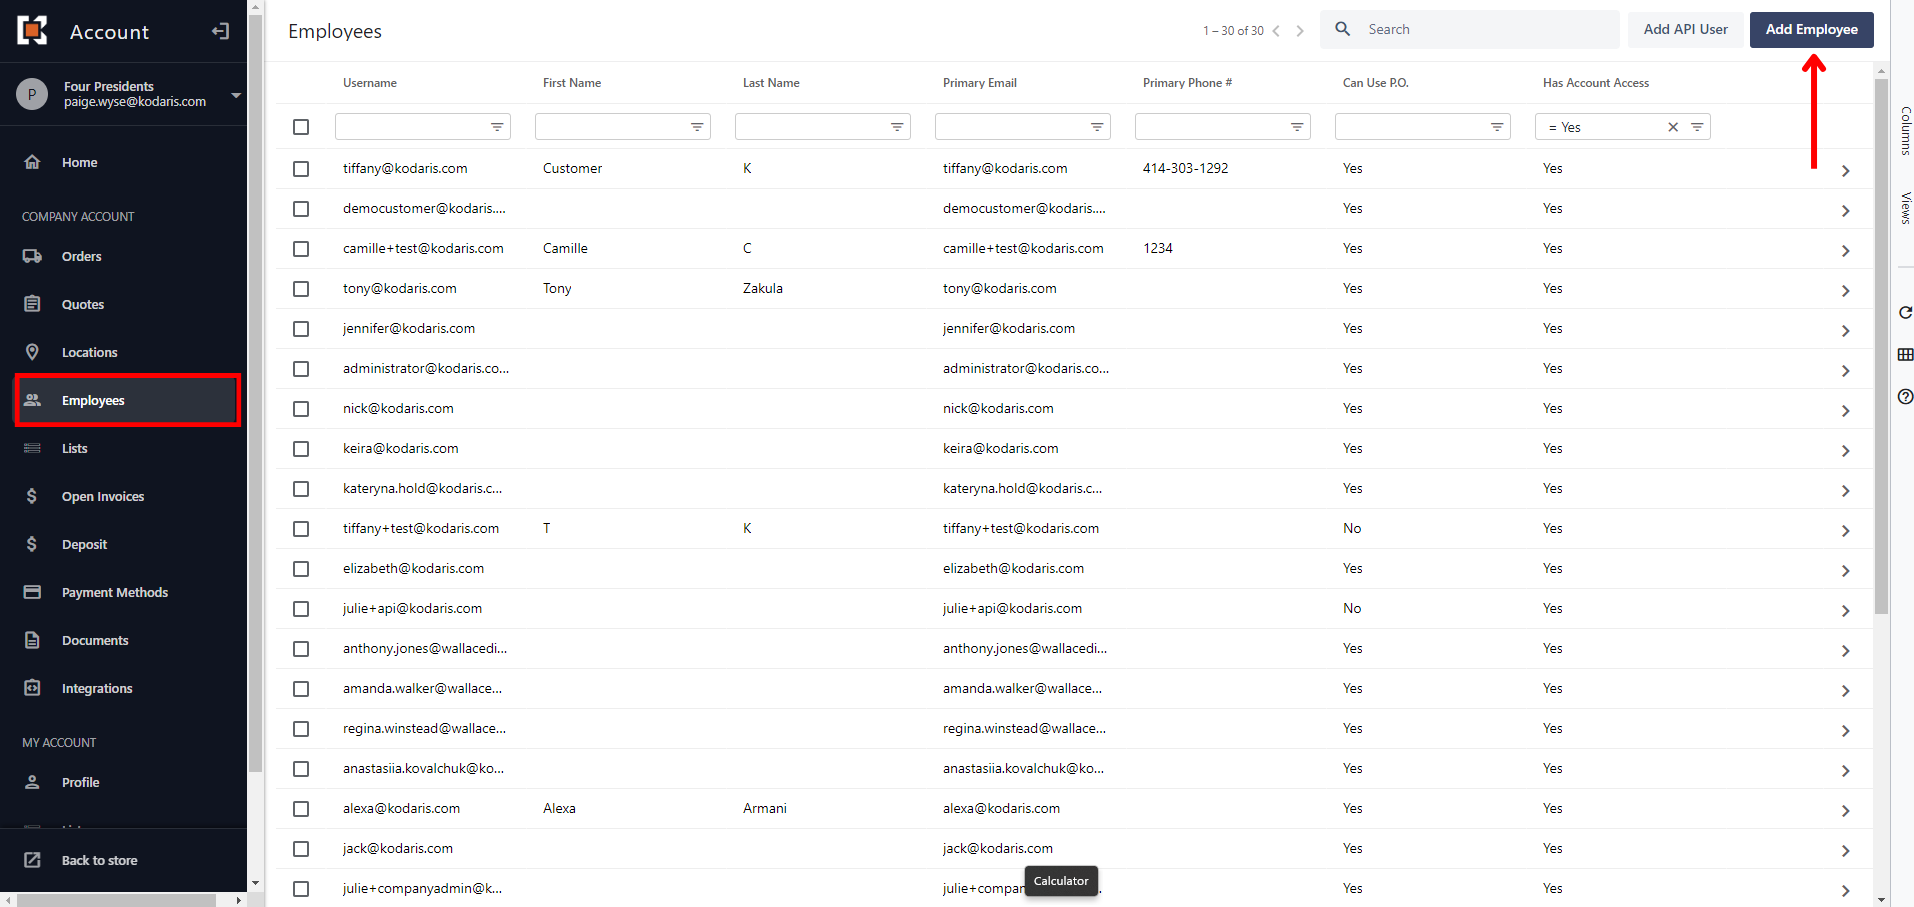
They will then fill out all the required fields with the “Username” being the email address their employee will use to log into their own account.

After they’ve added an employee or user, they will now see them listed under the “Employees” tab. In this example, we have many employees listed.

It’s important to note that the Kodaris Customer Portal supports single sign-on (SSO), which is an identification method that enables users to log in to multiple applications and websites with one set of credentials. The Portal can be authenticated with other applications or your e-commerce site.
To edit the permissions under an employee’s account, click on the arrow on the far right-hand side of the screen for the employee whose permissions they want to adjust.

This will bring up a new screen. Here, under the “Details” tab, your customer can update their employee’s information, such as profile and contact details, address, and more.

To further build out an employee’s profile, they can fill out the “Employment” section. This section is mainly for your customer’s records and to be able to distinguish between each account’s roles and responsibilities.

If they scroll further down the screen, they will see a section titled “Permissions” with a long list of capabilities. This is where they will control all permissions granted (or not granted) to employees. A company admin of the account will have all permissions turned on by default, and they will have full control over other employees’ permissions.
Permissions can be set differently per employee account, too. The ability to set permissions per user can be a differentiator, especially for large companies with various departments and roles that will use the platform differently.
To grant permission to a capability, ensure the checkbox is selected. To deny permission, deselect the checkbox.
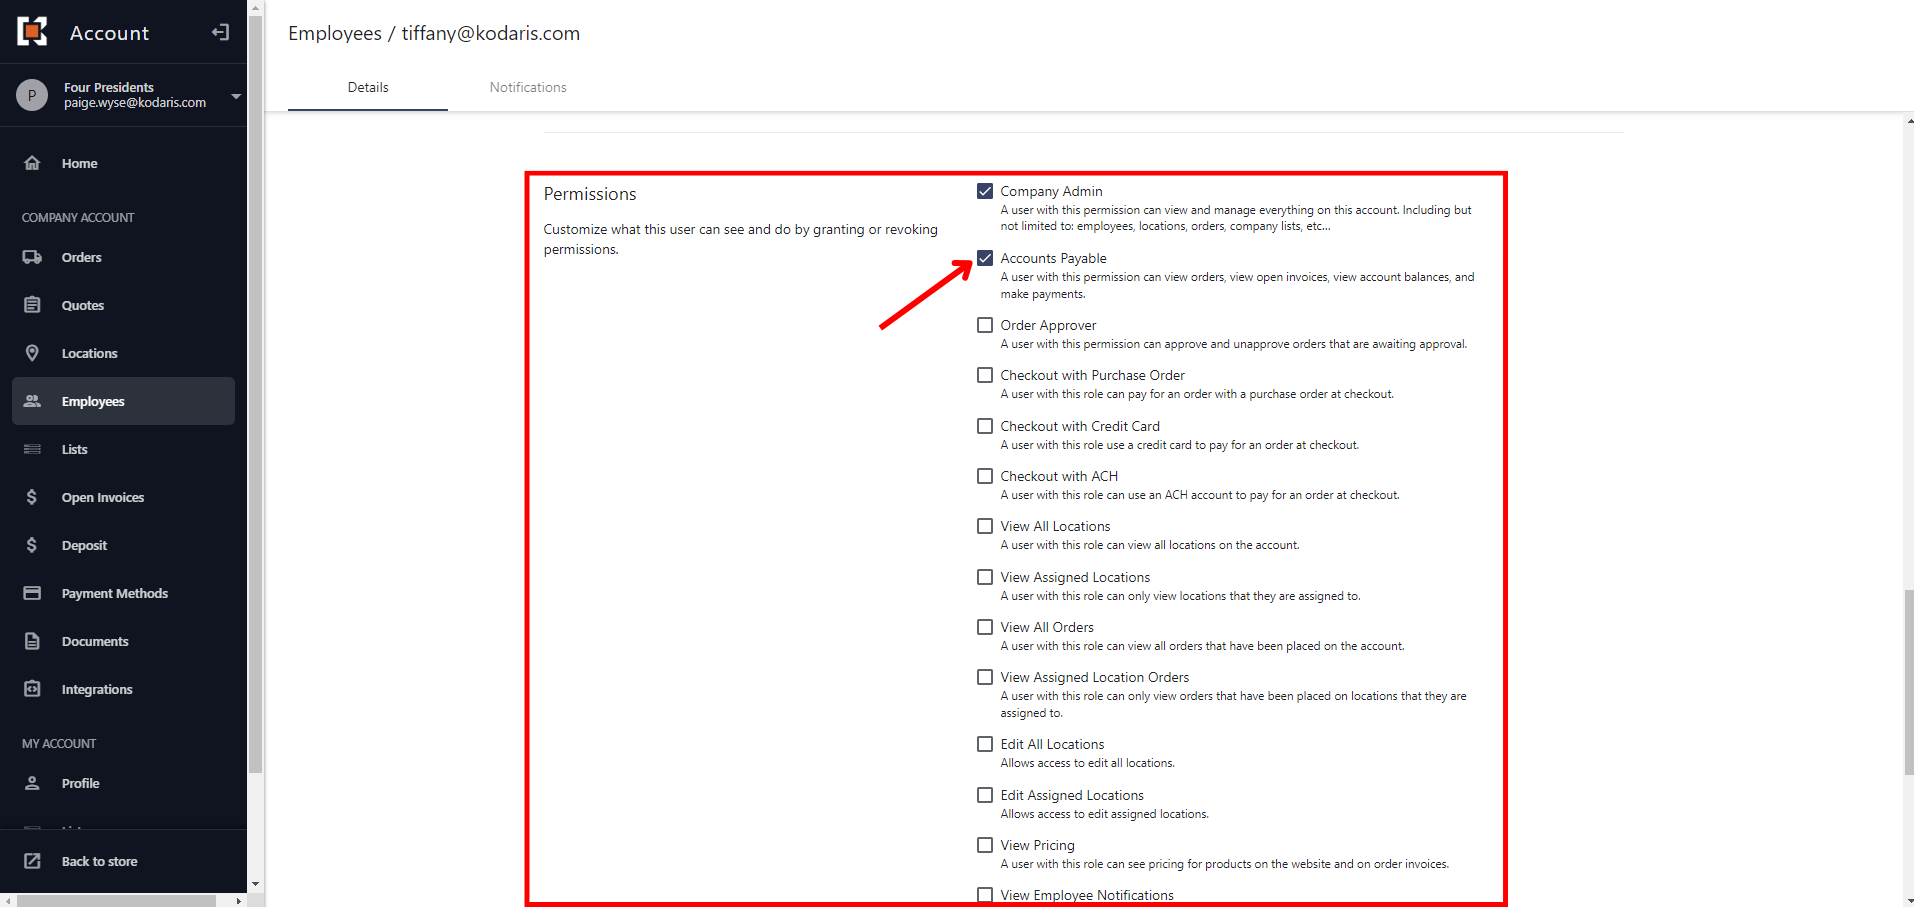
If, for any reason, your customer needs to remove access to an employee’s account altogether, they can select “No” under the “Account Access” section. If they need to reinstate an employee’s access, select “Yes”.
