To assign products to company catalogs via the Import screen in the operations portal, first create the CSV import file. This file must contain the product codes and the external IDs of the company catalogs where products should be assigned. To determine the products to be used, navigate to the PIM section.
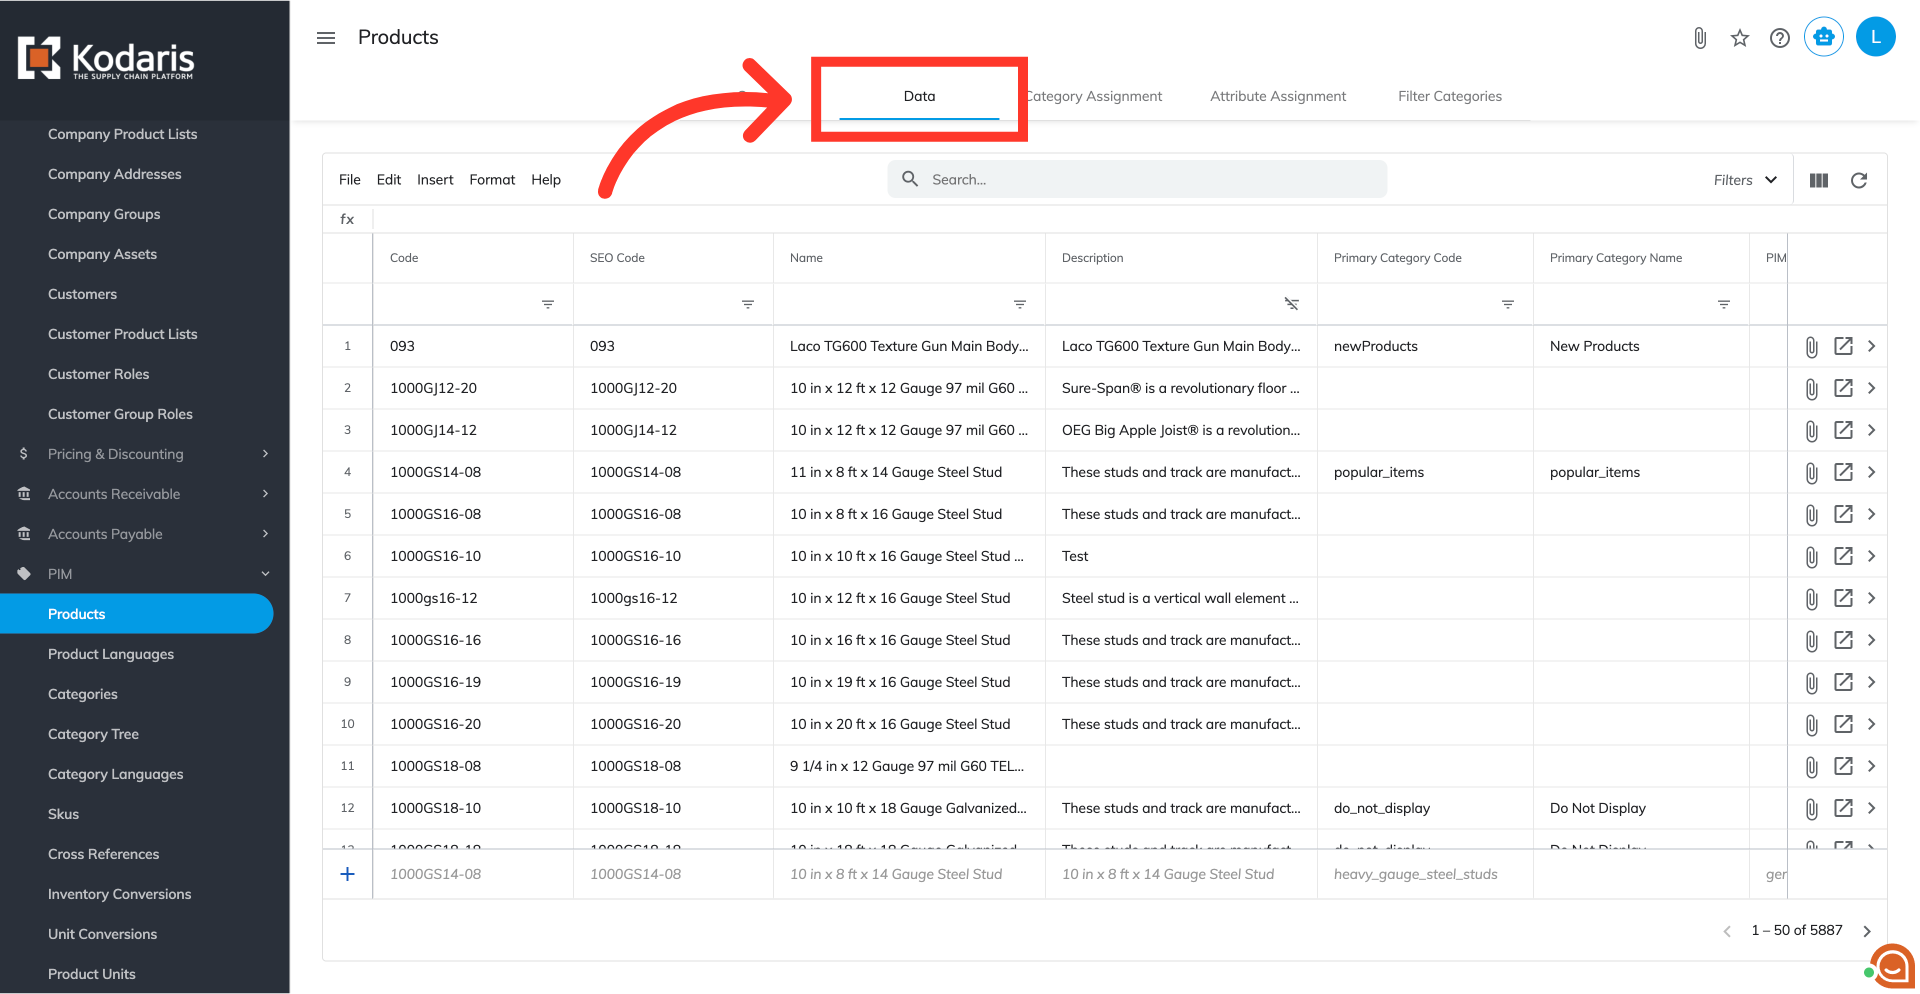
Then, go to the "Products" screen. In order to access "Products" the account must be set up either as an "administrator" or a "superuser", or have the appropriate roles: "productView", "productEdit".

For the spreadsheet view, go to the "Data" tab.
Use the filters to help narrow down the products you would like to export. You can also use the search field.
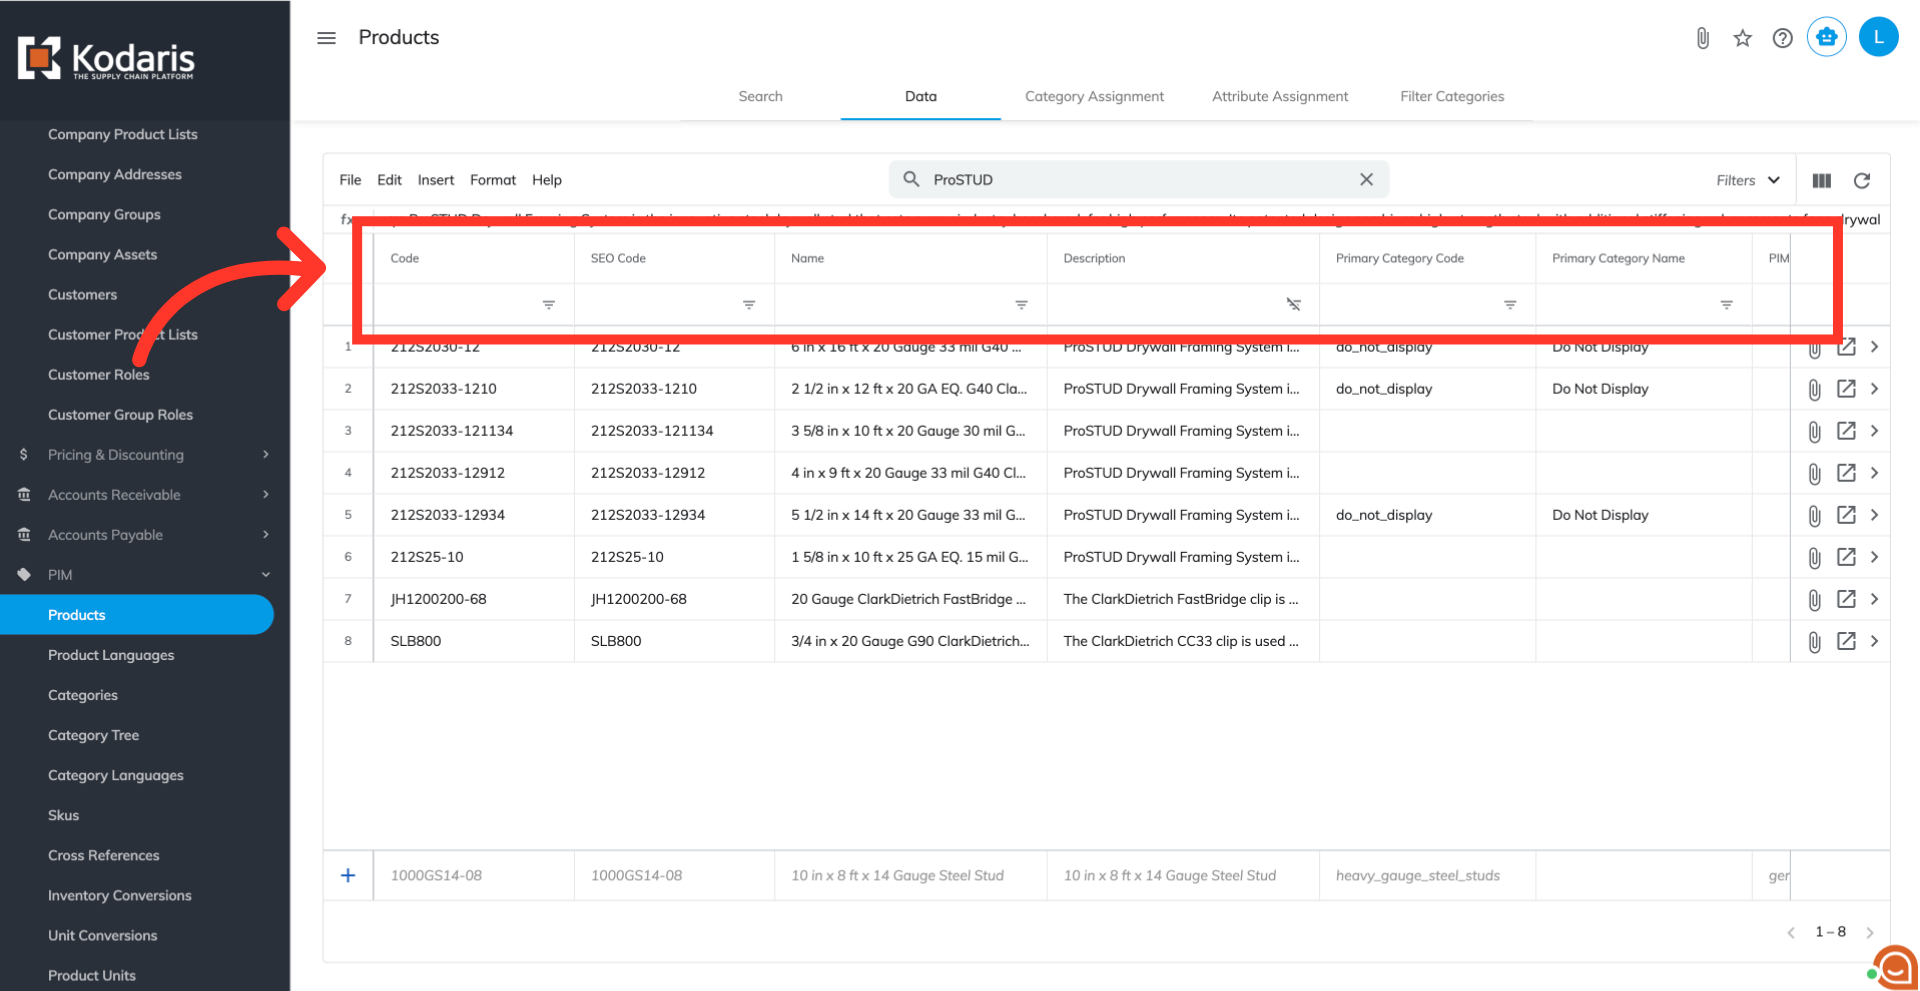
We only need the "Code" column data for this import. If you would like to remove the other columns before exporting, you can use the "Show/Hide Columns" icon and remove the other columns from your current view.

Click "File".

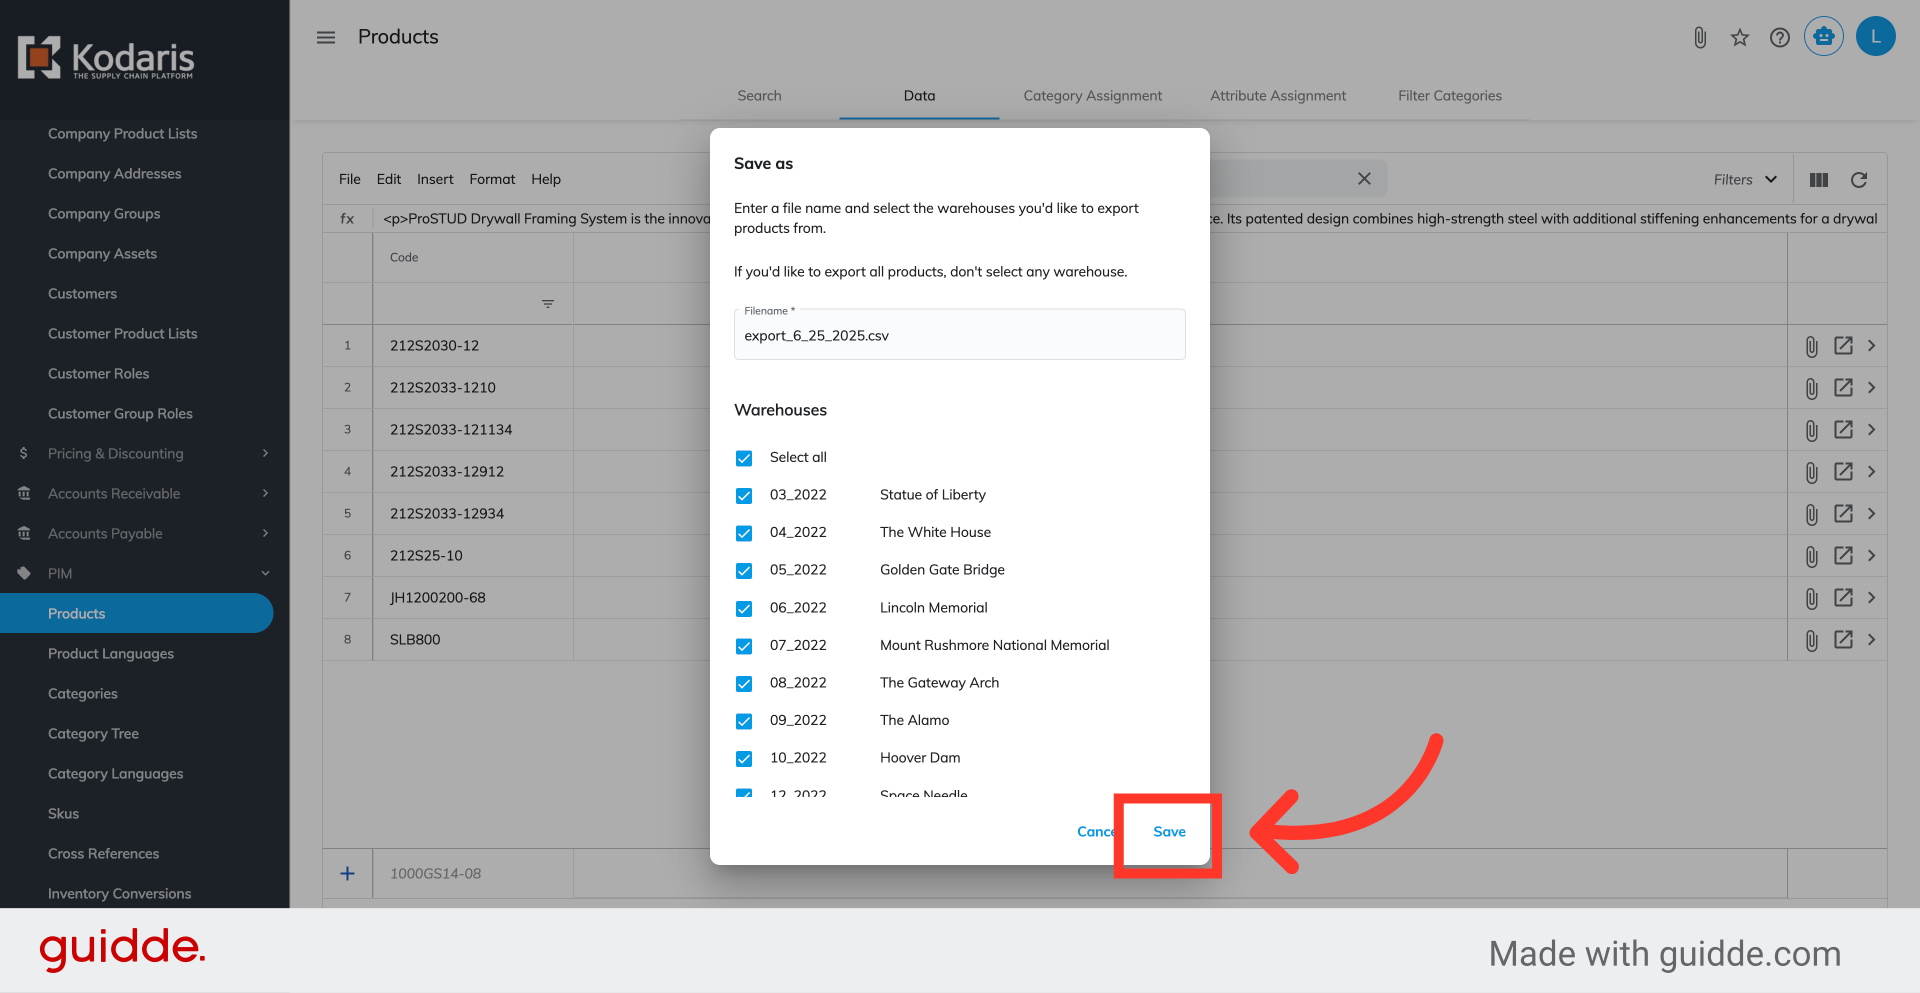
Select the "Export" option. This export will be used to assign products to company catalogs.

If you would like, update the file name by clicking into the field and typing.

Click "Save".
The exported sheet now contains the products that you would like to assign to company catalogs.

Before importing, you will need to update your header row.
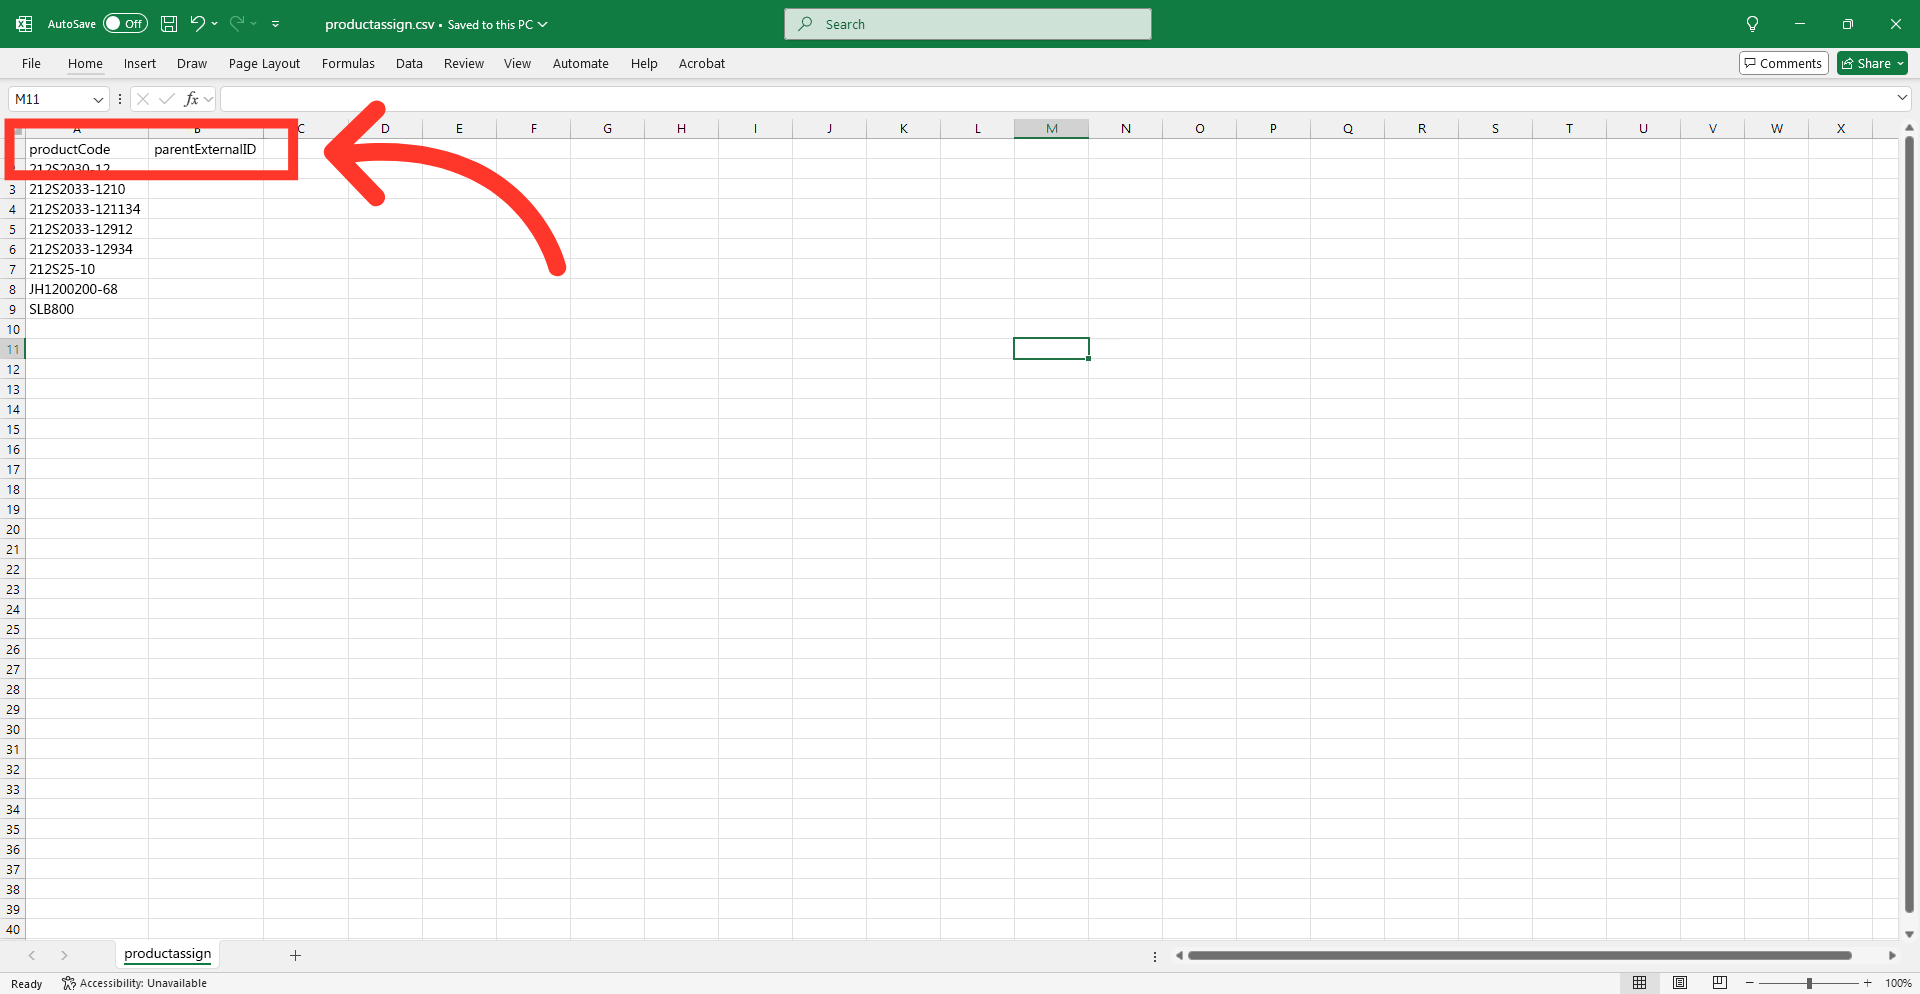
Rename the "Code" column header to "productCode".

This column must contain the product codes that you would like to assign to the company catalogs.
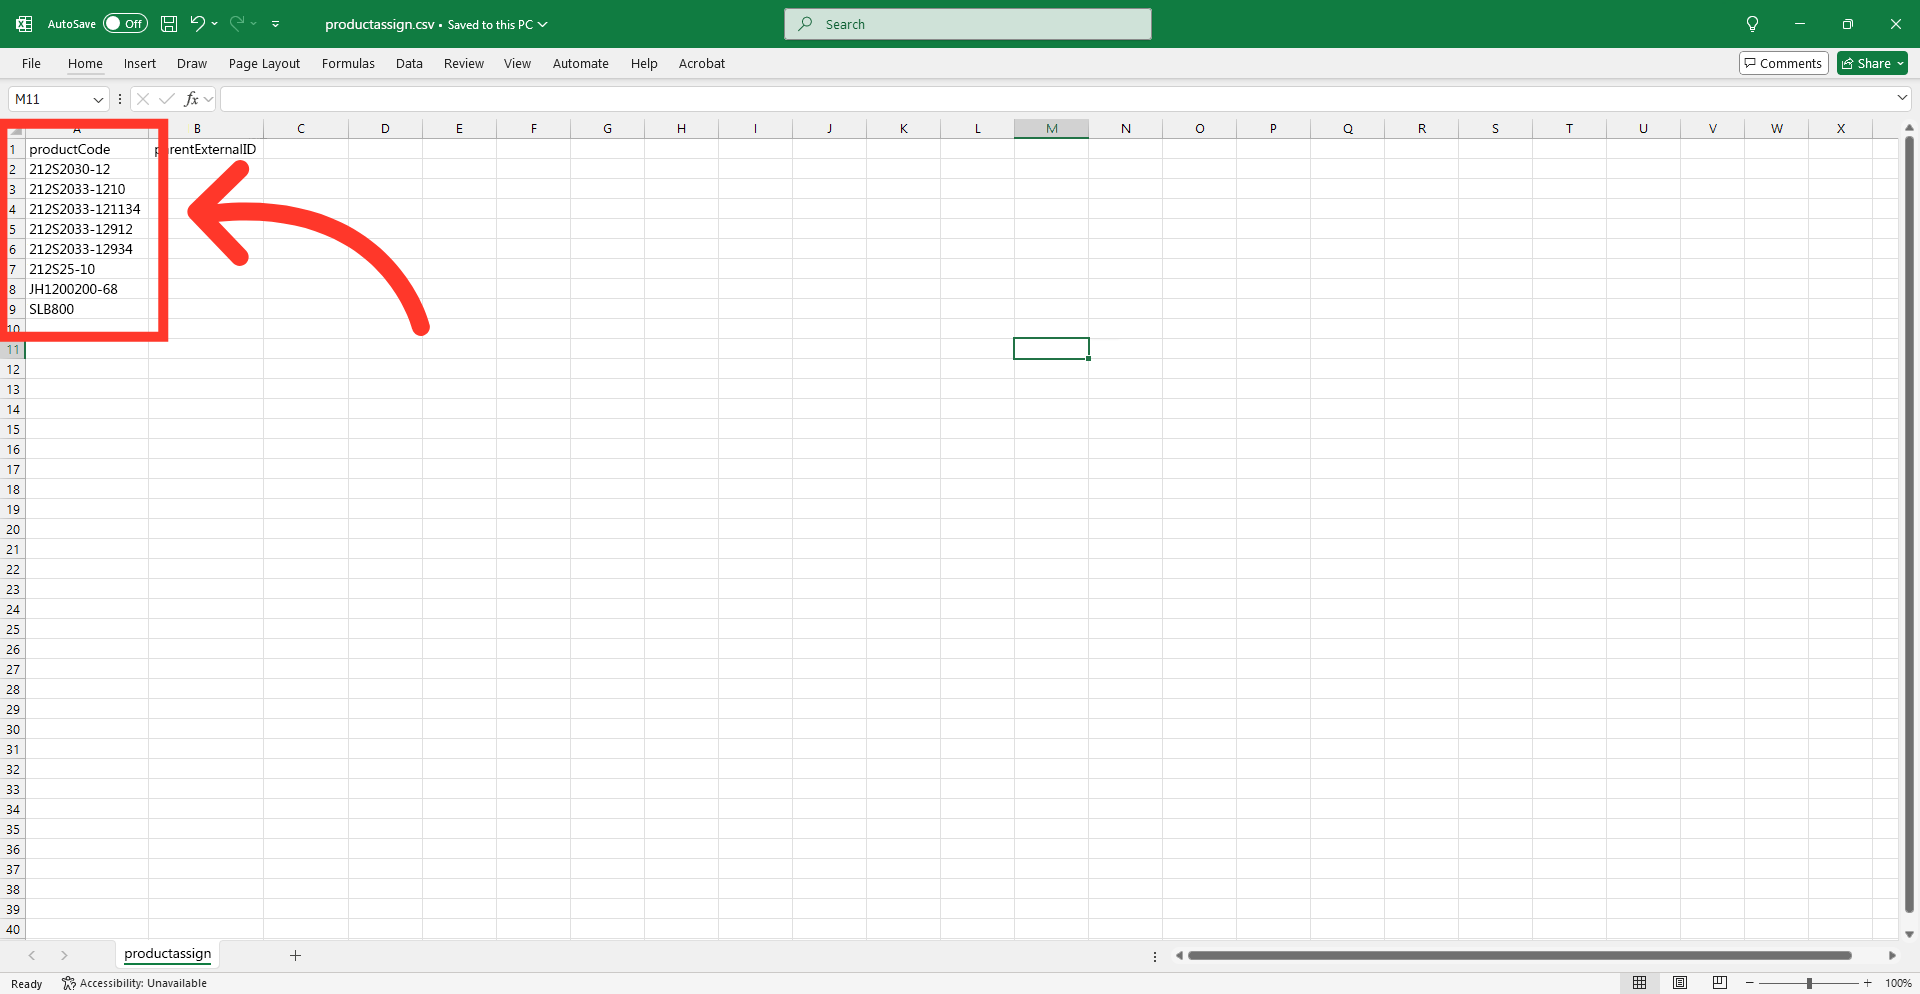
Add a "productExternalID" column header.

This column must contain the "External ID" for the company catalog you are assigning products to. The "External ID" acts the identifier for the company catalog.

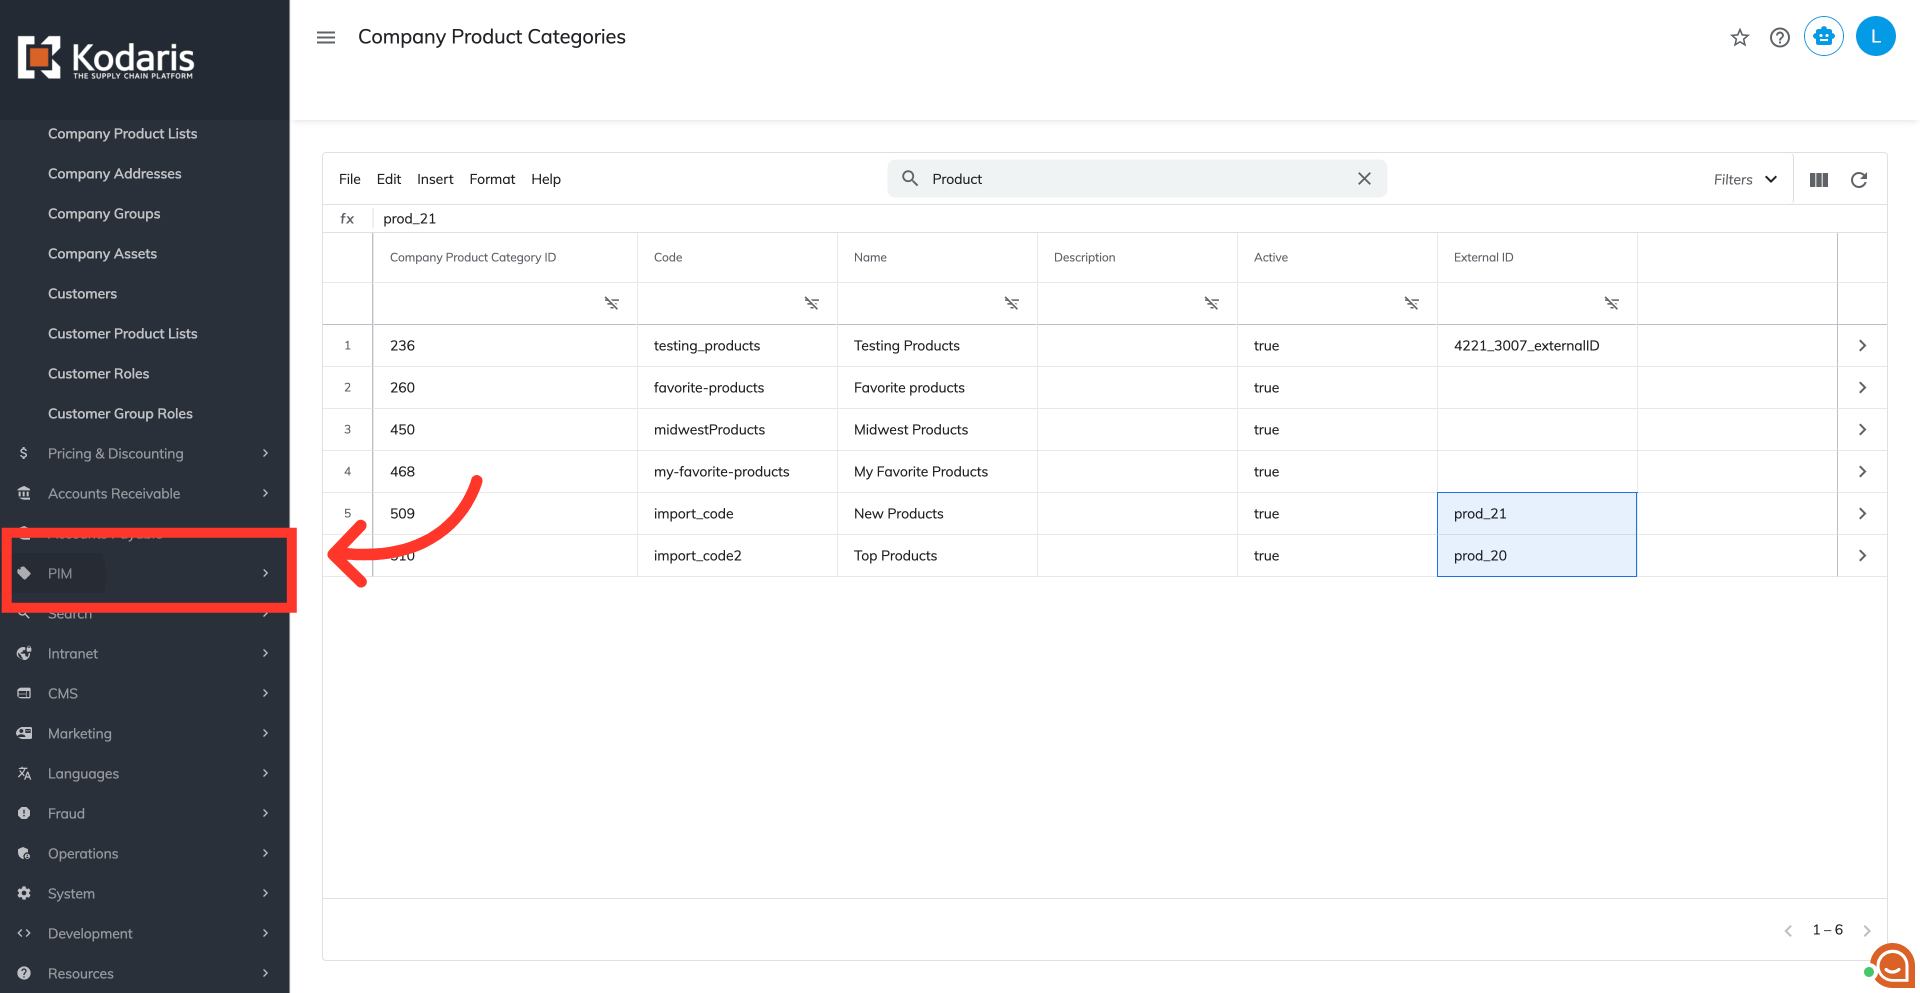
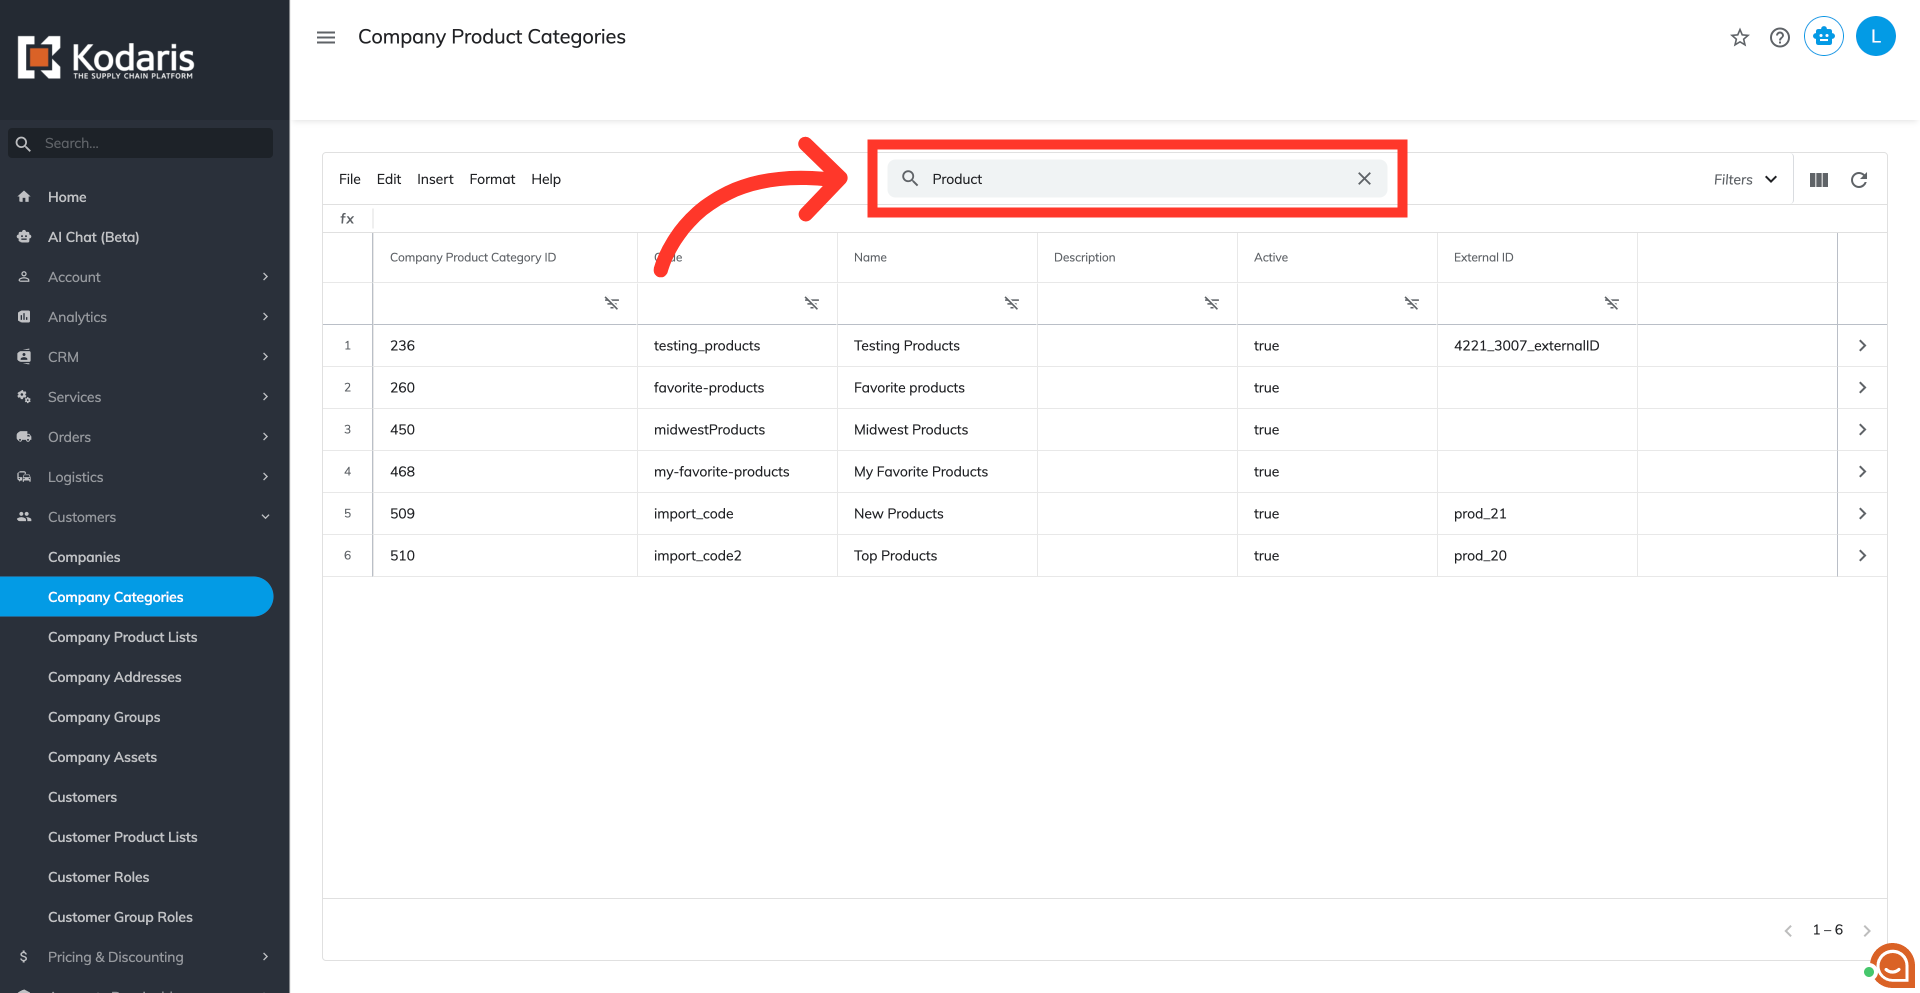
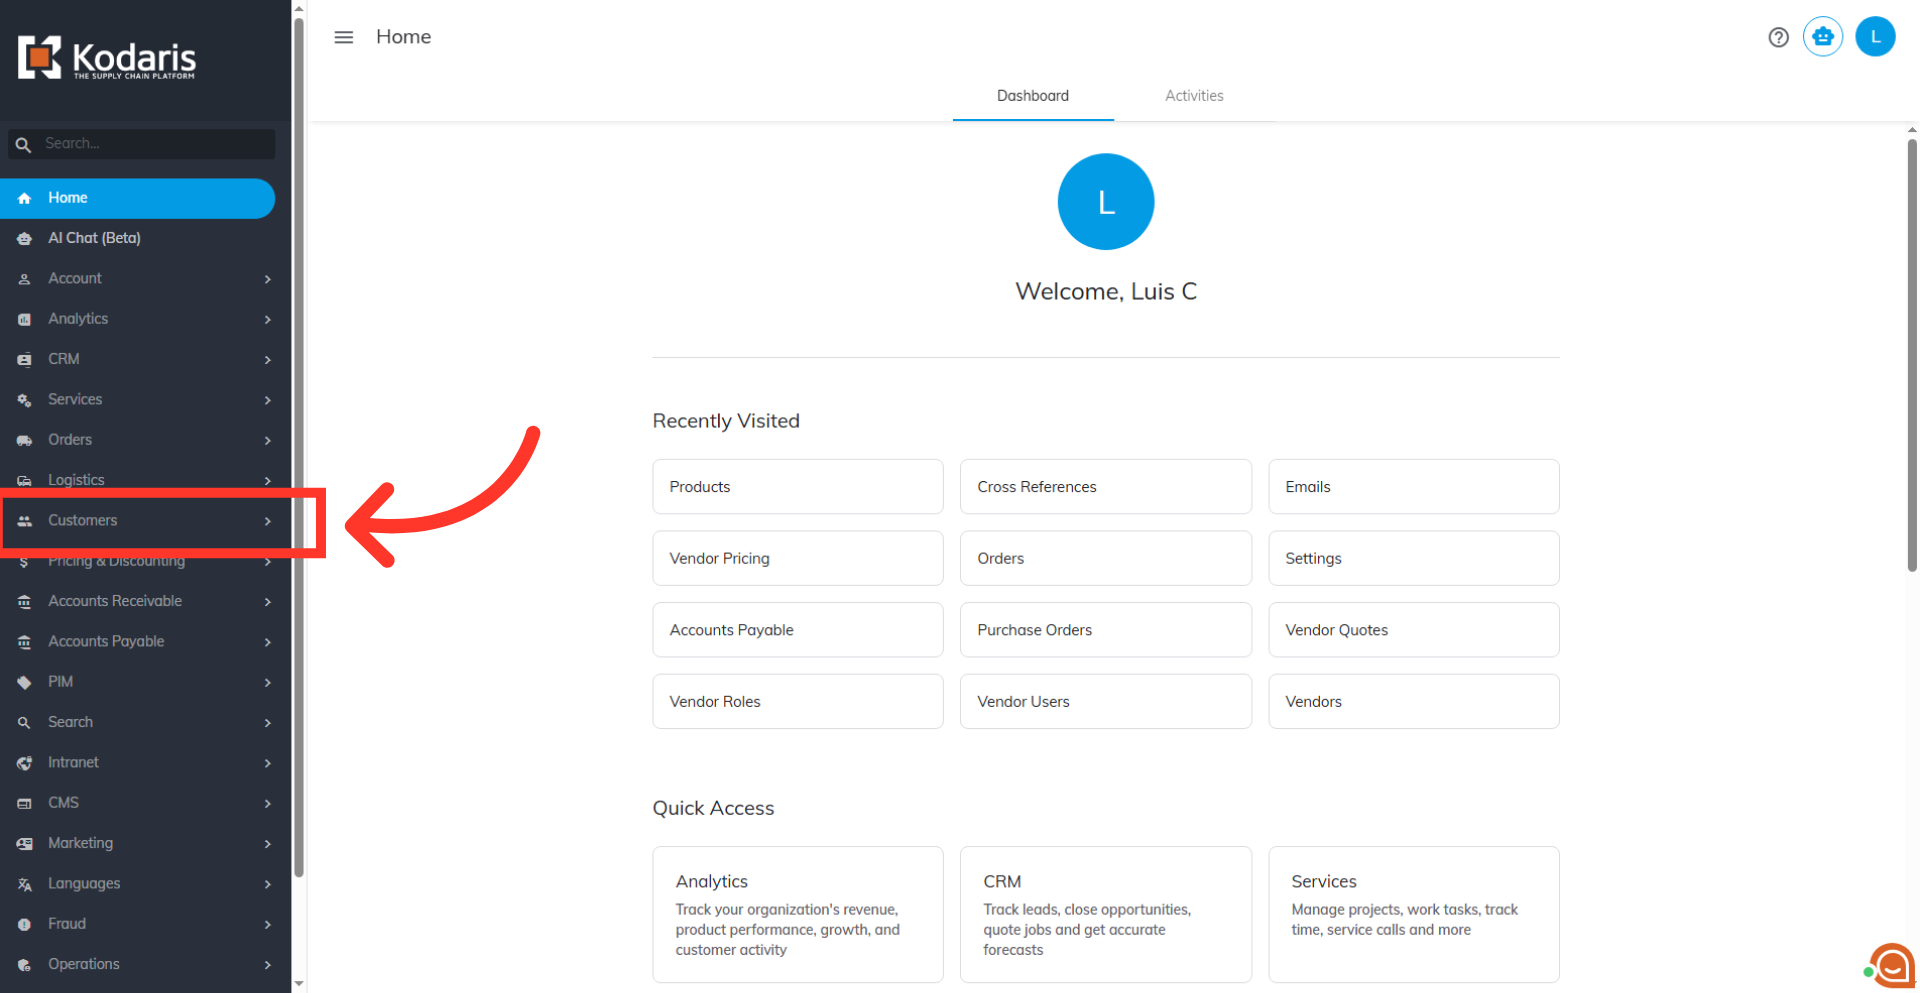
To find the values for the "productExternalID" column, navigate to "Customers" in the operations portal.

Next, click "Company Categories". In order to access "Company Categories", the account must be set up either as an "administrator" or a "superuser", or have the appropriate roles: "companyCategoryView", "companyCategoryEdit".

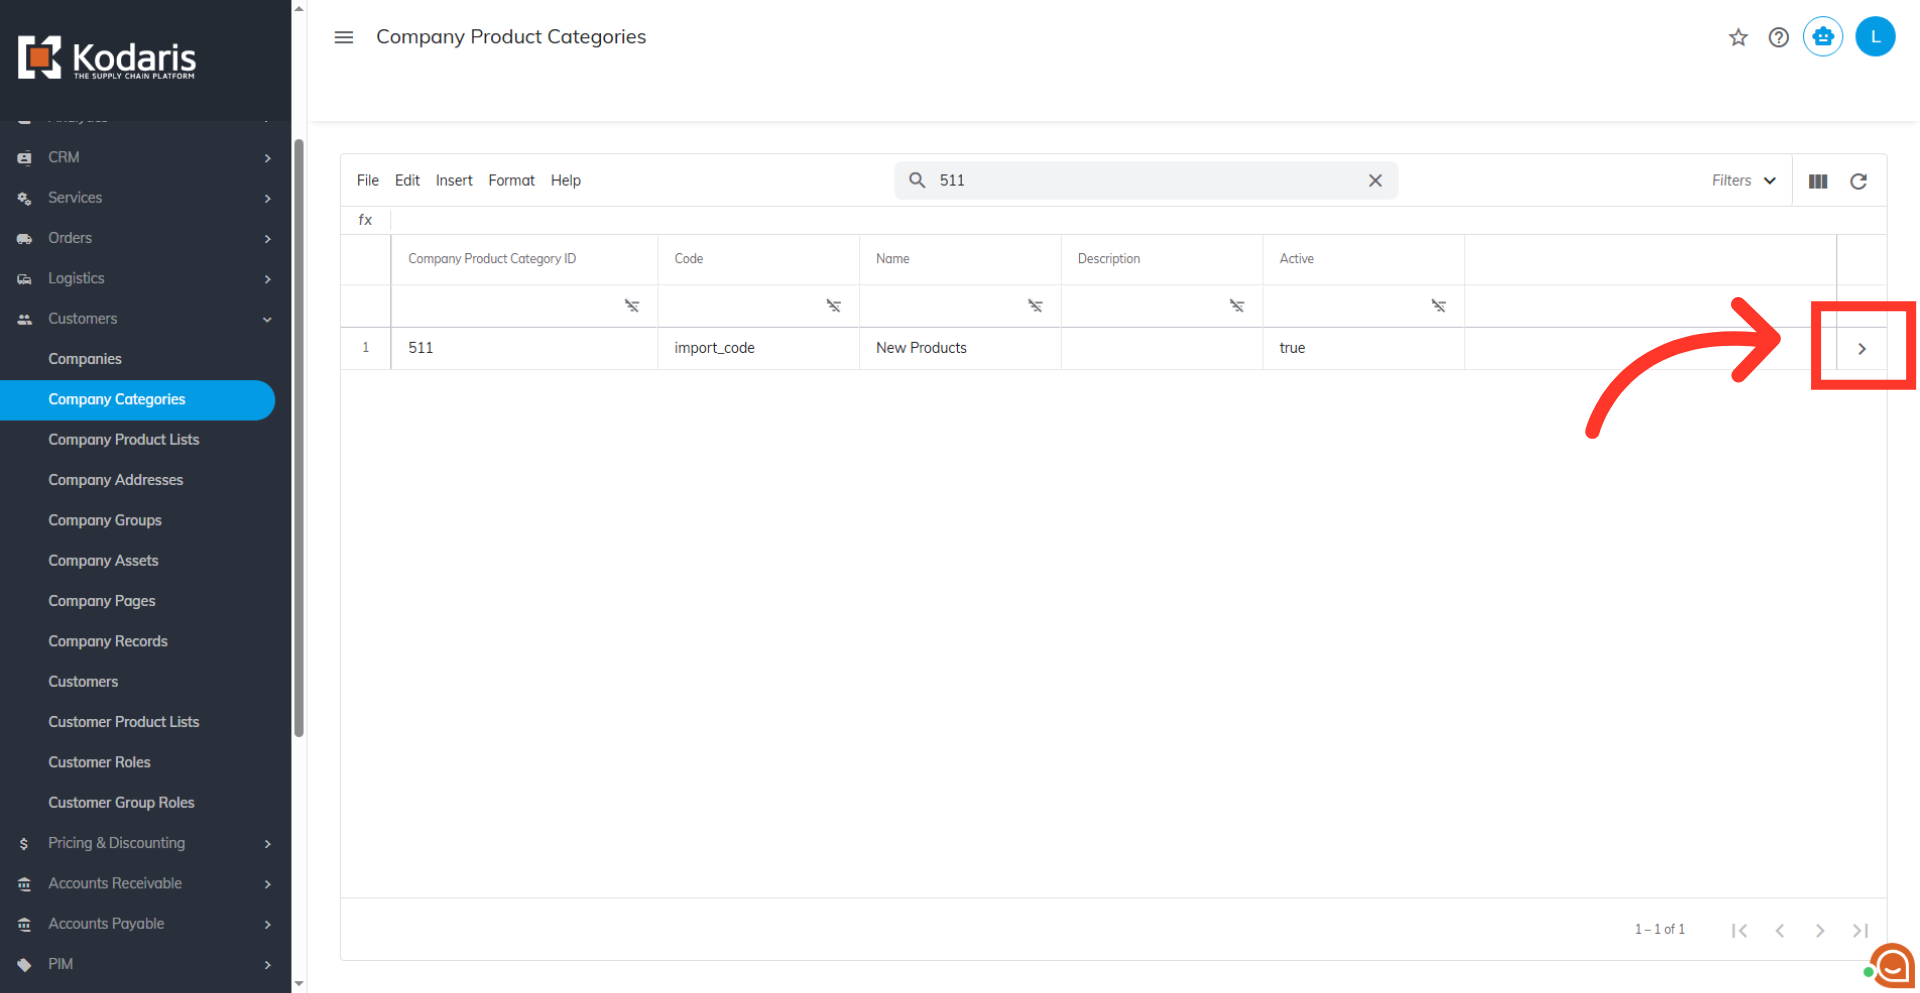
If the "External ID" column is not visible on the grid, click "Show/Hide Columns" to display it.
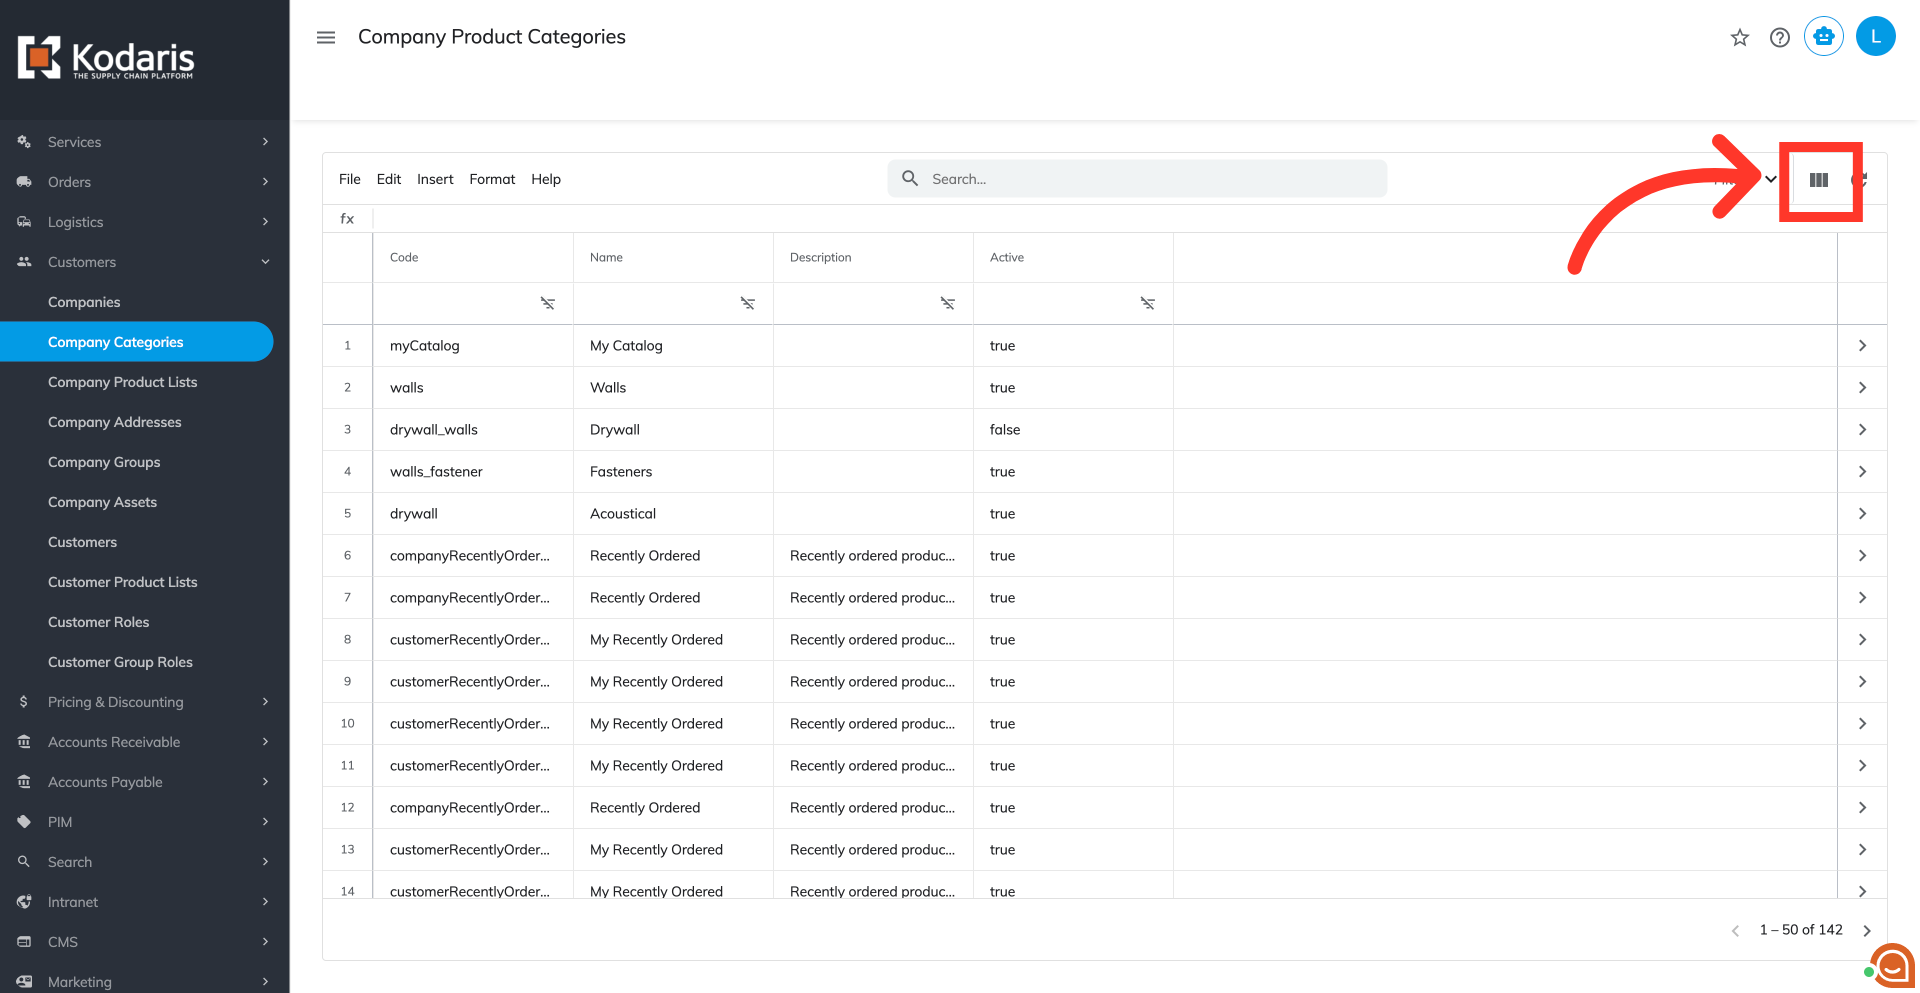
Click "External ID" to make its column visible in the grid. To simplify the view, other columns may be unchecked, or additional ones may be added.

Type in the company catalog you would like to assign products to.
Copy the "External ID" for the company catalog and add the value to the "productExternalID" colu in the spreadsheet that you are prepping for import.

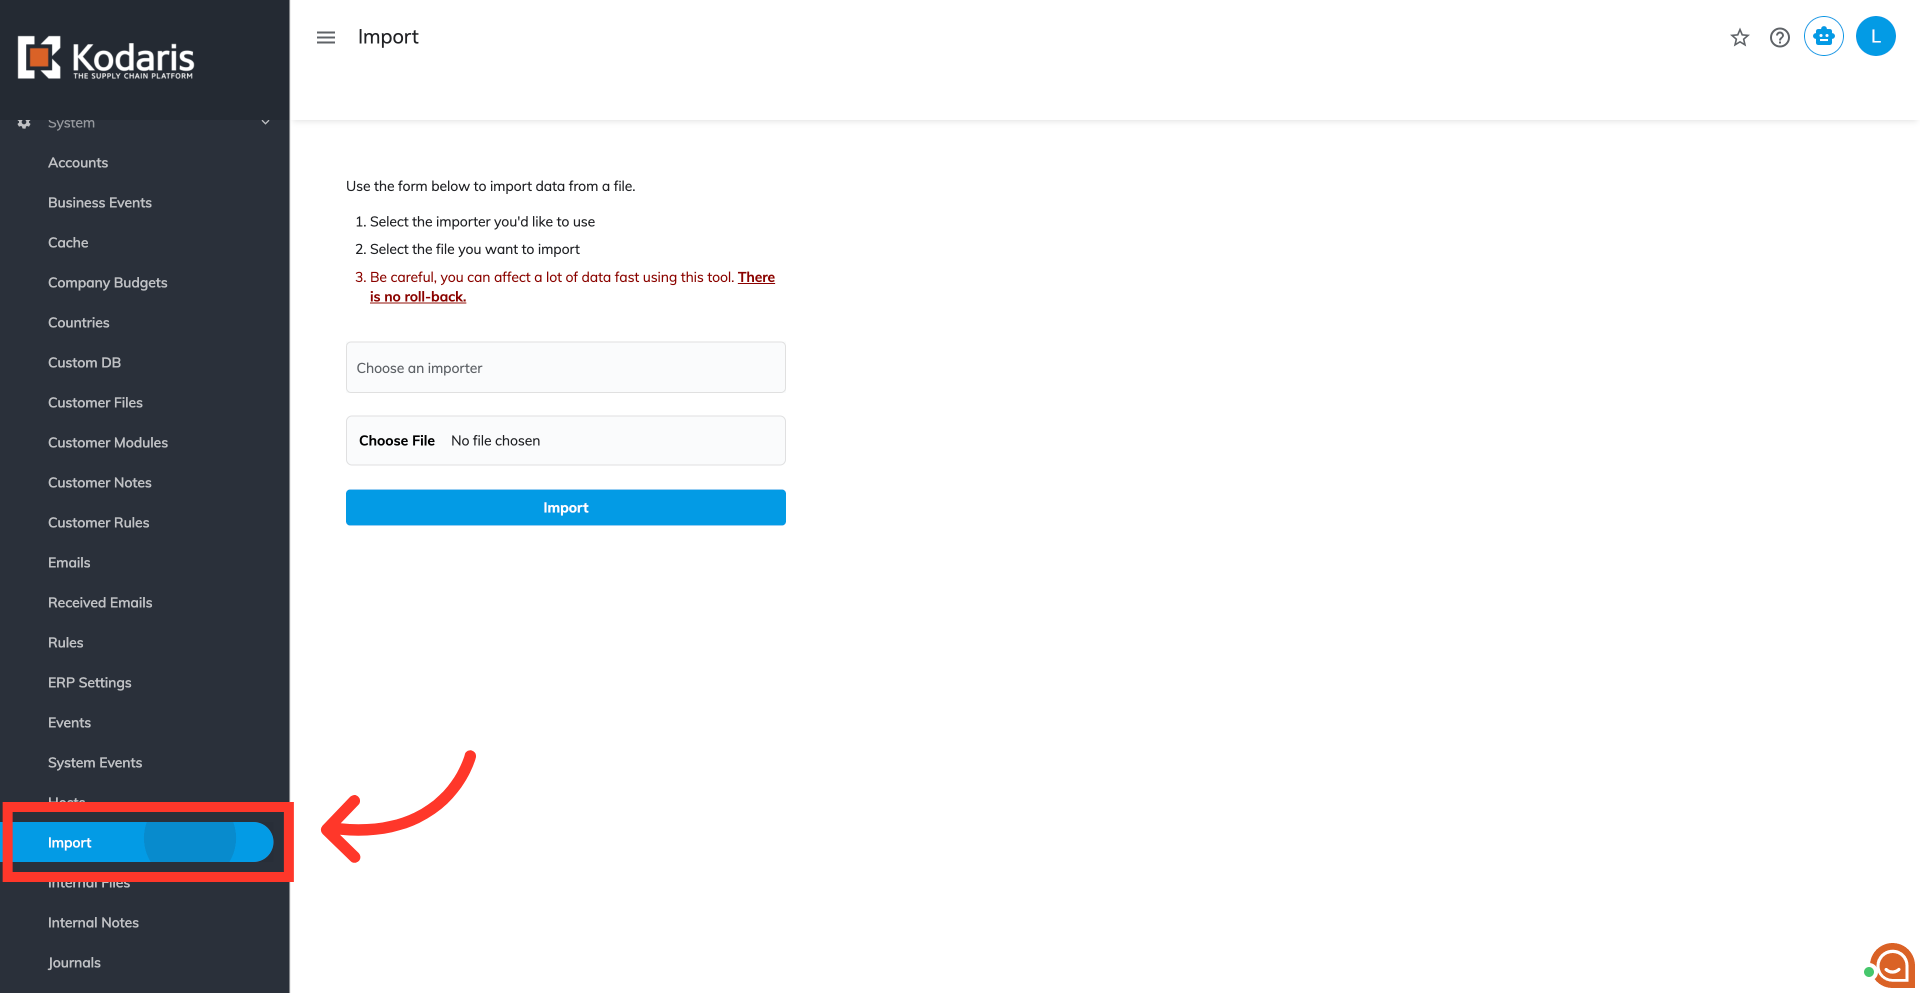
Once you are ready to import, navigate to the "System" section in the operations portal

Then, click "Import". In order to access "Import" the account will need to be set up either as an "administrator" or a "superuser", or have the appropriate roles: "importEdit".
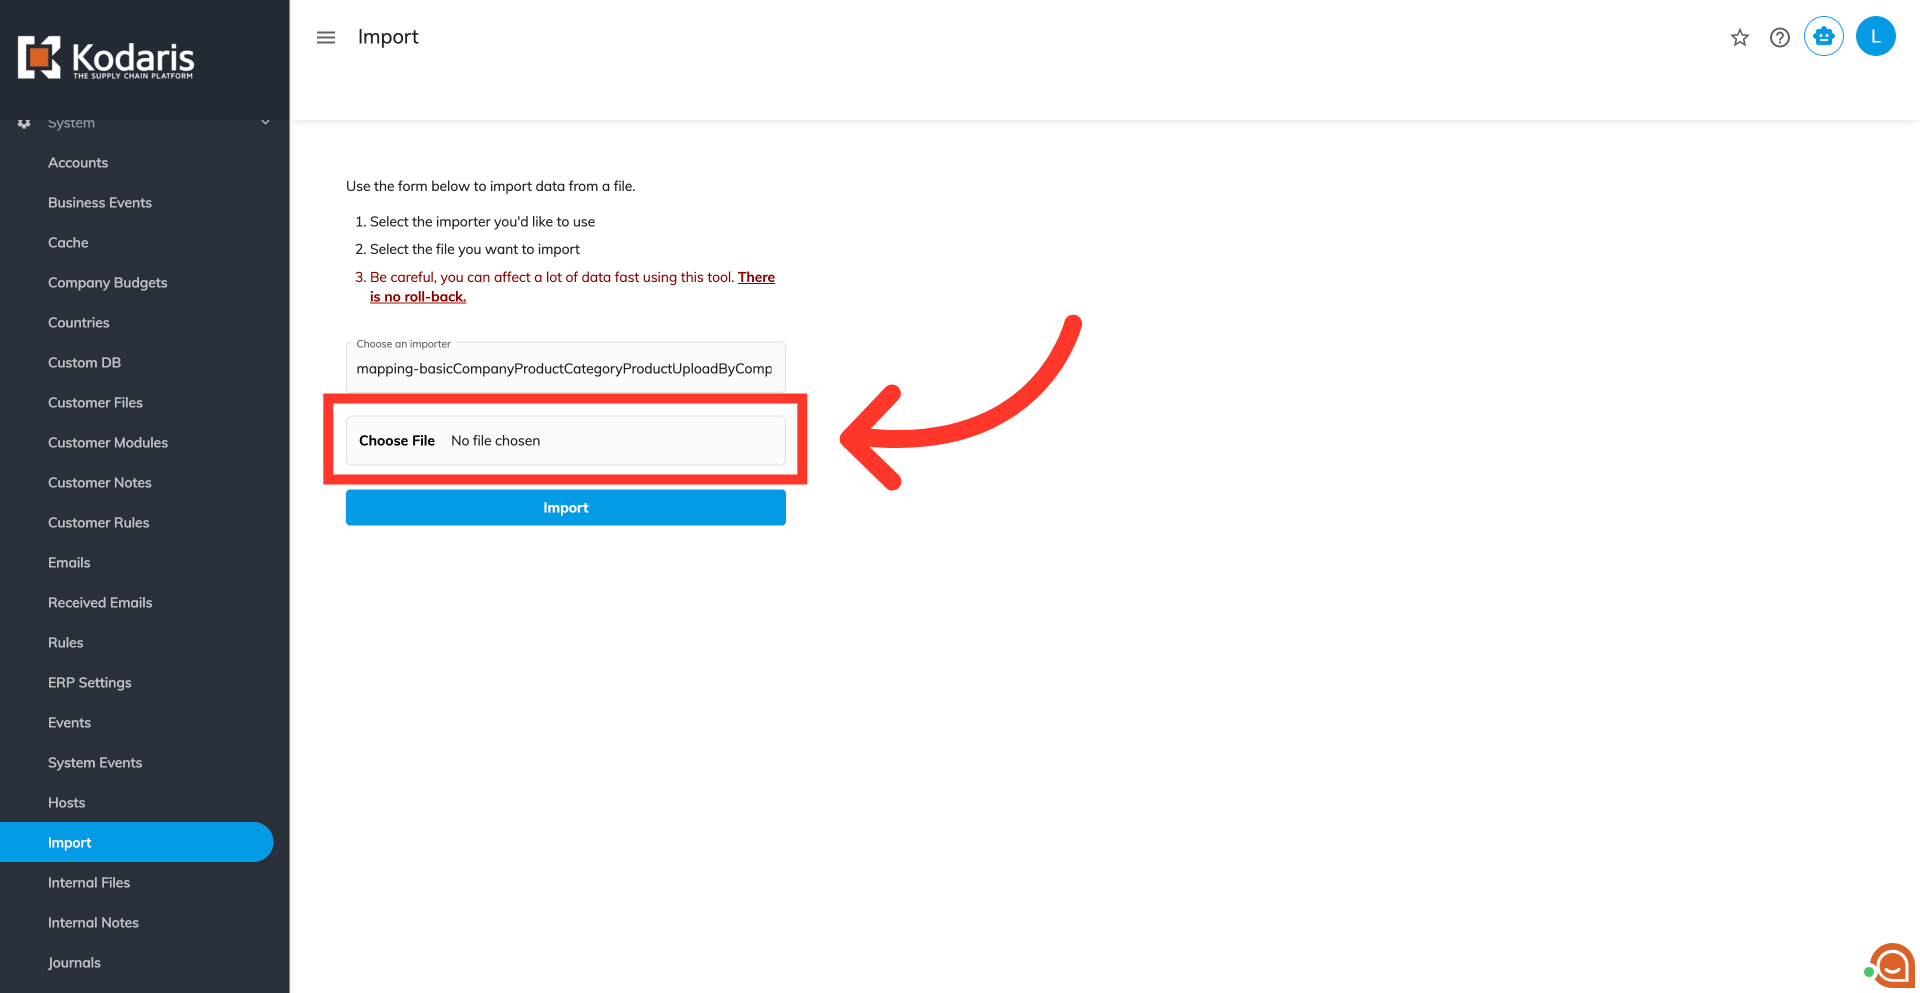
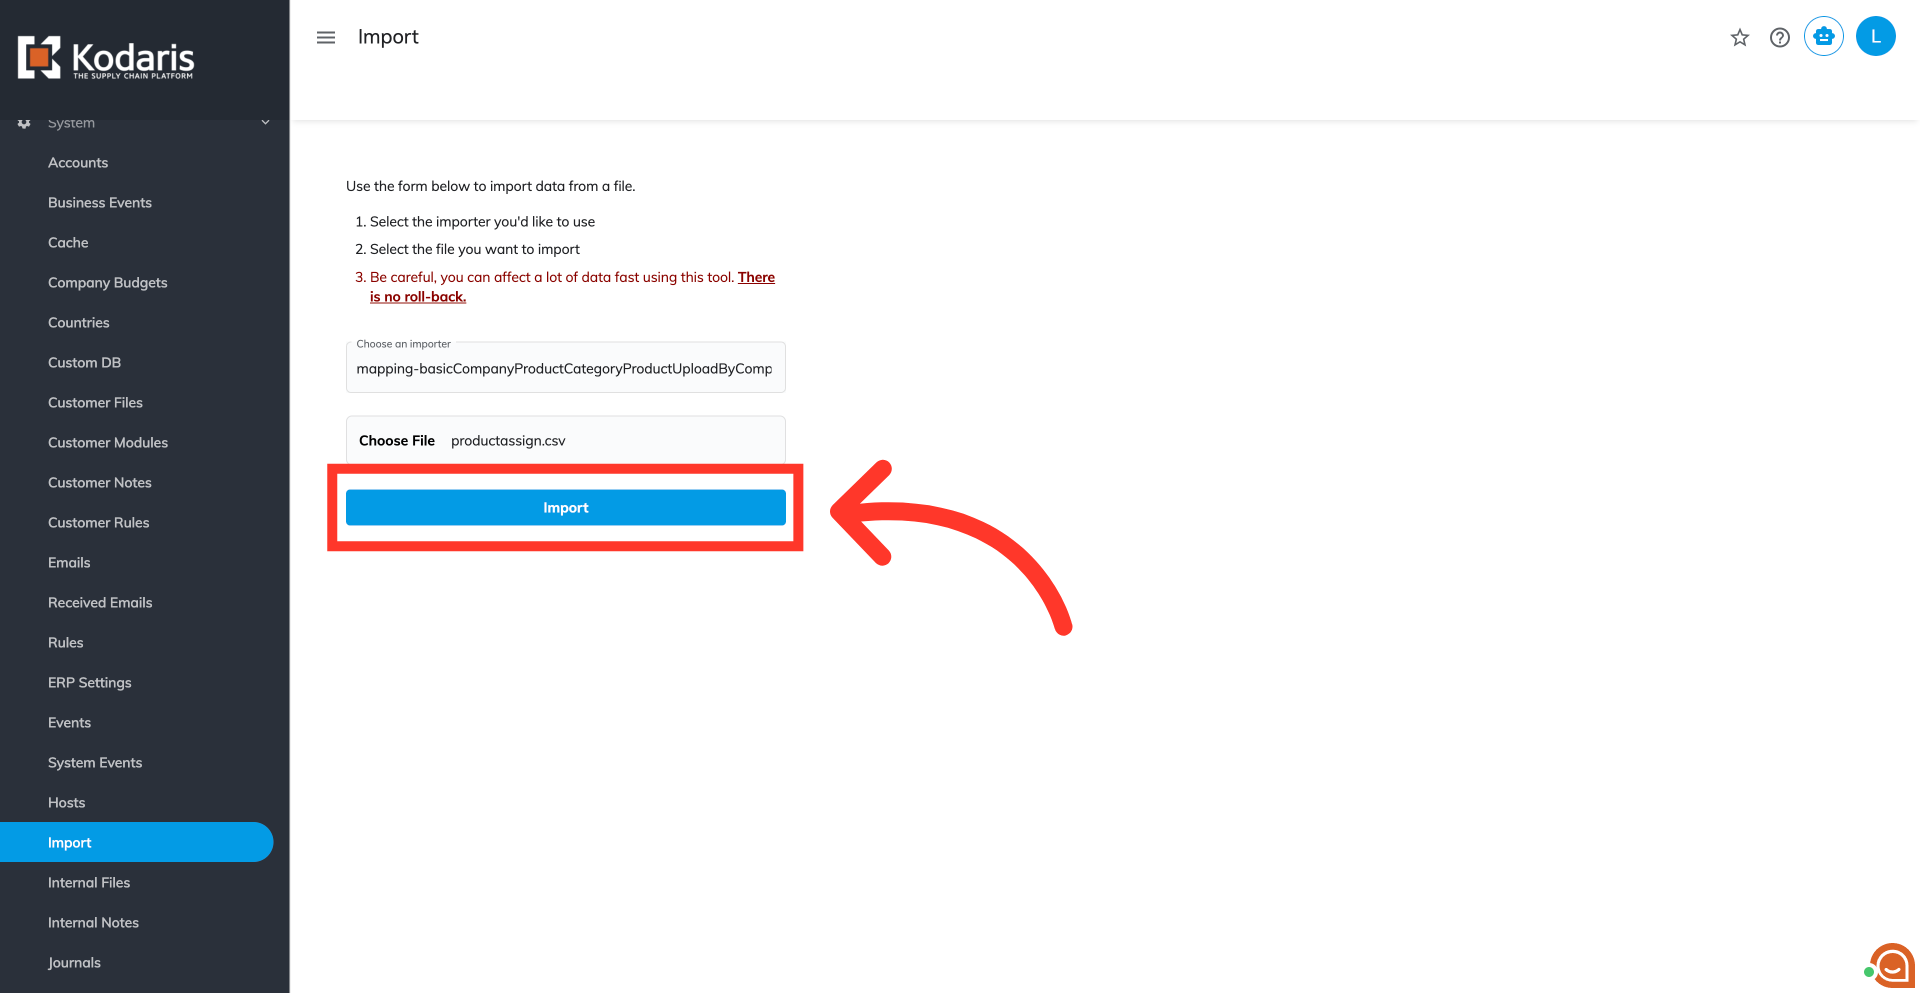
Type in "mapping-basicCompanyProductCategoryProductUploadByCompanyProductCategoryExternalID" in the field, and select the importer from the dropdown.

Click on "Choose File" and select the file you would like to import.
After selecting the customer catalog importer and the CSV file, click "Import". Be sure to choose the correct file as this action is irreversible.
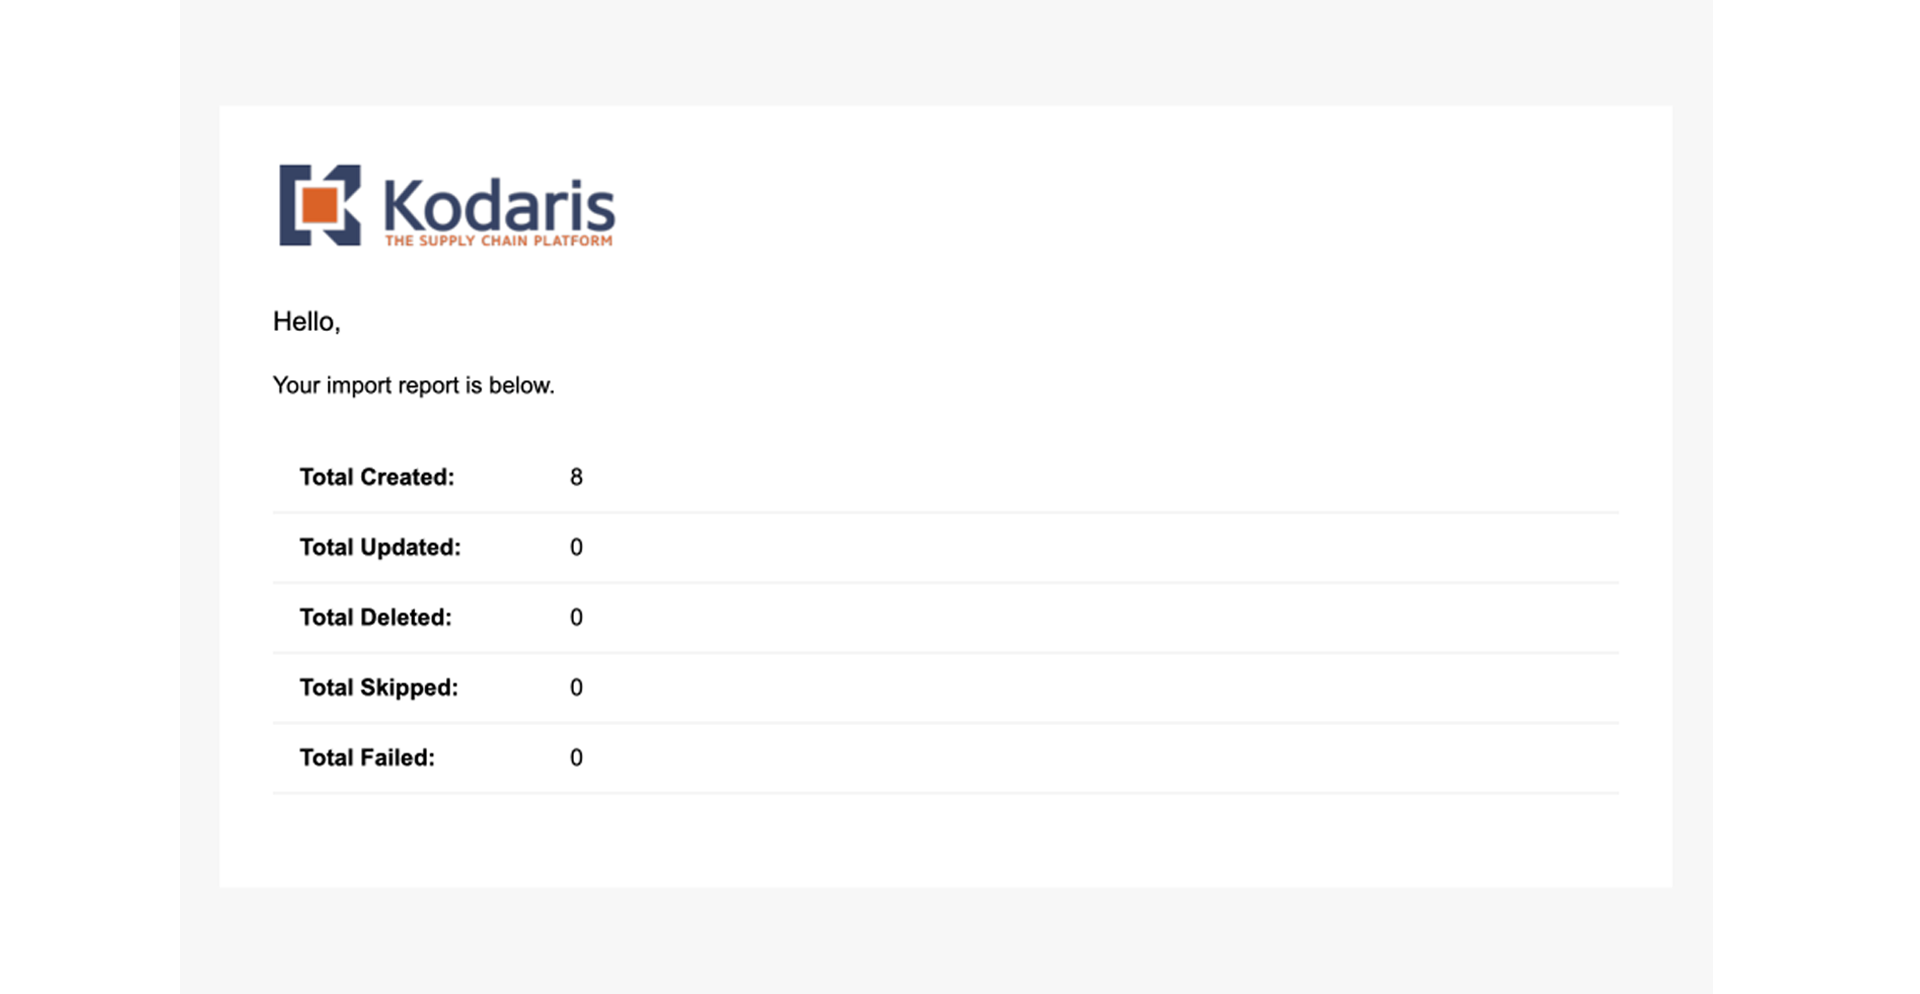
An import message will appear letting you know that the import file is in process and to check back in a few minutes for the imported data. If you are importing large amounts of data, it may take a short amount of time to complete. The import will continue to run in the background.

A confirmation email will be sent once the import has been completed.
To verify that the products have been assigned to the company catalog, navigate to "Customers".
Select "Company Categories" and search for the catalog.

Click on the more details icon.
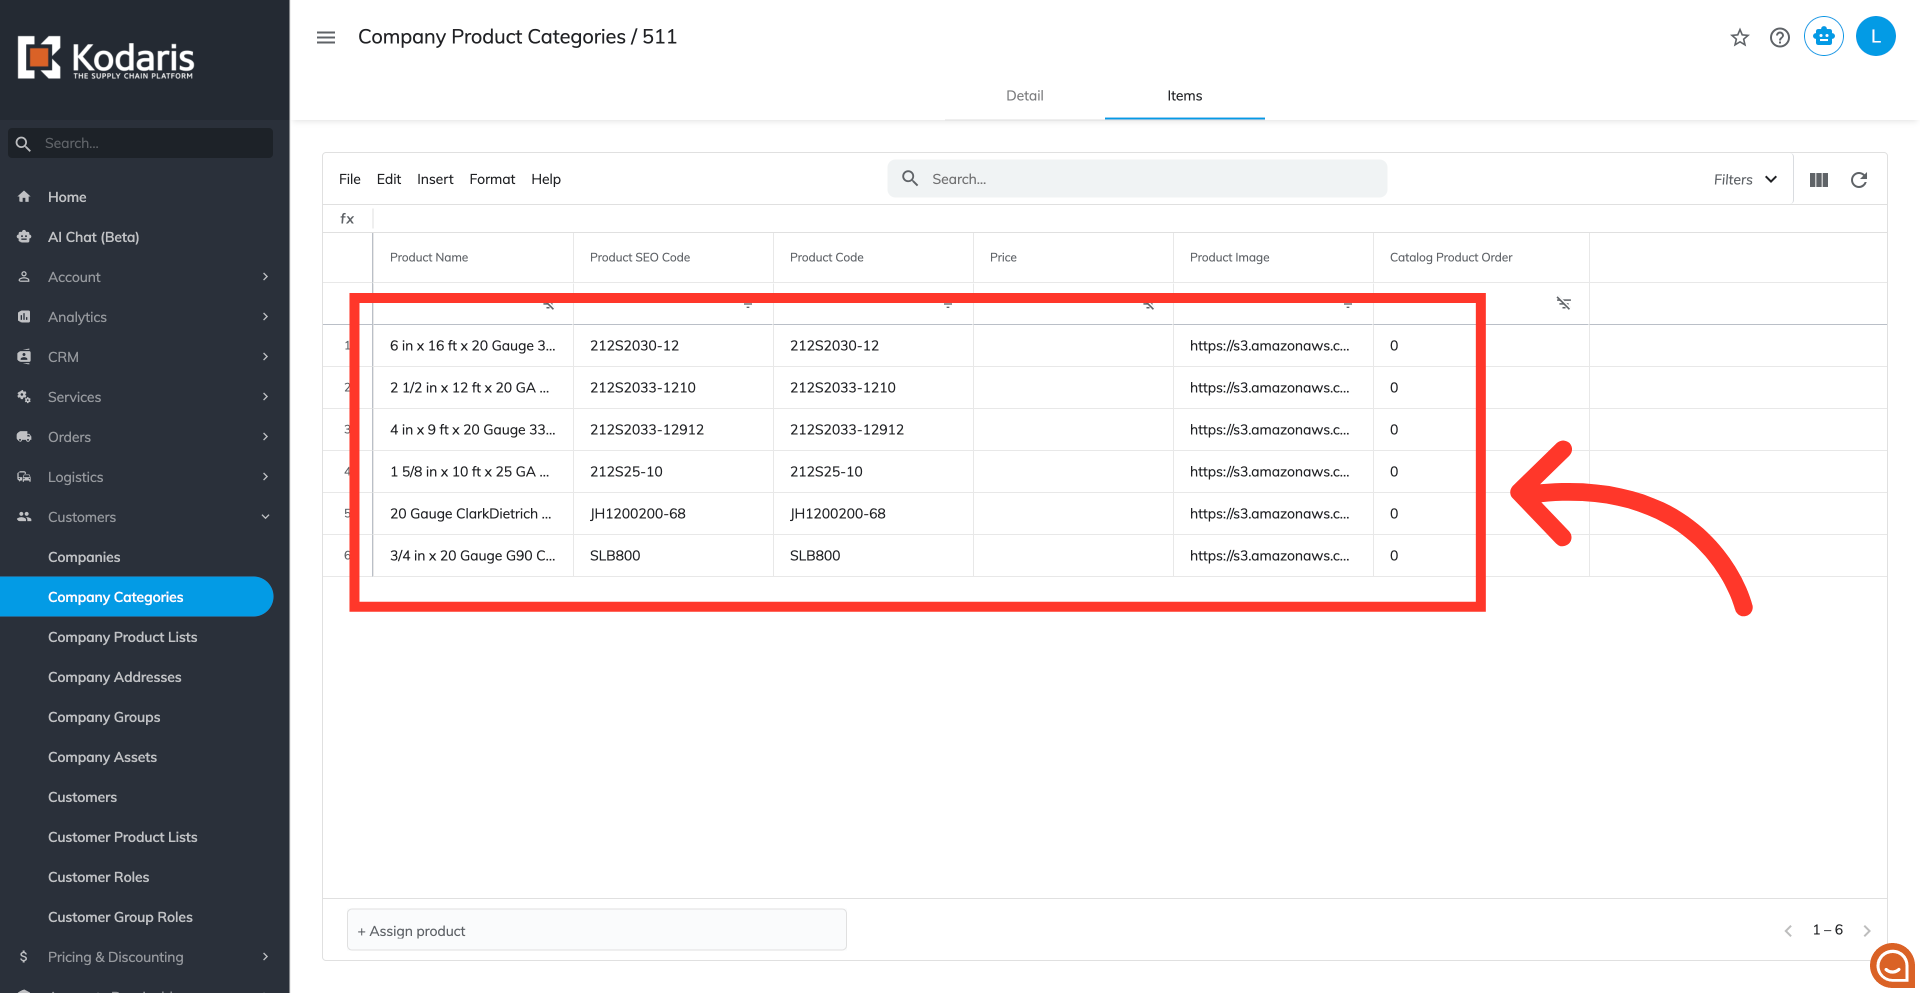
Go to the "Items" tab.

Verify that the products have been assigned to the company catalog.