Back to Website
Product Documentation Developers Integration Hub Create an Employee API User & Authenticate to the API

Create an Employee API User & Authenticate to the API

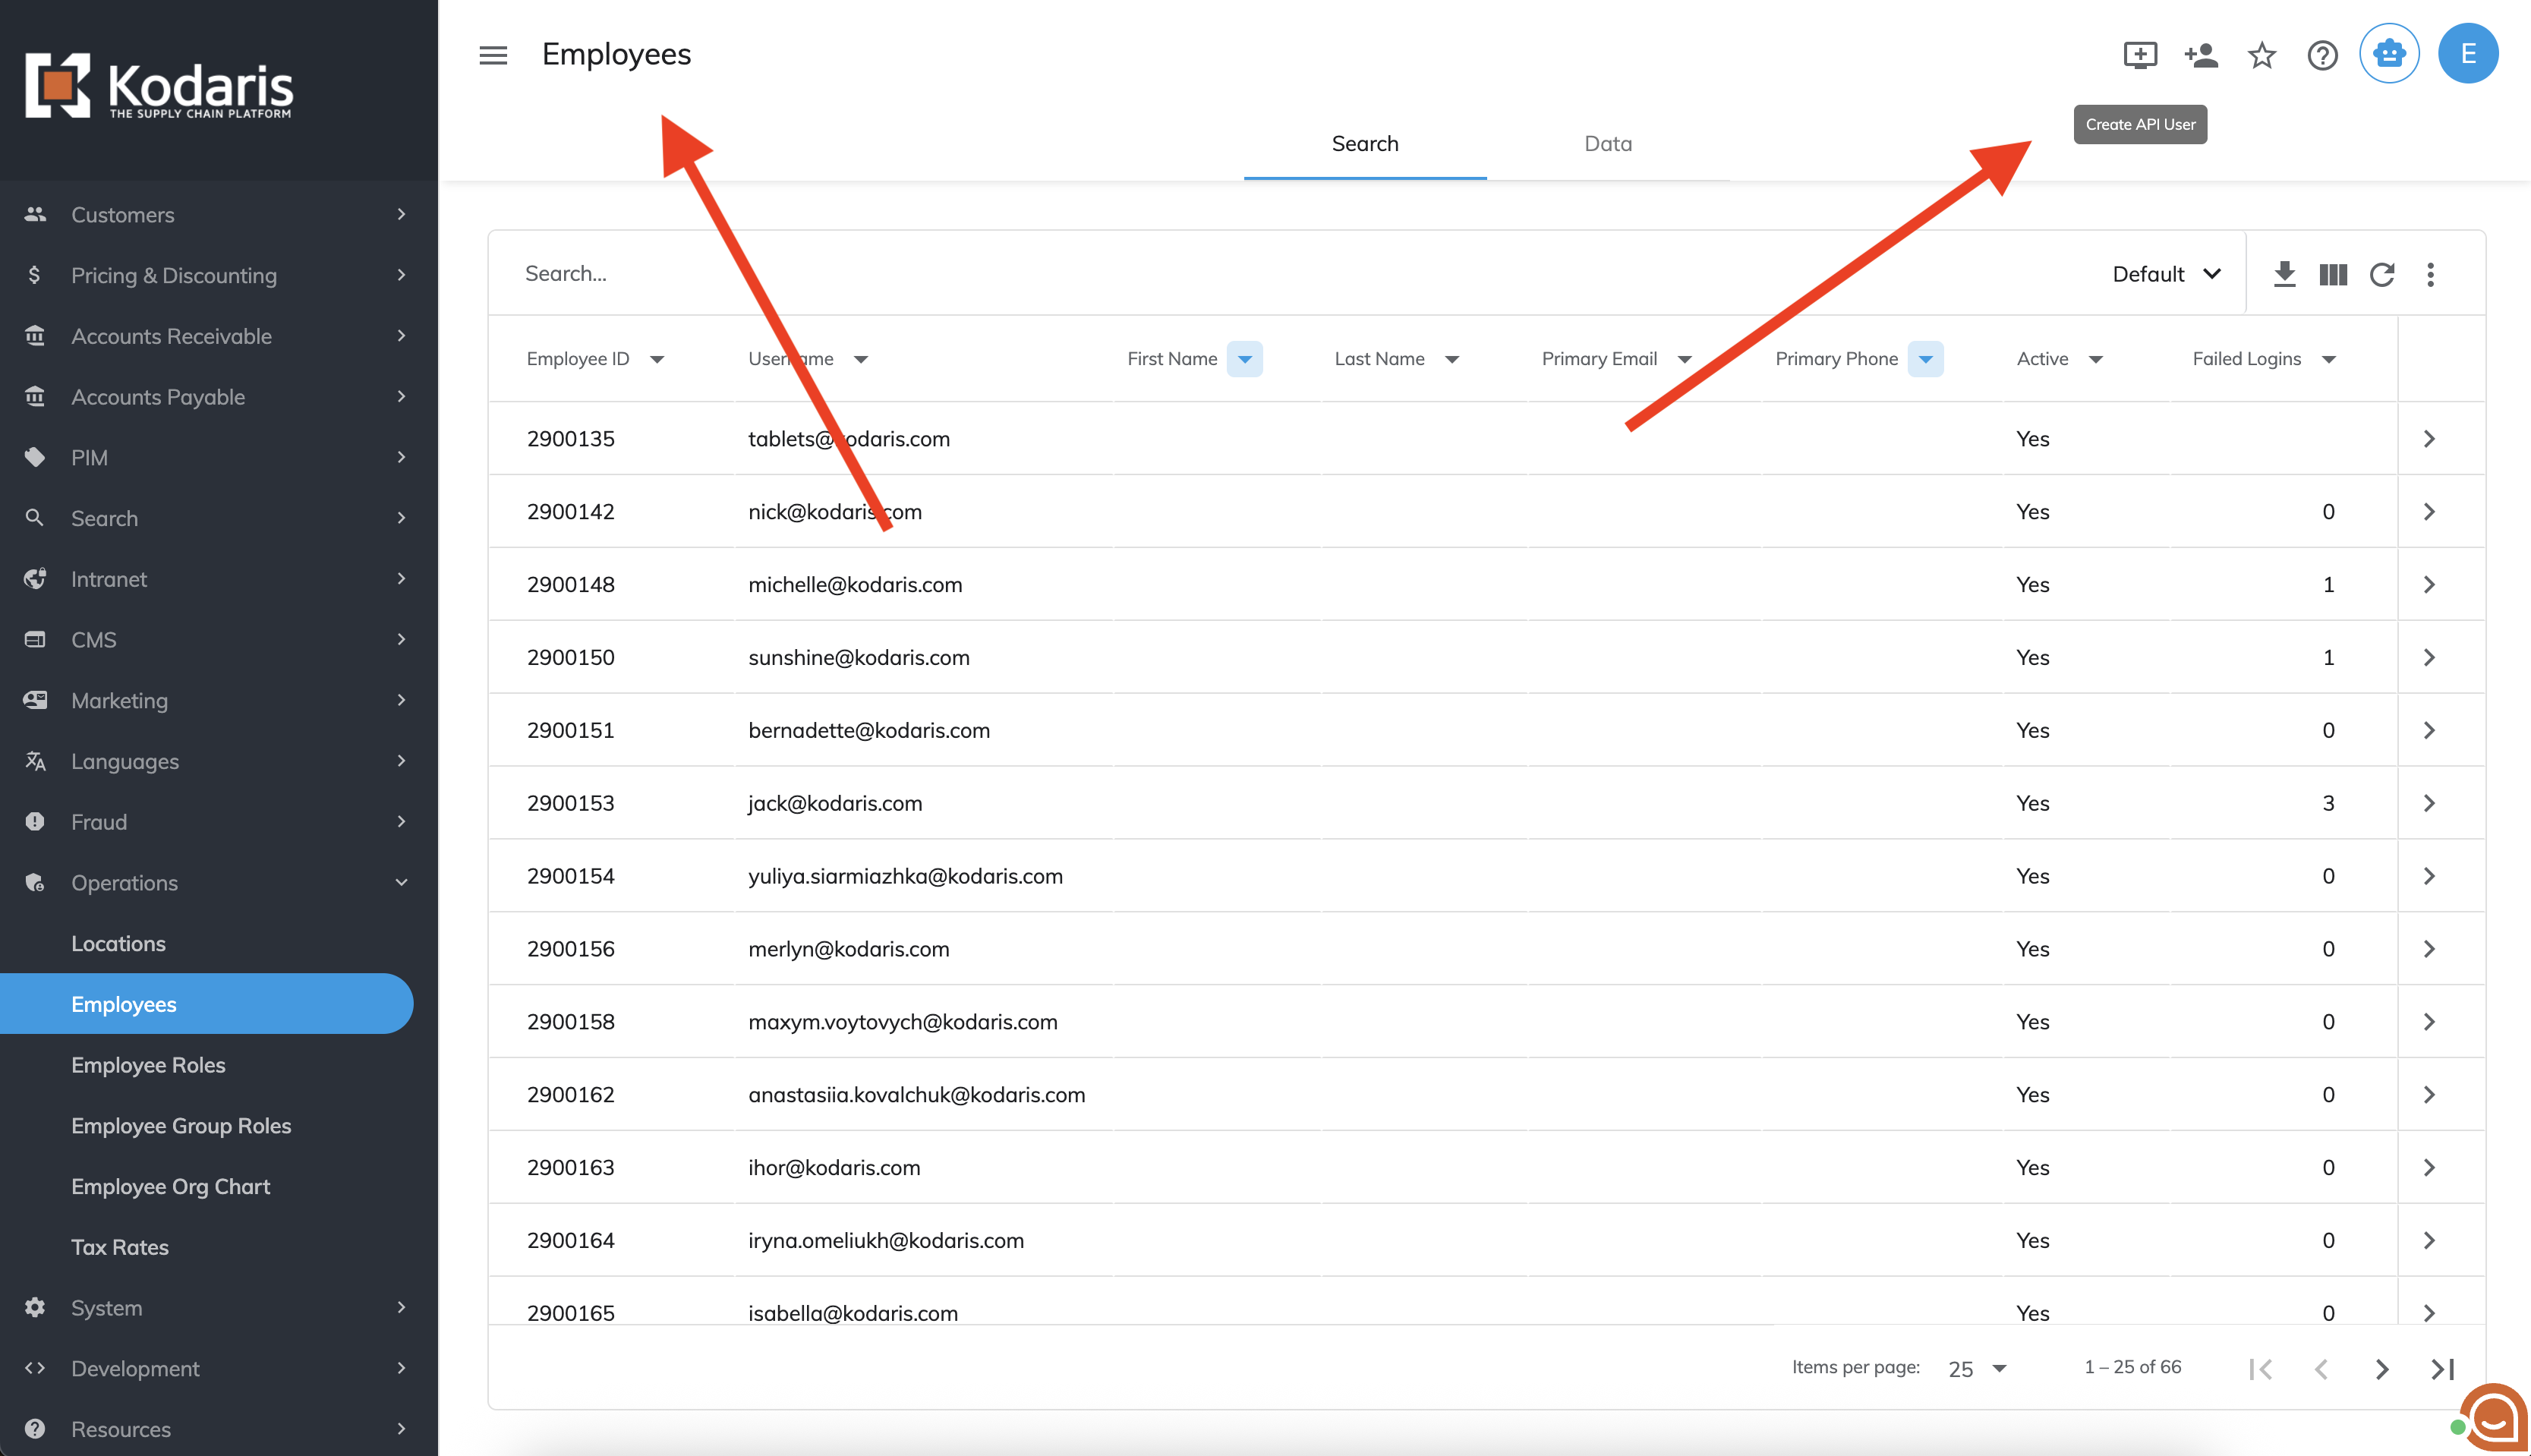
In this guide, we're going to take you through how you can create an employee API user and authenticate to the Kodaris API.

Video overview:

https://youtu.be/eYar7aOU1eA?si=DG0Jhn3waxNFSGHB

Create an Employee API User

  1. Sign in to your Kodaris system as an employee
    3004_sign_in.png
  2. Navigate to the Employees screen and click Create API User
    3004_create_api_user.png
  3. In the popup window, enter your API user's name and, optionally, a description. Then click Create User
    3004_name_api_user.png
  4. After your API user is created, be sure to copy and save the API key. This is the only time the API key will be shown. Once copied, click Assign Roles.
    3004_copy_api_key.png
  5. You should be redirected to the roles screen for your new API user. Here, you can set whatever permissions you'd like your API user to have, for example administrator.
    3004_permissions.png

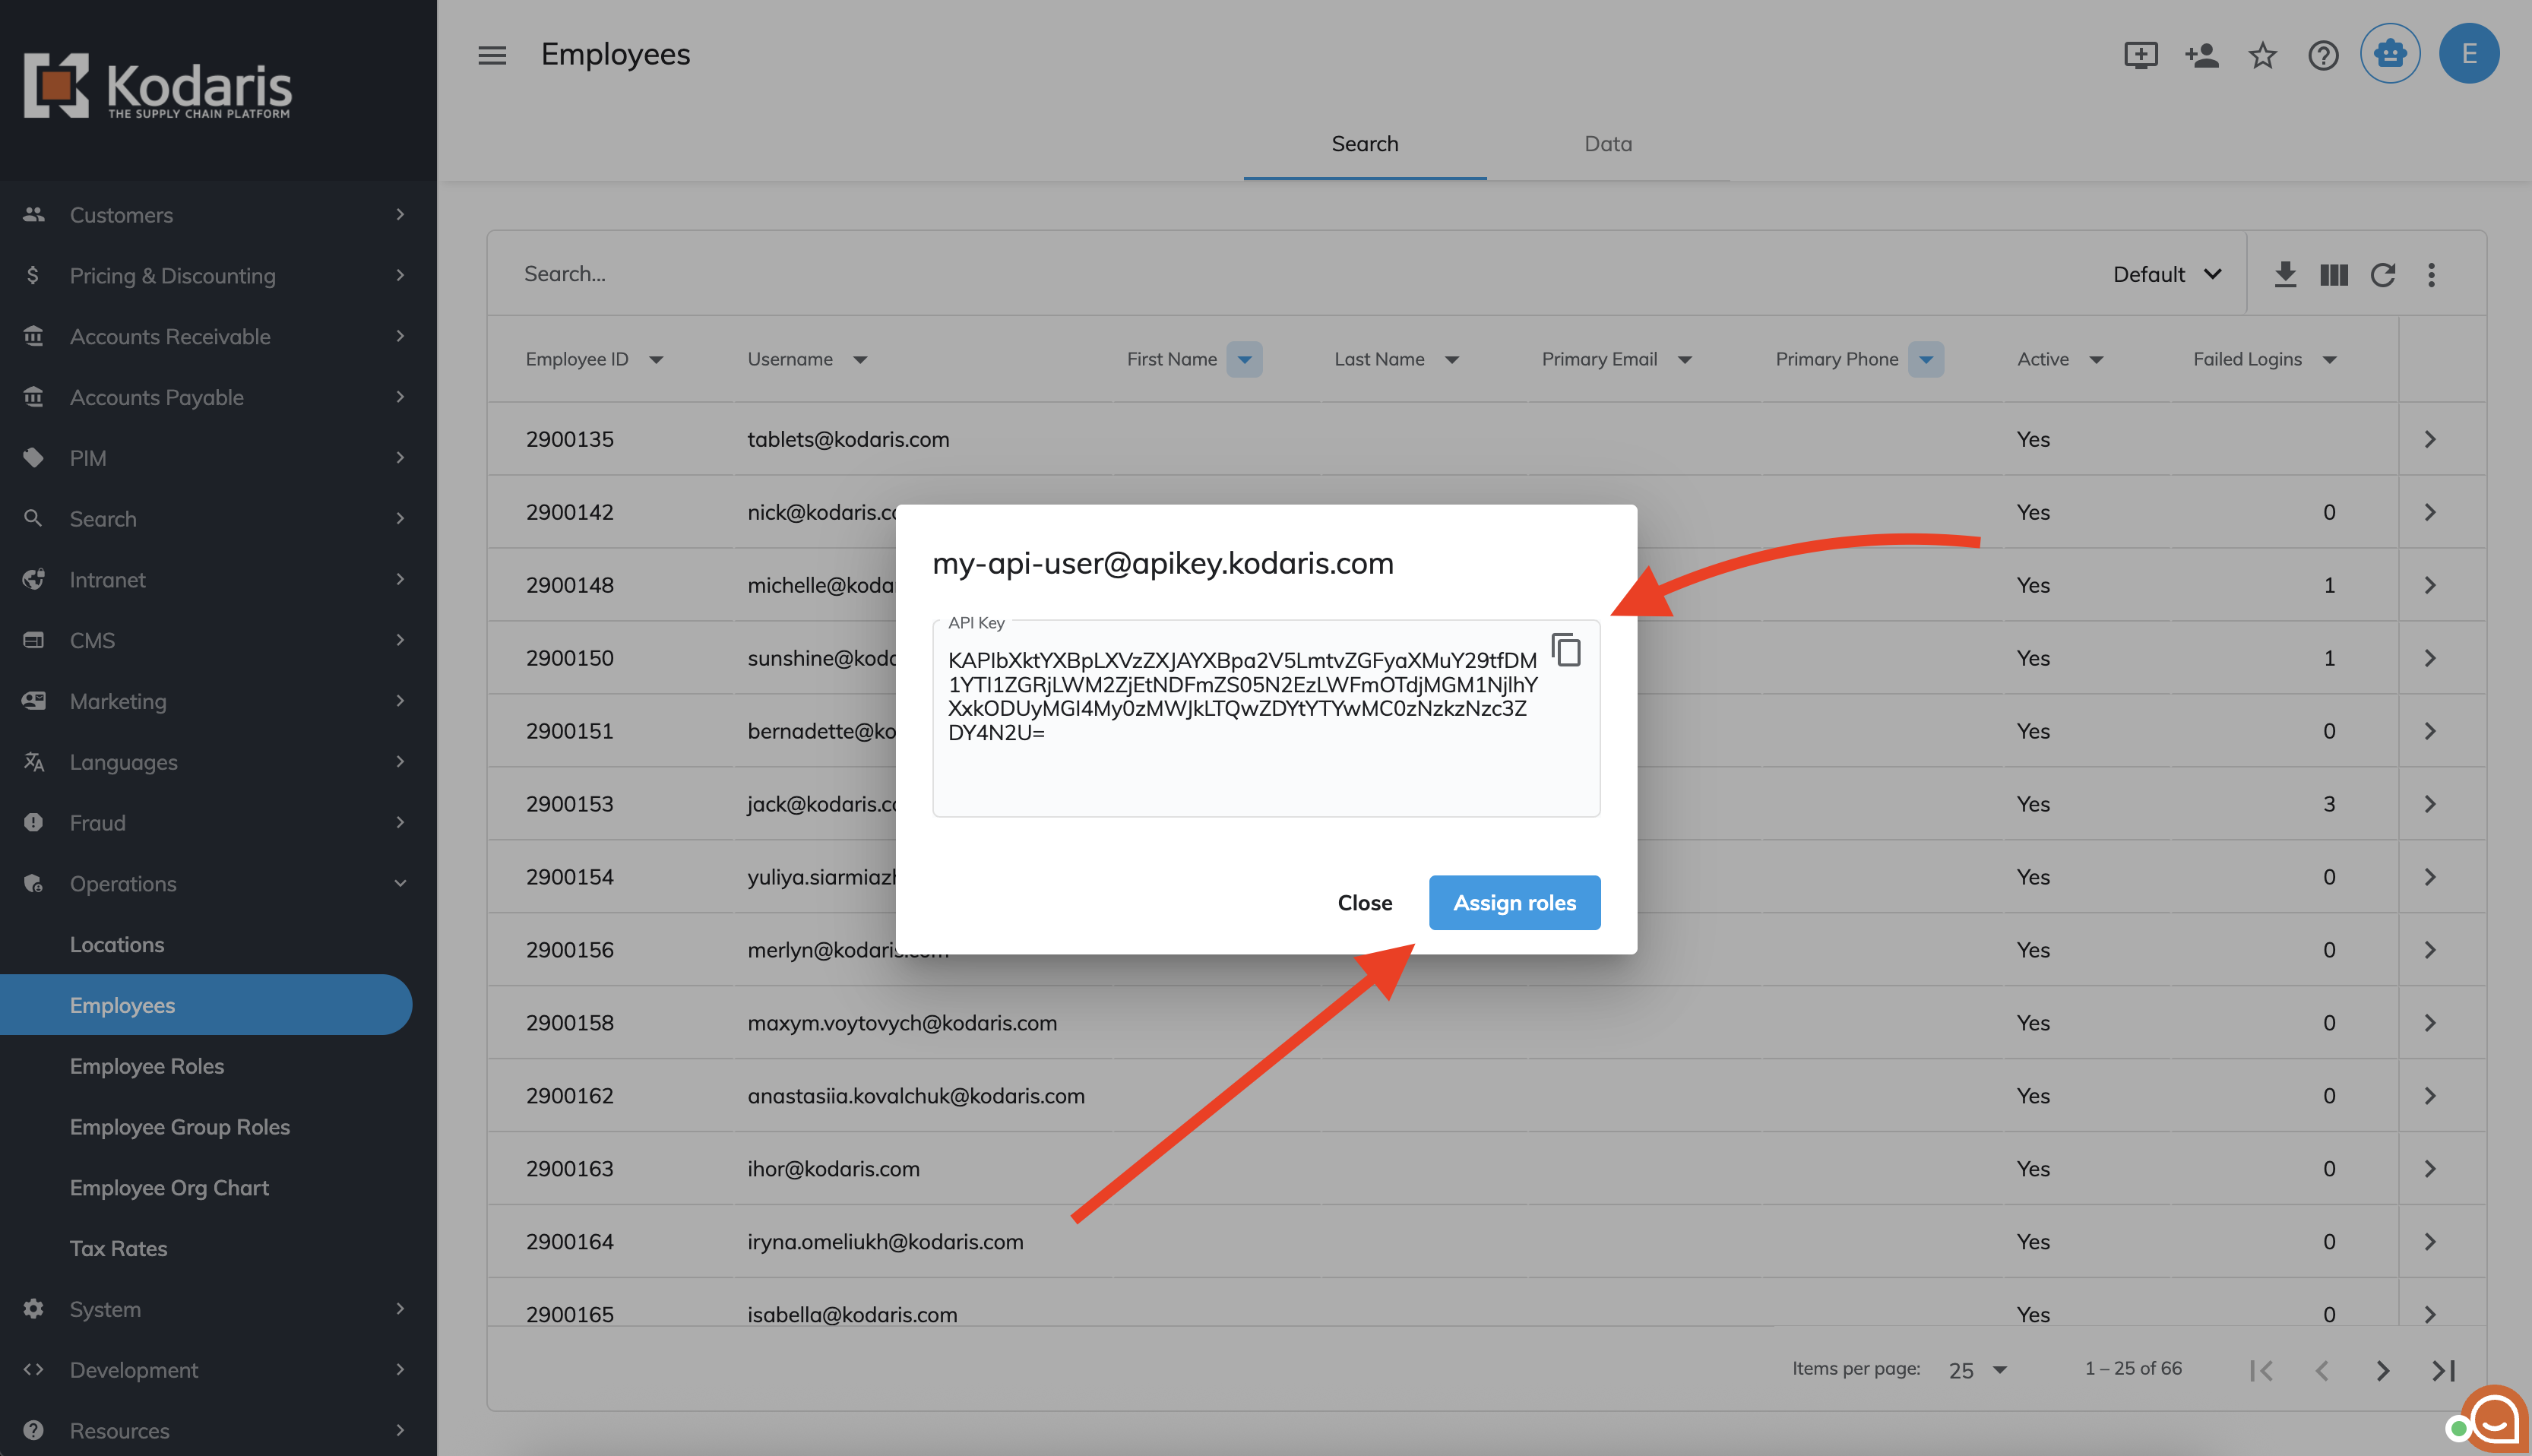
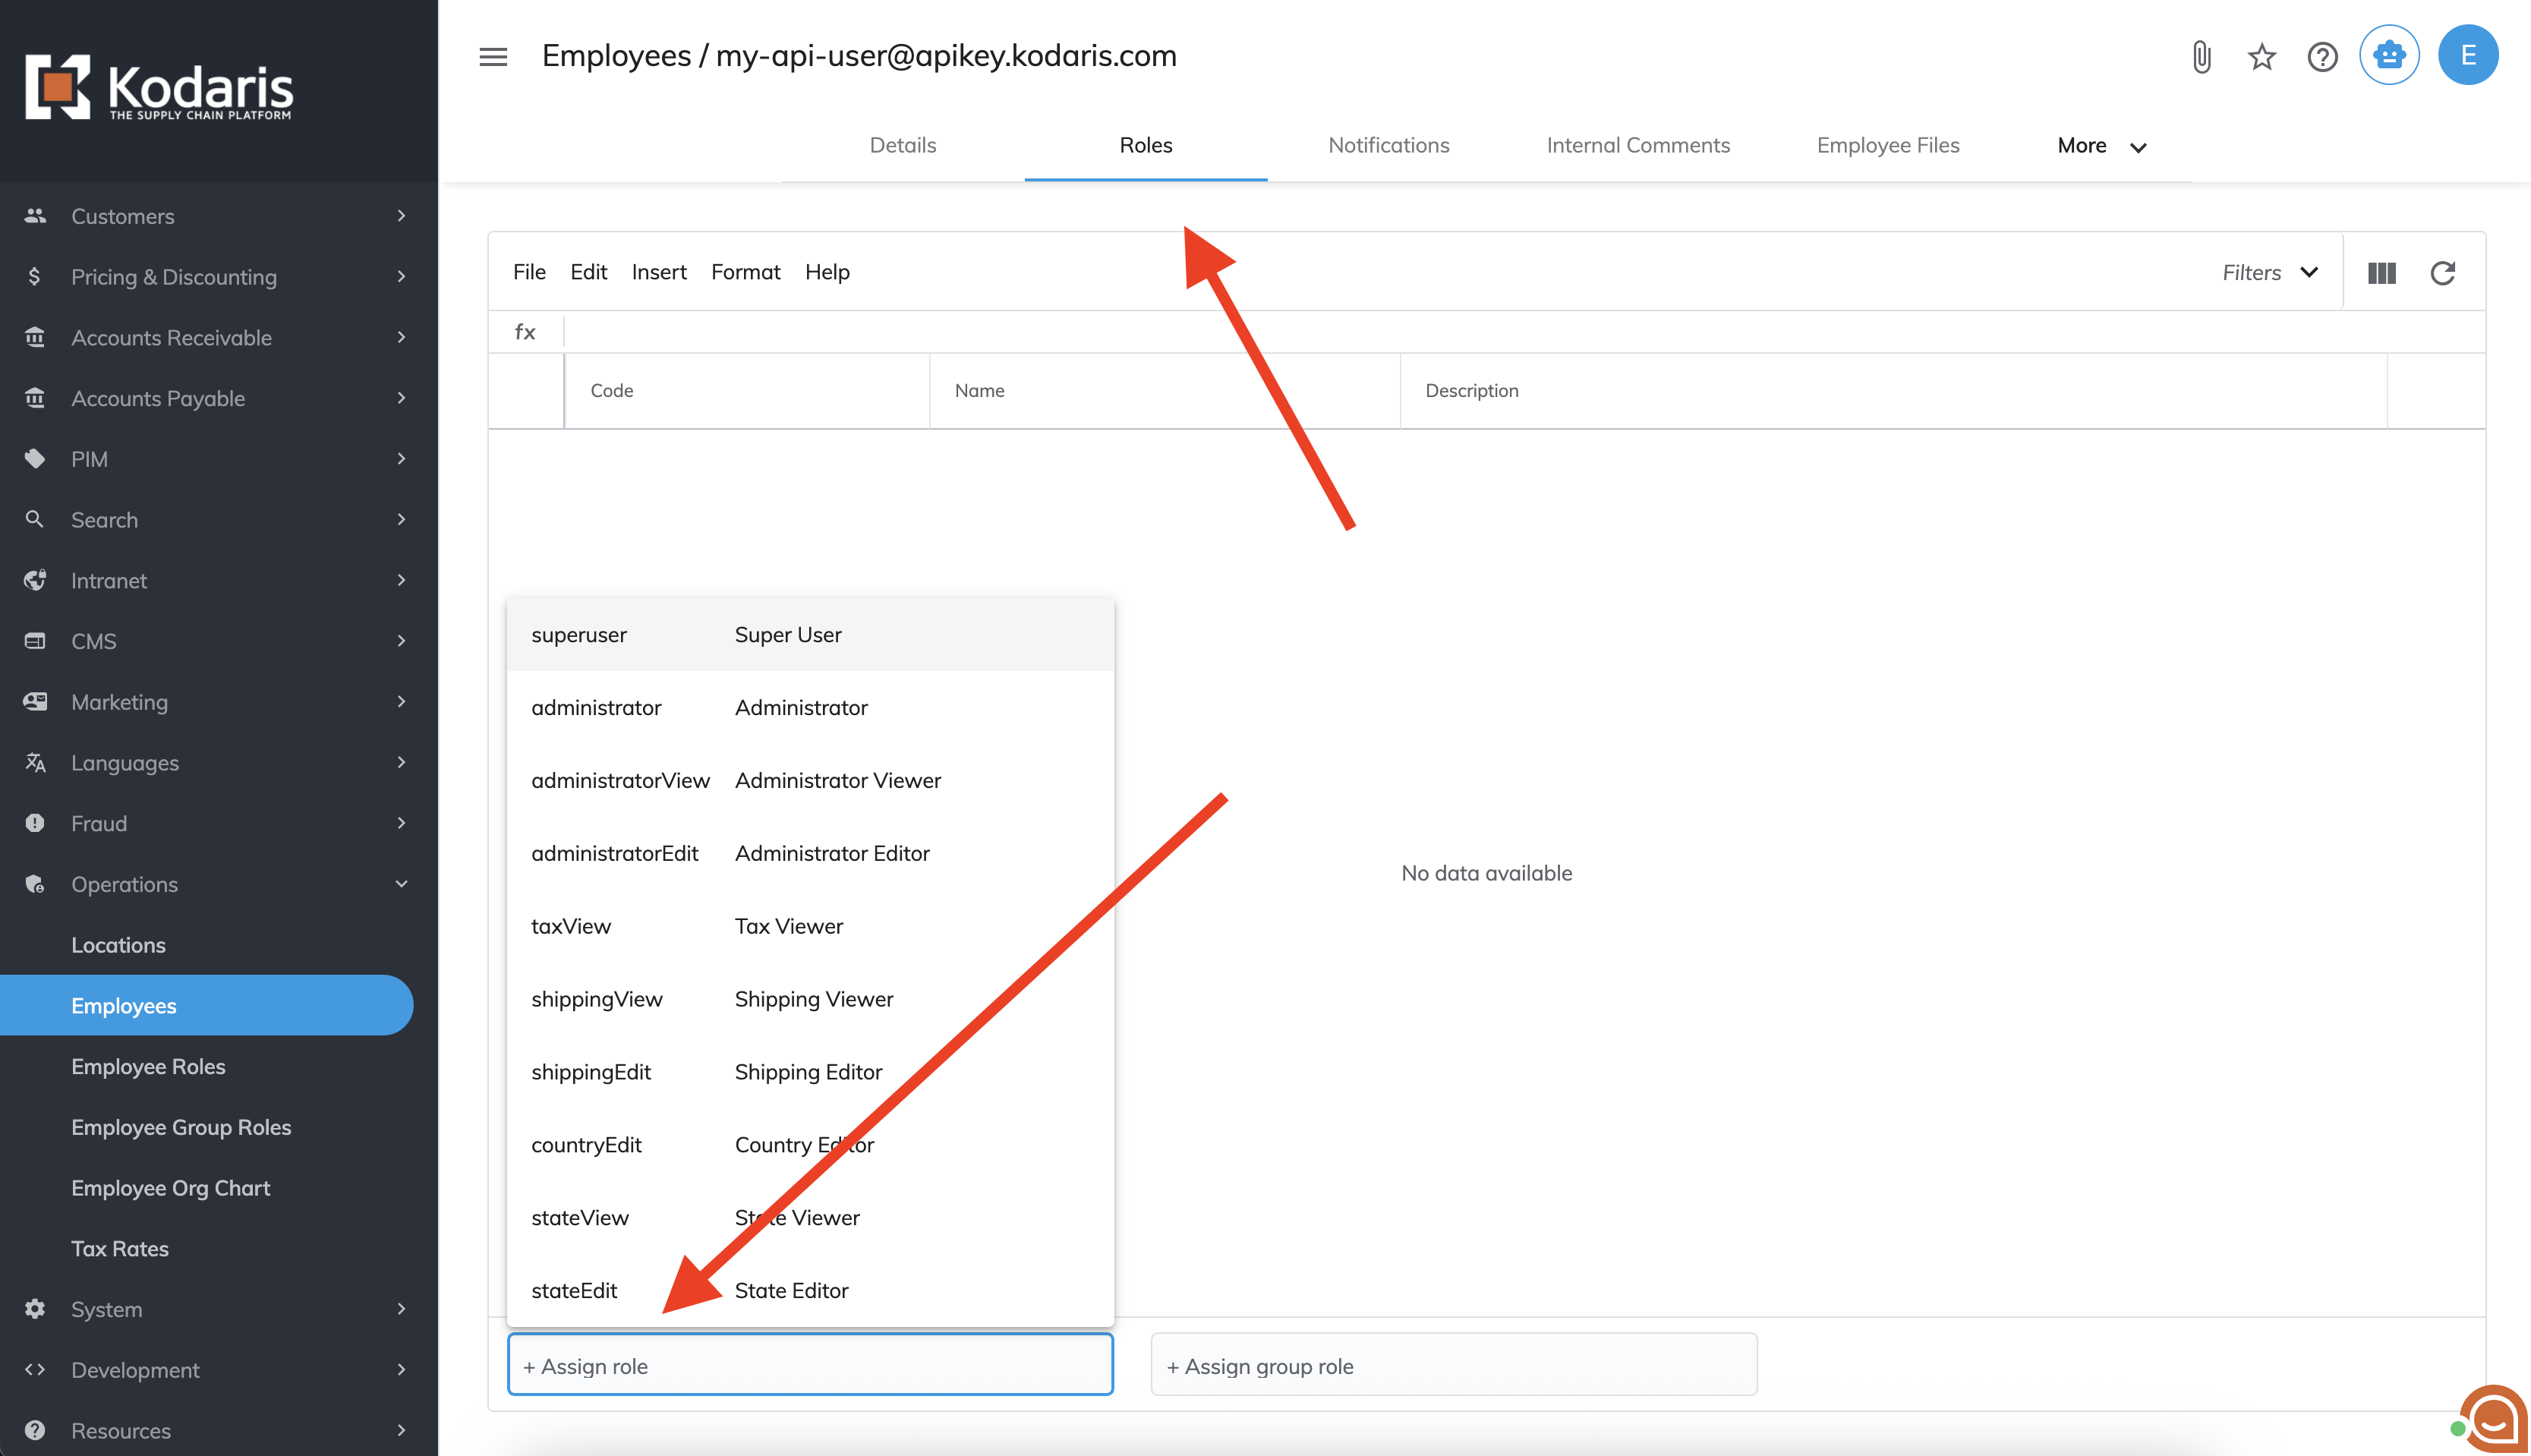
Your API user is all set! You can now authenticate to the Kodaris API.

Authenticate to the API

  1. Sign In
    • Call the endpoint: POST / api/user/employee/apiKeyLogin
      • Headers
        • Accept - application/json
        • Content-Type - application/json
      • Body
        • apiKey - the api key of your api user.
      • Response
        • A response will be returned indicating whether the login was successful or not. The response will also contain your userSessionApiKey that you will need to use on future requests to get responses back as a authenticated user.
  2. Fetch an Auth Token
    • You'll need an authorization token for any API requests you make to the Kodaris API.
    • Fetch one using the endpoint: GET / api/user/employee/authToken
      • Headers
        • Accept - application/json
        • Content-Type - application/json
        • userSessionApiKey - the userSessionApiKey from the /apiKeyLogin endpoint response
      • Response
        • The returned response will contain your auth token that you will need to use on future requests.
  3. Fetch Orders under your Company Account
    • In this example, we'll authenticate to the Kodaris API and fetch orders.
    • Send an API request to endpoint: POST api/system/order/list
      • Headers
        • Accept - application/json
        • Content-Type - application/json
        • userSessionApiKey - the userSessionApiKey from the /apiKeyLogin endpoint response
        • X-CSRF-TOKEN - the auth token from the /authToken endpoint response
      • Body
        • page - 0
          • Returns the first page of orders
        • size - 10
          • Returns a page with 10 orders
      • Response
        • A list of orders will be returned

Example

// Login to our account
var loginRes = kd.http.fetch({
  method: 'POST',
  url: 'https://commerce.kodaris.com/api/user/employee/apiKeyLogin',
  version: 2,
  body: {
    apiKey: 'xxxx'
  },
  headers: {
    'Accept': 'application/json',
    'Content-Type': 'application/json'
  },
});

// keep our session token for future requests
var userSessionApiKey = loginRes.body.data.userSessionApiKey;

// get CRSF token for requests
var tokenRes = kd.http.fetch({
  method: 'GET',
  url: 'https://commerce.kodaris.com/api/user/employee/authToken',
  version: 2,
  headers: {
    'Accept': 'application/json',
    'Content-Type': 'application/json',
    'userSessionApiKey': userSessionApiKey
  }
});

// keep our token for future requests
var token = tokenRes.body.data;

// get list of orders
var ordersRes = kd.http.fetch({
  method: 'POST',
  url: 'https://commerce.kodaris.com/api/system/order/list',
  version: 2,
  body: {
    page: 0,
    size: 10
  },
  headers: {
    'Accept': 'application/json',
    'Content-Type': 'application/json',
    'userSessionApiKey': userSessionApiKey,
    'X-CSRF-TOKEN': token
  }
});

kd.log('ordersRes', ordersRes);

-> response ->
{
  "status" : 200,
  "errors" : null,
  "body" : {
    "success" : true,
    "code" : 200,
    "messages" : { },
    "errors" : { },
    "data" : {
      "size" : 10,
      "number" : 0,
      "totalElements" : 1571,
      "isLast" : false,
      "totalPages" : 158,
      "isFirst" : true,
      "hasPrevious" : false,
      "hasNext" : true,
      "numberOfElements" : 10,
      "offset" : null,
      "content" : {
        "0" : {
          "deliveryAddress1" : "123 Main St.",
          "deliveryAddress2" : "",
          "deliveryAddress3" : "",
          "deliveryCity" : "Jenison",
          "deliveryCountry" : "US",
          "deliveryDelivered" : null,
          "deliveryEmail1" : "sales@kodaris.com",
          "deliveryEmail2" : null,
          "deliveryExtra1" : null,
          "deliveryExtra2" : null,
          "deliveryExtra3" : null,
          "deliveryExtra4" : null,
          "deliveryExtra5" : null,
          "deliveryFirstName" : "Jane",
          ... omitted for brevity
        },
        "1" : {
          "deliveryAddress1" : "123 Main St.",
          "deliveryAddress2" : "",
          "deliveryAddress3" : "",
          "deliveryCity" : "Wadsworth",
          "deliveryCountry" : "US",
          "deliveryDelivered" : null,
          "deliveryEmail1" : "sales@kodaris.com",
          "deliveryEmail2" : null,
          "deliveryExtra1" : null,
          "deliveryExtra2" : null,
          "deliveryExtra3" : null,
          "deliveryExtra4" : null,
          "deliveryExtra5" : null,
          "deliveryFirstName" : "Jane",
... omitted for brevity
In this article